
Fresh Fruit Food Photography
Keep your food photos looking fresh with these ‘berry’ useful techniques.
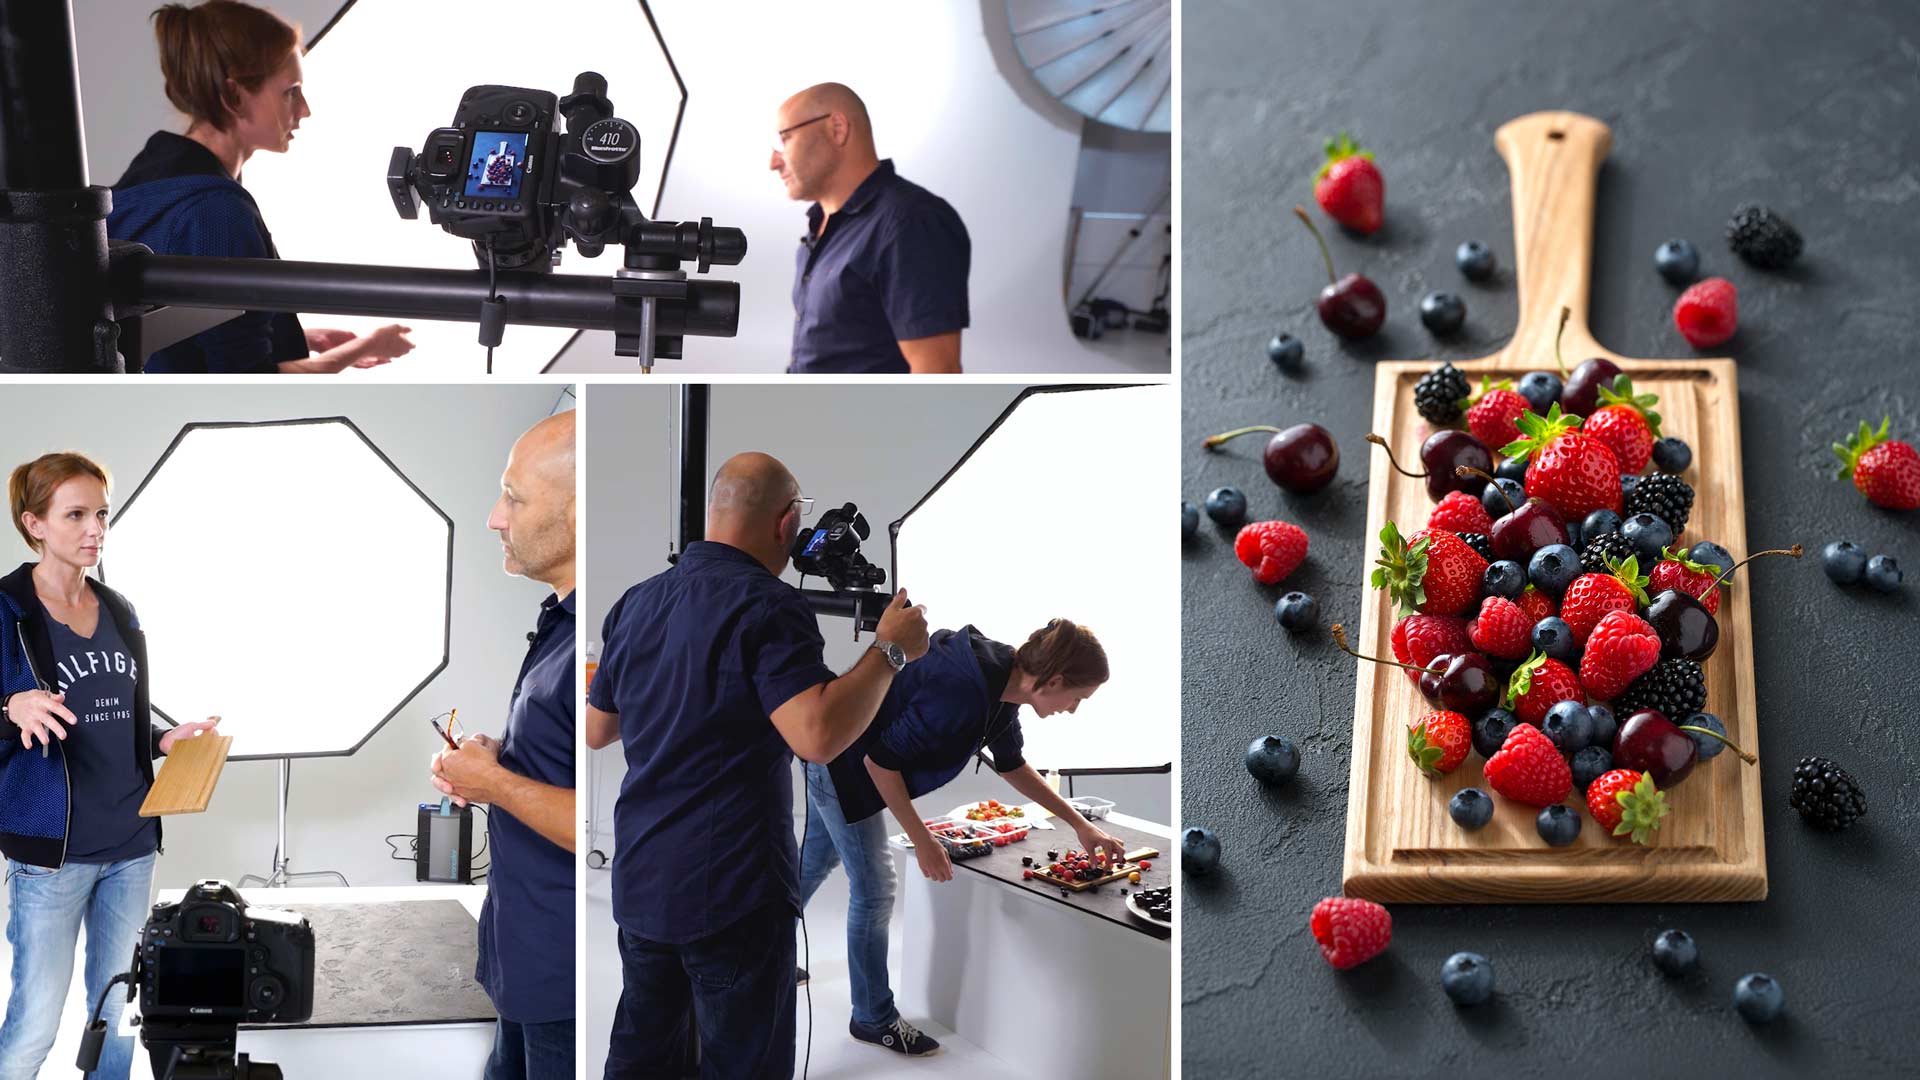
In this series of food photography classes, Karl teamed up with food photographer Anna Pustynnikova. Together they demonstrate essential preparation, styling and lighting techniques for eye-catching food photography.
Simplicity is key in this seemingly chaotic scene. Anna uses an assortment of fresh berries to create a beautiful, eye-catching image using just one studio light. She explains the preparation and styling required for this shot while Karl demonstrates a number of alternative lighting techniques that could be used to enhance the shot.

In this class:
- Product Photography: Food Photography
- How to store and prepare fresh berries for food photography
- Useful equipment for food styling
- Testing and selecting suitable backdrops and props
- Using color to enhance an image
- Suggested lighting modifiers for food photography
- Depth of field selection
- Alternative lighting setups
- Emulating natural light using studio lights
If you enjoyed this class, watch the replay of Anna’s LIVE food photography workshop.
Comments
what a wonderful work thanks a lot for this video
Thank you.
Beautifully done. Thank you Karl and Anna
This is the first video I’ve watched, and I’m very impressed with all the little details. I have recently purchased some props, a slate base, and will be giving this a go tomorrow. I’m really looking forward to watching more videos Karl.
Great Stuff Trevor. Anna is back with us next week for new courses filming and two live shows, so look out for those.
Really greatful for the tutorial. Would love to give some feedback and make a request.
The request is if we could see the other images that you referred to. The shot without the scrim, the one with the scrim, and the ones with the high and low daylight
Feedback would be that I’d love a transcript. I know they are super expensive to create, but it will help me when I want to get back to certain topics that I’m able to find them easier. I suppose an alternative to a transcript would be to have a summary of the points with corresponding images. Or another would be lighting diagram maybe.
Hi Darren, I’ve just checked through the video and there are some direct comparisons, I think the main one you are looking for with the Octabox vs the scrim and hard light is shown at 1:37:33 (but you’re right it should be identified more clearly) there are also several comparisons from 1:33:00 through to the end of the video too comparing the hard light position and its effect. I will ask our video editor to take another look at the cuts on this though and see if improvements can be made. As for transcripts there are english subtitles on the video if that helps, although we don’t believe lighting diagrams would be any more beneficial than what you see in the video. Kind regards Karl.
Really like how you compared the backgrounds… and seams we all are kind of same… I also feel often my stuff is so poor compare to the others… but my mates think exactly opposite… really great to see how “real” the stuff is you serve! Thank you for that Karl!
Thank you Philippe.
I would really like to know where to get that black textured background, used, they mentioned artificial slate.
Hi Adam, look for grey slate stone.
Karl, when does a soft source of light become almost too soft? Is there a rule of thumb that bigger is always better? I wonder how would it look if you used that bad-ass 2x2m diffuser panel of yours.
Hi Bogdan, yes I think that would be too soft. We mostly use the big scrims for glossy products purely for the reflection in the object but for other items a bit of bite and contrast is welcome. Hence bringing in the harder light in this example at the end of the lesson.
Hi Karl, this was a really good tutorial. It would be really good if you could attach one image from each new light setup you did in the end. I never saw a side by side comparrison in lightroom, only maybe a small flickering. I like to have them side by side and analyze them to see in detail what huge impact your small attribute did.
Thank you Karl and Anya. This is great alloy of food stylist and light master. Your work with light makes me feel same as I got from Igor Sakharov workshops last autumn. The amount of work over details is the difference between nice and great photo.
Thank you Leonid.
Really enjoyed this, learned a lot that I thought I knew. I was wrong, going to try it this weekend.
Great Tutorial Karl. I’m loving your courses. I have a question concerning your camera settings: When you proceed to the shots, you’re constantly in manual focus or automatic? or do you first auto focus on a point of the product after you immediately switch to manual to block your focus then you shoot?
Thank you in advance for your answer.
Andrew from FRANCE
Bonjour Andrew, Je photographie principlement en mode manual focus.
I guess the best answer would be “Try it out yourself and see how long.”
Hi Alexandru, I’d be planning on 4 hours for something like this. But it could be done in less with experience.
May i ask ? i know this video is for learning purpose and good job by that, but how long it takes to make this kind of photo if it was for a payed job ?
Absolutely fantastic video!! I am just looking to get started in food photography, and have recently purchased 2 x Neewer 460 LED panels. I got these as I need good portability, but they are very bright (even at the dimmest setting), so could you recommend the best way to diffuse the light a bit?
Hi Nick, thank you. I would go with our diffusion rolls. You save money on these as a member https://visualeducation.com/product/lighting-diffusion-rolls/
Sorry Karl …. another question …. but you didn’t do any post-production on this image? I mean saturation, contrast, spot removing
Hi Micaela, I did a little bit of saturation and a small amount of sharpening but that’s pretty much it.