
Rendering
In the seventh in our series of Blender 3D Basics classes, Ethan Davis takes you step-by-step through the rendering process in Blender.
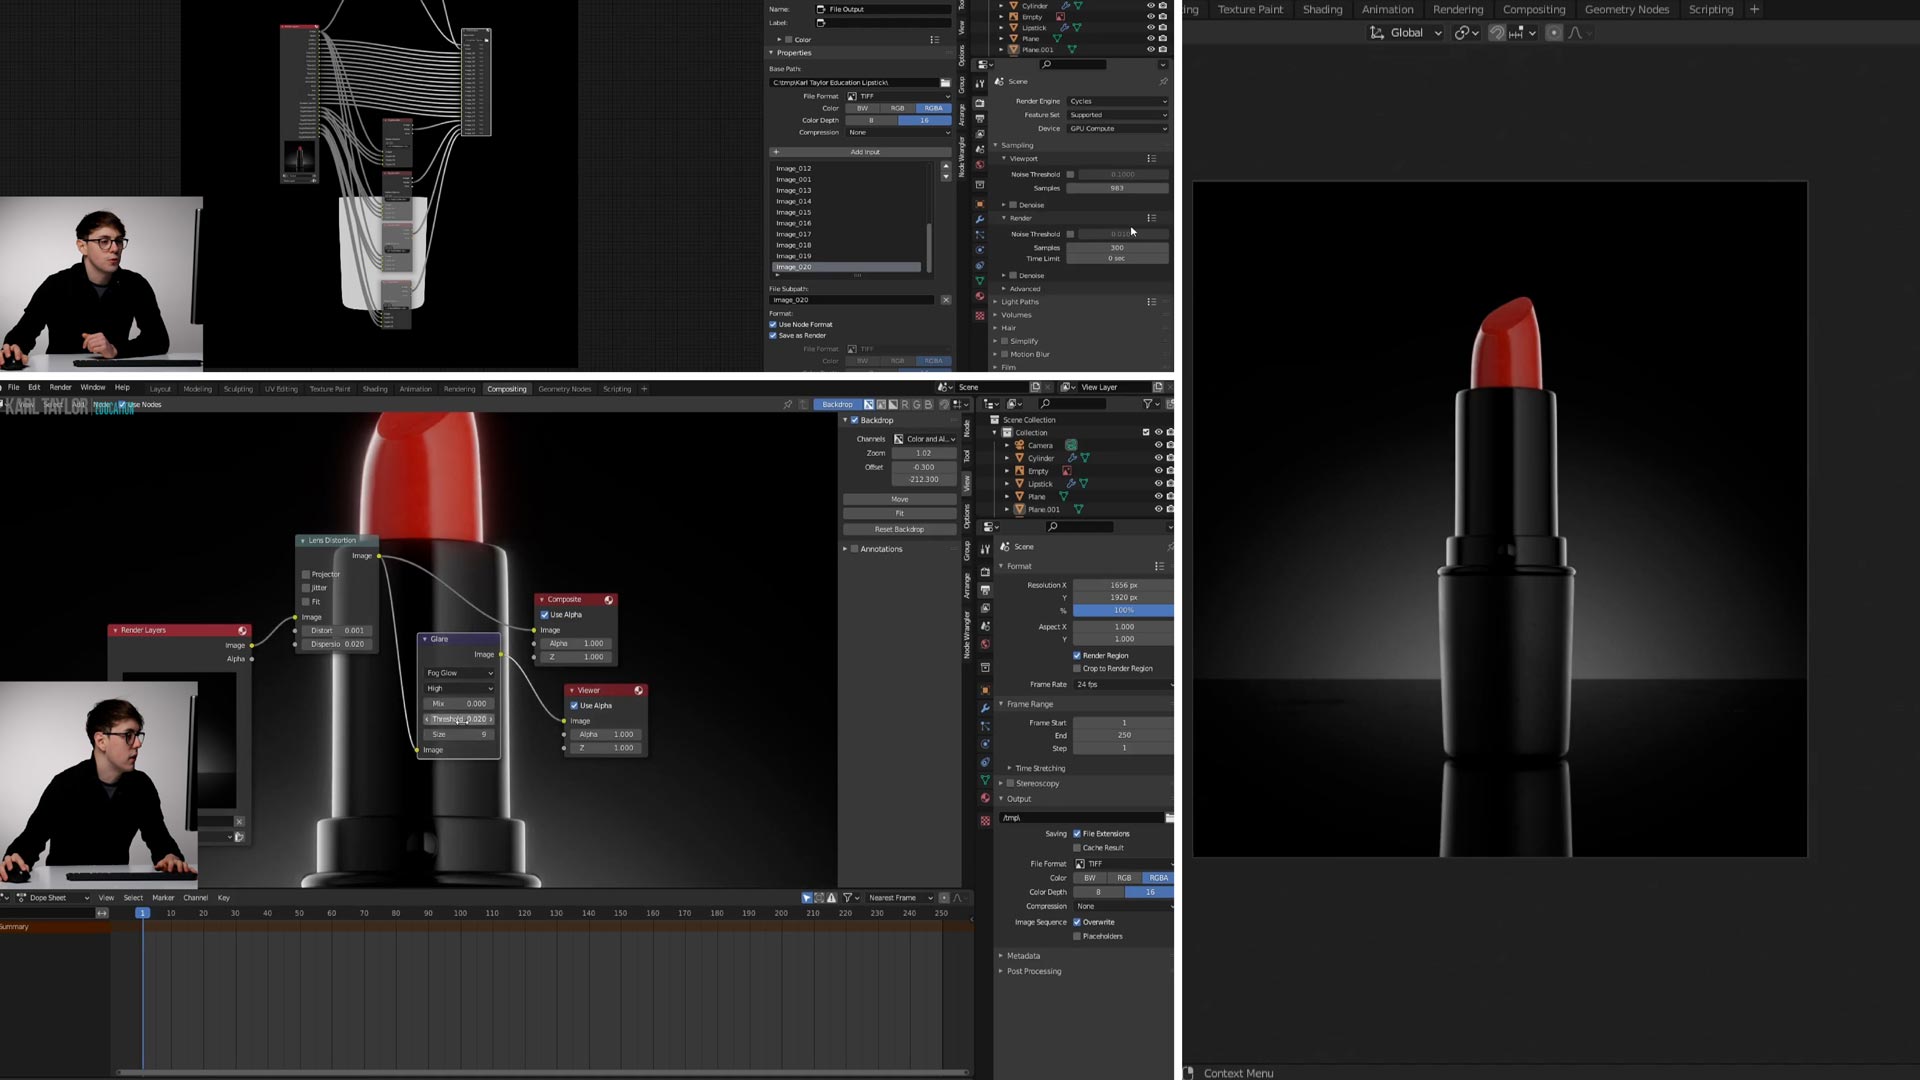
As he shows you how to render your CG model to produce an image file, Ethan explains the different available render engines, plus the different components and calculations you’ll use.
You’ll learn about CPU vs GPU rendering, sampling, resolution, denoising, render passes and layers, and much more.
By the end of this class, you’ll be ready to turn your lipstick model (or whatever model you happen to be working on) into an image file.
You may also find it useful to refer to the Physically Based Rendering, Render, Render Engine and Samples entries in our 3D CGI Terminology A-Z.
Comments
Hi Ethan,
in my version of blender I don’t have Cryptomatte(legacy) only Cryptomatte itself, is there any alternative way of what node i can use or do it?
regards
Nvm found it.
Hello Ethan, hello KTE team,
That is a fascinating course! Thank you so much for sharing your knowledge, very inspiring.
I was wondering, if there would be any difference in the rendered image between a CPU rendering and a GPU one with a state-of-the-art graphics card: besides obviously the rendering speed, would a GPU rendered image be more realistic or anything different from a CPU one?
Thanks again and all the best!
Rémi
Hi Remig,
CPU and GPU rendering should yield exactly the same results, the only difference being the speed.
That said, there are a few niche feature sets that arent supported on GPU rendering, and you also have to be mindful of the amount of VRAM you have available on your GPU.
Corey
Hi Ethan,
I have tried to render but the result is not same as the image in viewport. The image of render result is blurred that look like not select focus to object.
I don’t know why ? Pls, explain this problem to me.
Thanks so much !
Hi Ethan,
so when you ask us to go to edit and then preferences and then to settings, it then says i cant even select CUDA ( i dont have a graphics card just yet)
it says,
“No compatible GPU’s found for Cycles, Requires NVIDIA GPU withcompute capability 3.0”
Let me know what to do about it
Regards
Hi Lamia,
If you don’t have a dedicated graphics card (GPU) yet, you’ll have to go with the CPU rendering option instead.
Regards,
Corey
Hi Victor,
For the render passes, you will need to follow the composite settings I used, this means not only enabling them in render passes, but attaching them to a file output and selecting a space for these to go. Now when you render, everything will automatically go into that folder, so no need to save individual passes. To get them into photoshop you will need to load every image, not just the base image as they are still separate images.
In terms of an elongated image, I’m not quite sure what you’re experiencing but my only advice if the actual image is elongated is to check the camera settings are properly set, maybe even add a new camera and try that,
Feel free to email the Karl Taylor team an image of what you’re experiencing and they can pass it on to me, or email me personally at and I can help you from there!
Thanks 🙂
Ethan, how do I save my render and export it into Photoshop? Sorry, I try to look up stuff that I don’t understand, but I’m having trouble with these.
Hi Victor,
For a simple single-layer render, you can just go to the “Render” drop-down menu and select “Render Image” or press F12. This will bring up the Render window, once the image has finished rendering you can then go to the “Image” drop-down menu and choose “Save As…” to select your file parameters.
If you follow Ethan’s compositing techniques shown in this video, the same workflow applies, however you shouldn’t have to do the final “Save As…” step, as the File Output node will automatically save your passes for you.
For the Photoshop workflow that Ethan uses, please see the next class here.
Hope that helps, if I can be of any more help please get in touch.
Corey
Hello Corey,
Followed your instructions regarding the simple single-layer render. I choose Save As and selected my file parameters. Went into Macs Finder and dragged the file in to PS, No passes came with it. Checked the file output and all the passes were still there, just not in PS.
Next, Tried Ethan’s techniques, again no passes followed into photo shop. So, I’m sure I’m doing something wrong. Checked my file Output again, the passes were still there, just not in PS.
Again, I’m dragging the image into PS. What can be the problem?
Victor
Found the answer myself, however, i have other questions. Will contact you later. My Regards.
Ethan,
Tried to test Render. I get an elongated image. Location and Rotation are all at zero. What am I doing wrong?
Victor