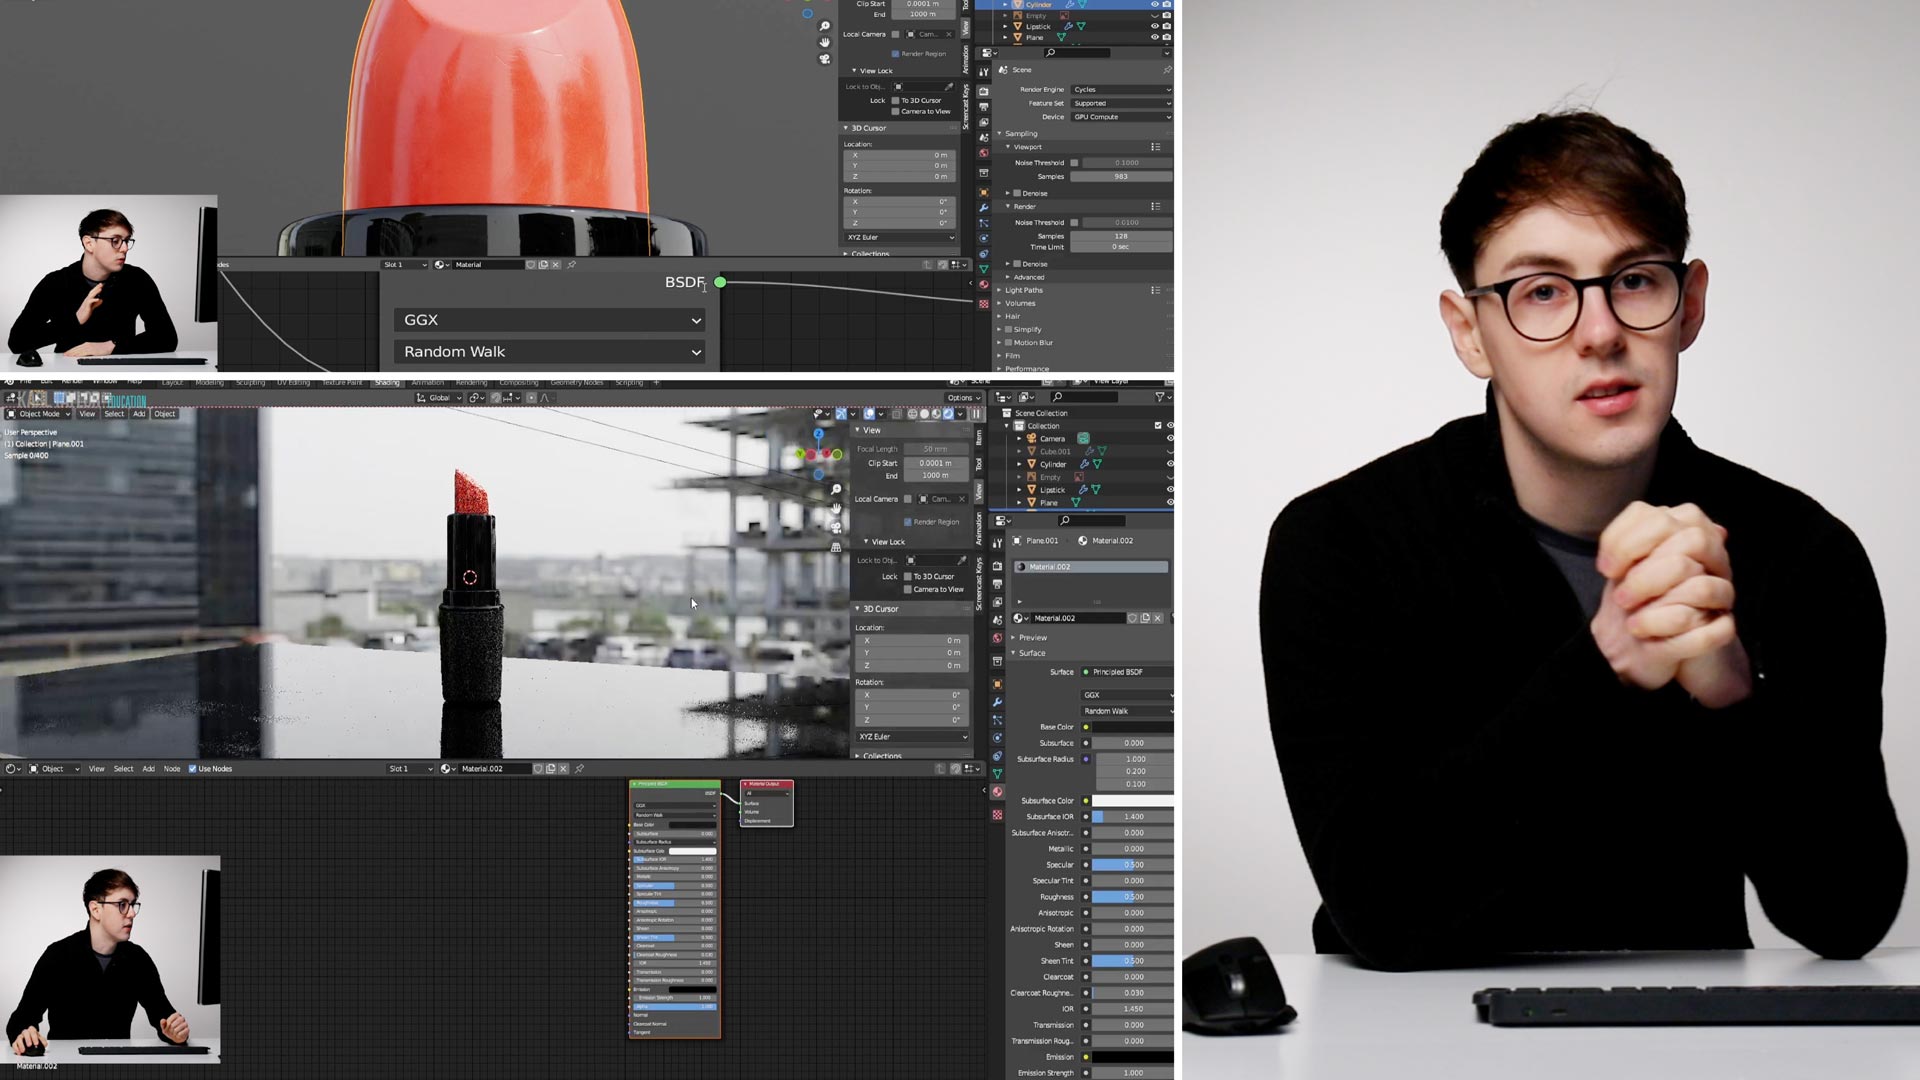

Texturing
In the fifth in our series of Blender 3D Basics classes, Ethan Davis shows you how to use texturing to make your 3D CGI models look more photorealistic.
The textures Ethan illustrates include fingerprints, scratches, and dust, as well as a variety of surfaces ranging from rough to glossy.
Some of the properties he demonstrates include Roughness, Metallic, Specular Tint, Anisotropic, Sheen, and more.
As he moves between Shading and Editing mode, he shows you how to use normal maps and bump maps, and demonstrates UV unwrapping.
This comprehensive texturing tutorial will boost your Blender skills significantly.
You may also find it useful to refer to the Bump Map, Emission, Index of Refraction, Node, Normal Map, Normals, Texture Mapping and UV Map entries in our 3D CGI Terminology A-Z.
NOTE: The specific texture Ethan uses for the lipstick is available to download here.
For other textures (free and paid-for), Ethan recommends the following resources:
Please note that this page contains affiliate links. While we only recommend products and resources that we believe in, we may benefit financially from any purchases you make via these links.
Comments
Really stupid questions, but where do I activate the captions?
Hi, there should be a CC button on the video player on the right and side at the bottom. It may be that this video doesn’t have captions yet.
Hi Ethan, how can I resize only one texture without effecting the other? For example, the fingerprints only without effecting the dust? Thanks.
Hi Ton1,
You could do this by using texture coordinate and mapping nodes linked the left of your image texture node and using the scale feature, or by creating a separate UV map for each image texture.
Hope that helps
Hi Ethan,
I need your help again.
First off, thank you so much for your time, the colour on my lipstick has been applied perfectly, i was making a mistake by adding roughness texture into the base color.
now, when we add a plane and rotate it horizontally as our lipstick’s background and i go to the rendered view, that background doesnt show, if i go back to layout its right there, but then in rendered view it not.
if i stay at Layout and to render view i can see the background but everything is pitch black, if i go to shading and then render view i cant see the background.
Please Help!
Thank you so much.
Regards
Lamia
Hi Ethan,
The problem is fixed now, thank you anyway.
Regards
Lamia
Hi Lamia, please can you email me a screenshot at and I can help you from there 🙂
Thanks Ethan and Karl for tutoring us on 3d modeling. I went as far as texturing and had a problem with the stretching of my textures. The Bottom part of the black plastic textures were okayed looked normal but the parts where is had extruded while modeling, stretched my textures all the way up the black plastic. I can’t seem to figure out the problem
Hi Collins, This is due to your model and UV map stretching between geometry. To fix this, you could tweak your UV map so that there isnt as far as a gap so the texture doesn’t stretch. Or, add some loop cuts and then press U – Unwrap again to re unwrap it with extra geomtry.
Thanks! 🙂
Hi Ethan,
And i am stuck yet again. So when i apply the base color to the lipstick, the colour appears only on the top part of the lipstick and the sides stay white, i dont know if anyone else has come across this but i cant move beyond it.
Please help
Thank you so much.
Hi Lamia, I think this is because you’ve applied the texture when in EDIT mode. Make sure you’re in object mode, so the whole object is selected and then press assign texture.
Hi Ethan,
Thank you so much for getting back.
So i have tripple checked everything, i am on the object mode, the whole lipstick cylinder is selected,but no matter how many times i apply the texture its not wrapping around the whole lipstick, only the top that too not fully and its appearing on bottom left side of the lipstick, that too not soo much.
regards
lamia
Hi Lamia, please can you send me a screenshot ? Email it to
Thanks,
Ethan
I am enjoying your lessons, but I have noticed something a little annoying. It seems that since you’ve done this lesson before, some of the settings in Blender have been remembered. I’ve been working for about an hour watching and rewatching to see if I’ve missed a step.
When I was trying to get my 4k texture to cover the whole bottom of the lipstick it wasn’t. It was only covering the bottom. I figured it was the UV map problem, but when I clicked on the UV Editing tab the wrap wasn’t there like it was for you. I found I needed to click the UV sync selection button for it to show up. But it didn’t look like your unwrapped UV map. Finally, I happened to right-clicked in the UV editing window and click unwrap and there it was.
Just something I’ve noticed.
Hi Ethan, I’m grateful for this brilliant series you guys have created, good job. I’m having a challenge though. I noticed that when you switched to the shading workspace your axis maintained it’s position but when i switch to the shading workspace my axis changed and the whole view-port looked really different, I’m not sure how to explain it exactly. Is there a setting that i need to change?
Hi Nesto,
When you change workspaces, the view changes to a default position, I believe Ethan had already opened the viewport and realigned his view before what was shown in the recording. There is a slight shift but not as extreme as the default change.
Any camera objects you have set up will keep their position when changing workspace however, and you can reselect the camera view by pressing the camera button on the right hand side of the view port.
Hope that helps.
I also had this problem, so I kept looking around for possible solutions. The best thing I found was to make sure that you have the object selected and then press the . on the num keypad (or choose View –> Frame Selected) on the top of the render view. Took me almost a full day to have this figured out.
Hi Ethan.
First of, thank you so much for tutoring us on this, spending quiet some time on blender now.
I have this one question, in the first step of texturing when you introduce the black to the lipstick, your getting this clean look, where as i am getting a pixelated look to my material, i actually had to do everything from the scratch twice and when i get to texturing part it’s giving me this pixelated look. i have followed every step as you have taught , not missed out on any part. but i am now stuck here.
please, get back to me on this.
thank you so much
Regards
Lamia.
Hi Lamia, have you right clicked and pressed ‘shade smooth’?
Let me know, thanks 🙂
Ethan,
i remember doing the shade smooth part, now that you have asked , i have done it again and now the texture is not pixelated anymore, it’s smooth and clean now.
Thank you , Thank you so very much 😀
Regards
Lamia
Hi,
If anyone has come across the problem of the camera in blender showing in landscape mode and has been able to change it to portrait mode please let me know also.
If i grab the camera and then rotate it, the view rotates with it.
I couldn’t come across anyother solution over the internet.
Regards
Hi Lamia, you can change the dimensions of your camera is the camera settings, click on the camera and a right tab with a camera icon will appear. Change the dimensions so that the width and height are in a portrait format ( height being more than width )
Hi, Ethan
I’m an aerospace engineer coming to this with years of experience with Solidworks. I got about a third of the way through this video and realise I know ‘not much’ about rendering images.
Wow!
This is a superlative software, and as an enthusiast photographer who is looking to blend experience with adventure I’m really looking forward to following you in this tutorial series.
You certainly know your craft!
Cheers
Thanks so much Elliot!
You should really include the files used in these videos because i find it time consuming to search online for all those files or smiliar and not paying attention to what the course has to offer. I really hope you would do this soon, otherwise i don’t know if i’m gonna continue paying for these courses.
Other than that, the information in this course is awesome! Ethan explains very good!
Hi Cosmin, thanks for your feedback but unfortunately we can’t provide them with the course because they are licensed and not owned by us. I do believe we have provided the links to the textures though.
Hi, my bad, i was talking about the imperfections he used in this course. It took me a while to find some good ones and i actually found the same ones but it took me some time.
If it’s a problem with the license maybe some links to where you got them would be nice.
I think it would help a lot.
Thank you and keep it up!
Hi Cosmin, there are links to websites that will help you find lots of imperfections as well as the lipstick material I used. Dont worry if they aren’t the exact same, you can use so many different ones that will do very similar things and you can get creative with it.
Thanks for the kind words also!
Ethan, nicely done. Though I think it could help beginners to cover the nature of UV mapping in more depth because it’s pretty complex. Thanks again.
Hi Ethan. I’m following this great tutorial of Blender, and now I’m at the stage of texturing.
But I was wondering if you have covered UV mapping and Texture mapping for this particular object. Or did I miss it somewhere?
Cheers.
I found it at 15:38 and I could finally unwrap the nib of the lipstick which I was struggling. Problem solved:)
thanks
Karl, please do the same for me as well. Thx.
can you please share all materials ( textures ) used in tutorials? I can find lots of free textures if i google but they dont work same or im doing something wrong ? Please share final blender source file so i can inspect for a better learning.
Hi Egozalan, we will look into this with Ethan and come back to you.
Links with paid stock graphics could help me a lot. This could give me a good starting point with collecting them. I am sure you’ve paid for all of these, I can do it aswell. But I do not know any good place to get them.
Hi Egozalan, The texture I used for the lipstick can be located at
https://ambientcg.com/view?id=Paint001
As for imperfection maps, any black and white image will do! You could easily create your own with a black table and some white flour even 🙂 There are so many different free ones with just a quick google search.
Some websites that do good textures can be seen below:
https://www.poliigon.com/
https://ambientcg.com/
https://www.textures.com/
https://www.cgtrader.com/free-3d-models/textures
https://3dtextures.me/
Some are free and some aren’t so bear that in mind. Also keep in mind the size of the texture, if it’s higher resolution, it will require more memory and be a bit slower to render.
Thanks Ethan.