
Classic Car Photography on Location
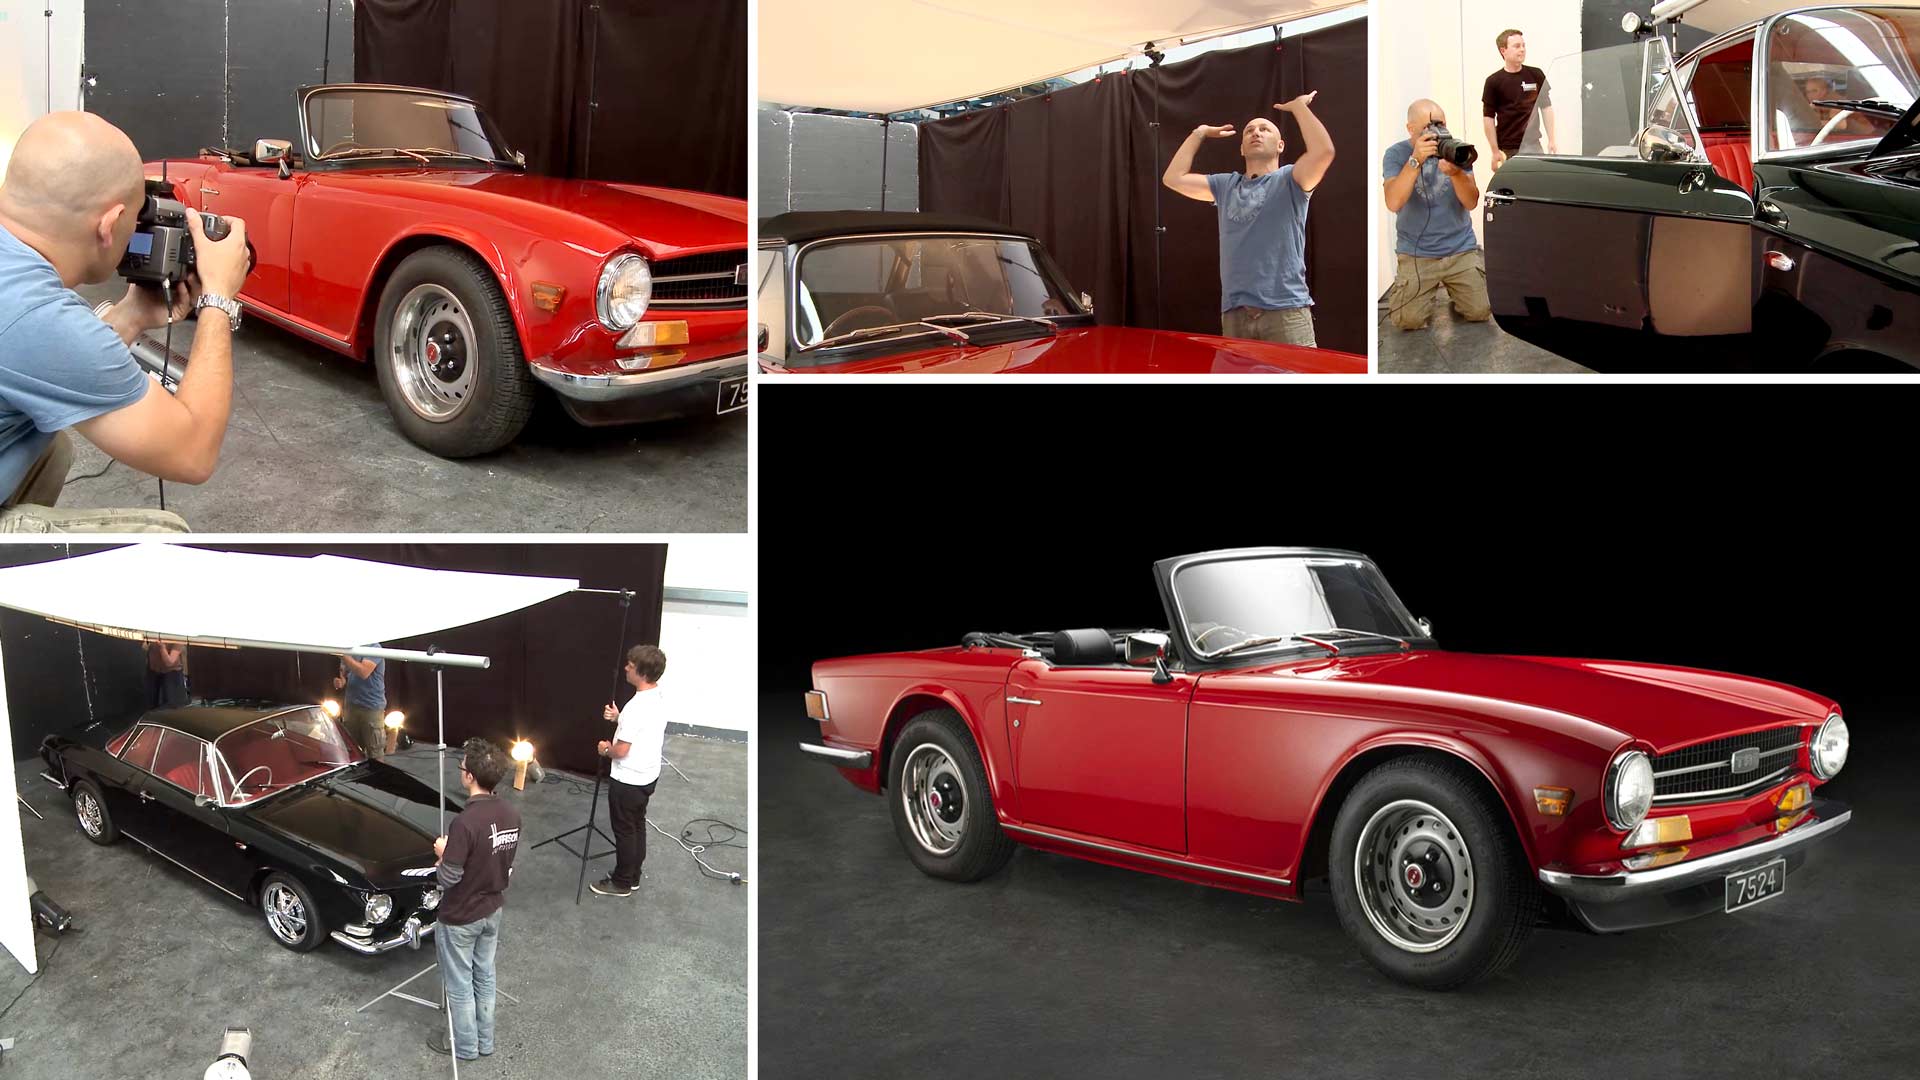
Cars are notoriously difficult to shoot – not only due to their size, but also their various materials and textures. Usually, they require a specialized studio and equipment. But in this class, Karl captures some stunning images of a car in a shipping warehouse with just some standard studio gear.
This shoot proves once again that knowledge and understanding matter more than a big budget.
Comments
Are still images of the final product available to review anywhere?
Hi, are they not on this page?
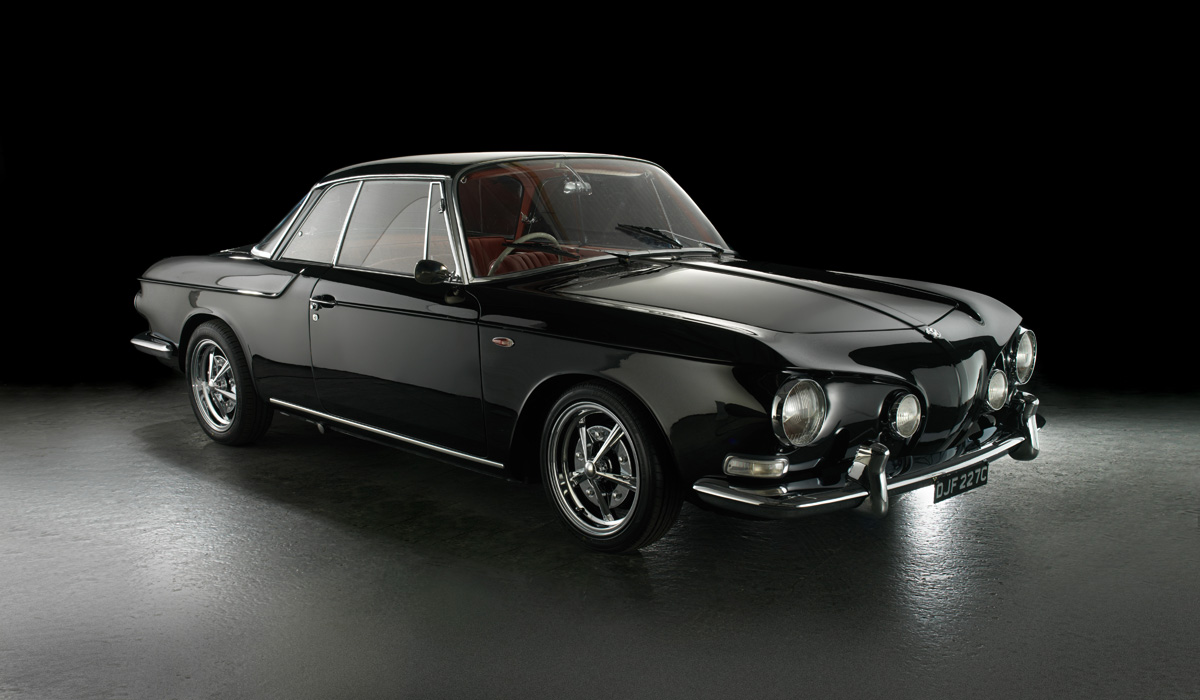
Thank you. I am just seeing one image of the black car.
Hi Dakota, OK I’ll make a note for the web team to add the Red Car image to this page. I think it’s also in the video though.
It is. The tutorials are great and I learn and take notes from each one of them! I will send you an email. Thank you for the thorough explanations.
AWESOME! ❤ THANK YOU VERY MUCH 😁
Hi Karl, aside tracing paper, what other material can one use to diffuse light?
Hi you can use the real thing Lee 216. You can use material but this isn’t good if you want clean gradient reflections in glossy surfaces. You can also use large white panels as we did in this car shoot too.
Hi Karl! I love your education website. Lots of quality content. I wonder if it is possible to replace the polyboards with diffusion fabric like this for easyer portability? And shoot through the fabric instead of reflecting the light from the polyboard surface? https://www.ebay.co.uk/itm/123112286001
Hi, yes that would be ‘scrim’ lighting which you will see in many of our tutorials.
Hi Karl,
I am just trying to find out which lense been used? thanks
I think I used the 80mm and a 50-110 on this shoot.
Karl thanks for the heads up on the scrims vs poly boards. I forgot about this videos glad you answered me in the last question about scrim substitutes. Great looking shots on the cars. Top notch.
Hi Karl, thank you for your quick and helpfull answer! So I’ll go with the scrims and use polyboards as surrounding “walls”.
Saw you few month ago in Paris at Pin up Studios and I’ll be at Photokina of course and like to say hi on Wednesday. See you there – Cheers
Hi Karl, have the challange to take a picture of a glossy, laquered bench http://establishedandsons.com/wp-content/uploads/01-Drift-Bench.jpg ( appr. 300 x 150 cm). Can’t take the shoot in my studio, cause it’s in a museum where I only have a big and high room. Now I’m struggling in what to take with me as equipment. Thinking about two softboxes above (each 200 x 140cm) or lee filter 216 (152 x 700cm) above with barbulbs or building a room with polyboards like you did in that shoot. Would be nice, if you can give me a little idea what you would do 😉 Thank you in advance and kind regards from Cologne, Detlef
Hi Detlef, I’ll be in Cologne for Photokina, I’m giving a talk at the Manfrotto stand on the Wednesday at 3pm if you can make it and say hi! I’d go with big home made scrims which is what I use for mostly glossy objects, if that’s not an option then polyboards like on this shoot and retouch the polyboard joins out. You really want a lovely gradient light on this, softboxes will just give you big homogenous blocks of light as reflections which could be distracting.
What lens and focal lengths are you using for Hasselblad and comparable DSLR Full Frame?
Hi Paul, A Hasselblad 100mm is about 70mm on 35mmFF and a 150mm is about 110mm of 35mmFF and an 80mm standard lens on the Hasselblad is about 50mm on a 35mmFF in fact they list the equivalent focal length on their lens specs, click on any of the lens ‘data sheets’ https://www.hasselblad.com/h-system-lenses/hc2880mm/
Loved this Karl!! Those were some amazing insights. I am an automotive photographer myself. Wanted to ask you, for shooting interior/exterior details of the car and maybe logos etc, will reflectors with grids and trace/scrims give an awesome effect? I have been using strip soft boxes. They do the job, but the highlights are harsh and evident. Please give your suggestions. Thanks a ton Karl.
Hi Kartik, yes trace scrims will definitely help on those sort of details especially if they are glossy. See some of our product photography section for further info.
Thanks Karl 🙂
Also, please do a full lesson on Automotive Studio/Commercial photography and retouching. Can’t wait for that. Cheers
Hi Kartik, that will be coming by the summer of 2018.
A true masterpiece of lighting. Would you ever use gels with this type of setup? I’m thinking of when vehicles, such as Ferrari, where they are associated with red.
Can’t wait to see that Karl Dealing with all the things that can show up in the reflective panels and glass on a car in camera is a great challenge and your spot on that a bigger space is better Love your approach mate on your light shining products the wonderful gradient tonal lighting is just wonderful
Would you have used tracing paper to shoot through for softer light sorry Karl just asking
Hi Paul, we’ll be doing some proper car shooting tutorial in our own studio early next year. And the ideal technique will be to use much much bigger solid white panels that can be used further away from the car. You’ll see the reasons why during this shoot. Thank you.
Hi Karl,
have these tutorials been released as I can’t find them on here? if not do you know roughly when these will be available.
Many thanks
Hi Samuel, the video is on the page for this course? You need to be logged in to view it?
To translate this into video can you do the same kind of clean up in After Effects that you do in Photoshop?
Hi Paulian, i’m not a video expert so I don’t know about the same technique in After Effects i’m afraid.
Beautiful. but how about the reflection of the floor on the body of the car ?