
Clinique Shoot 1: Planning and Lighting
For this particular product photography class Karl replicates a Clinique-style advertising shot and demonstrates the process of working to a brief. Guided by the brand’s fresh, clean style, Karl explains how to light and style a high-end advertising image. You’ll be able to watch, step-by-step, as Karl shares his shooting process and reveals some top tips for effective product photography.
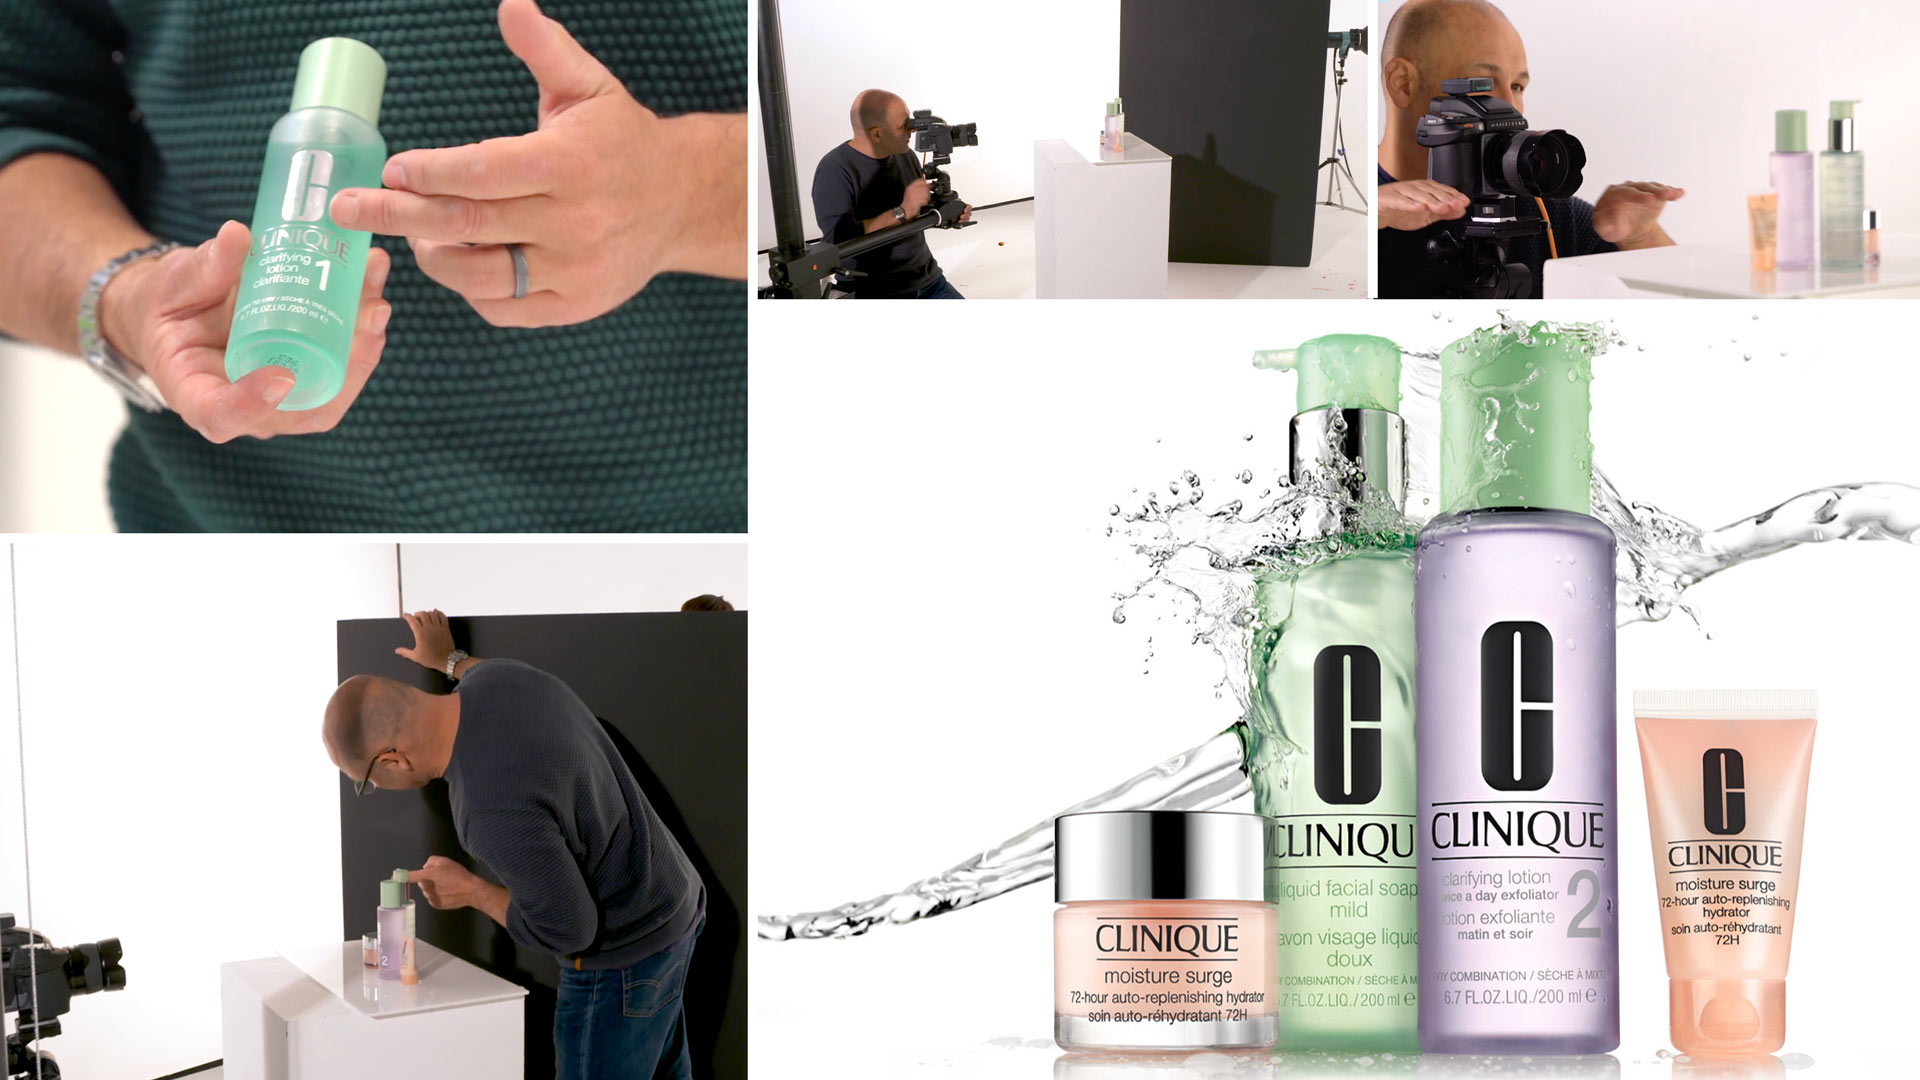
In this first part of the shoot Karl outlines the challenges he expects to face throughout the shoot and starts work on his lighting setup, focusing initially on achieving the clean white background typical of Clinique advertising images and perfecting the gradient lighting on the silver caps of the bottles.
Challenges:
- Creating a Clinique style advertising image
- Getting a white background and base surface
- Graduated lighting on the silver caps with black edges
- Backlighting through the bottles with high contrast on the edges
Solutions:
- Using mood boards and reference pictures
- Carefully controlled background lighting
- Using scrims to create gradient lighting
- Reflectors and flags to add highlights and contrast
The apparent simplicity of Clinique’s clean, fresh advertising images are greatly misleading and I knew there would be a number of challenges to overcome throughout this shoot.
Before I started the shoot I collected a number of Clinique advertising images that I could refer to as these would guide me in my lighting and composition.
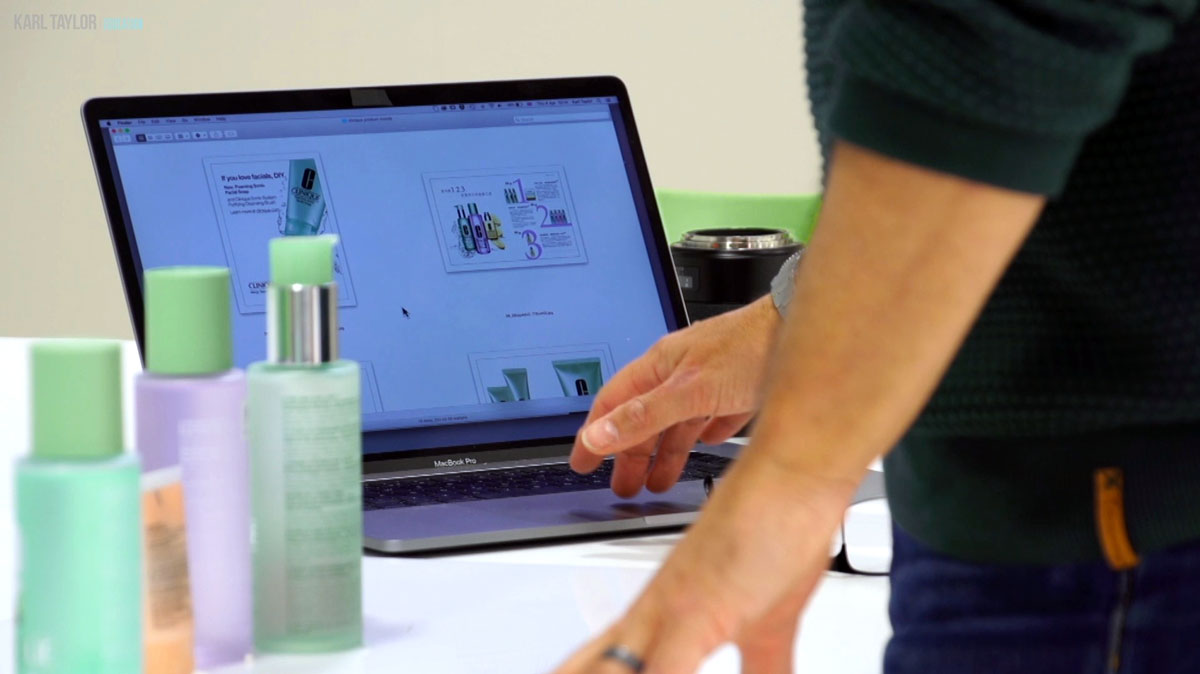
I used other Clinique advertising images as references for the lighting style and composition.
The first phase of the shoot involved creating the clean white background typically seen in Clinique shots. For this I used two lights to achieve a bright, even light that would reflect into my base surface and through the bottles.

The clean white background typical of Clinique advertising images with a slight reflection in the white base.
From there the next stage was to introduce some side lighting. A key part to consider here was the silver caps on the bottles. For this I needed to create a gradient light but with high contrast on the edges, which I did by introducing black flags.
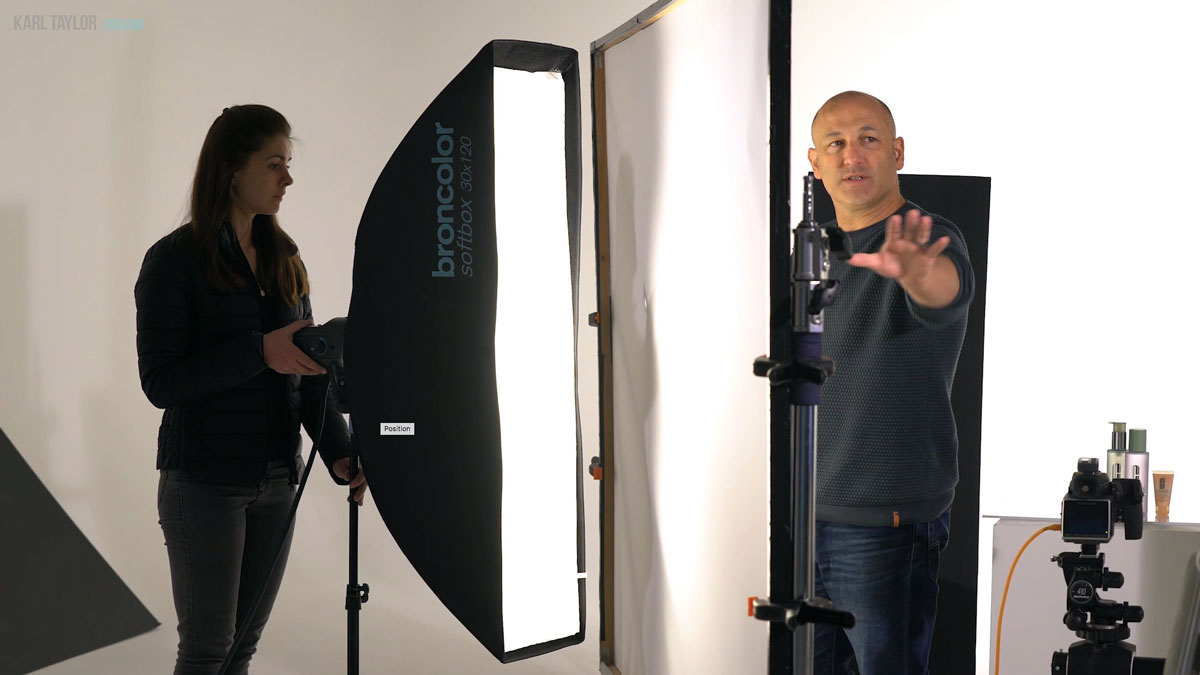
Using scrims to create the gradient lighting on the silver caps of the bottles.
In the following stages of the shoot I start looking at increasing the contrast in the bottles, reflecting black into the logos, capturing the splash shot and photographing the smallest bottle separately.
The final image:
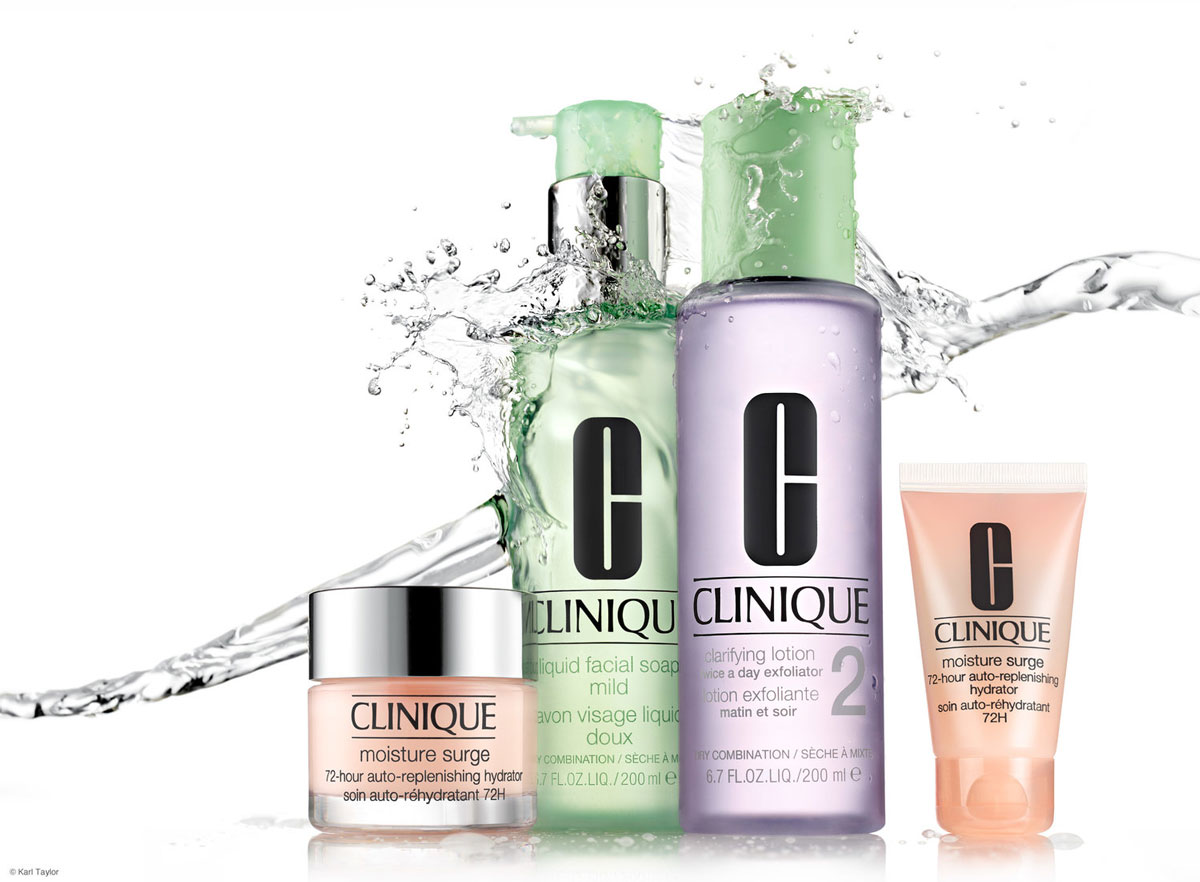
The final Clinique advertising style image
To learn more about product photography, read my top tips for product photography here. You’ll also find a selection of product photography classes on our website, though I’ve put together a selection of classes below which I think you may find useful.
If you have any questions about this shoot please post in the comments section below.
Comments
Thanks for the tips on the product and some fashion/lifestyle commercial photography. I am going to try to stick around for a while since I am learning a lot. I find the courses are good additional skills if work on social media or you have a part-time business.
Karl
I might make a suggestion for your video pages. Just to be clear, these are top drawer. Honestly a fantastic look into the process and techniques. Brilliant. After watching many videos, I find there are always points where you cross an important universal lighting situation, specific to the shoot, but at the same time an extremely important universal concept. Lighting chrome, producing the dark edge, etc.. The example here is when you moved the scrim in closer to even out the ratio of light on the chrome lids and the bottle surfaces. One of the most important learning points of the whole shoot . I actually think those important universal concepts should have some supporting text/images on these web pages, and there may even be a mechanism in the site to search for these learnings via search words or a menu selection, or perhaps under lighting theory, a sub category to find solutions to your problems so you can find the video that helps. I learn loads in each video, although currently the way forward, generally speaking is linear. Watching various shoots/post production start to finish. I’m suggesting a non linear viewing approach to concepts or ideas. Just a suggestion..
Hi Karl,
Do you prefer to use the softboxes for the gradient, rather than a bare bulb as the bulb would be far less controllable (lots of bounce)? I see you use a bare bulb when shooting single items or more chrome that can give a more general gradient.
Thanks, Joe
Hi Joe, I don’t prefer either, I only apply the physics to what will be needed. For example a bare bulb is going to provide a radial gradient, a 30×120 softbox through the scrim is going to give me a gradient that is stronger in one direction than the other and more suited for example to a bottle shot. As you progress through more of our classes you’ll see the differences in play.
Hi Karl, I’m just binge watching your product p. lessons, one after one.
You have such a lovely approach to technical details, even the most complex ones.
I live in Italy (that’s why my english is barely acceptable, sorry) and I find here it’s nearly impossible to find a large size tracing paper to build my first scrim. Almost sure I am translating “tracing diffusion paper” wrong to italian and that’s why I can’t find it among retailers.
May you suggest me an e-commerce reference for that?
Thank you
Francesco
Hi, your english is much better than my Italian! But I’m glad you are enjoying our classes – here’s what you are looking for, you better with the 1.52cm wide rolls – https://www.leefilters.com/lighting/colour-details.html#216
Ciao Francesco,
ho comprato i rotoli lee sul sito thomann.de
spediscono in Italia
Grazie Roberto, molto gentile.
Quale hai comprato?
//
Thanks, Roberto, very kind from you.
Which did you choose?
Questo è il link
https://www.thomann.de/it/lee_farbfolie_rolle_216_w_diffusi.htm
non è largo 1,5 metri ma 1,23
E’ un rotolo di 7 metri circa
La puoi trovare da Condor foto in Italia
Karl, your information is priceless! I don’t know if someone has already mentioned this, but in the audio world, we call those “bendy arms” goosenecks. Cheers!
i am from INDIA and i can’t able to join membership from card and Paypal too I had tried different cards. Please solve my problem email :
Thanks Karl for another great tutorial ….. Absolutely loved the insight at 38:20
Golden words !
Thanks to corona virus, I have decided to try my hand at product shots for the next 4-8 weeks. This means buying a few pieces of new grip equipment. Related to that, I have a question about the scrims you use in your videos. In some of your videos, like the motorcycle shoot, you seem to use every piece of high end gear you can get your hands on. In others, like the egg video, you appear to be making an effort to demonstrate how much can be done with the least expensive materials possible. It isn’t clear to me sometimes whether the choices you make in a video are for the sake of efficiency (designed for budget strapped subscribers) or highest possible quality (cost is no object).
For instance, in the Clinique and headphones shoots, you use Lee diffusion paper on a roll to make large scrims. Do you use the roll of diffusion paper instead of a pre-made diffusion scrim because it is less expensive, more flexible, or the highest quality? I was tempted to buy a 25 yard roll of Lee 216 or 250 paper, then hang it over/between a couple of booms, but then saw a number of what appeared to be pre-made collapsible scrims that would do the same job but were easier to handle and required less time to assemble.
You have a video about parabolic reflectors where you convincingly argue that the Broncolor Para series of reflectors (I have a Para 133) are qualitatively superior to other models. With that in mind, I wondered if the same was true of pre-built scrims. So, do you make your own out a roll of Lee filter paper because it is the best for the job? Or for some other reason?
A related question has to do with pico lights. They are quite expensive to buy but you suggest in one or more videos that one can simply create a truncated cone out of acetate or some other heat-resistant material, and tape it to the end of a normal monolight instead. If so, does it achieve the same effect? I’m not thinking about buying a pico light or two right now, so I will try the cone method but I’d like to get an idea what the difference is. I assume there is a difference or you wouldn’t use pico lights yourself, and you seem to prefer them to the cone idea because I haven’t yet run across a video where you use the cone method.
Best regards,
AP
Hi, I’ll try and answer each paragraph:
1. It’s for both, I have all the gear I need so for efficiency I can use it but for the purpose of some of our classes I like to demonstrate that you can often do the same thing if you just figure things out with less gear. As was also demonstrated in the One Light Lipstick Challenge Live show.
2. No I nearly always use it on the roll if it needs to hang vertically, it’s the same material so it makes no difference if it’s in a frame or not it’s simply if I need a roll to go horizontally or landscape I can’t do this with it on the roll so I have it in a frame instead
3. Collapsable scrims or fabric scrims are rubbish for product photography as the gradation reflections are not as smooth
4. I make my own with wood, L brackets and LEE
5. If i’m using a Pico with a fresnel attachment you can achieve a similar effect with a tight honeycomb grid on normal light. If i’m using a picolite with a projection attachement this is harder to achieve, you can arrive at similar with a snoot with a grid on the end of the snoot or there are third party projection attachments you can get for other brands but I don’t know how good they are.
Hi Karl,
Really enjoying the detail you put into this. There are things I’ve learned and some I’m learning.
On to the next video.
Thanks again.
Cheers 🙂
If you were to actually photograph this project for the client, what would your estimate in time be to complete the job for start to finish including the retouching to composite the image complete?
Hi, 2 days due to the nature of many splashes required. Sometimes you can be lucky and get the best splashes first time, other times it can take all day. Post production also was very important on this one as you will see in the post production chapters for this shot.
Karl, I’m watching your videos for the first time after having your subscription for a month now. Its amazing that you are talking about many things I learned and tough myself. It defiantly make me feel better about my growing skills as a Director of Photography. Also, Christopher. Are you the Christopher Moore that I learned from at the AI of CO?
Wow?. I don’t have any connections at Fuji. It seems to me that you/your staff are in a much better position to negotiate a trial/loaner. I’ll just wait and see if anything further is done on this. It would be great to see your feedback on this topic??.
On an entirely different note… As I’m sure you’re aware Fuji just introduced a new medium format camera – the Fuji GFX100 102 megapixel game changer with revolutionary capabilities for a digital medium format camera like IBIS, fast shooting and autofocus and superb dynamic range and resolution.
I know you’re “married” to Hasselblad but would really like to hear your comments/comparisons which, hopefully; will not include a bias towards Hassleblad but, rather, will offer a truly objective perspective. Hmmmm. Thoughts?
Hi Christopher, ask Fuji to let me have one and i’ll review it 🙂
Karl, Thank you for taking the time to respond to my question. I really enjoy participating in the Q&A of live-streamed sessions so it’s important that I’m able to schedule them in advance so that they don’t interfere with clients or other obligations. That’s all I’m sayin’. Thanks again for all you do. Your training is extremely helpful.
?
It sure would be nice to know when “coming soon” refers to. I understand that it can be difficult sometimes to lock in dates but a ball park idea at least would be helpful. In school one of the most important questions students ask is: “Teacher… When is it due?”
Hi Christopher, ah yes but in school this would be the equivalent of the teacher saying there is a lesson in ‘Renaissance Art’ coming soon and the student asking when that lesson is coming in that semester! 🙂 The honest answer is I like to let our students know what is coming so they are aware at least that it will be coming rather than not knowing at all. We film the tutorials so I’m obviously aware that I’ve shot them but there is still the process of the team having to edit and prepare the video and this is done with the other videos in the pipeline in mind. However in this instance I can tell you that it will be released at some point in July.