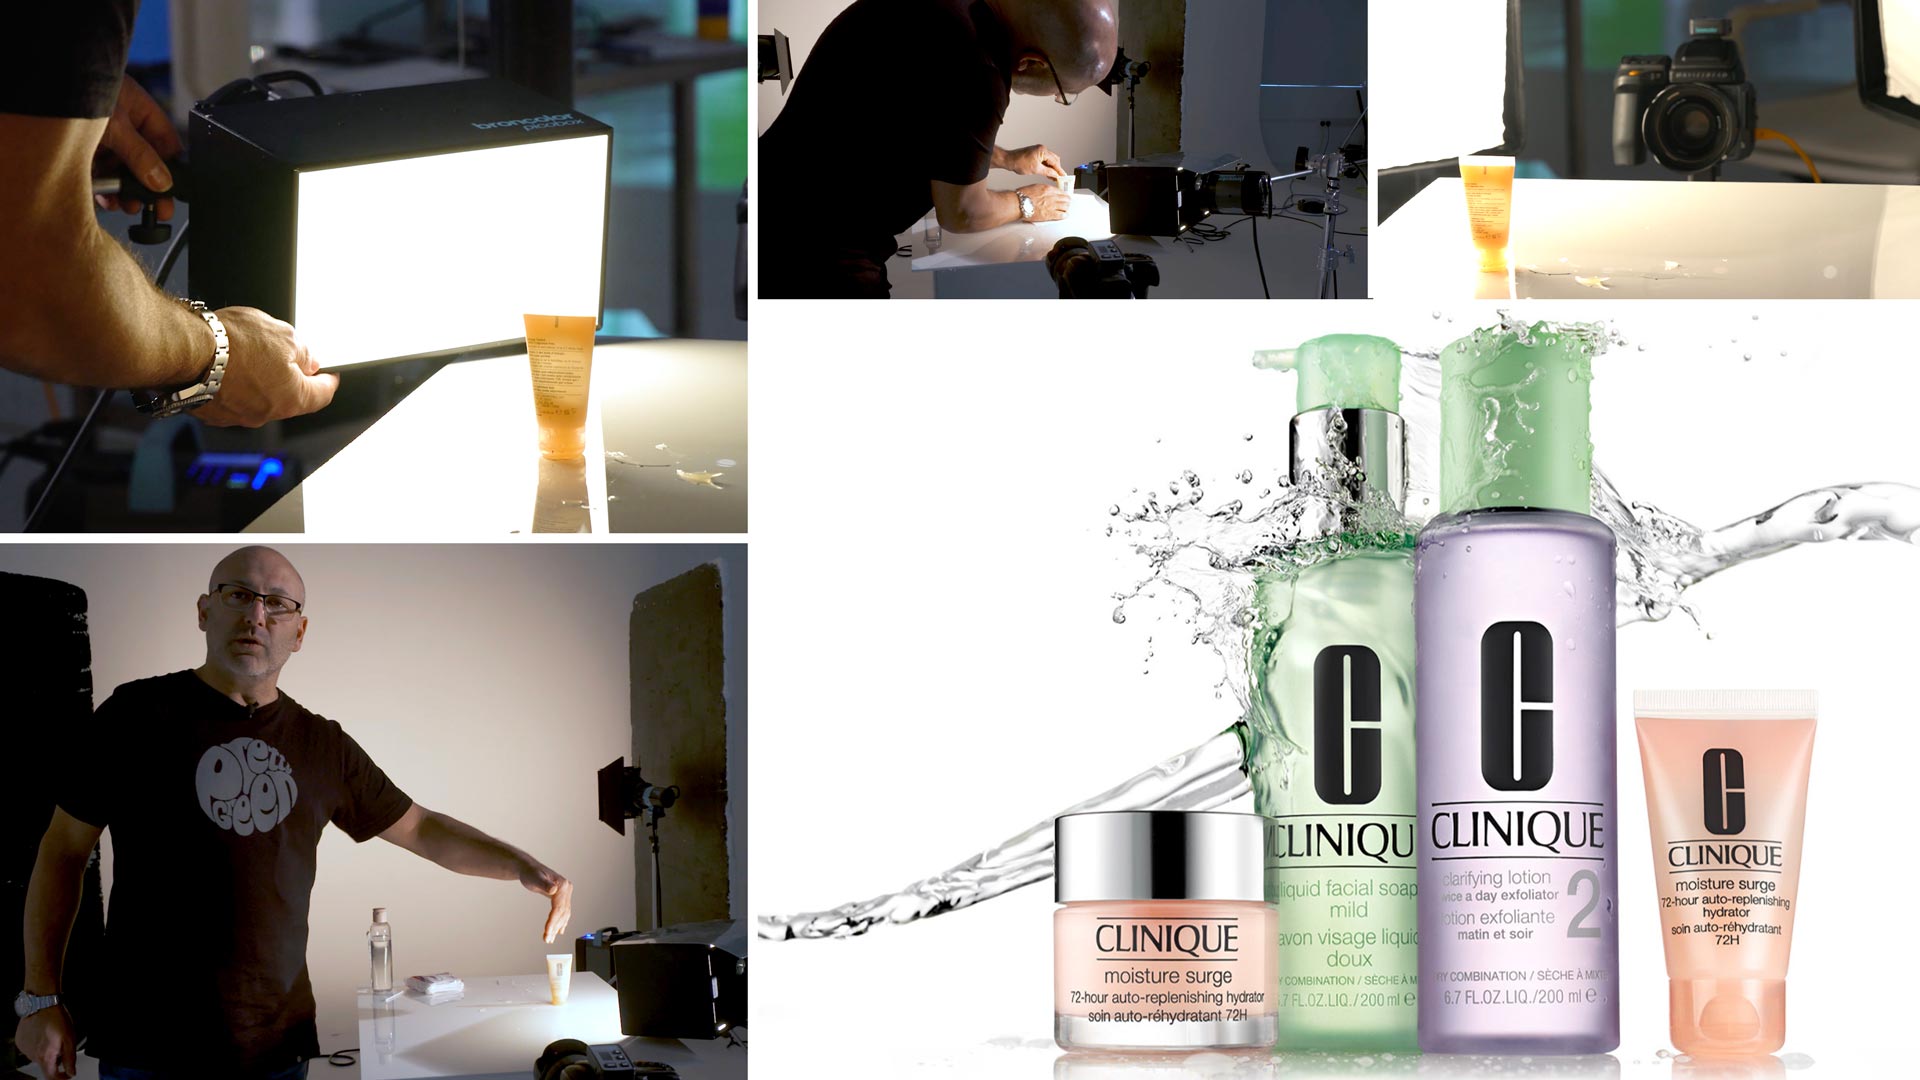

Clinique Shoot 3: Lighting Final Bottle
When it comes to product photography, the main goal is to ensure the product looks its very best. But when working with multiple products, this can mean shooting different items separately – which is what Karl had to do for this Clinique advertising image.
In this class, Karl demonstrates how to shoot the smallest of the Clinique bottles on its own. You’ll see how he lights the different texture of the product and how he treats the surface to create a slightly glossy appearance.
In this class:
- How to light matte surface products
- How to add shine to matte surface products
- How to control the specularity of a light
- How to photograph products for a composite shot
This final Clinique bottle required a completely different lighting setup in order to have the same style of those in other Clinique adverts. When I was shooting the bottles in the previous classes, this small bottle looked very flat compared to the other bottles and I knew I would have to change the lighting to match the other products.
I used two small softboxes to create a strip of light down each side of the product. This helped add shape and form to the product and also revealed the smooth texture of the bottle. Although I could have achieved a similar result in Photoshop, taking the time to light the product correctly meant I would have a much better and more realistic result.
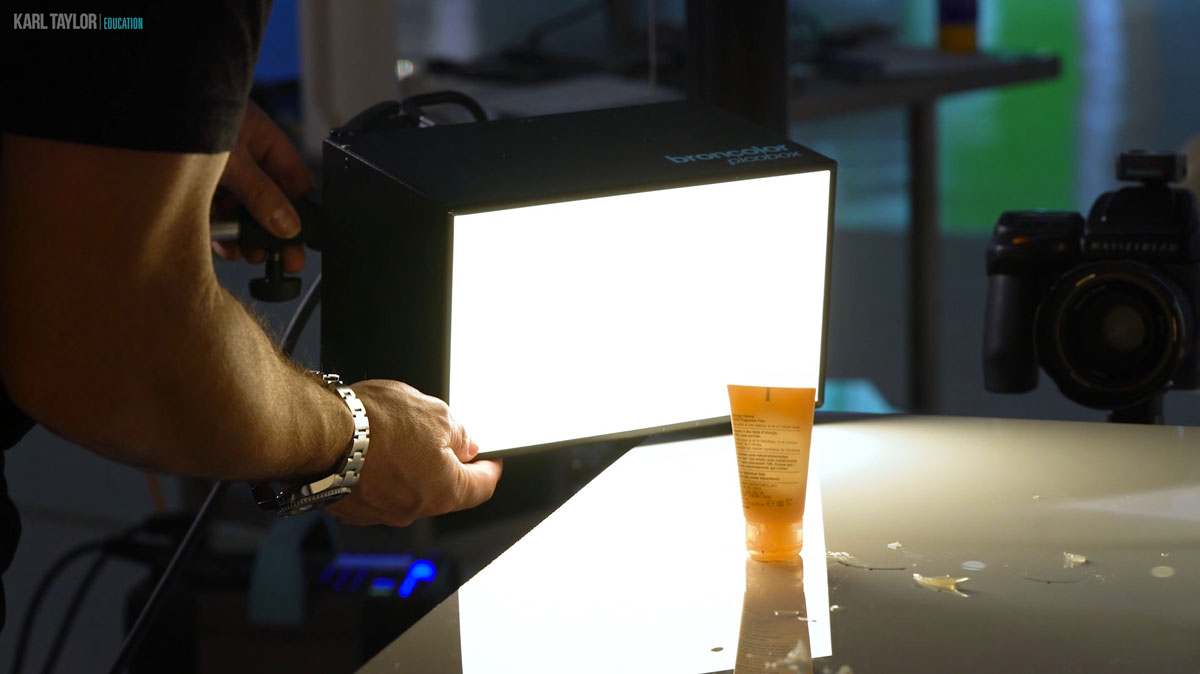
Lighting the final bottle with a small softbox.
I also wanted to add some shine to the surface of the product as this would allow me to get a more specular light and enhance the shape of the bottle.
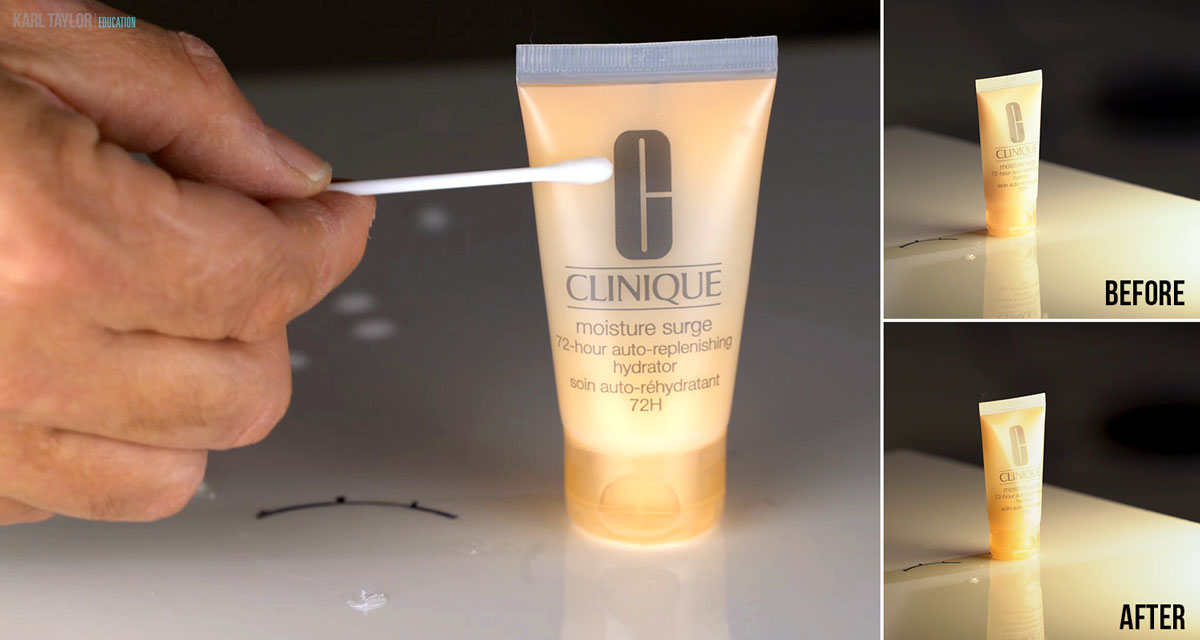
Adding a shiny effect on a matte surface.
Having captured the small bottle separately, the next stage would be to choose the best splash shot and combine that with the black logos and bottle shot. You can watch the full post-production process here.
The final image:
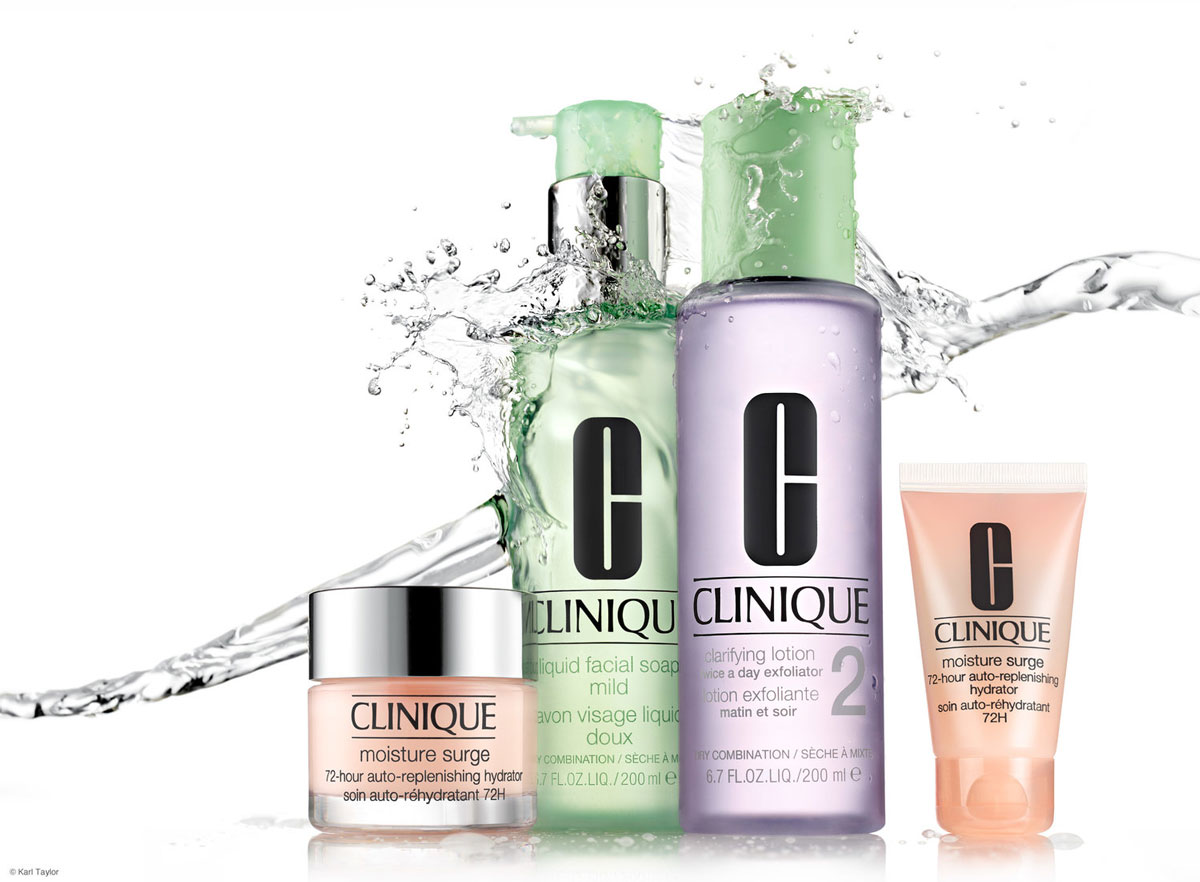
The final Clinique advertising image.
To learn more about product photography, read my top tips for product photography here. You’ll also find a selection of product photography classes on our website. I’ve put together a selection of classes below which I think you may find useful.
Questions? Please post them in the comments section below.
Comments
6min 38s why moving softbox further away increase reflection I don’t get that??
Since you wanted a hard light of mat product why didn’t you use bare bulb with P70? Or picolite
In the spirit of maximizing the in-camera solutions, I am thinking that adding the solution to matte the bottle and using a precise light & modifier combination while the other bottles were in place may have worked as desired.
In hind sight, do you think that such an idea could have worked or do you still consider it to have been not possible given the needs of the other bottles, scrim positions, avoiding reflections, etc.?
Hi, it may have been possible but if I remember correctly I needed to position the smaller light in closer to get the ‘sheen’ that I wanted.
Awesome information Thank you Karl
Thank you.
Is there an Bowens mount equivalent of the picobox? I wish I could get this size of softbox.
Hi, no I don’t think so but you can mask down larger softboxes such as the 30×60
You have a good point! If I need an even smaller diffused light source I can make one with Translum gaffer’s tape and scissors. In the past, I have cut and taped Translum to the front of my reflector or snoot. Then used tape to mask off the shape I wanted. I like the idea of being able to make any shaped reflection in the object. I would be remiss if I did not warn others to be careful of the heat that modeling bulbs produce. It might ruin your day if you set the Translum on fire.
Karl, great solution. Sometimes we get set on getting it all in one shot yet it is almost impossible to do. Good to see you giving us options when to pull the plug an have a different solution.
Thanks Jared.
… great course, thank you so much for this!
I agree that the little bottle looks totally “dead” without the gloss. But what would be a solution, if the client wouldn’t want that matte product to look glossy?
Hi Jens, you can gradually wipe it off until it becomes more matt again or you could polarise it.
I have to say all three courses have been amazing. Looking forward to the final composition selection process .
Thanks Geoff.