
Creating Gradient Backgrounds
Make sure your gradients make the grade.
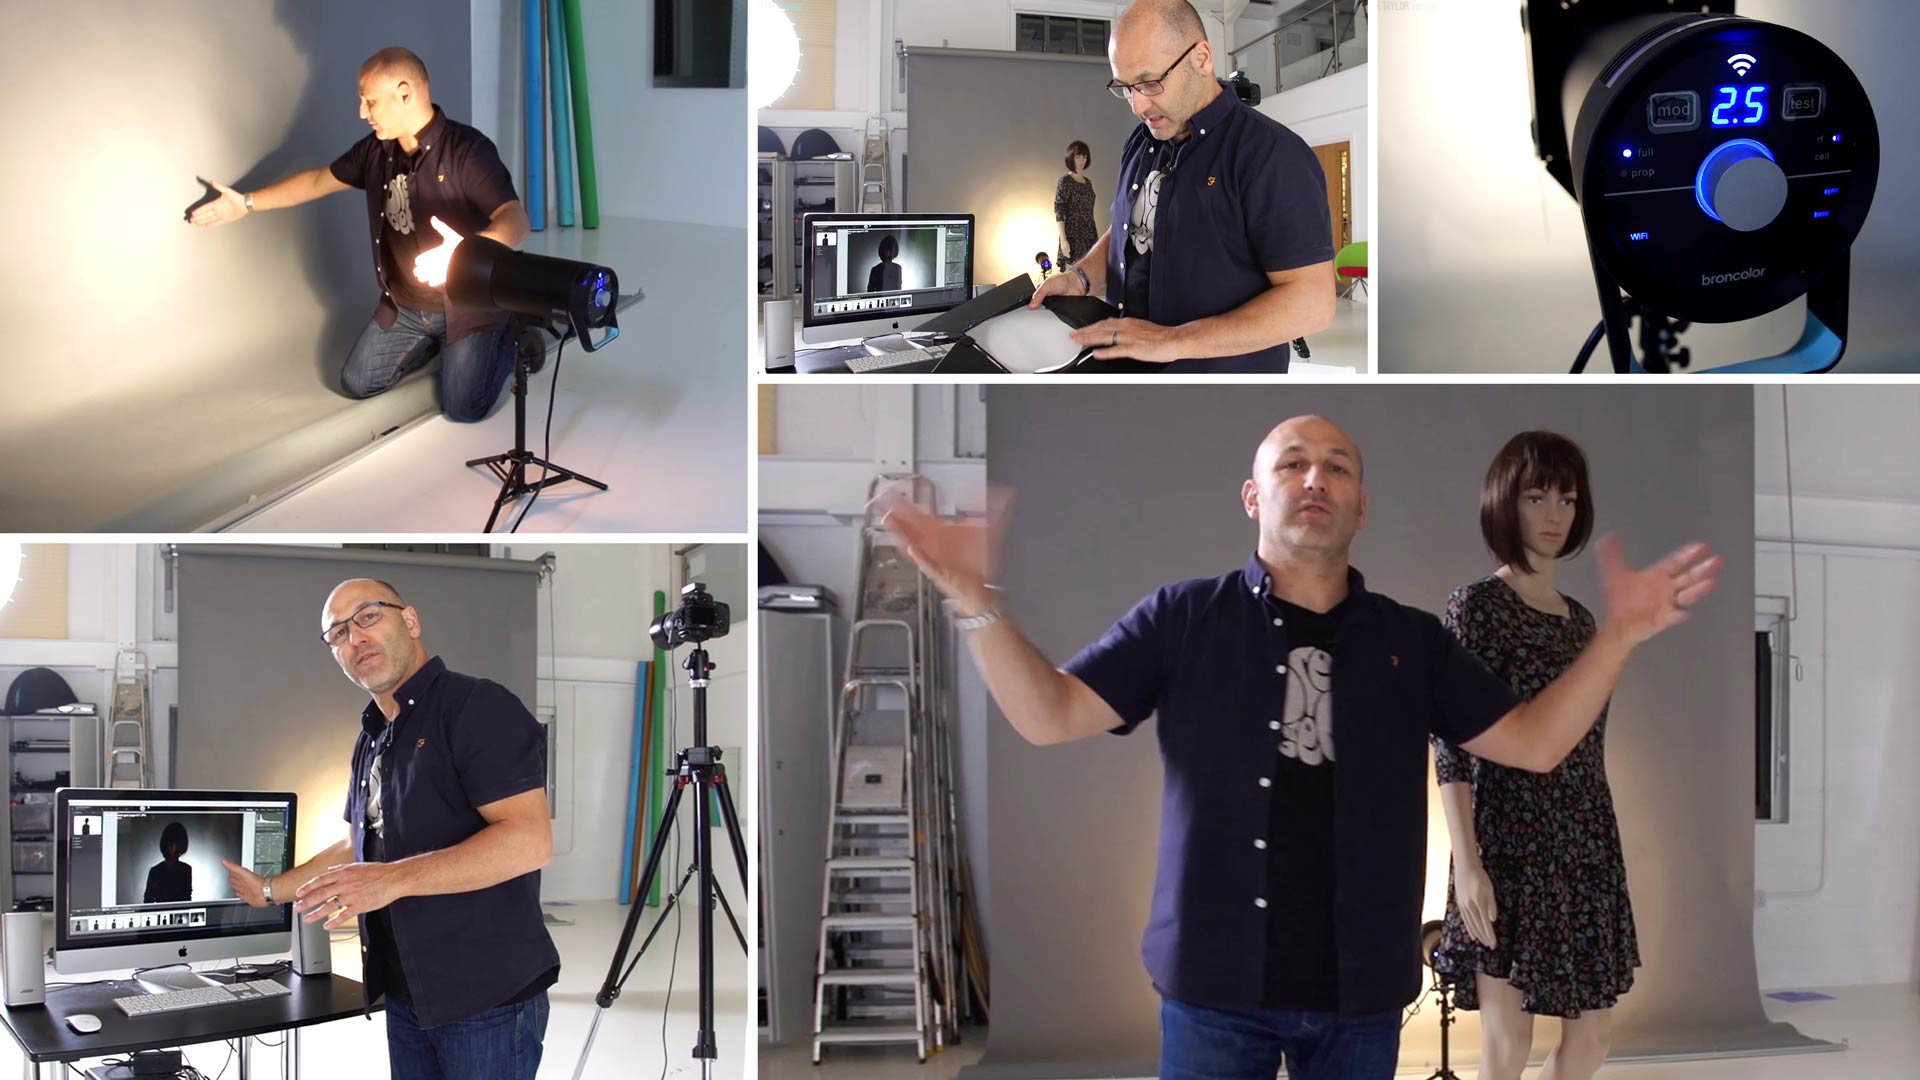
After explaining how to overcome the challenge of creating a clean white background for your photography, Karl explains how to achieve another popular look — a graduated background light. This technique is perfect for separating the subject from the background in an aesthetically pleasing way that doesn’t cause any distractions.
This too can be a difficult look to achieve, but Karl explains each step and outlines a few important things to consider when looking to create a smooth, graduated background.
In this class:
- How to achieve a graduated background light
- Common mistakes and how to avoid them
- Illuminating different background surfaces
- Adjusting a graduated background light
- Diffusing light to achieve a soft, graduated look
Questions? Please post them in the comments section below.
Comments
Karl,
Your teaching is second to none. I’ve been photographing since 2013 and nearly all of my work has been outdoors. Studio lighting has been a foreign concept for me because it wasn’t incorporated into my workflow. I did a corporate headshot session today and was able to troubleshoot to find the correct exposure smoothly without the use of a light meter because of these tutorials. Also, that exposure was achieved without the use of any modifiers. The hardest part was managing my gradient background. But, overall, thank you for this site.
– T. Young
Thank you.
Really like the result of doing this! I’ve been trying to replicate it but haven’t quite been able to and now after watching it several times see you have the siros at power 2? I’ve rented the siros 800 which only seems to go down to power 4 so is it the 400 that you’re using? Do you have any tips for using the siros 800 or is it just too powerful to do this with?
Hi Cameron, it should be fine to use the 800, try decreasing your ISO or using a darker grey background, alternatively you could put an ND gel over the background light.
Thank you SO much for the speedy response and guidance. I appreciate your time.
Hi Karl,
I LOVE this effect! I’m shooting in my double garage which I have painted all white, but I’m now considering dedicating one wall to this style of lighting and painting it grey so that I have a permanent ripple free surface. Would you recommend a neutral grey as close to 18% that I can find? How pedantic should I be about the colour? Can I also use gels directly onto this surface to get the most out of the wall? Many thanks is advance… this is by far the best educational investment I have made. I am learning SO much, now I just need to get doing 🙂 Thankyou for the wonderful resource!!
Hi Belinda, thank you for your kind comments and I’m glad you are enjoying it. Yes deifinitely needs to be a neutral grey, I’d go darker than an 18% go for something similar to ‘charcoal’ in the colorama paper range especially if you are working in a smaller studio space as the light falling from your main lights on to your background will also lighten it.
Nice job Karl! I learned a lot and still learn 🙂
Thank you George.
Hi Karl,
I’m learning a lot from these awesome videos. Thank you 🙂
I have no experience with studio flash lights and I have a question with regard to using them… had this from the previous videos also.
Does the halogen light switch off when you take the picture, thus having the subject or the background illuminated only by the flash, or does the halogen light stay on and contribute to the total lighting when the pic is taken?
Hi Viknish, it doesn’t switch off it stays on when the flash fires. Watch this video which is number 2 https://visualeducation.com/class/types-of-studio-lighting/ but I’d recommend you watch from number 1-15 in this section before watching the actual shoots or other techniques.
Hi Karl,
That’s what I thought but wanted to be sure. It also explains why you switched off the halogen lamp for the flash experiment with the fan.
I’ve watched number 2, but I will definitely watch it again. Yes, will cover all 15 before moving to the actual shoots.
Thank you, Karl! Loving these videos 🙂
Thanks Viknish.
Hi Karl
I’m working with a white solid, painted infinite curve. I do not have a grey background. I would like to use the gradient technique. Can I still achieve a grey background by moving my other 2 studio lights much further forward and achieve a similar result ?
Thx
Hi Ezetna, yes you can still achieve a good gradient on a white infinite curve. See our recent live shows page on Business Portraits and see that in action.
Hi Karl, will this gradient work with muslin mid grey backgrounds?
Thanks,
Kit
Hi Kit, as long as they are flat not if they are wrinkled or textured as they will cast shadows.
Hi Sir, can i get this effect with a speedlight ?
Hi Fajar, yes but you would need to attach a round diffuser to it first.
do i need flash bracket to attach a round diffuser ? sorry but i am newbie and so interesting with this course
Hi Fajar, I think you can just purchase dome attachments for speedlites.
great stuff – did wonder about why you might stand on stool on this lesson as camera so high – is that just a creative choice so can shoot down on model and see more of the background gradient?
Hi John, because I’m only 5″ 7′ ha ha. Usually to look down slightly on the model.
Hi Karl, this whole lighting course has been invaluable and very well scripted. When I originally thought about subscribing I thought it would be another one of those courses that promised all and delivered very little. I can honestly say that in every video I learn a tremendous amount, and my photography is already reaching new heights. Thank you.
Thank you Matthew.
I totally get that. Great video!
another well done class thanks frank
Thanks Frank.
The background light is continuous light or a strobe?
Hi Richard, if you haven’t understood that then I have to ask that you start at chapter one and watch all the way through as this is very important to how you will absorb the knowledge and what you will take away from it. I design and script these courses to teach the right information in the right order. Thanks Karl.
Kiss me Karl hahaha! Thanks another brilliant video!