
Creative Portrait Lighting Techniques
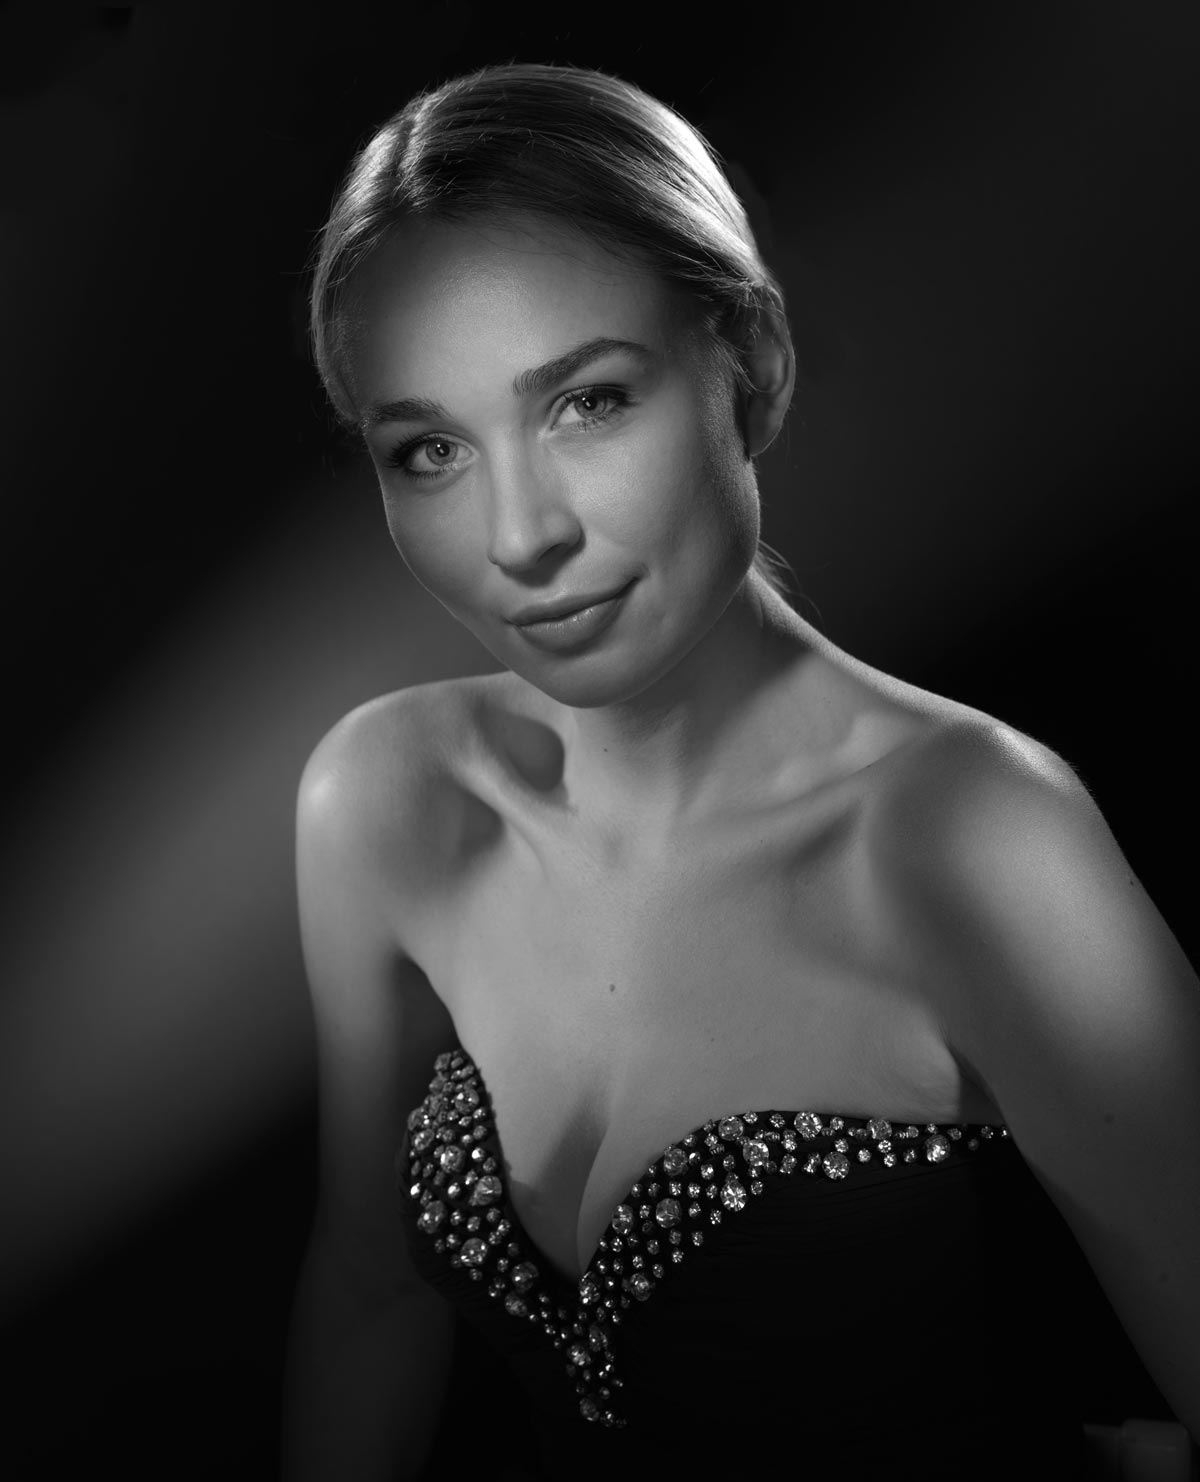
Capture the spirit of classic Hollywood glamour.
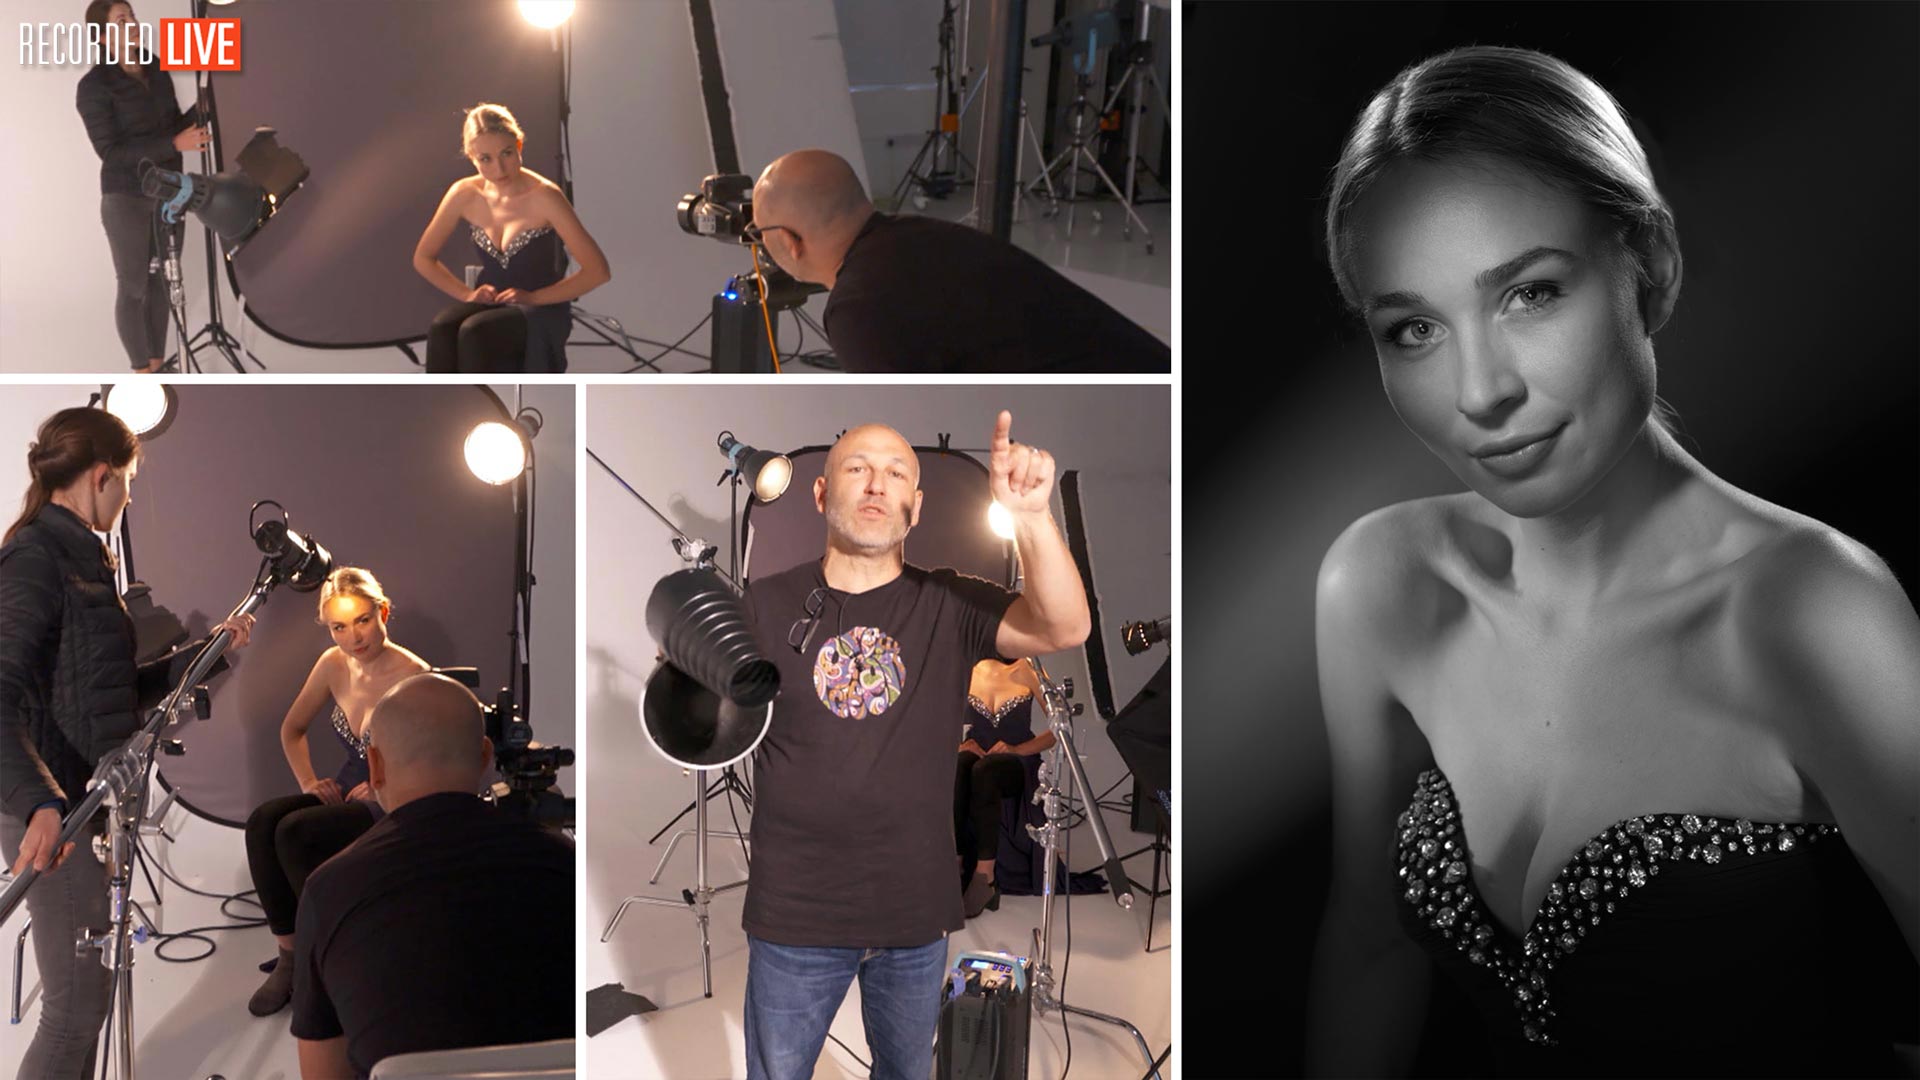
In this class, recorded LIVE, Karl shows you creative lighting styles and techniques that you can use to recreate glamorous, Hollywood-style black and white portrait photography.
Working through each step of the shoot, Karl explains his lighting setup, power ratios and lens choice for this image. Using a combination of seven lights, he also explains how to balance multiple lights and what alternatives you can use if you don’t have fresnels.
In this class:
- Portrait photography ideas
- Portrait photography black and white
- Portrait photography lighting
- Lighting modifiers for portrait photography — using fresnels for portraiture
- Controlling depth and direction of shadows
You can also watch part 2 of this workshop, where Karl demonstrates two more creative lighting setups.
Questions? Please use the comment section below.
Comments
Hi Karl,
I am deeply impressed!
Impressed by your education – your perspicuity and your passion.
Thank you very much!
Hi thank you. And also thank you because I love that new word I’ve just learnt!
Your reply made me smile.
Thank you.
( my english is rather poor… greetings from germany)
Excellent show, thanks to all the team. It was great that you stuck with the one lighting style and went into lots of detail, that is how we get the most learning out of these shows.
Hi Andy, thanks. I thought that might be the case and I plan to take the same approach on the forthcoming ‘Creative Portrait’ Live shows that we have coming up.
hello Karl i love this style of portrait…you used 7 lights ,,,i only hv 3,,i could skip the back ground light cos it can be added in post..i could do without the soft box light..still i remain with 5…is there a away to do it with 3 lights..may be 2..probaly 3 photos and merge them together,,provided that the model doesn’t move:)–or if possible how would u do it?…
thx–
Hi Fabrizio, if the model can stay perfectly still seems to be the only solution for you but that will be difficult. Unfortunately when using small ‘pockets’ of light like this then because they are so focused on individual small areas you usually need a lot of them. You can of course use narrow beam torches and do it with continuous light and increase the ISO, the colour of the torch light wont matter too much as ultimately you are aiming for a black and white shot.
thx a lot..yes using a continuous light with a torch is a very good idea..didnt think about that..:)–in wildlife photography u hv very little option in controlling light..close to none:)
Hi Karl & KT Team
Very much enjoyed your teaching, the way you started working up the background lighting first Karl.
And slowly moving lights forward building & revealing your vision, on screen.
Finishing with beautiful tones & shades of light, draped around your model .
(1930’s Hollywood B/W style wonderful).
Thanks again Karl & Team for another, great & entertaining, photography lesson.
Thanks John, I enjoyed that one too. A bit different to softboxes or paras!
Hi
The link to part 2 doesn’t seem to work?
Paul
Hi Paul
Thanks for bringing that to our attention. That should be fixed now 🙂
Hi Karl
your using picolight, is a normal light broncolor 800L aswell posible with a fresnel on it? Or has it to be picolight / pulso
i like the way this portrait is verry mutch this is the way i lik eto make them but not enough equipment 🙁
HArm
Hi Harm, any small Fresnel modifier would work. It can even work with tight angled honey comb grids.
Never can get this live show here because im at job, but i see all the video now. Really good how you use many spots of light perfecttly in control to get amazing results. Love it! Greetings from Argentina!
Hello in Argentina, thank you for your comments.
Great show, Karl. The way you build the light in the light set up is very instructive, I really appreciate your teaching method.
Thank you Cristian.
Karl mentioned a new competition based on retouching. I went to the submission page and don’t see that competition listed.
Hi Bob. This is one of our upcoming critique shows. You we have regular members critiques and images can be submitted before the shows, info on how to submit your work will be on the members home page in the weeks before a live critique show.
Hi Bob, it’s not a competition it’s a forthcoming critique on retouching which you will find in our live show listings page. Cheers Karl.
Excellent technical demonstration of Hollywood style lighting.
Thanks Geoff.
Great & informative as always <3
Thank you very much
Thank you Yazeed.
Sadly I missed the live show. If I hadn’t I’d have asked about the shadow shape that developed on the model’s left hand side – it was changing the form of her jaw line. Towards the end, when Ashley moved to the model’s left and the model twisted, her jaw was re-established. Was I seeing things ? Might a small fill to reveal the ‘correct’ jaw line have been helpful ?
As usual a very helpful show – my first in the portrait series, having been concentrating on the product tutorials so far. Plenty to catch up there for background interest …
Hi Barry, in the photo shown on the page here, there is a very faint line of light along the jaw and I agree that could be lifted more.
Thanks for taking the time to reply Karl ..
Thank you for this tutorial, I was waiting for a course with fresnel lighting… It’s very interresting…
Hi Michael, yes I love using fresnels, they have a perfect fall off quality to the light at the edges and are often useful in my product photography too.
Hi!
For anyone who wasn’t able to watch live there were some comments in the chat about some more affordable lighting modifiers that members have tried out. I have listed a few of these below. We have not been able to test these ourselves but may be a good option if you are looking for some more economical modifiers 🙂
“Barry: Hi Karl I have just managed to fit a Dedolight DP 2.1 imager projection unit on to a Bowens 400RX flash head using a Westcott adaptor to Bowens plus a home made extension sleeve and it works fine total cost for the Dedolight and adaptor and a piece of Aluminium as a sleeve for approx. £300 great”
” Christopher: I mentioned the inexpensive projection attachment from Denny Mfg. in USA in an earlier post. Karl might want to mention this as an option. It doesn’t have adjustable plates but you can focus it and it will take Rosco metal patterns/masks. I’ve found it to be a good alternative to the very expensive Broncolor projection unit. The Denny unit (they call it a Universal Pattern Projector) can be adapted to most studio lights.”
“Ted Eggs: I made a DIY grid to fit a speedlight with a small Pringles tube and black plastic straws”
great course on your lighting a wonderful set up thanks
Karl and your team frank
Thank you Frank.