


Specialized Racing Bicycle Photoshoot
For this product photography class Karl photographs a Specialized time-trial racing bicycle to demonstrate how to light and photograph complex products that have multiple different textures and small important details.
Throughout this step-by-step shoot, Karl explains the concept for the shot, his composition decisions, background choice and techniques for controlling the lighting. As he gradually builds the lighting setup, you’ll learn techniques for lighting matte products, how to reduce flare, and see exactly how important the position of the light is.
This detailed class covers multiple techniques that could be applied to numerous different products and clearly demonstrates the value of methodical work practice and deliberate problem-solving.
Class objectives:
- Professional techniques for how to photograph a bicycle
- How to secure objects for a product shoot
- Lighting techniques for matte products
- How to avoid flare
- How to create rim lighting for products
- The importance of lighting position
If you have any questions about this class, please post in the comment section below.
This shoot was one that I really enjoyed, but it wasn’t without its challenges. If you only see the final setup, the shoot itself may seem quite complex, but in actual fact it wasn’t as complicated as it looks. This is because, by working methodically, I could solve problems one by one to get the final image.
The first problem to solve was securing the bicycle. It needed to be in a fixed position to avoid any movement during the shoot. You can see exactly how we did this in the video.
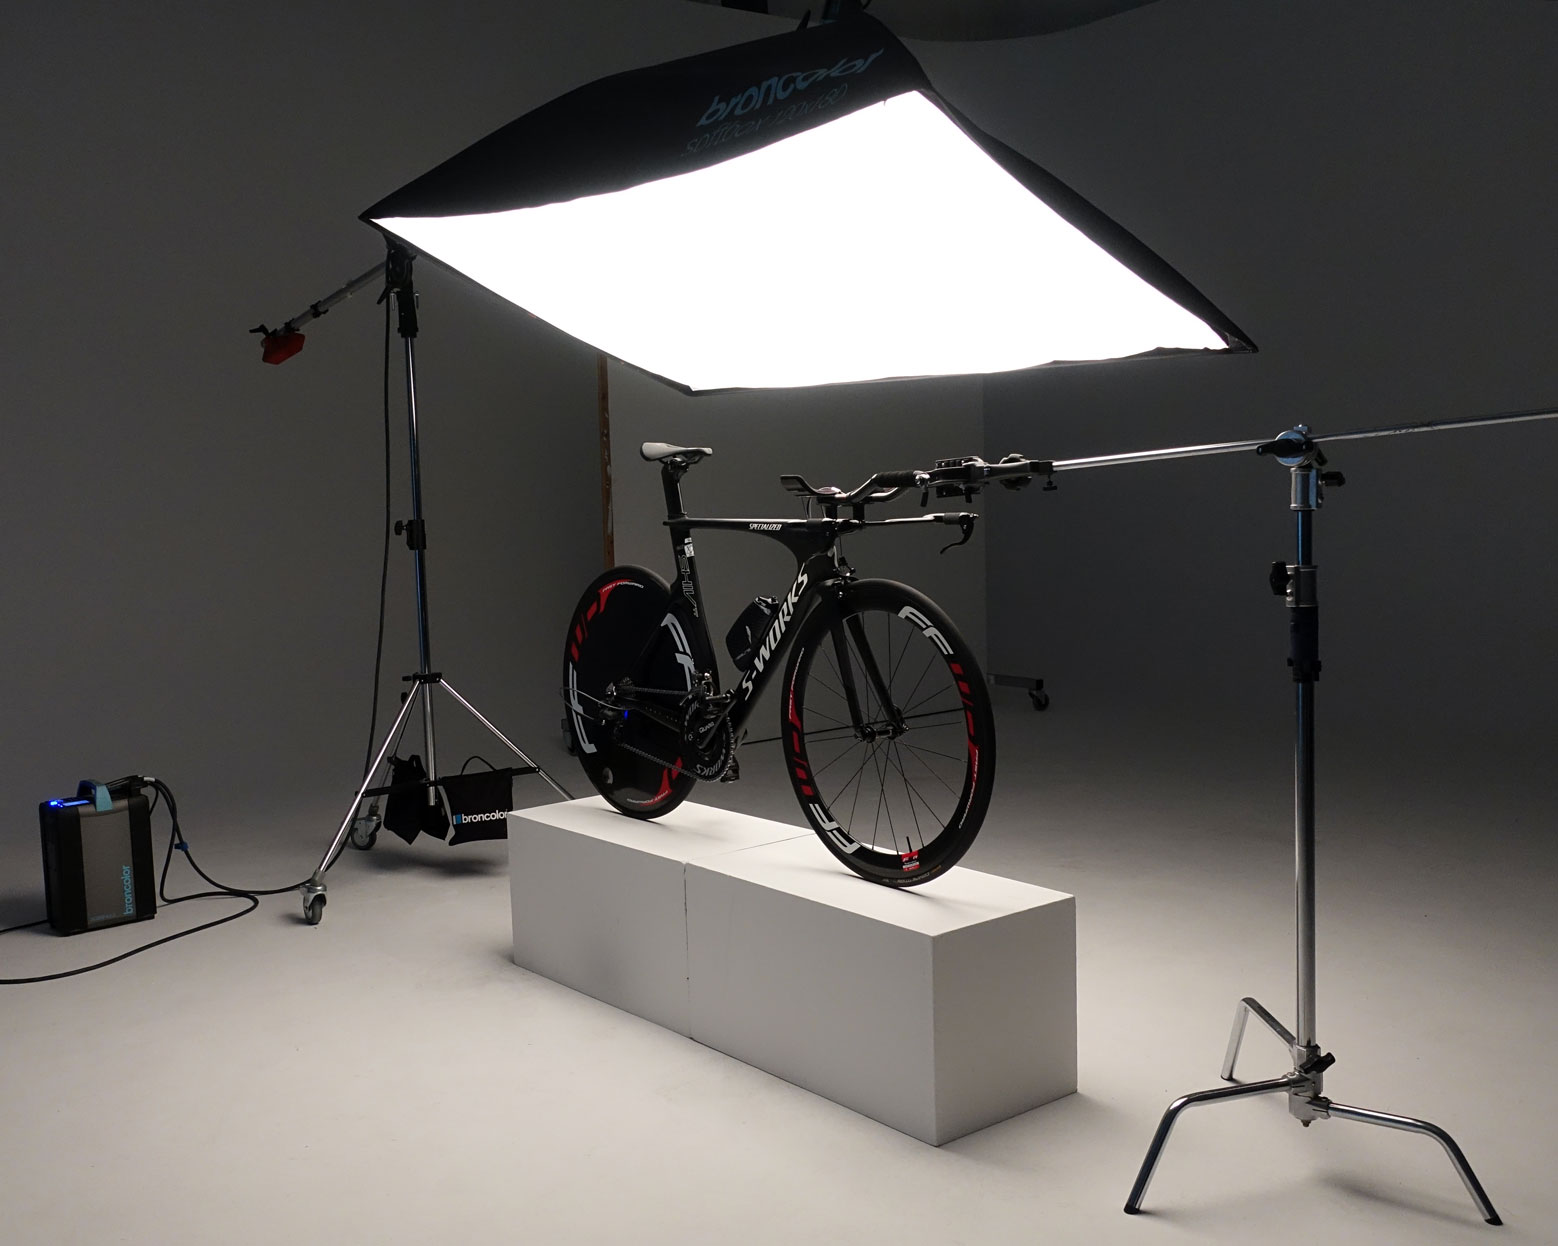
The bicycle was fixed in position to ensure it did not move during the shoot.
With the bicycle in position, the next step was to start building up the lighting. Starting with an overhead softbox, I continued to add to my lighting, enhancing the rim lighting on the frame and adding small pockets of light to other key areas.
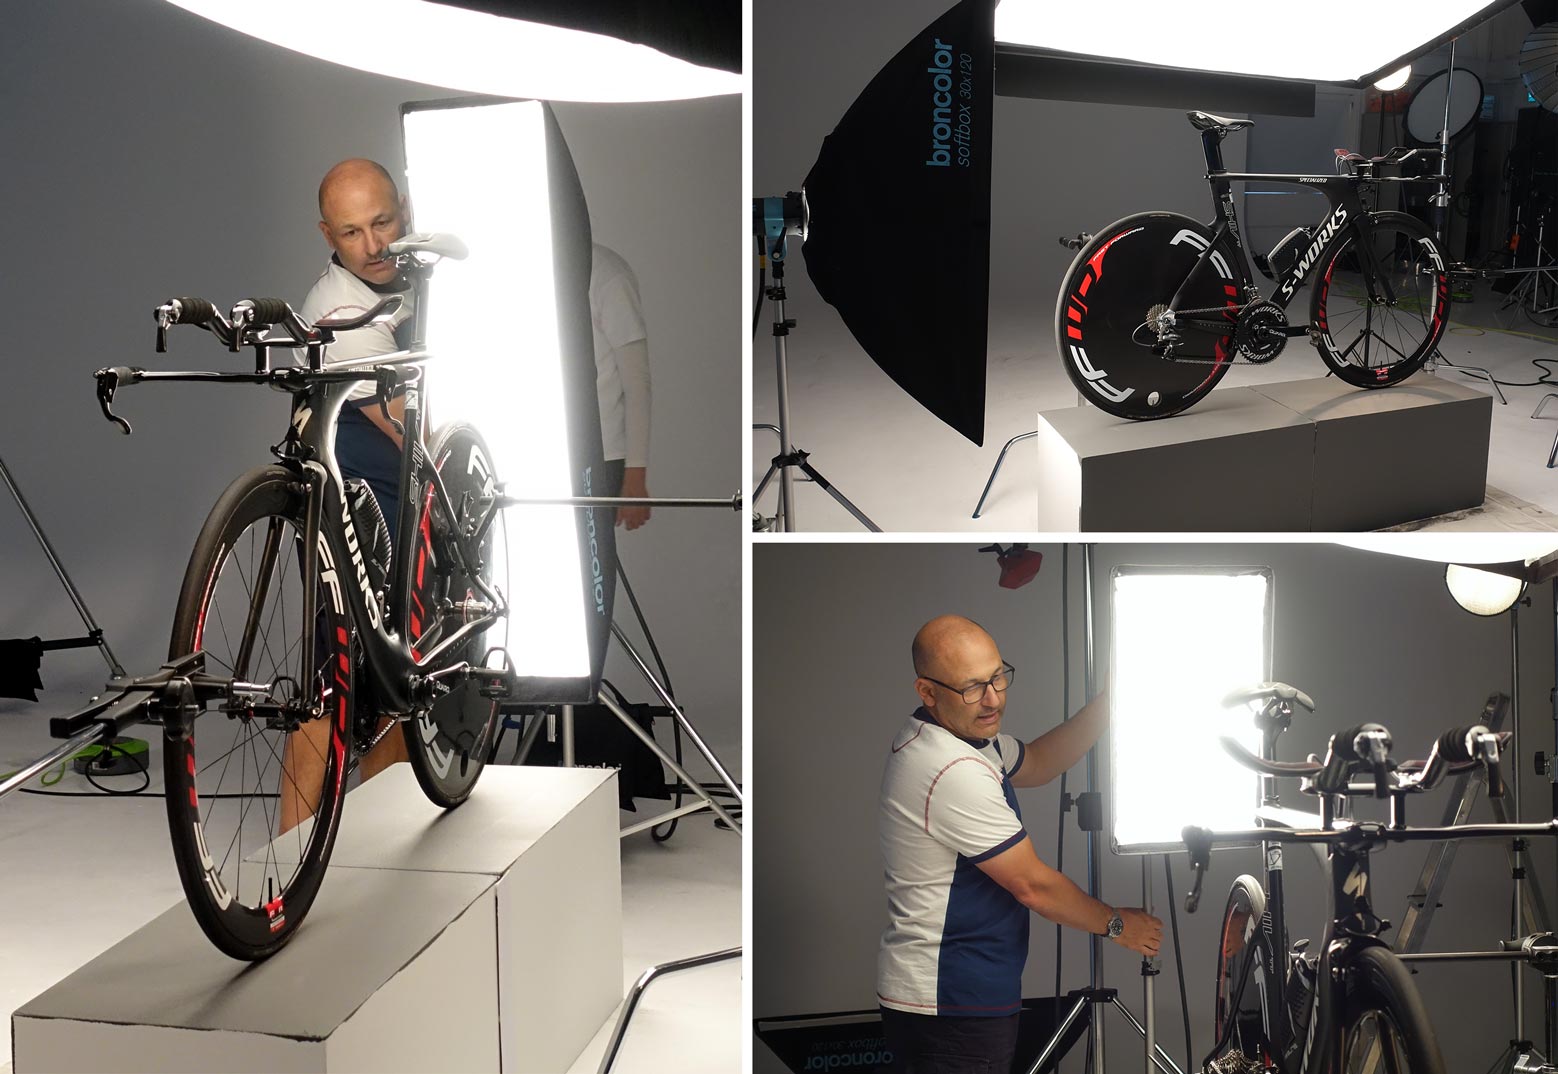
Lighting the product included techniques such as rim lighting and small controlled pockets of light.
As I started to balance the multiple lights one of the challenges I had to overcome was flare. The position of my lights meant I was getting flare, which was causing the image to appear dull and low-contrast. Once this was solved, it was a case of balancing the lights to achieve the mood I wanted.
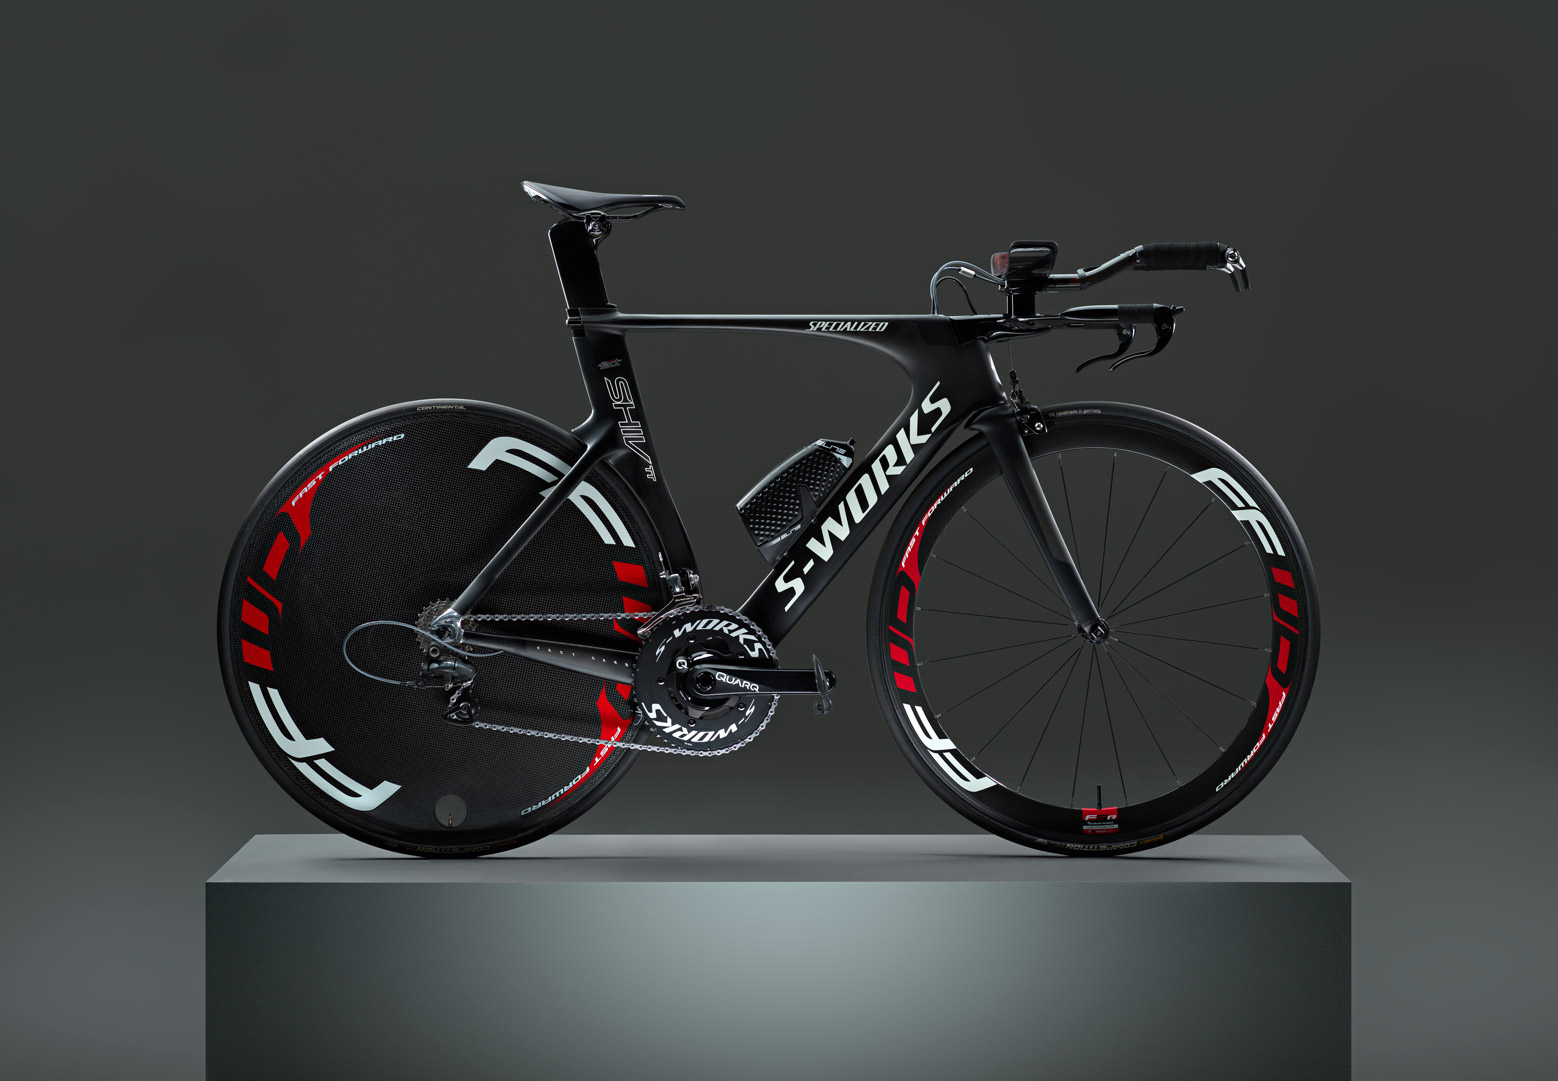
The final image.
Comments
Hello Karl, this platform is a true inspiration and a motivation to keep us moving forward.
Have actually a bicycle shoot (studio) to present this week as I am about to finish my Product module from a photography course here in Portugal.
Having a hard time on avoiding those shiny spikes (blown highlights) on the rear cassette wheel. Rehearsing, at home with 2 Godox AD100 and 2 speed lights on a budget. The studio itself has more possibilities regarding light, however, we are a few students and there are some gear limitations.
Any thoughts regarding this issue (rear cassete blown highlights)?
Cheers
Carlos
Hi Carlos, I’m glad you are enjoying the content. You might consider changing the angle of the light hitting the cassette to reduce the glare (see this class – https://visualeducation.com/class/angles-of-incidence-and-reflection/) or consider polarising the light source (see this class – https://visualeducation.com/class/live-workshop-polarising-studio-light-and-why/) Cheers Karl.
Hi Karl, thank you for the assistance. I am focused in your guidelines regarding the laws of physics (optics) it is something that I can’t go against and have accept it. That issue is clear and solved for me.
I was a bit hesitant to polarize the rear wheel cassette as it is metal, but it would at least show great improvement.
Watched both videos, actually more than once and both of quality and knowledge that really justify the result on your final images. Changing the angle of the light source made disappear those spikes of blown highlights. Problem solved.
Another issue came and nothing related with light, but with the cutout of the wheels on PS.
Both are made of standard spikes (not flat carbon rims) and even before editing, I knew that selection on PS would be a challenge. Unfortunately, was the only one at the store that I could borrow.
Is there a better and smart way to select the bicycle (including wheels)on PS, as the background at the studio was of a very poor quality?
Thank You again. Very helpful indeed.
Carlos
If I may add, kind of lesson learned. End up making a selection from the entire bike using mostly with the pen tool. Tried initially to go through the color range but didn’t manage to well, maybe lack of knowledge in there and should of made the image on a white BG, instead of a grey carbon bicycle over a studio grey BG.
On my way now, after the subject selected, to get the details of the bicycle through stack layering and introducing a gradient BG to look smoother. The BG at the studio (paper roll) was really in a poor condition. Off to PS! Cheers
Hi Carlos, it’s of course better to not have to do any cutout work at all and this will come down to good planning in your lighting and background lighting stages to avoid the need for that. If you need to use any automatic cutout then you have the magic wand option and you may find that changing the tolerances in the top bar can help but if there is not enough contrast then it will be a problem and you may have to revert to doing it manually. Also you could look at making a duplictate layer and then adjusting the contrast and saturation of that layer to see if you can make the spokes more apparent and then make your selection on that layer before reverting back to the original layer.
Thank You Karl.
Really wish that I could live more close to join one of your classes. The way you go to the point is overwhelming.
I went trough a similar path (maybe into to more the hard way) and manage to get a “contrasty” image for the cutout. Worked about 90% and the rest done manually.
Can’t appreciate enough your assistance.
Kind regards,
Carlos
Hi Carlos, thanks. Our live workshops are currently online only and I don’t think we will have any in person workshops this year so don’t worry about not living close by!
Loved this shot and loved how you controlled all the difficult and important elements by fine tuning each lights!
One question Karl, why the Picolite can allow the output just until 8,5 on the 3200 Scoro? You’ve mentioned it around 1:06:45.
If the Picolite can take the power up to 1600, it should be 9 on the Scoro.
Is it only for an extra safety reason?
I have a Picolite and working with it, I just would like to be make sure to not spoil my gear.
Thank you.
Hi Karl,
I have seen the softbox 120×180 many times in your tutorials. However, it’s not easy to get that huge softbox for me. Is there any solution to replace this softbox with other modifers in this tutorials?
Best regards.
Julian
Hi Julian, the next best option would be an Octabox 150 which is a great ‘all rounder’ and then of course you could use scrims instead or large poly boards (white boards that you bounce light into).
Hey Karl.. I love watching these over and over again to learn bits, even though I hadn’t yet had an opportunity to photograph a product such as this. Well.. low and behold, that opportunity has arrived and it pops up a question. Basically, I will start with some very high end cycle parts, (working a high tech style) but there is a difference in direction which I wanted to throw in your direction. The product concept starts with the e-comm website.. and usually, in so many cases it is more like a pack shot. Shooting on a white background creates some limiting factors for sculpting. The shot here, in my mind is more geared to a glossy brochure shot where they would never dream of requiring a white background and where you can wrap the light from above and behind and flow it over the bike bringing out the sculpting. If you had to work with a light to white background.. and luckily for me, it may not be pure white, how would you modify your lighting objectives? Basically, I understand that shadows are going to be my friends and working even with the most subtle light shadows would be very helpful to work the subject. Do you have any helpful suggestions shooting a dark subject, give it that high tech sculpted look yet have it sitting on a light to white background? Could it be accomplished in much the same manner as long as you can control the light? One thing going for me.. I my have old lights but have as many as 11 heads available.
Hi Gary, some very good questions there and it is a situation i’ve been in many times and argued with art directors on in the past. They’ve said ‘we want rim lighting and we want it on a white background’ – I’ve sarcastically told them then expect to see a smaller version of the product as the edges will now disappear! There are however a couple of options but how well they can be implemented depends on the product. On my commercial site – https://karltaylor.com/objects you will find some Diesel Glasses floating in the air, they were shot on a 10% grey (off white) background and the feature highlights that would blend into white, by careful use of light but ensuring a black line separates the edges from the white and the highlights I can ensure the product doesn’t blend into the background. Essentially this isn’t really rim lighting as you’ve added a black line but you get the idea. The black lines can be created by very precise shaped lights in precise positions so that the edge of the light is the line reflecting or by using a piece of precise black card to make a flag or drawn in in post. In terms of using shadows to create more sculpting then use of blacks/negative fill to enhance shadows to create more sculpting can be useful.