
Dual Lighting Fashion Shoot
Explore the challenges and rewards of a dual lighting setup.
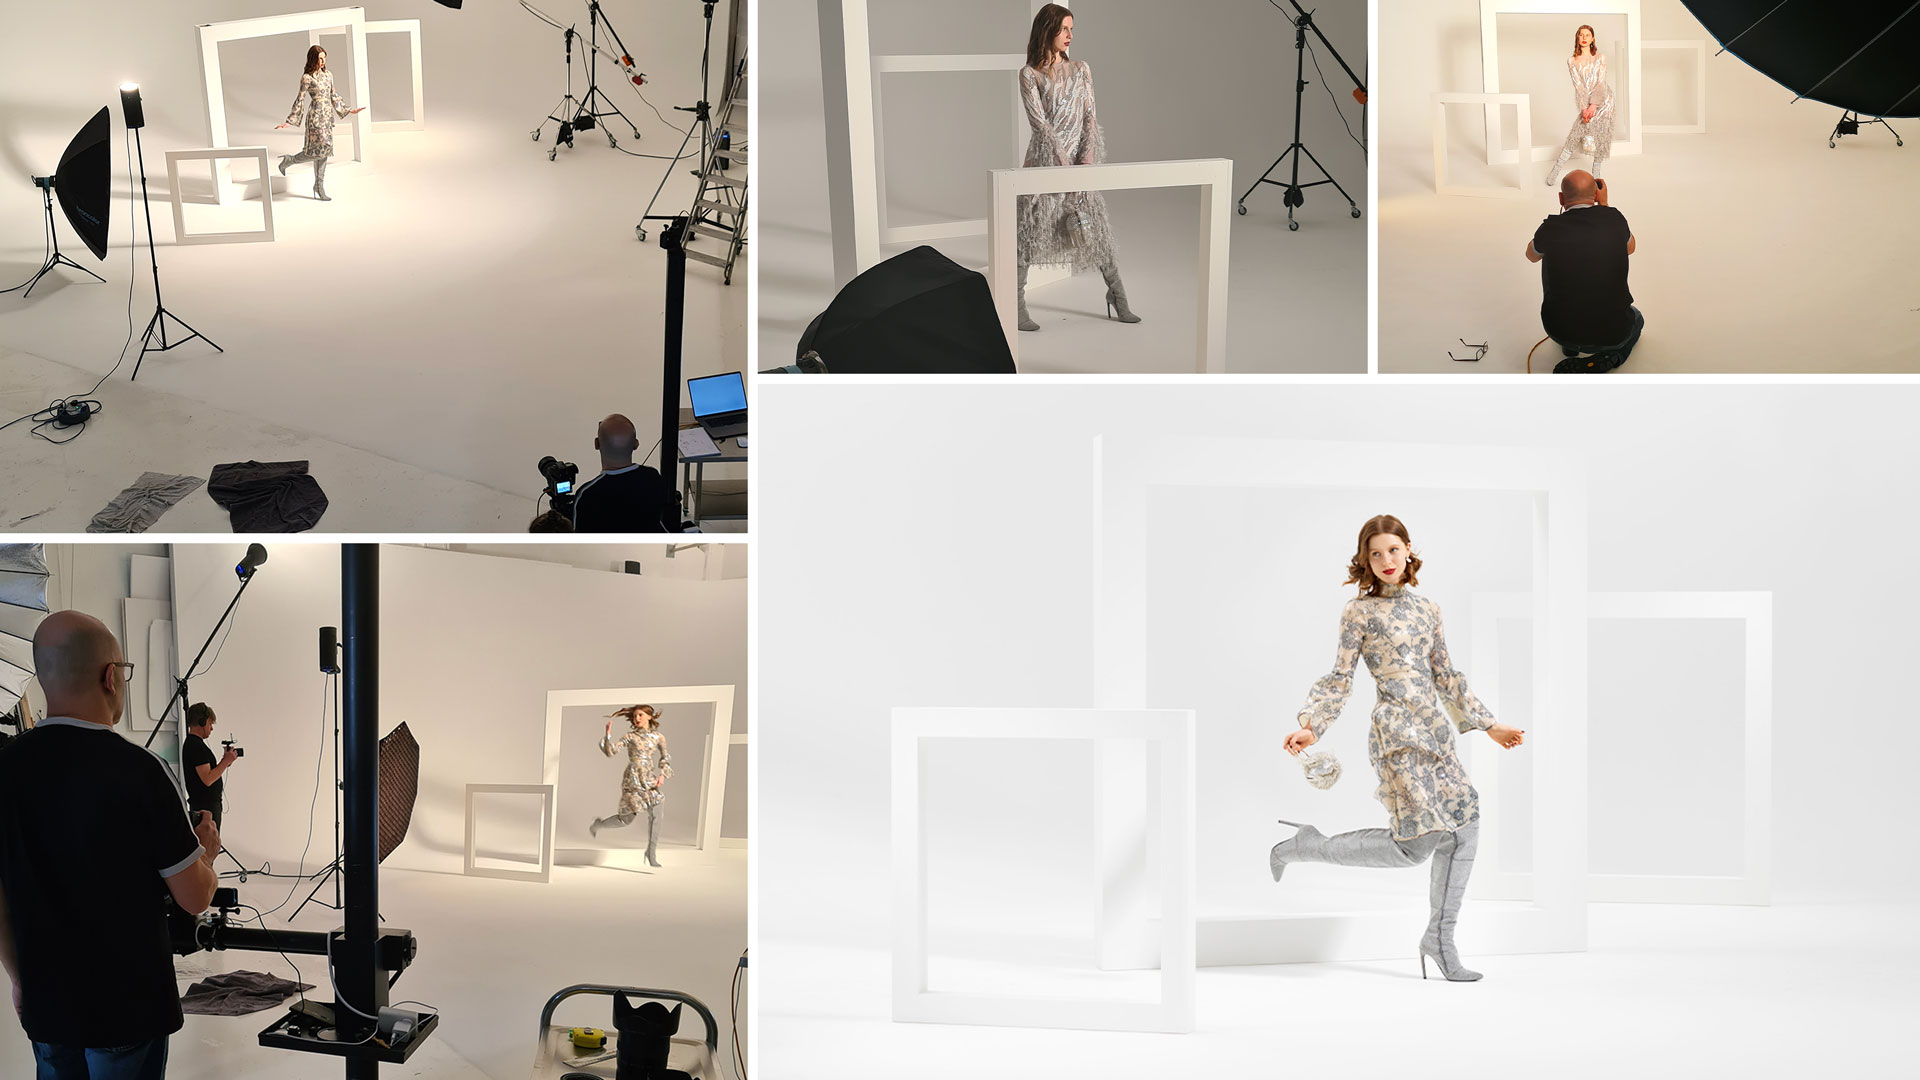
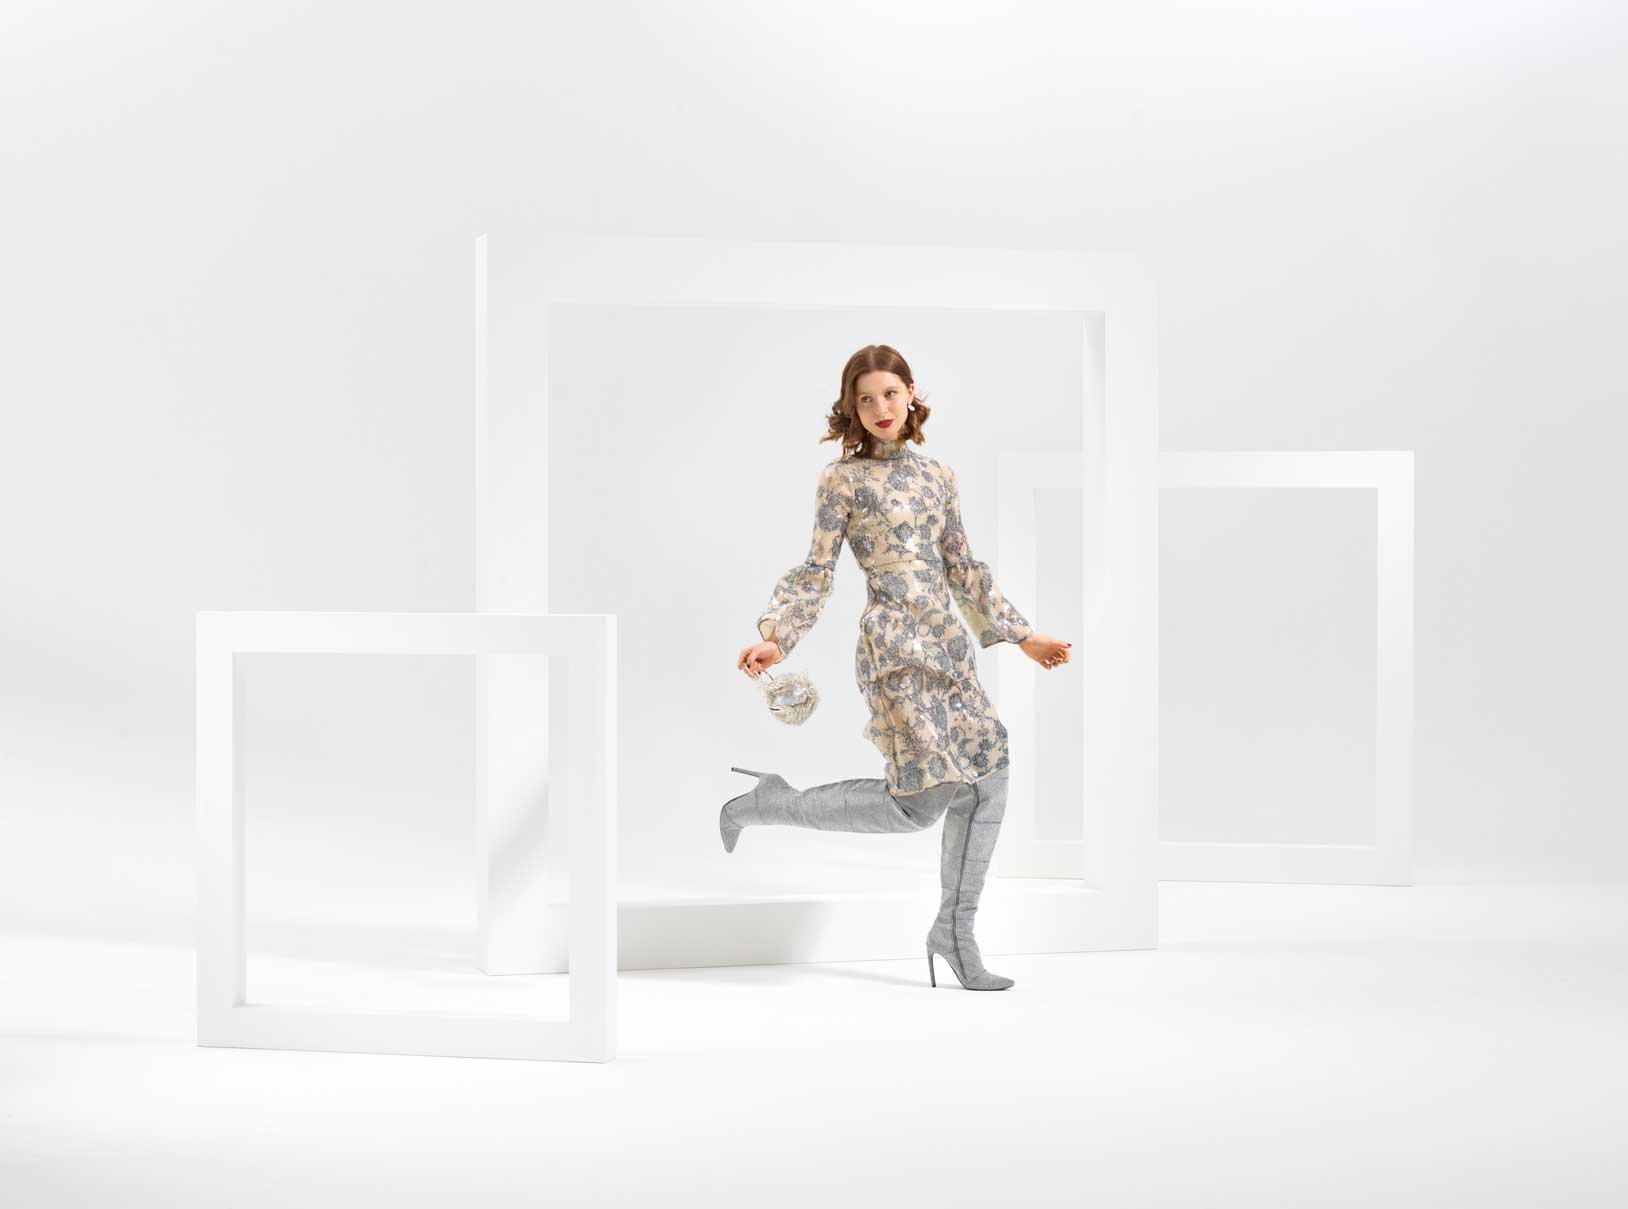
In this fashion photography class, you’ll watch Karl make a succession of adjustments to his lighting setup as he works to balance the global fill illumination and soft ethereal glow on the three square frames with the harder light he needs to direct at the model.
Given their different sizes and positions, and the fact that they are white objects positioned in front of a white backdrop, getting the light on the frames just right requires a lot of trial and error.
Particularly challenging is achieving the necessary dimensionality to make the frames stand out from one another and the cove.
As the shoot progresses, Karl switches to shooting handheld and experiments with different lenses. With model Brit trying different outfits and poses, Karl continues to make adjustments in pursuit of the perfect contrast levels.
What initially begins with one model, three square frames and two fill lights ends up requiring a total of five lights to achieve Karl’s desired result.
What you’ll learn:
- Combining hard and soft light in fashion photography
- Creative ideas for fashion photography
- Lighting setups for fashion photography
- Styling for fashion photography
- Shooting handheld fashion photography
- Working with a fashion model
To see Karl and Tim build the square frames, along with some posing blocks, check out our class on ‘Building Studio Blocks and Frames’.
You might also enjoy ‘A Monochromatic Moment in Time’, another fashion shoot involving the largest of the white frames.
If you have any questions about his class, please post them in the comments section below.
Comments
Sir can you make some class for fashion shoot photography camera angles and how to take best images full length and close up shots ? I am from India and we are shooting for some brand and in India best products selling is women’s clothing and I want increase my talent as a fashion photographer so if you make some video it will be helpful for me and our team
Hi Karl, I truly enjoyed this shoot so much was covered. I was also enjoyed watching how you worked with your model she’s great. Couple things I would like to know from this shoot.
a) you stated you did not like using the wide angle lens when shooting the model moving was this because of distortion the lens has when the model is close to the edge vs as a static model she was more of less in the center and the edge gave that nice wide angle view?
b) I noticed that there were hardy any shadows on the dress, was this due to the ceiling being lit up or the height of the key light, although when it was lowered almost level I still could not see any hard shadows.
Thanks for showing this it was different and became a real hit.
Hi, thank you very much. In answer to your questions:
a) Yes the model and frames looked too distorted for my liking, I’ve used wide angle for fashion before and it can work well (see talk show with Daria in our live show replays) but for me it wasn’t going to work on this set up.
b) The dresses were light and there was a large about of global illumination from the ceiling bounce etc, as you would have noticed even the shadows on the floor were kept light.
Hi Karl,
I enjoyed this video, and the accompanying post-production video. As always, I learn a lot. As you know, many of us on KTE suffer from SSS (small studio syndrome), and as such often wonder how we could ever attempt something like this. But while watching the video, and paying attention to your props and background lighting, I got to thinking, how well do you think it would work to create the background elements using CGI, then just photograph the model against a pure white background, and comp her in? I see only a small amount of shadow that would maybe need to be added to give the proper feel. When there is no direct interaction with the props, this seems like a reasonable way to accomplish images like this with far less equipment and studio real estate. I don’t know if you have done something like this already on this site — I will poke around more and see, but it might make for another interesting set of classes if you have not covered the topic. Thanks again for all great material!
Hi Bill, that’s bizarre as we were just discussing the very same thing yesterday when it comes to these large sets where the model isn’t directly interacting, for example the other shot with the model with the falling ping pong balls some of those shots could have had a CGI frame and balls. These elements would also have been relatively easy to CGI. Ethan who is one of our instructors in our CGI section often creates sets in CGI for his product photography to sit in so he is doing exactly what you describe but on a smaller scale shoot. So in answer to your question yes this would be possible, the key thing to do though would be to note your lighting as carefully as possible so that you can replicate it on the elements in your 3d model for realism. Let us know how you get on.
hi karl taylor, may i know, what paint did you use at the background and the floor in the shooting area? thanks.
Hi, yes this is Dulux Trade Vinyl Matt Pure Brilliant White.
Hi, can i know the lens focal length and the Fstop you are using?
Hi, sure this was a 100mm lens at fll.
Hi Karl!
Huge kudos for the subtitles as my English is so poor.
The question is not on the topic of this show. To create soft lighting, many photographers now use a large 165cm parabolic umbrella with diffuse white material that hangs over the top. During testing, I saw that the light generated by this modifier is not as uniform as from a real softbox with multiple screens. Your opinion, can this option replace the softbox? After all, it is lighter, more compact and more convenient. Maybe you will have the opportunity to test and compare modifiers with each other.
Hi Alex, a softbox has double diffusion which means that the light is very homogenous at the front. This is not the same with an umbrella or para through single diffusion but would be similar if it had double diffusion. I think an Octabox 150 is the best for size, weight, softness etc.
Hi Karl, supposing I want to reproduce that in a studio with a black ceiling , what would you suggest me to get the same global illumination?
Hi Zans, if you have white walls then I would simply create some sort of velcro stick strips to your ceiling that allow you to stick up large foamboard white panels to the ceiling when you need a white ceiling or have some sort of fabric you can put up. Without the white ceiling and walls you can’t create a global illumination in the same way.
I recently did a small shoot with a couple of models to capture shirts. My space is somewhat tight as I have been working almost exclusively on products and table top work. I was a little perplexed over the amount of space you need for even simple limited fashion work. I realized just how limited my ability to even offer that service if I rely on my studio as it currently exists. Having that distance from background to model (if you need separation) on top of the distance from model to camera specially if full length work is required is a concern. I totally get why you used a little longer lens to compress depth for the final result, but having your studio size is such an asset. I’m not complaining.. I just think it is important to understand ramifications and requirements in order to accomplish a task. Great to see how the whole thing comes together. I appreciate being able to peak over your shoulder, as if we are an assistant and sponging it all in.
Hey Karl! hi form LA, first GRACIAS! for sharing your skills and tricks, question any lighting scheme to shoot flats? from time to time I do some shooting for the manufacturing industry (fashion) and they ask “simple” photos like flats, basically jeans lay down on the floor they need it for their sales reps, but as you can imagine most of the time I have to work on location with very little space, any advise is very appreciate it, BTW I work with speed lights and a couple of umbrellas Nikon D700, 50mm and 85mm
Edelart
Hi Edel, thank you for your comments and glad you are enjoying our content. You might like these classes –
https://visualeducation.com/class/live-photography-workshop-fashion-accessories/
https://visualeducation.com/class/flat-lay-photography/
WOW! In my first two days with KTE I’ve learned an amazing amount about lighting. The live shoots are just the bomb, I feel as if I am sitting in the studio as it unfolds. Excellent, excellent.
Thank you and welcome aboard!
Hi Karl! Enjoyed the class. During the short time I have been with KTE, I have picked up many tips and suggestions from every one of your shows. In relation to this class, I would like you to clarify a few things relating to flash power and shutter speeds. Do you shoot at your maximum sync speed in order to eliminate all ambient light and control the exposure only with the power of your strobes? Also, when you were shooting Brittany as she was moving around, how did you freeze her actions? As far as I know, flash freezes action. However, to eliminate blur, do you need to shoot at low flash power, at least on the strobe that is lighting the model? Further, did you shoot in continuous or single mode? It appeared to me to be in single mode but I wonder whether one can shoot in continuous mode, when using strobes? I hope my question/s make sense!
I use very old studio strobes (100ws with modelling lights), where the power can be changed only from full, 1/2 to 1/4. I also have two fairly new speedlights, where you can change the power from 1/1 through to 1/128. Any suggestion as to how I could use them optimally for freezing action, in an area of 12′ x 16′?
Thank you.
What I just saw is incredible. There is so much information in there. Also a great complicity with the model. Thank you and thank you to the whole team.
Thank you glad you enjoyed it.
Can’t put my finger on exactly why, but this is one of the more captivating of your lessons, Karl. Call me a photo geek, but I really like the documentary style of this one and I drank in lots of information. Oh, and your model is fantastic, amazing — what a pro!
Thanks Edward, Brittany is great. She’s in this one too and I think if you enjoyed this class you will like this one too – https://visualeducation.com/class/live-photography-workshop-creative-portrait-lighting-2-0/
Good tips also from the model and Karl on posing a moving model. If I work with a model next year, I will use some of your tips. Many thanks for your expertise and your team.
What I love very much with your classes is the trial & error you explain on the way to the finished picture. It somehow is reassuring, that even a Pro like you doesn’t just turn on the lights in the perfect spot and starts shooting immediately. Don’t get me wrong – some never will get to the point where it looks that good and that is what sets the Pro apart from the Wannabe really.
Like always I take away a lot of tipps and tricks and new perspectives on how to analyze and improve my pictures