


Editorial Food Photography: Honey Tea
Get a taste of what it takes to serve up professional-quality food photos.
Learn how to shoot editorial food photography with Karl and professional food photographer and stylist Anna Pustynnikova in this food photography class as they show you the start-to-finish-process of creating this editorial-style shot of a person with a cup of tea.
Working with people adds an additional element of interest in food shots, and these types of images are particularly popular for blogs, websites, recipe books and even restaurant menus. But to achieve the best results, you need to understand how to light, style and compose the shot. This is exactly what Karl and Anna will teach you in this class, as they show you the step-by-step process of capturing this image.
In this class:
- How to photograph food
- How to pose and photograph hands
- Food photography lighting examples
- Techniques and tips for photographing liquids
- Using specialist lighting modifiers
Questions? Please post them in the comments section below.
Utilising a fairly straightforward, three-light setup for this shoot, key elements to this image were to ensure the subject’s hand was correctly lit and that there was a nice, golden glow behind the tea.
Before any of this though, outfit selection was one challenge that we had to overcome. We ran through a number of different options before deciding on a denim jacket. Although not the focus of the shot, the jacket served almost like the background, which meant it was important to get it right.
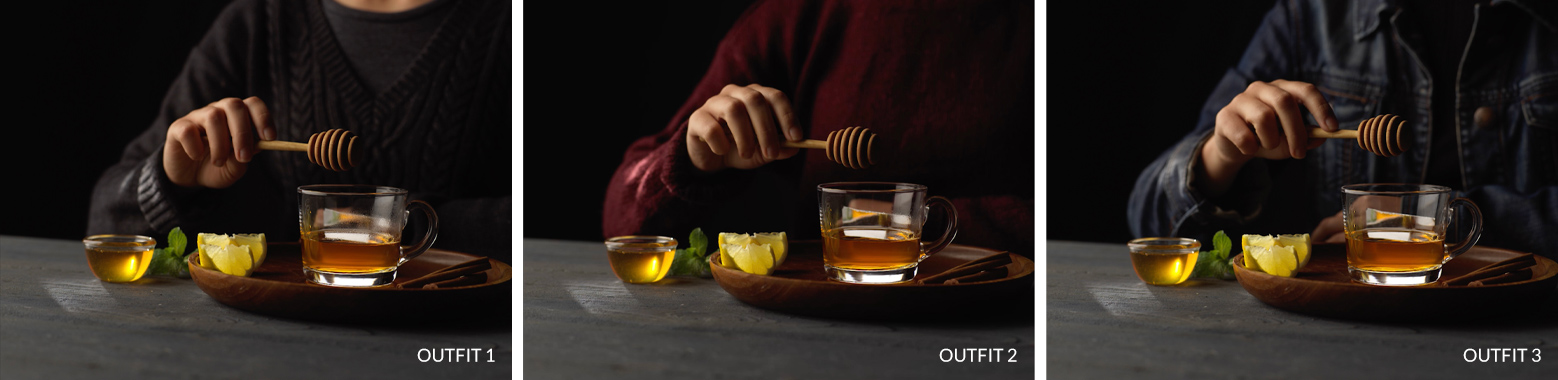
Making the right decision in terms of the outfit was an important stage of the shoot.
The light on the hand was achieved using the key light, which was carefully controlled to achieve the correct exposure. Positioning the hand also took some time — hands can be tricky to photograph so it was important not to rush this stage.
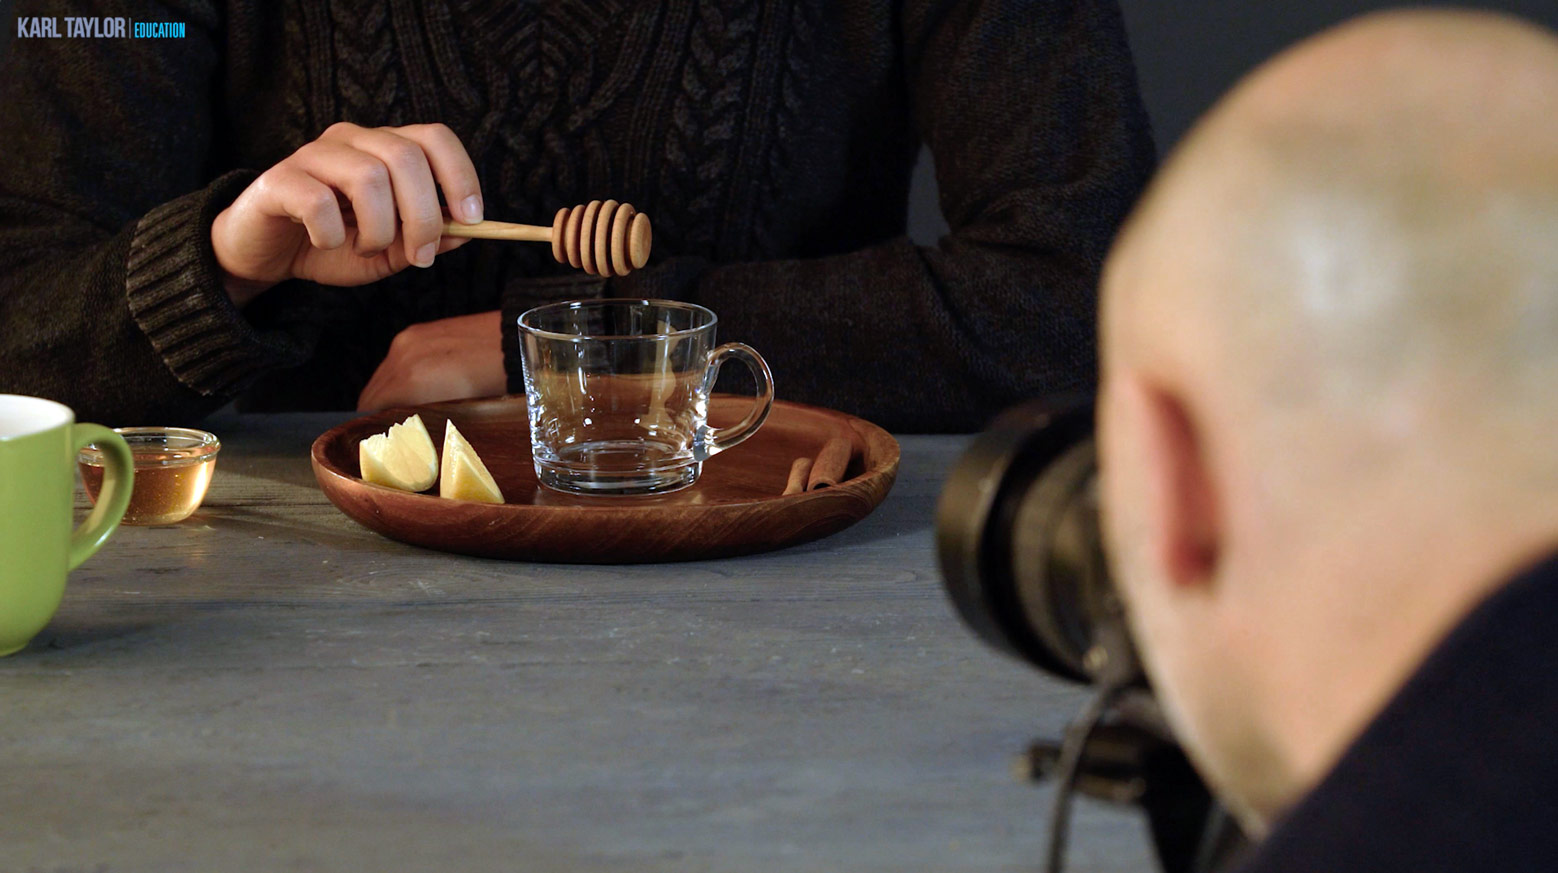
Hands can be a difficult subject to photograph, in terms of lighting and posing.
Once the lighting was finalised and the subject had the right position, the next focus was to achieve a nice glow behind the tea. This was an important stage of the shoot and is a technique often used in bottle photography. Without this little trick, the tea would have looked dark and dull.
Taking the time to address each of these details paid off and we were able to create this great, final result. If you’re looking for easy food photography ideas, this is a great shot to try as it doesn’t require much equipment and uses ingredients you probably already have at home.
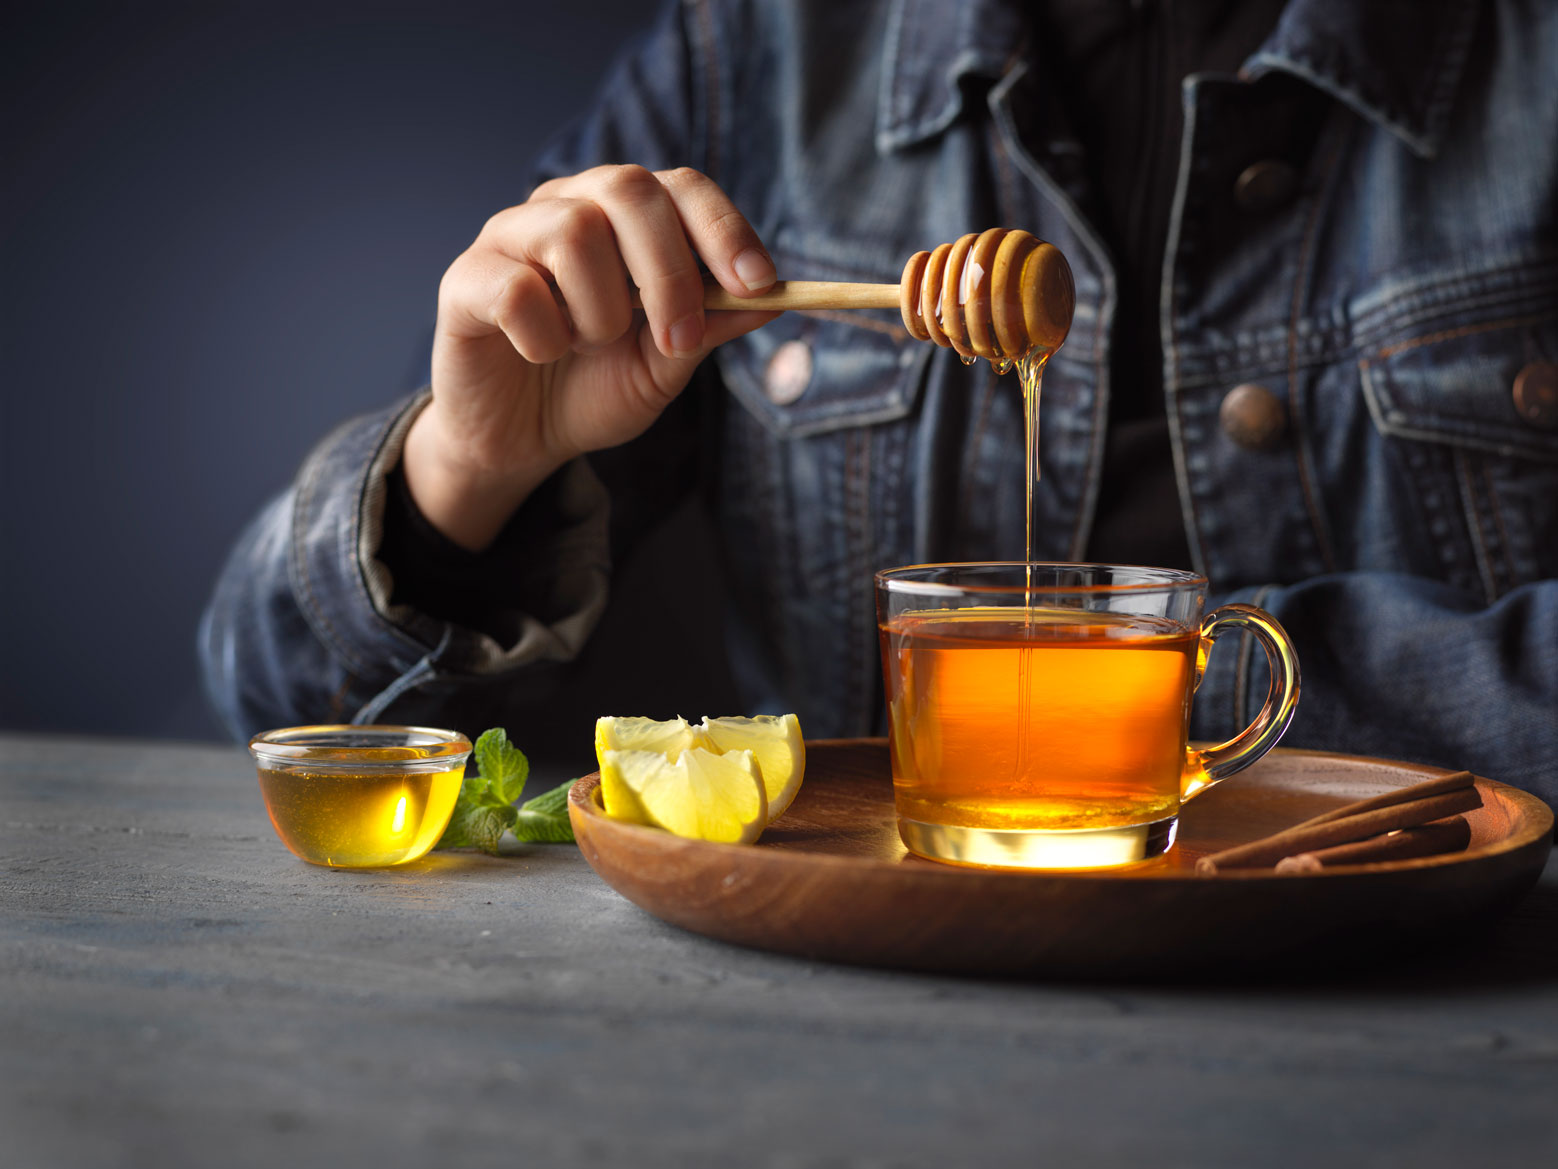
The final honey tea food photograph
Comments
It is really essential to watch this video. Nice teamwork.
thank you very much!
Thank you Francois.
You guys are adorable and i cannot get enough of these videos!
For 20e/month its a goldmine..!
Also I have just bought few older model Elinchrom strobes to get started with studio photography.
You are my greatest inspiration!
Hi Karl. I love how you make the tiny details look professional, it makes your photo extraordinary. Can you talk a bit about the technique you used with the gold reflector at 20:12? How were you able to retain that beautiful gold reflection when you removed its reflective source?
Hi Anwar, thank you that is very kind. At around 20:12 I put a gold card in for one shot of the pouring honey, that shot is then used in the final post production comp. For the reflector with the tea that is bouncing light from the main softbox.
Very fiddly work on the lights but the result is lovely. Really nice to see the process.
What is the name of the gold card you put behind the drink? Cheers!
Hi, it’s just gold reflective card that you can buy from art supply shops, I don’t think it has a specific name.
Hi, I am new into food photography, every day I try to learn more and this is the perfect place for learning. Although I have a question; how do you position your speed light? I understand what you do with the other lights but I cannot fully understand how you configured your camera off flash. Could you be so kind to explain to me. Thank you in advance.,
Hi Jose, what speedlite? I don’t understand your question. I think you may be confused over how this is lit and you should watch this video – https://visualeducation.com/class/types-of-studio-lighting/
Wish you would make a tutorial about photographing hamburgers with McDonald’s style of lighting.
Hi we will put that down as an idea for a future one.
I would love that, thanks Karl
Me too. A Starbucks Inspired shot would be great too.
Love it,Karl.
I can see a gradation on the background in the final image .
Is that because you bring the shadow side back in the post or you made one?
Hi Jack, I made one as I just felt it needed something there. The technique if you need to see it was also used in an earlier watch tutorial post production.
Ok, thanks Karl
love it, Thanks
Thank you
Ash, you can take the rest of the day off! Well-done!
Ha Ha no chance!
Very good job!!!!!
Fantastic show, Karl. And great working atmosphere.
Cheers,
Jorge.
Great shoot! I really love your attention to even the smallest detail – makes the shot!
Cheers Bob.