


Editorial Food Photography: Making Pasta
Learn the art of creative visual storytelling.
In this food photography class, Karl and Anna shoot a series of images showing the start to finish process of making homemade pasta.
Lifestyle food photography such as this is highly popular for food blogs, recipe books, restaurant menus and stock libraries and are in high demand. To produce the best images, attention to detail and careful control of light are key.
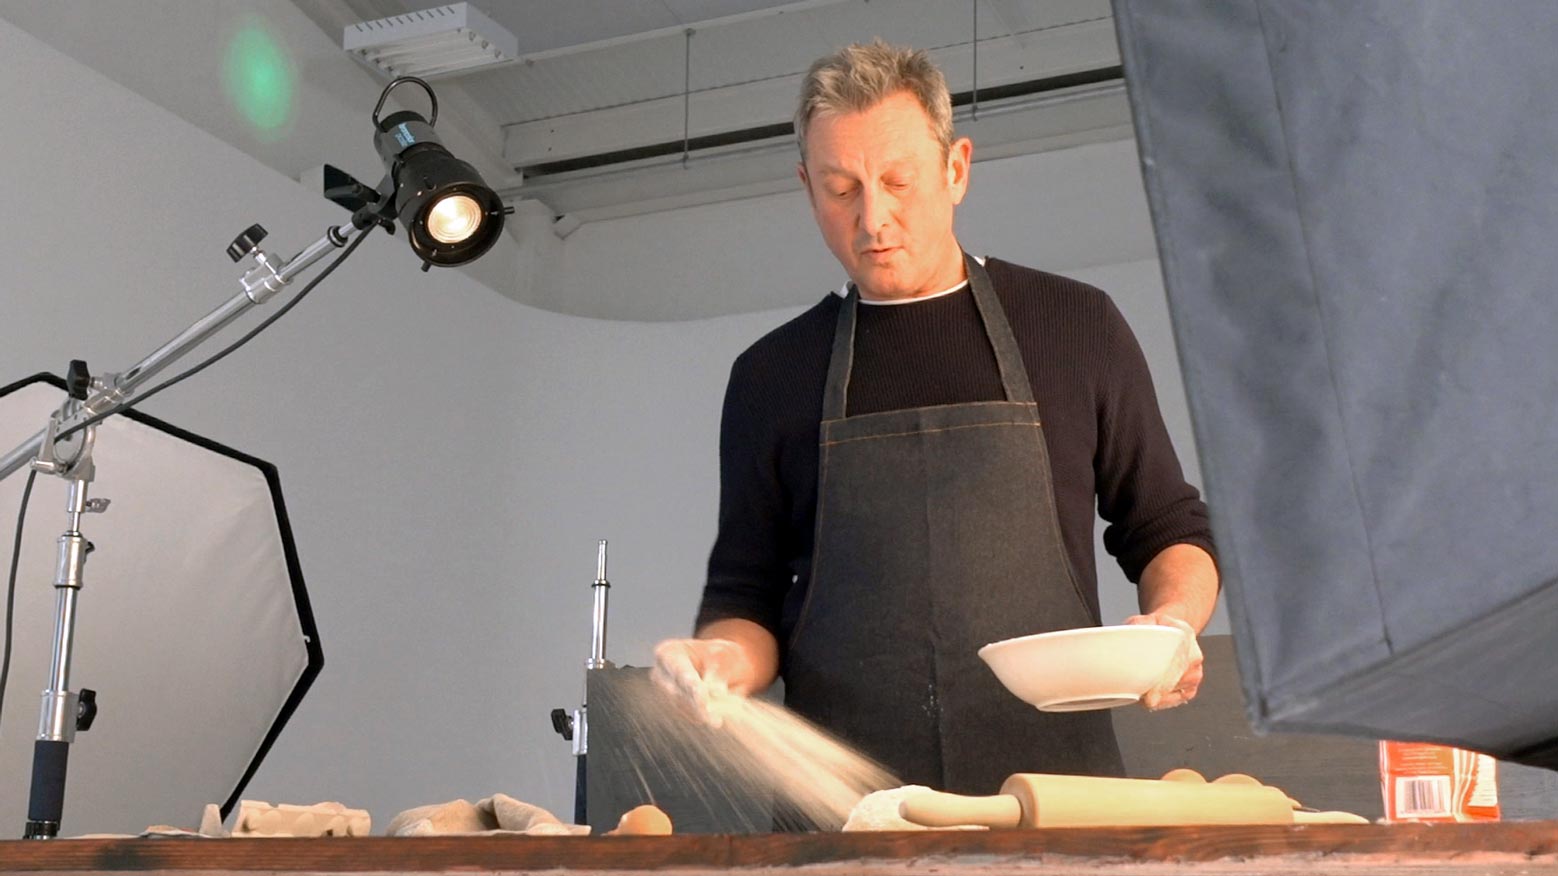
Throughout this class you’ll see Karl and Anna’s workflow, including the styling and lighting as well as how to give creative direction to your model. Karl uses a three light setup, including some specialist lighting modifiers, to create a dappled lighting effect, while Anna carefully styles the shot and provides guidance for posing the subject.
In this class:
- How to shoot editorial food photography
- Creative ideas for editorial food photography
- Visual storytelling
- Food photography lighting setups
- How to photograph hands
- Giving creative direction to a subject
To learn more about shooting editorial food images with hand models, take a look at our Lifestyle food photography: Chopping vegetables class and Stir Fry Food Shoot.
Questions? Please post them in the comments section below.
Telling a story with photography
In this sequence of images Karl and Anna take the viewer on a journey of making homemade pasta, but in order to do that they had to carefully think about the shots they needed, the styling for each frame and what lighting would work for the whole series.
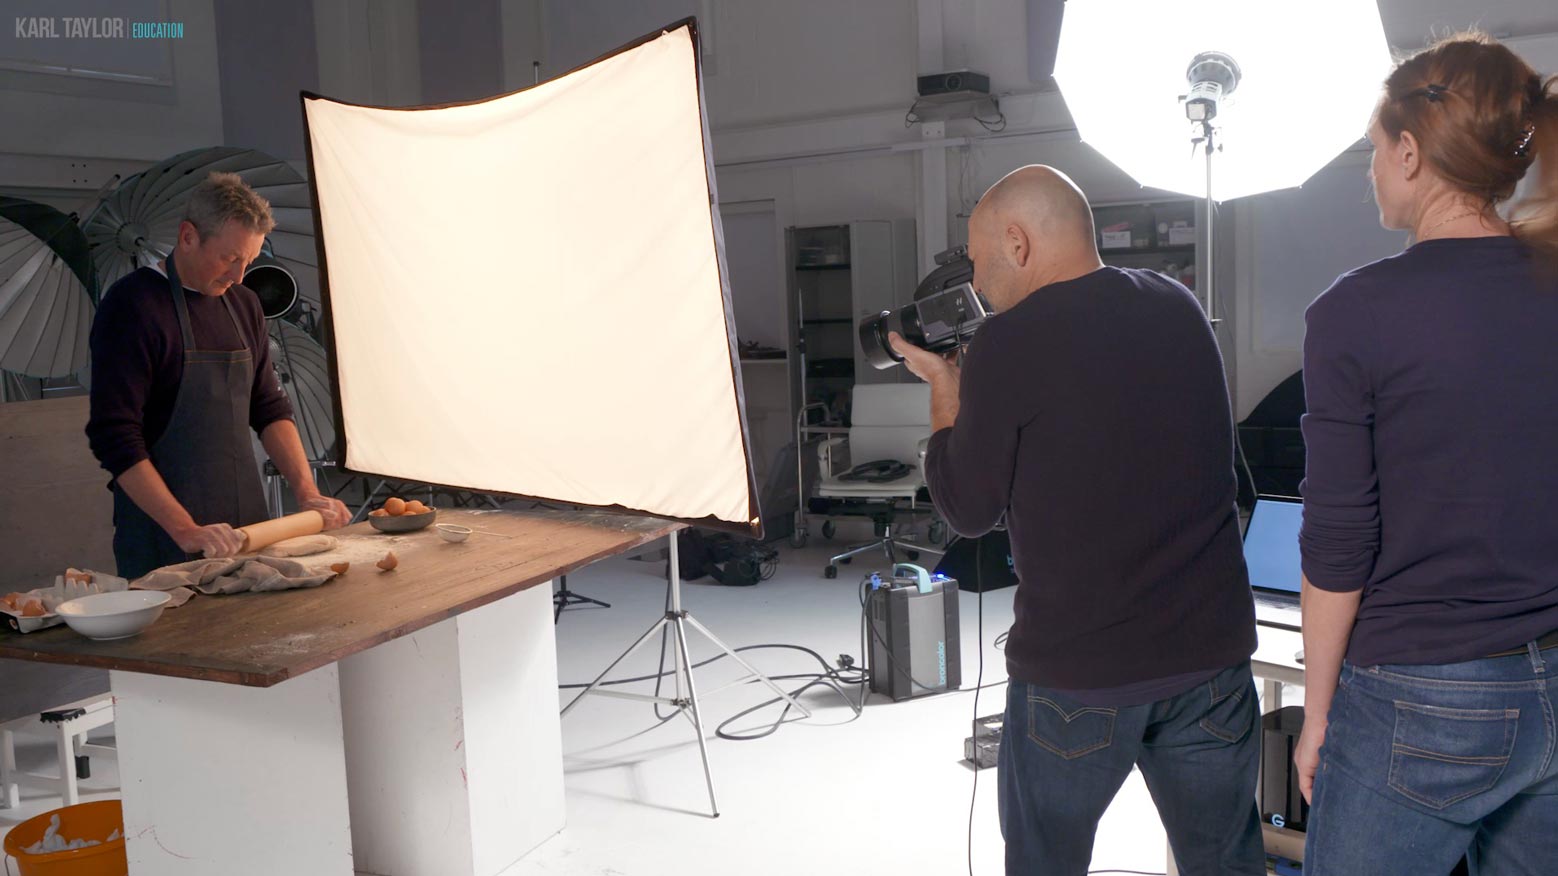
The lighting setup had to allow for a smooth, uninterrupted shooting process.
Karl used a three light setup to achieve soft, dappled lighting. The setup needed to be versatile enough to allow a smooth, uninterrupted workflow as the subject worked through the sequence of shots, from cracking eggs, to rolling dough.
Anna was on hand to give creative direction to the subject during the shoot.
The styling for the shot included a few simple props, which Anna adjusted throughout the shoot. She was also on hand to explain which parts of the pasta making process were most important and worth shooting.
This series of images was a team collaboration that required good planning and communication. Working together, Karl and Anna were able to create a sequence of wonderful images that take the viewer on a journey.
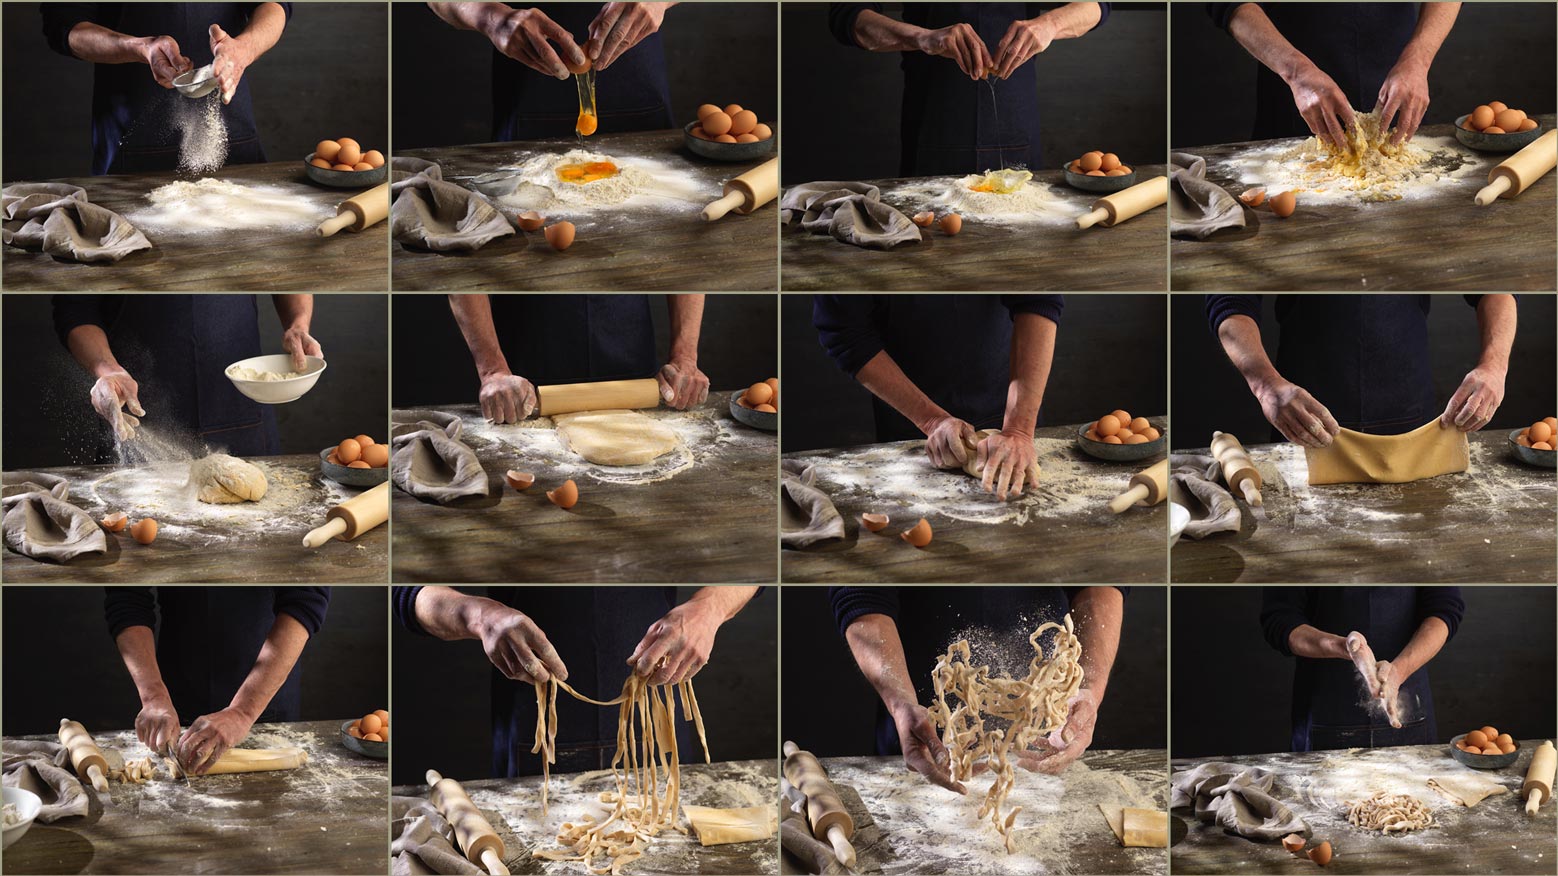
The final series of images
Comments
Hey Karl, curious what kelvin temp you’re setting the light in the large softbox to. It looks a bit warmer than the usual (love it). Thanks!
Also, are the other 2 lights set at the same temp?
Hi Allan, no all my lights are at 5800K, the modelling light power might make the light look warmer in the video but the flash light coming out is all the same colour balance within 100 – 200K depending on the modifier being used.
Hello Karl, great tutorial as always, I would like to know if on this kind of light setup, to freeze motion all the strobes must be able to have a short flash duration, or if can you get away with just one of them being able to achieve a short flash duration?.
Hi, that’s an intelligent question and flash duration is important, if one flash isn’t fast then it could spoil the effect. The simple way to deduce if it is a problem is to see what each light is doing. For example in this shot I’d look at which light is the main light on the ‘action’ part of the image and then I’d take a test shot with it off to see how much the other lights are lighting where the action is. If they are not lighting much where the action is then it is not as important that they are at the very fastest flash durations (but if you can get them fast then you might as well). Of course for the key light doing the main action part then it is imperative that at least this light is fast duration so run another test with that light on it’s own compared to with all the lights and you can see how much contribution the others were making to it from that perspective too. If you discover that most of your action light is only from one light then that’s the only one you need to worry about.
Hi Karl,
I just joined the course and I found your classes very useful, I am new to photography…
I noticed you did not shot in a continuous mode, it is a better technique? I am concern, if in a similar scenario, not being able to shoot the movements simultaneously with the model…
Thank you for your help
Hi Daniel, thanks for signing up. Shooting in continuous mode on a subject like this can be very useful as long as the studio flashes you are using can keep up and recharge in time to match. This is usually fine if you are using the flash on lower power settings. I come from and old school film background and prefer to work at a more considered pace and figure things out and study the results to see if anything else needs to be addressed. But in a situation like this where you have worked out everything with your lighting and subject it would have been beneficial, I was however shooting with a medium format camera which can only shoot a maximum of one photo per second.
Thank you so much, Karl.
Your videos are great! I am a food photographer and I am learning a lot. I wish to know what was the shutter speed used?
Hi that’s a very odd question for this tutorial? I’d ask you to watch this chapter https://visualeducation.com/class/understanding-flash-duration/ and then the one after it so that you better understand the relationship between flash, aperture and shutter speeds.
Hi Karl,
I am having a great time with your courses. Thanks for sharing that knowledge.
About this session, would you say that shooting in burst mode could be beneficial for you?
Hi, thank you and yes if your camera and flashes are capable of doing it.
Hi Karl,
First of all, thank you so much for sharing your knowledge with us. KT Education is really a boon.
Could you please let us know the camera settings (EXIF Data) you used for this particular shoot?
Thanks,
Balu Godugu
Hi, thank you. It was 100mm lens on medium format (about 70mm on 35mm FF) f7.5 ISO100.
Thank you so much Karl.
Hi Karl, I am very new to lighting.
And I am really going to need help …
Could you please name all the lights used in this shoot session.
And possibly the best platforms to purchase them.
Thanks.
Hi Richard, that won’t help you i’m afraid. In fact it could cause you to spend far more money than you need to, to achieve the same thing. Most studio lights do the same thing, that is they put out light at a given power and then the modifiers alter the light to create mood. I thoroughly encourage you to watch this section first, all of it please!
https://visualeducation.com/section/lighting-theory-and-equipment/ You will then have a much better understanding.
Hi Karl, i’m facing an issue while shooting a moving subject the result is always blurry even with an accurate focus, what shall i try to adjust? is the shutter speed and if yes.. shall i increase up the shutter speed ?
Hi STV, yes it sounds like a shutter speed issue but if you are asking those questions then you need to spend an hour watching this course first – https://visualeducation.com/section/introduction-to-photography/
Love this kind of work, very well done!
Thanks for the video.
Hi Karl is there any other method of getting dappled light then the projector?
Hi Yes, see this https://visualeducation.com/class/09-rustic-beef/ and this https://visualeducation.com/class/food-photography-styling/