
Environmental Portraits: Cake Designer
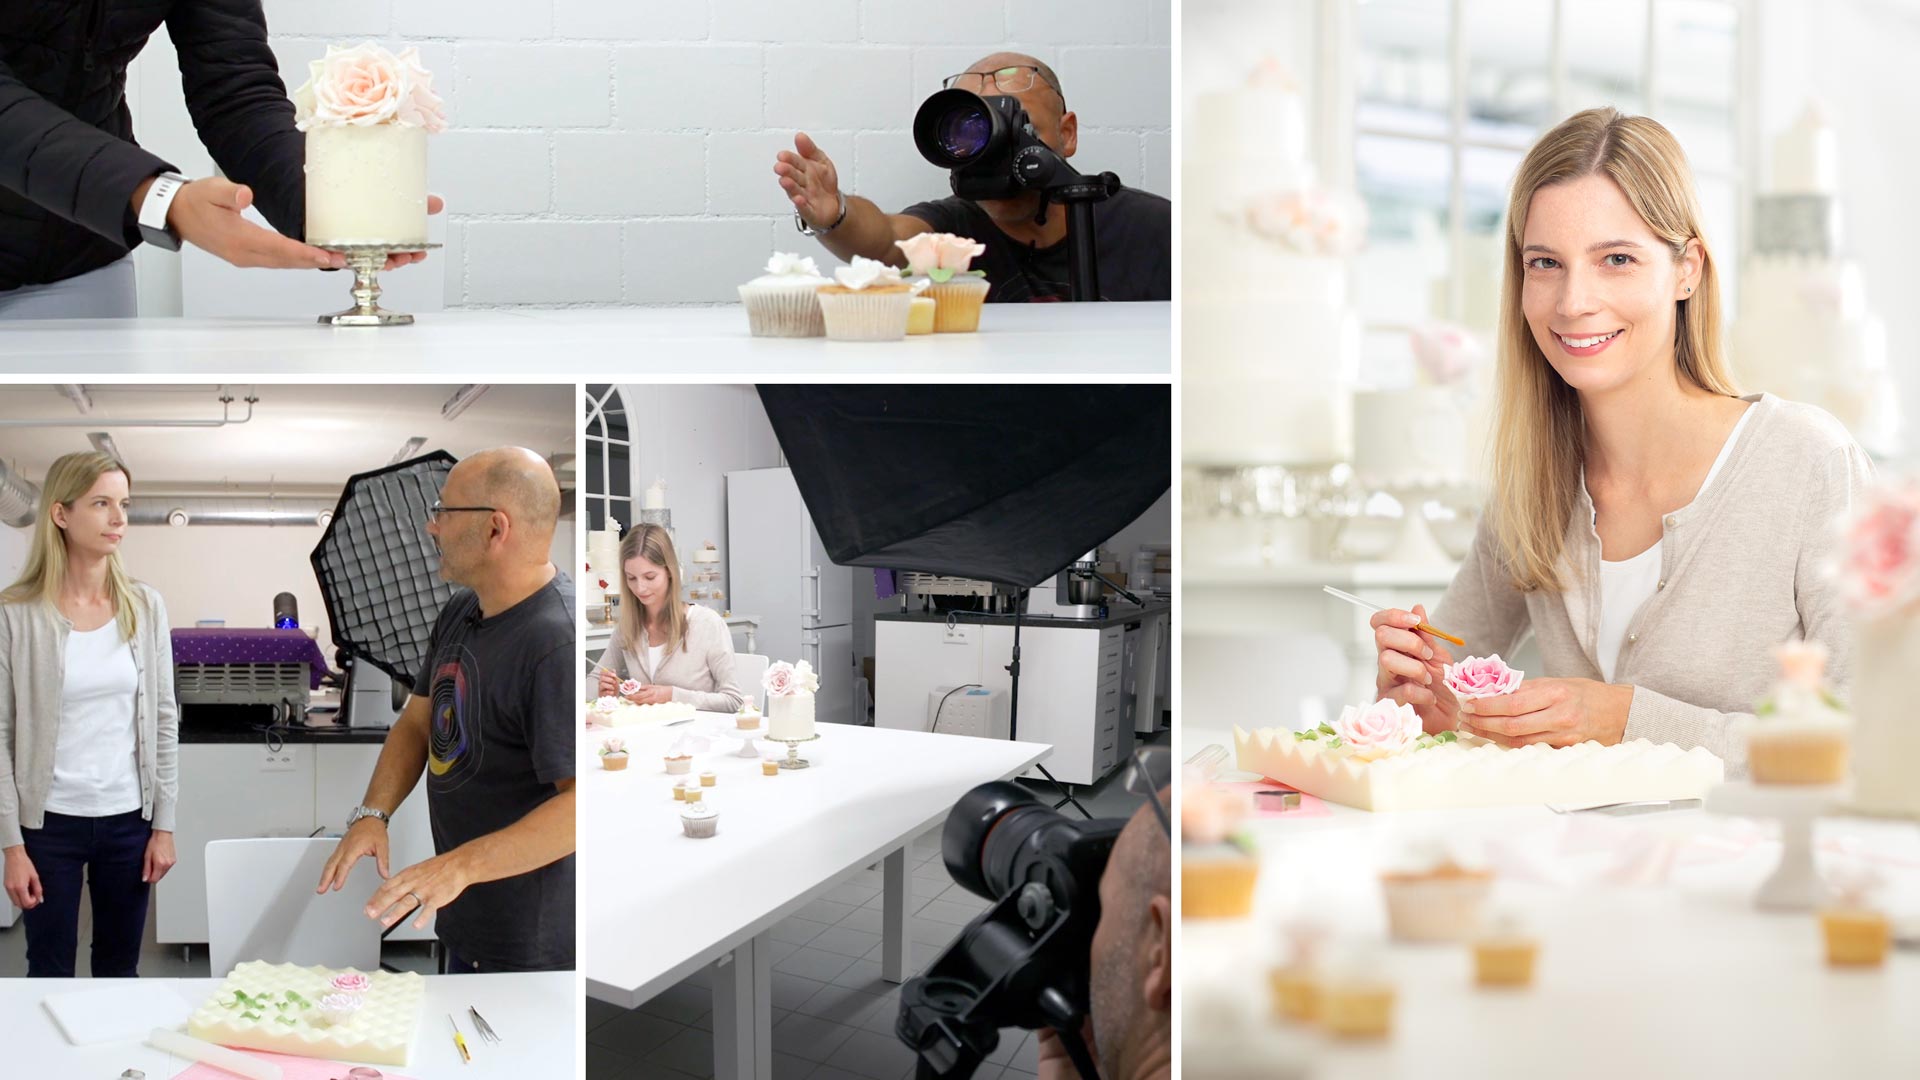
In this environmental portrait photography class, Karl faced the challenge of creating a bright, fresh-looking portrait image of a cake designer.
Working in a small, underground basement, Karl also had to overcome the challenges of arranging and lighting the scene as well as composing and styling his shot, all in just over an hour.
Using just a handful of lights, you’ll see how he carefully builds up his lighting, paying attention to small details, and uses certain lighting techniques to create the feeling of bright sunlight. He also explains how he uses certain compositional tricks to frame the shot and get the best result. As he explains his step-by-step process, you’ll get to see the start-fo-finish shoot and gain insight into his workflow and creative thought process.
What you’ll learn:
- How to photograph environmental portraits
- How to control light in small spaces
- Photography composition & techniques
- Camera settings for environmental portraits
- How to create a bright, fresh lighting mood
- Outfit choice and styling for environmental portraits
If you have any questions about this class, please post in the comment section below.
Photographing a portrait in a basement was never going to be the easiest of tasks, but because I’d already thought about the shot and done my research, I already knew what kind of photo I wanted to create.
Working in one half of the small, dark room (the other being unsuitable due to the many fridges, ovens and mixers), I had very little space to work with. To make the most of the space, I had to rearrange much of the scene, moving and removing items in the background and using several items in the foreground to create occlusion and guide our eye into the picture.
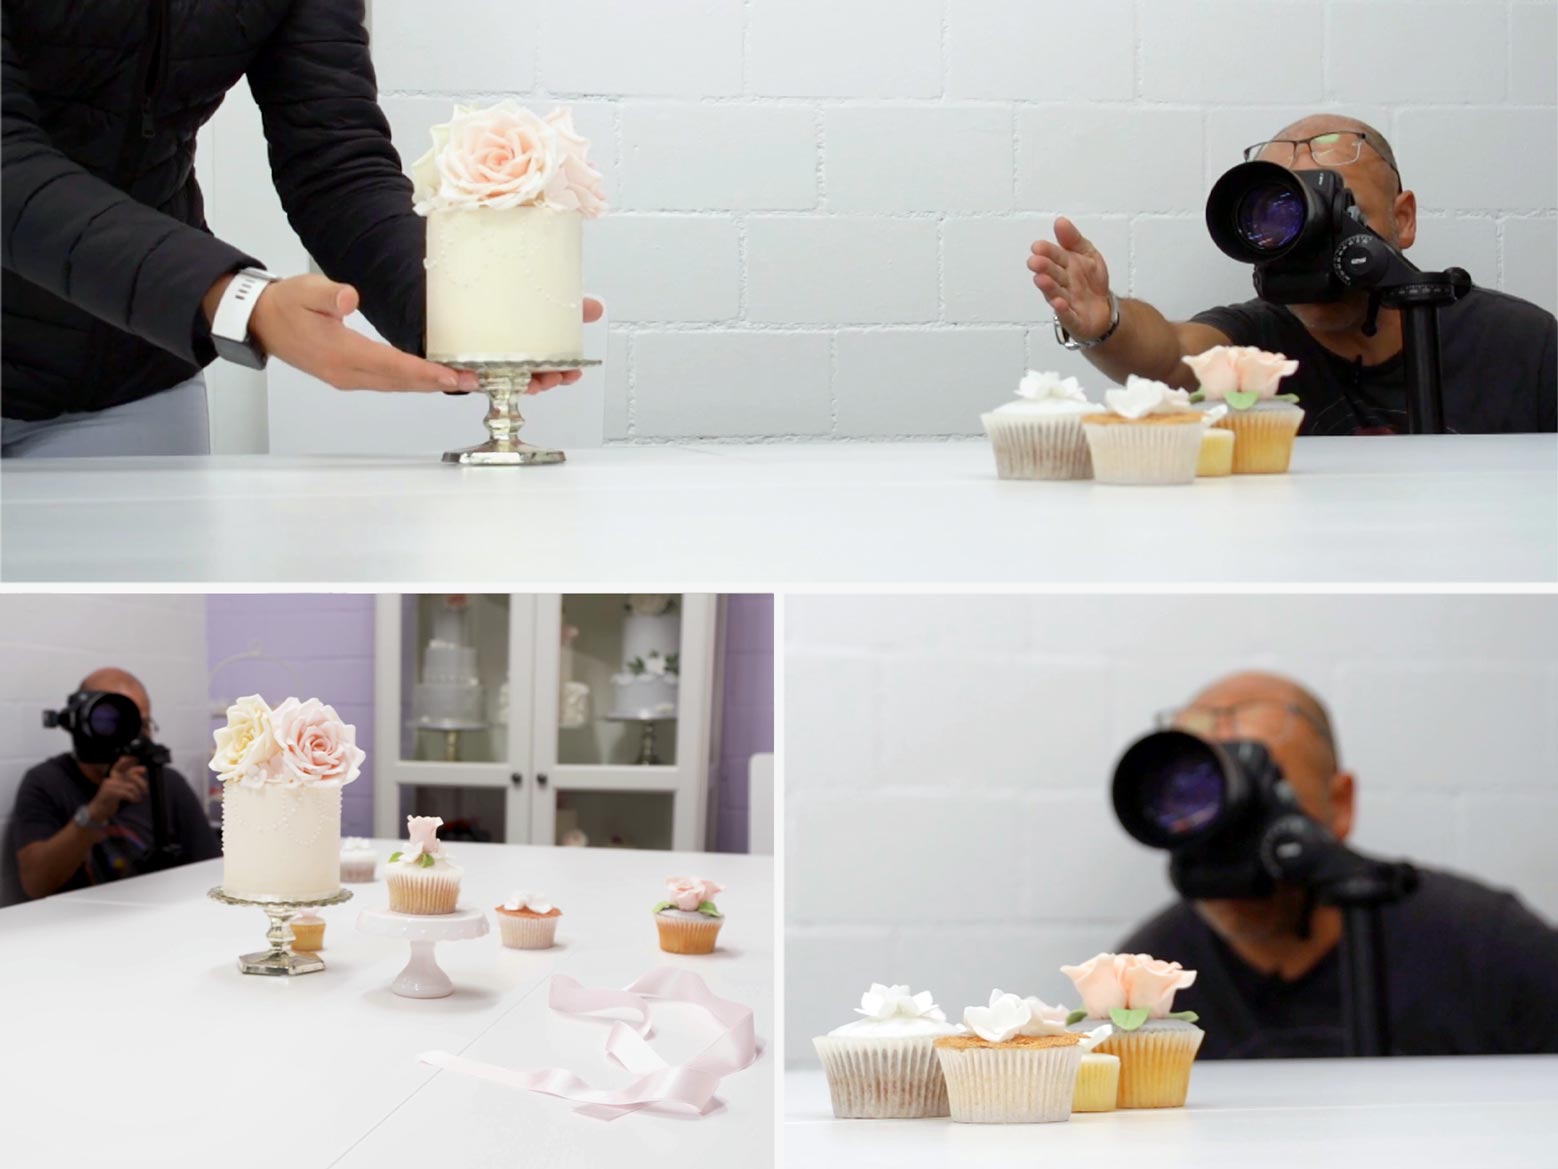
Using elements in the foreground for composition.
Only once I was largely happy with the framing of my image did I move onto the lighting. I used a large Octabox as the key light, combined with a couple of other lights for key areas of the shot. Balancing multiple lights took some time, and it was important to pay particular attention to little details in the scene, which I point out in the video.
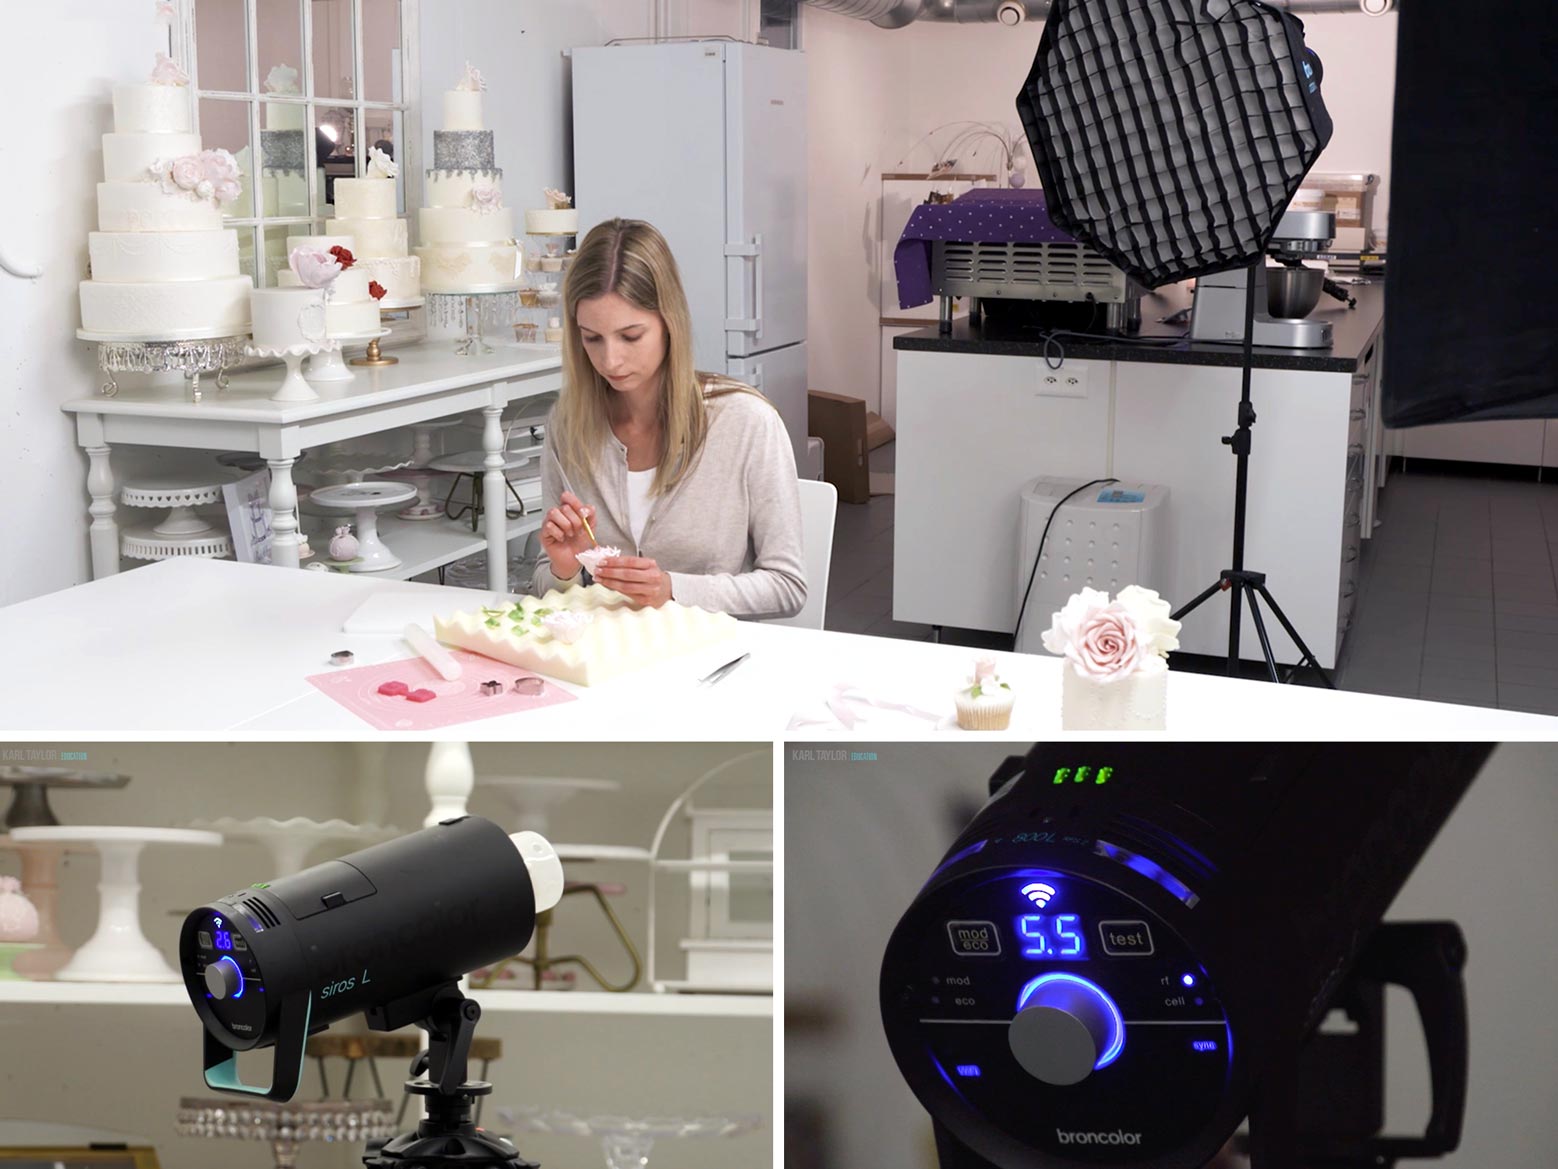
The bright, fresh mood was achieved using multiple lights.
Because I knew the type of lighting I wanted to create and how I could control my lighting to achieve this, I was able to work quickly and efficiently, creating the bright, fresh image I’d envisaged in just over an hour.
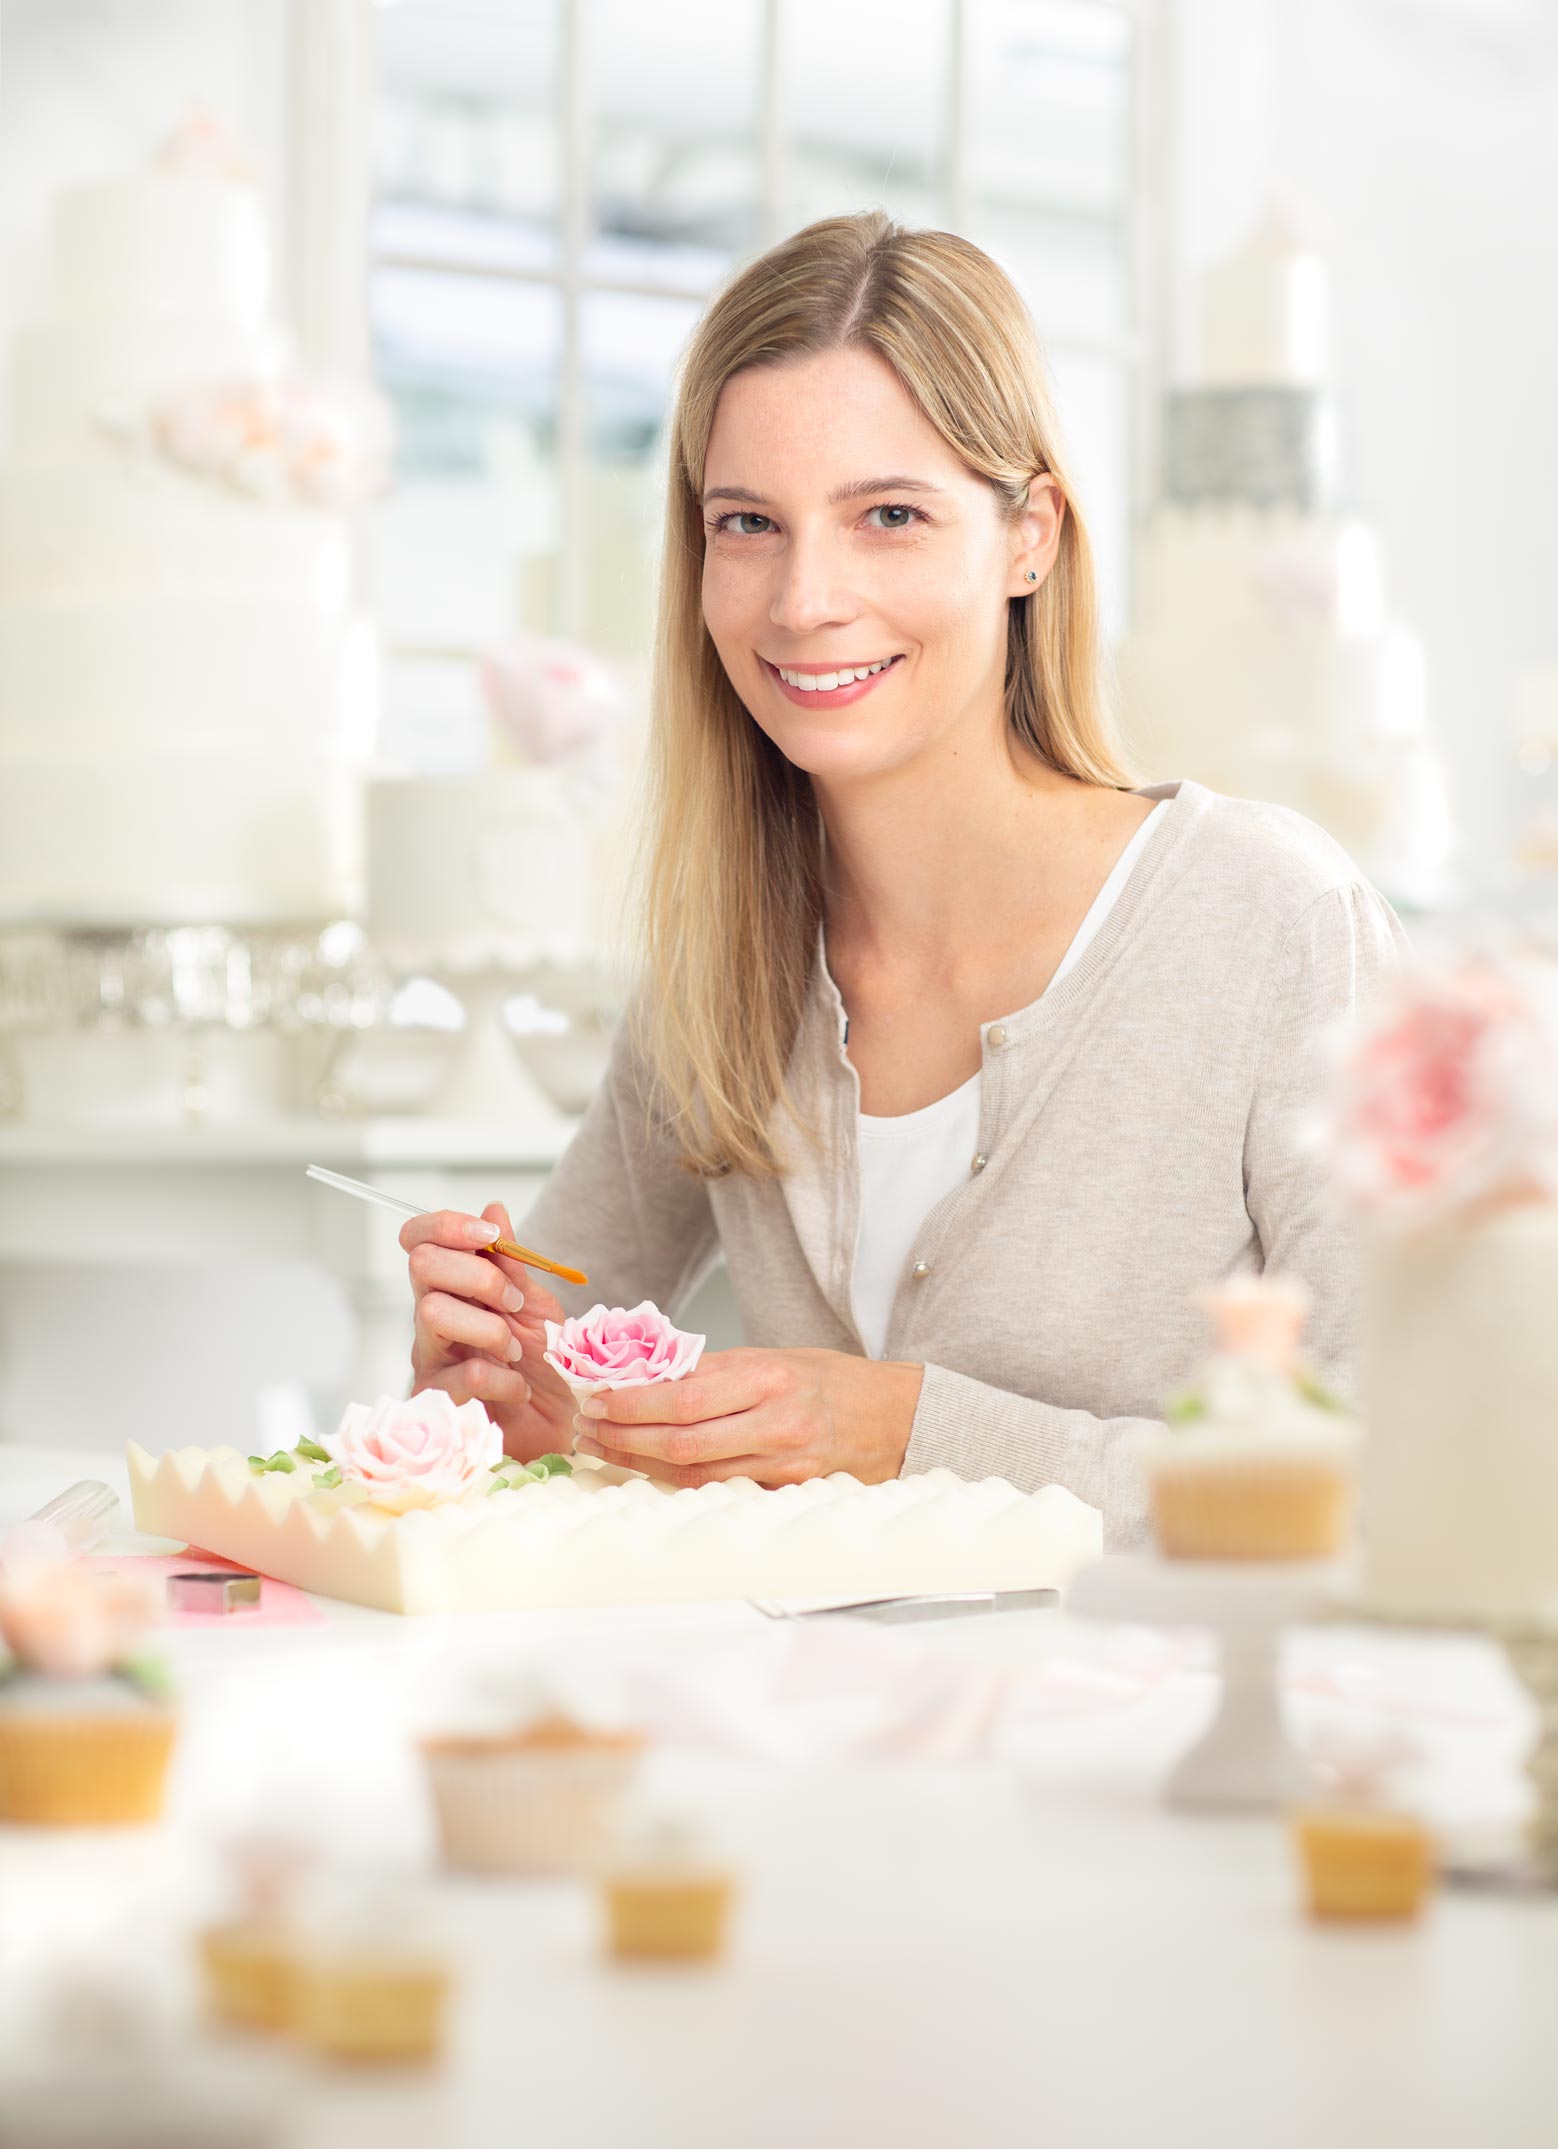
The final environmental portrait of the cake designer.
Comments
I’d love to see how you do it in more different types of businesses! Congratulations on this content.
Hi Thank you, when this whole covid thing is over we have plans to do more of these.
This is fantastic! I have been doing quite a few environmental portraits recently for branding and struggle with small unpredictable spaces. This was super helpful, thank you! Also love seeing how you work with non models 👍
Oksana
Hi Oksana, I hope you are well. Thank you and yes these environmental portrait classes have been very popular so we do plan to do more! All the best Karl.
You are absolutely the best, the way you pay attention to details amazes me. Im glad to be learning from the best
Very kind thank you.
Hi Karl, amazing results!
I have a question about setting up the tripod level. Are you always ensuring the vertical lines are straight (so shooting always straight ahead and never tilting up and down) or do you not care about this? The lines in this finished shot are perfect so I’m assuming you were completely straight on yes? Do you ever fix in post if you prefer a more angled shot?
Thank you for your time!
Hi Olive, it depends on each situation but generally I just judge it by eye and look out for too much distortion. Some distortion can be corrected in post up to a point.
Such a beautiful photo. I can see the importance to taking your time to preparing the shot/photos. Vs accepting things are… and having the attitude I’ll take care of it later… plus, when time is a crunch. I would rather have 10 awesome shots vs 200 junk photos. Thank you Karl.
Thank you 🙂
Hi Karl! It’s a great video. Thx for wonderful stuff. I hv two questions.
1. Generally for a shoot like this client expect to get few more creative images. What more ideas can you suggest from a location like this.
2. Can a shot like this be achieved with 2 lights with similar effect or will it require post production to fix the darker areas. If yes then where would you place the second light.
Hi,
1. you can make a few angle variations from the setup (like I do with the horse farrier) but in this one it was very restricted as it was a dungeon with no suitable background, so if it’s not there, it’s not there and you tell your client accordingly – there’s no point wasting anyones time shooting anything that isn’t going to work and as the photographer you should no what’s going to work and what’s not and you tell the client not the other way around.
2. No. If it could have then I would have only used 2 lights. Remember this is physics, it’s like saying can I make the glass of water completely full like you did when you filled it up to the top with water if I only fill it up half way full? No you can’t, if it’s not the same it’s not the same. If I could have only used 2 lights I would have kept the big softbox and the bare light at the back, I would have tried to use a mirror instead for the other 2 but it wouldn’t be the same. Planning to ‘fix it’ in post production is a slippery slope to ruin in my opinion. If you are planning to do this commercially and charge people money, then my recommendation would be to get the right tools.
Thank you so much! I understand seeing the location, I thought so and that’s why came up with this question. But this could get really tricky sometimes specially when you haven’t seen the location before and commit to give more shots.
Hello Karl, this is a beautiful end result though I am curious about what an environmental portrait video would look like with a tighter timeline. I’m thinking of this because I just did dozens of these by going to various locations with one assistant and one light (a Siros L/800). At first I also had a P70 reflector and a tight grid but switched it later with a 1×3 softbox. The goal was to get in and out as fast as possible, with the least impact on the subject because I was shooting people at work while they had to deal with potential customers, phone calls, etc.
Artistically, I was dissatisfied with the shots at first but as I did more, started seeing ways that a good shot could be had in the five to ten minutes with each subject. While doing it, I became very curious what kind of kit you would have used for that scenario. That is, where you may not have had the chance to scout in advance, didn’t know if it would be done indoors or out, and hadn’t met the subject beforehand.
A last question: I had one location that was simultaneous the most beautiful and the most difficult to shoot. I don’t see a way to upload an image here, so I’ll do my best to describe it. It was the business of a rock star from the sixties who had settled in Woodstock, New York. His business was repairing old bicycles. He did this in a huge open barn stuffed with bicycles and bicycle parts. That is, he had a big barn stuffed with all these parts, wheels, frames, crankshafts, you name it, it was there. Cracks between the boards allowed streaks of sunlight in, as did a large window and the open door. The portrait subject usually did his work just outside the door in the sunlight. For the shot I wanted, my subject moved inside the barn, framed by what looked like the accumulation of many decades of bicycle parts and memorabilia. I wanted the barn to look as it did to my eyes, though it was totally black to the camera. To get the right exposure of the interior, I needed a 4s exposure at f/11 and ISO 50. There was no way to get my 80 year old subject to stand still for four seconds, so I shone a light on him from outside the barn at about the same angle as the sun. That lit his side just fine but not the rest of him. My guess is that I would have needed around four lights to do the shot right, but with all the dangling things dangling from the ceiling and all around, think it would have created horrible shadows everywhere.
In the end I got a shot that I manipulated in Photoshop to get the exposure sort of okay but I’m not happy with it because playing with the highlight and shadow sliders in Capture One flattened it out more than I would like. That is, my subject looked flat. The rest was fine. Any ideas how you would deal with something like this? Imagine dozens of rims full of spokes dangling from the ceiling in rows every four feet, and other complicated shapes all over the place. The barn was basically a big black box with one opening.
Best regards,
AP
Hi AP, many questions in there but I will do my best. In answer to your first one I would have insisted on more time or I won’t do it. I’m very particular about this because for me if the client isn’t prepared to give me enough time to do my job properly then I don’t see the point in doing it at all because it won’t end up where I wan’t it and neither of us would be happy. As an example with the cake decorator, I would have been in and out in an hour if I was just shooting and not presenting and with one assistant but I would have needed at least 3 lights. For me 3 lights is the minimum to come up with something decent. On your second question, your mistake was not adjusting your exposure settings to suit the room, you mentioned 4 seconds at f11 at ISO 50, so immediately that tells me that at ISO 800 at f8 you would have given you 1/8th of a second which if you had put the camera on a tripod and your subject was relatively still with flash on him would have been perfect for you to capture the atmosphere of the scene and then the drama of flash to make him pop from the scene. The other great thing about using a tripod means you could have the flash in shot close to your subject and then take another shot with out the flash to remove it in post.
Looks like the mistake was my shutter speed more than anything else. I did have it on a tripod (almost always do) but was worried about motion blur, so I shot it at 1/250s. I did adjust the ISO to 400 after putting the model in the scene but looking at the raw file see that wasn’t enough. Agreed about going up to f/8 from f/11.
My main question though, was about lighting a dark room full of dangling objects so that they don’t cast shadows all over. The goal is to raise the light levels in the dark areas without creating new shadows. In CG, I would just add an ambient light and turn off shadow-casting for that light. In the real world, not sure how to do that.
I’m going back to shoot this again, so I am quite interested in your response. I have four lights I could bring, but another concern I have there is that they will create intersecting shadow patterns.
Hi Apaq, without seeing the room I can’t tell you but it’s usually going to be to make it look like the natural existing light but better and that will often mean replicating the existing light in some form but with the increased intensity of flash.
Hello Karl! I’m a huge fan of your work and you inspired me to became a professional photographer since I started to see your videos on Youtube, around 2012! After that time I’m starting now to have my own studio stuff and being able to practice environmental shots like this one.
In this shot, every time you wanted some extra light you added a new flash. Do you consider to user bouncing light materials anytime, instead of a new flash?
Thank you for inspire me for so many years
Hi Areias, yes if it’s possible to bounce but there was no natural light I could bounce and there wasn’t any light I could bounce from the softboxes, it’s possible I could have bounce with a concave make up mirror from the bare bulb but hey I had another light so it’s always easier to control when you have more lights!
As all the them, this is a great learning experience in light control and shall be re-referenced repeatedly. The cake hi lights from the global illumination light being turned. The control of mirror reflection with white paper. The gridded light under the table in the background. The placement of the subject doing her job along with the placement of cupcakes and props. Soft light from the large octabox and finally the smaller octabox. I would agree that KTE is the best online education platform on the planet!!!
Ha ha thank you very much 🙂
Am i allowed to ask something about the pricetag of a shot like this (or others you presented in this series) In most cases you show some assistances, like Ashe and Urs what makes life more easy the whole shoot, but you suggest in a previous reply that you could do this also solo ( quote: “This shot took about an hour but that included me having to present to camera and explain everything that I’m doing. If I was shooting this without a crew I’d be working more quickly but ….)
Either way, going towards location, seting up the whole image and presenting the final work towards the client; it all is time, equipment and work.
Would you be willing to say something about a reasanable and acceptable pricetag for these kind of shoots?
Hi, yes of course. For the last 25 years of my career as a commercial photographer I have for the last 23 years had an assistant, I didn’t have one for the first two. An assistant is probably your most valuable asset as they can help with shoots, tests, carrying, setting up and then in the down time they can assist with post production, marketing and many other things. If you don’t have an assistant then it makes test shots more difficult as you have to use a tripod and a selftimer to take test shots of yourself. So a shoot like this would have taken me an hour with one assistant. The pricing for your photography depends on your skill level and the quality of the work you can achieve, whether you have to pay for an assistant, what your overheads are etc etc. You can ask me what I would charge for a shoot like this but that doesn’t necessarily assimilate with what another photographer would be able to charge for a shoot like this as they might not be able to deliver the same results? My shooting rate is by the half day (minimum charge) so I generally don’t get booked for shoots like this anyway unless I’m doing an annual report and might spend a day or two working for a company on location. I think it’s fair to say that if it’s an hour to shoot you need to at least invoice 2 hours in total for the time to pack, get there set up and return and unpack. To find out my pricing and guidelines that of other genres charge that is all covered here in our business section https://visualeducation.com/class/pricing-your-photography/
Love your attention to detail and eye for the shot. As usual, a step-by-step approach to building the shot and dealing with problems. And Urs Recher as one of your assistants – how good is that!
Thanks David, always great if Urs is helping out – a vast wealth of knowledge on tap!
Thanks very much for this video. Very enjoyable and informative. Would you consider showing or summarising the post processing work on this video, or if not this one, another in the series?
I’d also be grateful if you would comment on whether a magazine type assignment would have expected a couple of other looks or set ups.
Hi Simon, there is no post processing in this image, there may be a slight curves or contrast lift on the raw file but that was about it. A magazine assignment will often depend on who the subject is, for example it may be less than 30mins – yes you will take more than one shot or more than one pose but the magazine or client would mostly be interested in you delivering the best shot. In some situations such as this one there is very limited scope whereas other locations have a greater and more easily accessible variety of backgrounds opportunities and it may only take 10mins to set up a complete change. This shot took about an hour but that included me having to present to camera and explain everything that I’m doing. If I was shooting this without a crew I’d be working more quickly but I don’t think there was much more I’d have got out of this particular scenario and I had a clear idea of the bright fresh type of result that I felt was appropriate to this profession.
Hello Karl
Thanks for the helpful and clear info.
You’re welcome
Attention to detail! As always.
Thank you.
Stunning result! Great things to learn, regards @ivarsony
Cheers
when will that one come out please?