
How to Use a Colour Checker Card
Check out this handy tool for keeping your colours looking good.
Colour checker cards (also known as colour checker passports) seem to cause confusion for some photographers.
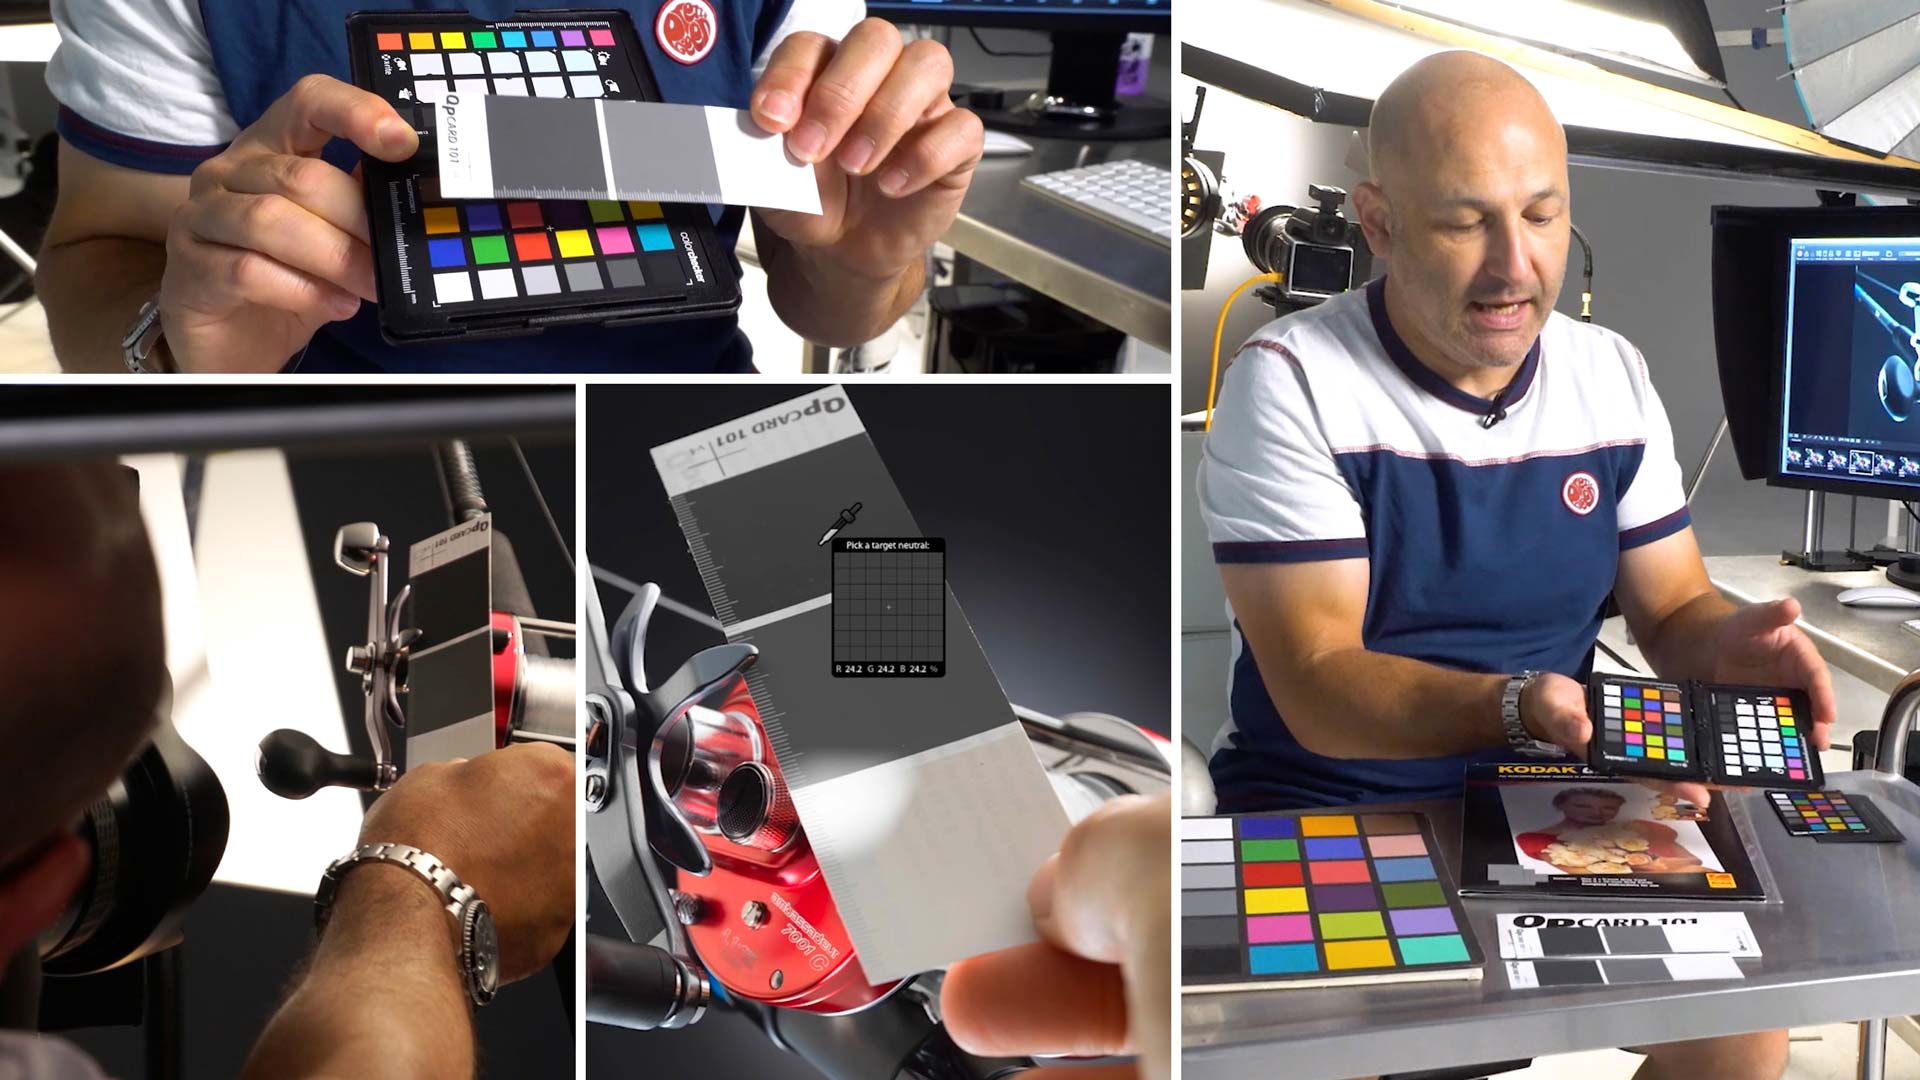
In this class, Karl clears up some of that confusion, explaining what colour checkers are and how to use a colour checker.
You’ll see different types of colour checkers and grey cards as Karl explains the pros and cons of each. Taking an image into different pieces of software, Karl also shows how to neutralise an image using colour checkers.
In this class:
- What is a colour checker?
- Different types of colour checkers
- How to use a colour checker
- How to remove colour cast in an image
- How to neutralise images
- How to create a colour profile
Questions? Please post them in the comments section below.
Comments
Karl, excellent explanation of your experience and thinking about creating custom color profiles. Thank you. However, I have a conundrum I’m trying to understand. Perhaps you can help. I recently bought a set of Interfit S1 monolights (much less quality than your Broncolor to be sure, but fit within my budget). I was running some comparison test shots with the monolights vs. Canon 600 speedlite vs. Yongnuo 600 speedlite vs. Canon 430 speedlite. When I apply the White Balance tool in Lightroom to the middle grey swatch on the X-rite Color Passport, I get color temps of 6100, 6800, 6800, 6900, respectively for the lights mentioned. Indeed, the monolight was 6100K with +11 tint. This is in an otherwise completely dark studio with white walls. My conundrum comes in that Interfit says their S1 monolights are very accurately 5700K +/- 100. I see numerous product reviews that claim the lights are accurately 5700K. Am I missing something in how I am using the Color Passport or the Lightroom White Balance tool? When I Googled the question, I came across a discussion group that asked this same exact question. The response that person got was “I just set my color temp to 5700K and move on.” So, should I be using the grey card and accepting it’s correction to color temp and tint, regardless of what the manufacturer says? Or rely on the manufacturer and just set to 5700K color temp. After looking at the images so long, I have to say my eyes can barely tell what’s what.
Hi Staden, thank you for your detailed information I understand your situation. First of all – Use the grey card and trust it (as long as it is new/good condition). My bron lights run at around 5900K barebulb, I’ve got speedlites that run at around 7000K (as was evident in the live show that you can watch where I shot the apple earpods and then switched to godox speedlites!). Additionally even the white paint tint can have an influence but the thing that has a large influence is the reflector or modifier you apply. I’ve got bron silver reflectors that come in a bit warmer and some that come in a bit colder. This is why the Grey card is important because it is always better to reveal something that we know to be neutral (grey card) as neutral in our shots unless you have a deliberate reason not too, but even if you have a deliberate reason it is better to apply this in post to the neutral shot. When we mix different flash and modifiers which is common then the grey card gets us back to a good balance but remember to aim it towards camera from a position where it is receiving most of its light from the key light.
Hi Karl – Great tutorial, however I have a few questions before I go and buy one. I had my heart set on the X-Rite passport, but after watching this I’m not so sure I need anything except a grey card ..
Recently I did a shoot for a potential client, some burgers, and the feedback I got back was he felt the colour was oversaturated. I admit I probably did dial in a little more sat to make the egg yolk and contents vivid and pop (and it’s part of my style I am trying to figure out) but potentially went a bit far.
He has some packaging which was in a couple of the shots, and this has brand colours. And looking at the images again, I see that this colour is different in each shot – but I feel more a saturation issue than WB. (This is what he may have picked up on).
1 – Would a passport allow me to dial back correct saturation if I re-processed the image (assuming I had shot it on the set). Does the passport allow for saturation calibration or just white balance?
2 – The packaging I had in some of the shots, I don’t have anymore for reference, so I can’t be certain to get it right now if I re-process the image. If I had a colour checker in the shot, is it easy to use that as a reference tool?
I don’t wish to spend £120 on a passport if it really isn’t going to help, but at the same time I want to move my photography portfolio up a notch and trust that I won’t let down my clients.
Thanks for your help,
John
Hi John, I’ll do my best to answer your questions. First of all a colour calibrating monitor with at least 99% of the Adobe RGB Gamut would be advisable. Work on your images in RAW, in Adobe RGB and then make your 16bit PSD or tiff once you’ve got the colour balance neutralised (from the grey card parts of the card) Don’t put in too much contrast or saturation at this stage as it’s better to do this later in PS. When you’re in PS, work on your colour again with the ‘Camera Raw’ filter on a new layer, the ‘Selective colour’ adjustment layer. – See my previous live shows on colour on this – or my natural decay post production live show. With the adjustment layer or new camera raw layer you can use masks to reveal additional saturation only where it’s needed and the same for contrast. In doing so if your client feels that something is too saturated etc then you can simply adjust the mask quickly and give them a new file. Anyway in answer to your question number 1. Yes you can use a colour checker to map colour but it’s convoluted and is usually better suited for the correction of flat field work such as paintings. 2. Yes this is where a colour checker can be useful. Also finally you don’t need to spend £120, if you look at the X-rite mini it has all the necessary bits on it but doesn’t come in a hard case, it comes in a paper sleeve (I think they are about £60, we include one free in our lifetime membership) but they will damage more quickly, the passport stands up on it’s own because its rigid and the case protects it from light and mishandling. However in 25 years of commercial photography I’ve only ever used the full colour checker profiling for painting photography, the rest of the time I only use the grey cards and you can pick those up for much less although I like to have the colours as a visual reference in the shot as I can look at the passport and my Eizo to give a quick assesment. Hope that helps Karl.
Which colour checker cards do you prefer? Xrite or Gretag – Thank you
Hi Kelly, I use X-rite colour checker passport
I’ve a great interest in color science and have a couple comments.
My experience is the color checker card should always be perpendicular to the camera lens because even though the light is bouncing all around hitting your subject at all angles the light that you see, the color you want to record, is generally entering the front of the lens. So yes, angling the card will give bias to one light or pick up more reflections off scene but, those photons are also being reflected away from the lens and will not be recorded / have less bias on the sensor.
Most color balance problems can be avoided if beginner photographers just STOP using AUTO WB. Especially, if they are doing any compositing work.
I do find the color checker quite useful in scenes with difficult lighting situations or scenes with strong, predominant colors and scenes with out-of-gamut colors such as clothing that you mentioned. In particular; subjects under a tree canopy wearing bright clothing, turquoise colors in tropical water, grass in 4 o’clock sun, translucide colors like colored glass. The color checker passport is always in my bag just in case of these difficult lighting situations.
The color passport checker is just a tool, everyone sees color differently. I have problems balancing blues-greens and green-blues. I don’t use the color passport checker every time – but I know when I need to use it and I curse when I should’ve used it and I didn’t. Also, I use it much less since switching to Capture One.
It might be interesting to do an experiment; a back drop cross-lit with fuchsia and yellow and model wearing mustard or say, a backdrop cross lit with violet and cyan with the model wearing yellow. Yellow is the Pantone color of the year 2021! Canon, Nikon, Hasselblad, Fuji GF sensors. Question; Does a Color Profile Checker make a veritable difference? Does a simple grey card suffice?
( disclaimer – I don’t have any affiliation with any product/company mentioned)
Kind regards.
Hi Geoff, thank you for your comments. I’m going to break each of your paragraphs into sections 1 – 5 (1 being the one that starts..’my experience’
1. What you see coming through the lens is based on the angle of incidence of the light reflected from the light sources. In the case of glossy surfaces as many products are you are actually seeing a direct reflected image of the light source but in facing the colour checker directly at the camera the colour checker will be missing the key reflected light. As the ‘colour’ of those reflections are also extremely important and that the primary resonance of that light from the subsurface will be from that light and others from diffusion, my experience is to aim the colour checker towards that key light at the angle of reflectance.
2. Yes, but I don’t think many people involved in product or professional photography use AWB
3. Absolutely, for example you can neutralise a model stood in green grass under a green canopy of leaves but all colours will be affected differently regardless because the colour of the light was biased to green. As such the reflected light from something Magenta for example will never look entirely accurate. The only way to have ‘accurate’ colour is to use completely neutral full spectrum light at around 5800K but in saying that, all colour is perceptual so in the example of trees and grass the image would actually look wrong if the colour was somehow perfectly accurate because the scene itself never was and visual imprinting provides us with an experience that it shouldn’t look perfect otherwise that would be unnatural for that situation.
4. Agreed
5. Generally a simple grey card will suffice but all cameras will yield a different result as their colour processing algorithms are different. Hasselblad natural colour system is, I have found, to be the most accurate but just as in the days of film we would sometimes choose, Ektachorme, Velvia or Kodachrome just to get a certain ‘look’.
Hi Karl, thank you for the tutorial.
Do you not suggest setting up the camera white balance to manual mode and take the photo of one of the grey areas rather than setting the WB to “flash” or “5500-5600K” under studio lighting conditions?
Thank you in advance.
Hi Masa, when shooting RAW the colour balance is adjustable but it is already set in Kelvin at flash colour temperature. The ‘neutralise’ tool that you click on the grey parts of the colour checker just adjusts it further to make it perfectly neutral to account for any slight variances of colour temperature or tint that occur from the softbox material or diffussion material or reflectors etc.
Hi Karl,
So then does it basically not matter what kelvin you set your camera to if the raw file is “preset” in kelvin at flash color temperature? I’ve wondered how to best set camera kelvin settings, particularly for optimal portraits/skin. I generally set my camera wb to the color temp of my lights.
Also, do you have an in-camera picture control setting you recommend? I’ve been using Neutral in my Nikon.
Thank you for sharing your knowledge and experience!
Hi Karl,
Maybe you can help with my colour checker issue. Im not sure if IM doing something wrong or if Ive just been mis-sold the item.
The company I work for shoots clothing. The clothing is hanging relatively flat.
We shoot with the same lighting position and power on every shot. We then send the images to an outsource company to retouch the images.
We have a lot of problems where the images coming back not matching the colour of the actual item, which results in more returns.
We bought the colour checker passport as we were led to believe that this would adjust the colours to match what we see in the real world. The grey sets the white balance perfectly, no problem there, but when creating profiles using the colour squares we still get colours not matching.
If we make the profile adjustments to make a yellow shirt looks perfect, then when we load that same profile onto a predominantly purple item (for example) then the colours aren’t matching.
Are we using the card wrong do you think, or does this just not do what we thought it would?
Are there any other ways to get matching colour, other than just having in-house staff to retouch for us?
Hi Christopher, it’s difficult to say without knowing your lighting, room situation, retouchers, camera, monitors etc etc as there are many steps in the process that can have an effect. Generally speaking though, as explained in this video, most cameras have a pretty good starting point on colour and then usually it’s just the neutralising of Kelvin that is the most important thing. The other thing here is do the retouchers know what they are doing? And most importantly are you viewing and checking all of this with high quality colour calibrated monitors.
Hi,
Thanks for the reply. Yes we check all the images on regularly calibrated Eizo monitors. The retouchers are skilled, but because they don’t have the items with them while retouching (the items stay with us in the studio in the UK while the retouching agency is based in India) they wont know whether the colours have come out correctly ‘out of camera’ or whether further colour matching work in photoshop is required.
Due to the number of products we need to get through in a day our stages are set up to a general, quite flat standard (2 back lights, 2 key lights with items against pure white backdrop) and the stylists don’t adjust these when shooting different items. They are for online sales so can be pretty basic, rather than anything more complicated that you’d use for advertising shots.
My thoughts are that management want an un-aquirable result which is: perfect colour every time out of camera with the same lighting sett up for all items regardless of colour, brightness, material etc
Hi Christopher, unfortunately I still can’t understand where the problem would arise. If you’re doing everything correct at your end and shooting a reference shot for the retouchers with a colour checker card then the workflow for them should be straight forwards. They could even save a profile from your colour checker card and lighting setup to revert to every time they work on your projects? If you’re set up is correct then there remains only a couple of options. Either the retouchers aren’t handling it properly or the materials you are photographing are out of the gamut capability of the camera?
Hi Karl and Team
I have a color checker passport already and will start using it for white balancing my images, could I just ask why there is a white balance full ‘page’ and a grey balance ‘page’ at the end of the passport? Is there a particular difference, I always thought it was neutral grey that was needed for white balance. I imagine they’re both neutral? But is there a particular reason why you would use one rather than the other?
Thankyou for your help.
Hi, any of the mid greys are your best option.
Hi Karl, I mainly use my colour checker passport to correct the white balance in my photos in post production in Lightroom as you suggested in your video. However, I have a question, what white balance setting should I use to take the photo of the colour checker passport in first place? Custom or Auto or particular Temperature? Picture style selection wouldn’t affect I believe because we are going to use the RAW image anyway.. Please advise?
Hi, you should set your white balance as close to the light source you think is providing the key light. For example if shooting with studio flash or outdoors in the mid-day sun then 5600K-6500K. If you want your sunsets to look very warm then leave it at 5600K which is what I do, but if you prefer them more neutral then adjust to 3600K – See this chapter for more info – https://visualeducation.com/class/understanding-light/ and this one – https://visualeducation.com/class/introduction-and-understanding-light/
Thanks Karl.
I am not a professional but am very interested in photography. This Colour Checker Passport I have kept for years but never used it. A month ago, I tried to test it with Capture One PRO ICC files, Lightroom DNG profiles for my GFX50R, Nikon D850. To sum up, I didn’t see any difference in my 50R. Perhaps it may affect some red, blue colour. In D850, there is a lot of change in color which I may not like very much.
Firstly, I totally agree with you about the lighting shining on the passport from different angles resulting in a variety of color tones. Which one is correct though when you create your profiles? Secondly, editing the photo, by adding anything onto it will also shift the color tone as well. So what is the point to do so. Someone said it creates a base profile for the starting point. Thirdly, I finally got the answer if I need to shoot a flat painting to use it. It makes sense to me.
Spending a lot of hours to create some go-to profiles for Daylight, Overcast, Shade, and flash I think is a bit waste of time. Although it is a little bit different, no one realizes it.
Overall, what I have learned from that is to create the profiles every time you keep shooting. One capture with one profile from the light source (main light) will work. However, keeping this pattern of shooting I no longer have any interest to hold my camera.
I think I will stick with the default camera profiles provided by the software will do!!!
Regards,
Peter
Hi Karl,
Agree with everything that you said. My mistake was after watching the Phocus video 16 on the Reproduction Tool was trying to do it for every product session and not getting the right results. I discussed it with Les Walkling here in Australia. It only works in a studio situation on a flat subject. You can’t do it in the field. All you can do in the field is neutralise and check that the white is not 255 and the black is not 0.
To do a camera calibration properly you first need to set up even lighting, do a white balance, then do a scene calibration and then do the Reproduction tool.
Also the Hasselblad colour is so good it is hardly worth doing. I saw a colour test on 10 different Canon 5DMk2 and they were all over the place. If you want accurate colour, then Hasselblad is the answer.
A big mistake you can make is doing Auto Levels. It changes the mix of the colours which changes the colour. You can only adjust levels with Luminance.
Hi Bob, yes agreed. I can only see the benefit of calibrating the camera to a checker card if it is flat field stuff like paintings in a very controlled environment with equal lighting and staying with the exact same setup.
Being a Hasselblad AND Color Checker Passport user, I fully agree with your assessment, and that much of the Passport’s use will be rarely or never used.
However, there are some interesting “details” of the Passport which viewers might like to know about, and which are not too self-understood. Each row of squares has a purpose. Again, some very useful, and some quite esoteric. Starting at the top,and working down –
Row 1 – The top row is actually a list of the same colors as you’ll find in the LR Develop section under HSL. Useful when you are trying to increase/decrease particular colors in your image.
Row 2 – These are “neutral” squares meant for use when shooting PORTRAITS. Square 1 in the row is neutral. You’ll see a “tick” on the bottom of the square. The remaining squares in that row “warm” the color balance incrementally. You’ll notice little “x’s” growing in size as you move to the right. The fact that these squares adjust incrementally means that the same adjustment will be applied each use. And yes, you can certainly further refine manually, if you wish.
Row 3 – This row is the same as row 2, but calibrated for use with natural light outdoors (Landscape, wildlife, and natural light portraits). Here, the neutral square is in the middle (notice the tick). The two squares to the right will warm the image, and the two squares to the left will cool the image. Notice the + or – sign on those squares. And again, these adjustments are always incremental.
Row 4 – Neutral squares
Rows 5&6 – According to x-Rite, these are random colors found in nature, and can be useful in determining white balance outdoors for particular areas.
Row 7 – If you look closely, you’ll see these colors are CMY RGB (from right to left) – your primary & subtractive colors.
Row 8 – Neutral colors. Clicking on ANY of these will provide you with a neutral color. However, this row is also useful for determining contrast range from white to black.
PS – Also, on the back side of the Passport – One side is a standard gray card, but white side is actually for creating a custom balance within your camera for the particular light at hand. Most cameras offer this function, including the Hasselblad, where you take a shot of this white section, and the camera will adjust to a custom white balance for the light that you are currently shooting in. Now this only has ONE bearing for you, and that is so that your LCD screen on the back more closely represents what a neutral WB is.
Hi Michael, thank you for that extra information that’s great.
I did a shoot for the ad agency I work with recently and, as I was looking for information on how to use a Colorchecker with Capture One, I shot it including the Colorchecker Passport. I then followed the instructions and created an ICC profile for this shoot.
I was surprised with the results.
I shot a shopping basket with, amongst other things, oranges, lemons, tangerines and orange bell peppers. Out of camera these were quite close in in colour. After creating the colourprofile, the difference in colour was really evident and much more realistic. The reds, yellows and blues on the Colourchecker were much more accurate using the ICC profile I made then the out of camera shot.
I used to use the Colourchecker mainly for adjusting whitebalance, but this has really changed my mind about the Colorchecker.
Hi John, yes it can be useful but for me the problem with what you described is that if you had to change the lighting setup part way through then you need to do the full profile thing again because it can only relevant with consistency of light and set. I’ve found this too time consuming generally and also depending on the shape of the product and which face is meant to be ‘accurate’ it can be difficult to ascertain where is best to place the card for using it in this way. That’s why for me I’m already happy with the colour from the camera and I just need to check the neutrality. If I find a red or a blue looks too strong in relatively later then I’ll adjust that colour in post but as mentioned in this video often for advertising/product images they often get enhanced and punched up a bit anyway.
Hi Karl,
Thanks for your reply. I will not use this on every shoot, even though I made a preset in CO to give the file the right settings to create an ICC profile. But it was really interesting to see how accurate the profile was in differentiating these colours.
Thanks again and keep up the good work!
Hi Karl,
It would never occur to me to change anything in the original factory settings of my camera. However, I have calibrated my iMac computer display screen at least once a month with Datacolor Spyder 5 Pro colour checker sensor and software, for better colour production of my photos in the web as well as in inkjet prints (where the drying ink cartridges are an eternal source of frustration).
Intuitively, it does make sense to think that if your display has bias in presenting colours, such bias will be transferred if not multiplied in the process after you view your photos for the first time in Lightroom and make any corrections to them. And each calibration usually does result as a minor visible improvement of the tones in the reference photos on the screen.
Datacolor also has its similar colour checker cards as presented in your video above, but mostly I have not observed major changes in the hue, saturation, or luminance in my photos after a procedure of beginning a photoshoot by taking reference photos of the cards in the prevailing light conditions and then processing those afterwards in the respective software to get the right presets.
– Now, they are announcing not to continue their support of previous versions, and are trying to sell newer versions of everything – I just wonder whether it would be worth it.
Theoretically, if every step goes 100 % perfect, one should be able to take a photo of the colour card and print it, and keep iterating the process of photographing and printing the result, with each print reproducing the colours of the original card endlessly… I wonder if any brand has tried the challenge?
This has cleared up a heap of questions I had about colour checker cards and the use of, really imformative, clear and precise as you would expect from Karl. Thanks
Man, this is EXACTLY what I am trying to understand right now, you read thoughts literally. I need to calibrate my screen too and couple of weeks ago I also got a pretty cheap color checker card(Digital Kolor Kard, dgkcolor.tool), and I’ve spyderx colorimeter but what I’m completely missing is what.. should my monitor look like after proper calibration? I have two cheap displays I mainly and only ever intended to use for office work, calibrating both of them with DisplayCal(ArgyllCMS) produces visually completely different results. I’m yet to try windows/mac software that came with the colorimeter but I just don’t understand what should I expect of the display calibration as a result. Is there anything specific I can do to verify the calibration?.. Say, I have this color checker card, is it something I can visually use to reference anything on my display or… Do you explain this anywhere? Can you link to a particular chapter?
I feel very lost here and I don’t really know where to start. This isn’t for anything professional, but who knows what I’ll be doing in 10 years. The knowledge would be useful. Besides I do want to improve my shots and I’m about to be scanning my filmwork later on so I’d love to have or be able to have more precise setup for photography purposes.
Right now at this very moment I signed up because I needed to learn this stuff to try my best to take a nice maternity shots, resulting in a couple of pictures and one wall print, which is why I want to figure things out.
My gear is nikon D700 and some older 50mm nikkor lenses, and a couple of softboxes with mounts for my three speedlites, all SB-700. Some diffusion paper and homemade reflectors like wallpaper, cardboard boxes from softboxes and whatever there is lying or hanging around. Due to shot being taken at home sometimes during day time there may be some light pollution which I also want to account for.
I started my quest about a month ago and what I do lack is time to experiment, as I never shot with artificial light before, and I’m just trying to do the right thing within an hour or two per shot and it’s simply not enough and I’ve so far didn’t end up with an acceptable result that I’d be satisfied with.
Thank you for these amazing videos, they did help a lot, it’s just my inexperience I need to deal with. I did learn a real lot here, reviewed my old pictures and figured out 99.98% of them is pure junk. Will strive to take better pics, even for my own sake. Maybe I’ll be taking part in your contests later when I’ll be able to take a shot that is worthy of submitting. Simply no time now.