


Lighting and Making a Small Set
Set yourself up for success – even in a small space.
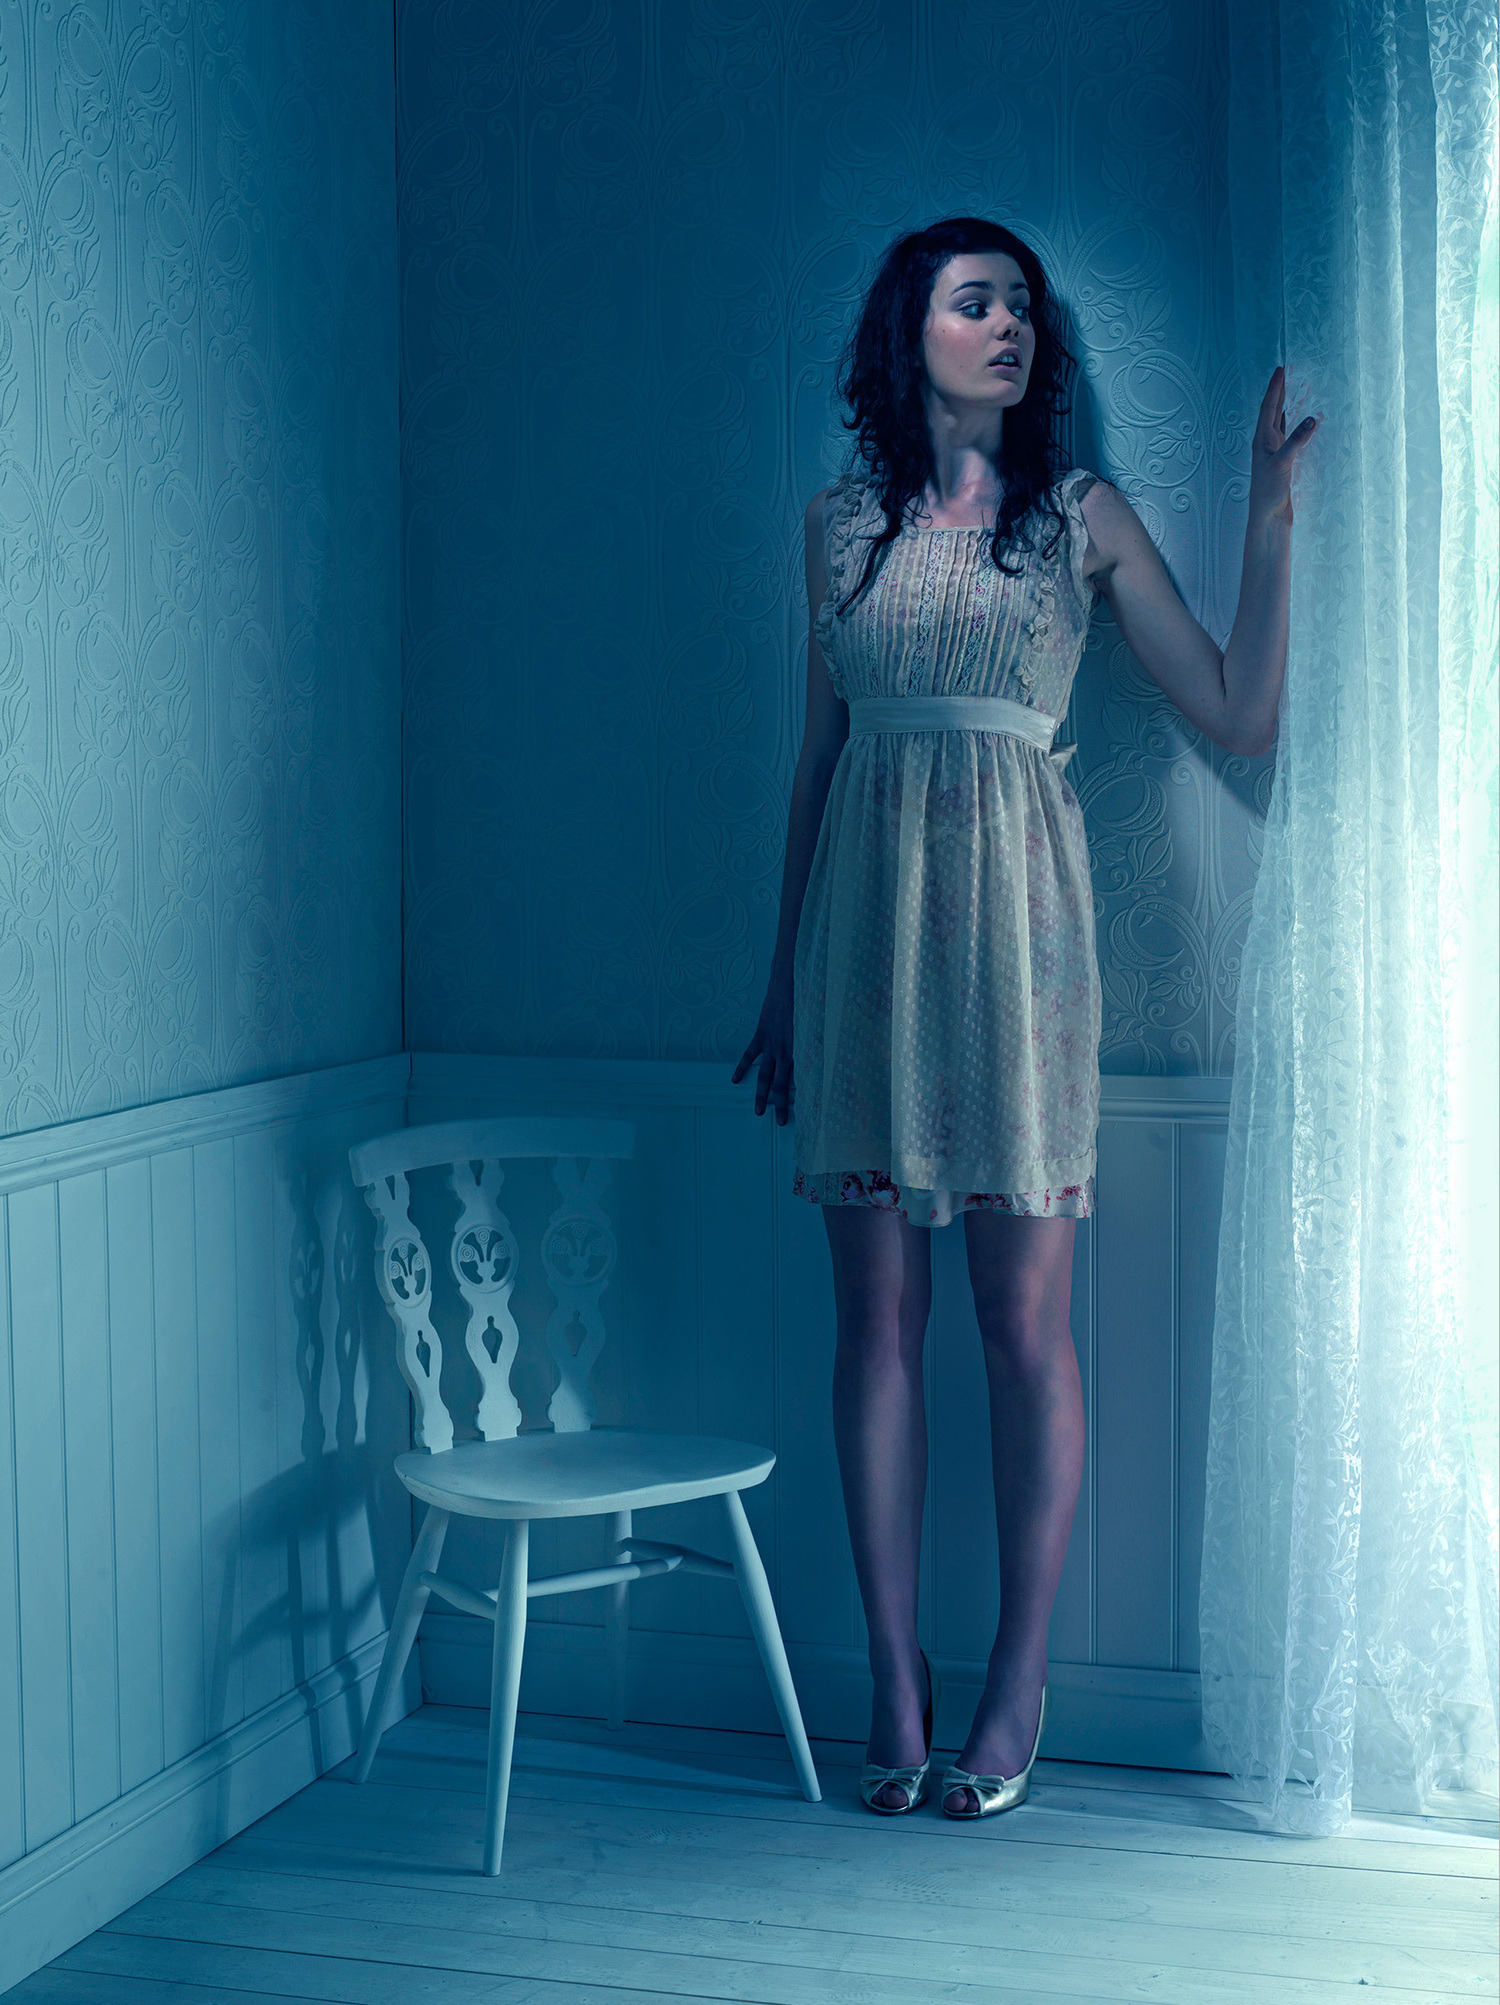
In this class, Karl and the team build a small set to shoot against as an alternative to simply shooting on a blank paper background.
Find out how to create stunning sets (even when space is limited) and how to use mixed lighting to create a cinematic atmosphere with small pockets of light. You’ll also learn how to maintain a balanced image by adding each light in to the image separately.
Questions? Please post them in the comments section below.
Comments
I love the mood of this shoot and when I saw the portable corner I was thinking to build one too. Having a small studio I always love to see how others solve such problems without bulky (and space consuming) constructions to get the portable walls to stand up.
I doubt your plywood-walls stand by itself? I haven’t seen any support or stands in the video (but then we cannot see the back of it hehe) and I am pretty sure it’s not that tiny wood panel on top of it.
Looking at the video again I see you using tools – guess you screwed on some brackets
Hi, yes we used metal L brackets I think.
Fantastic video thanks, cant believe I’ve missed this one with about a year of being a member.
My question is;
For the set build would one get away with 3mm hardboard using 8×4 sheets? So it would effectively be a posh V flat
In my studio ive previously been using 18mm mdf which means building a scant frame which is costly, time consuming and sometimes have to pay a joiner.
thanks
shane
Sorry, Plywood! I missed it on the description!
Hi Karl, did you light the model with the overhead reflector?
Hi Peter, not quite sure what you mean here? All the lighting was described in the video, was there something I missed?
These are some of my favorite types of photoshoots; almost like still life film making. Was the coldish blue effect done in post production, or were there gels introduced (or maybe a simple color temperature change)?
Hi Peter, the cold blue was done in post on this one to create a ‘night’ look.