
Whisky Photography
Treat yourself to a dram of photographic magic.
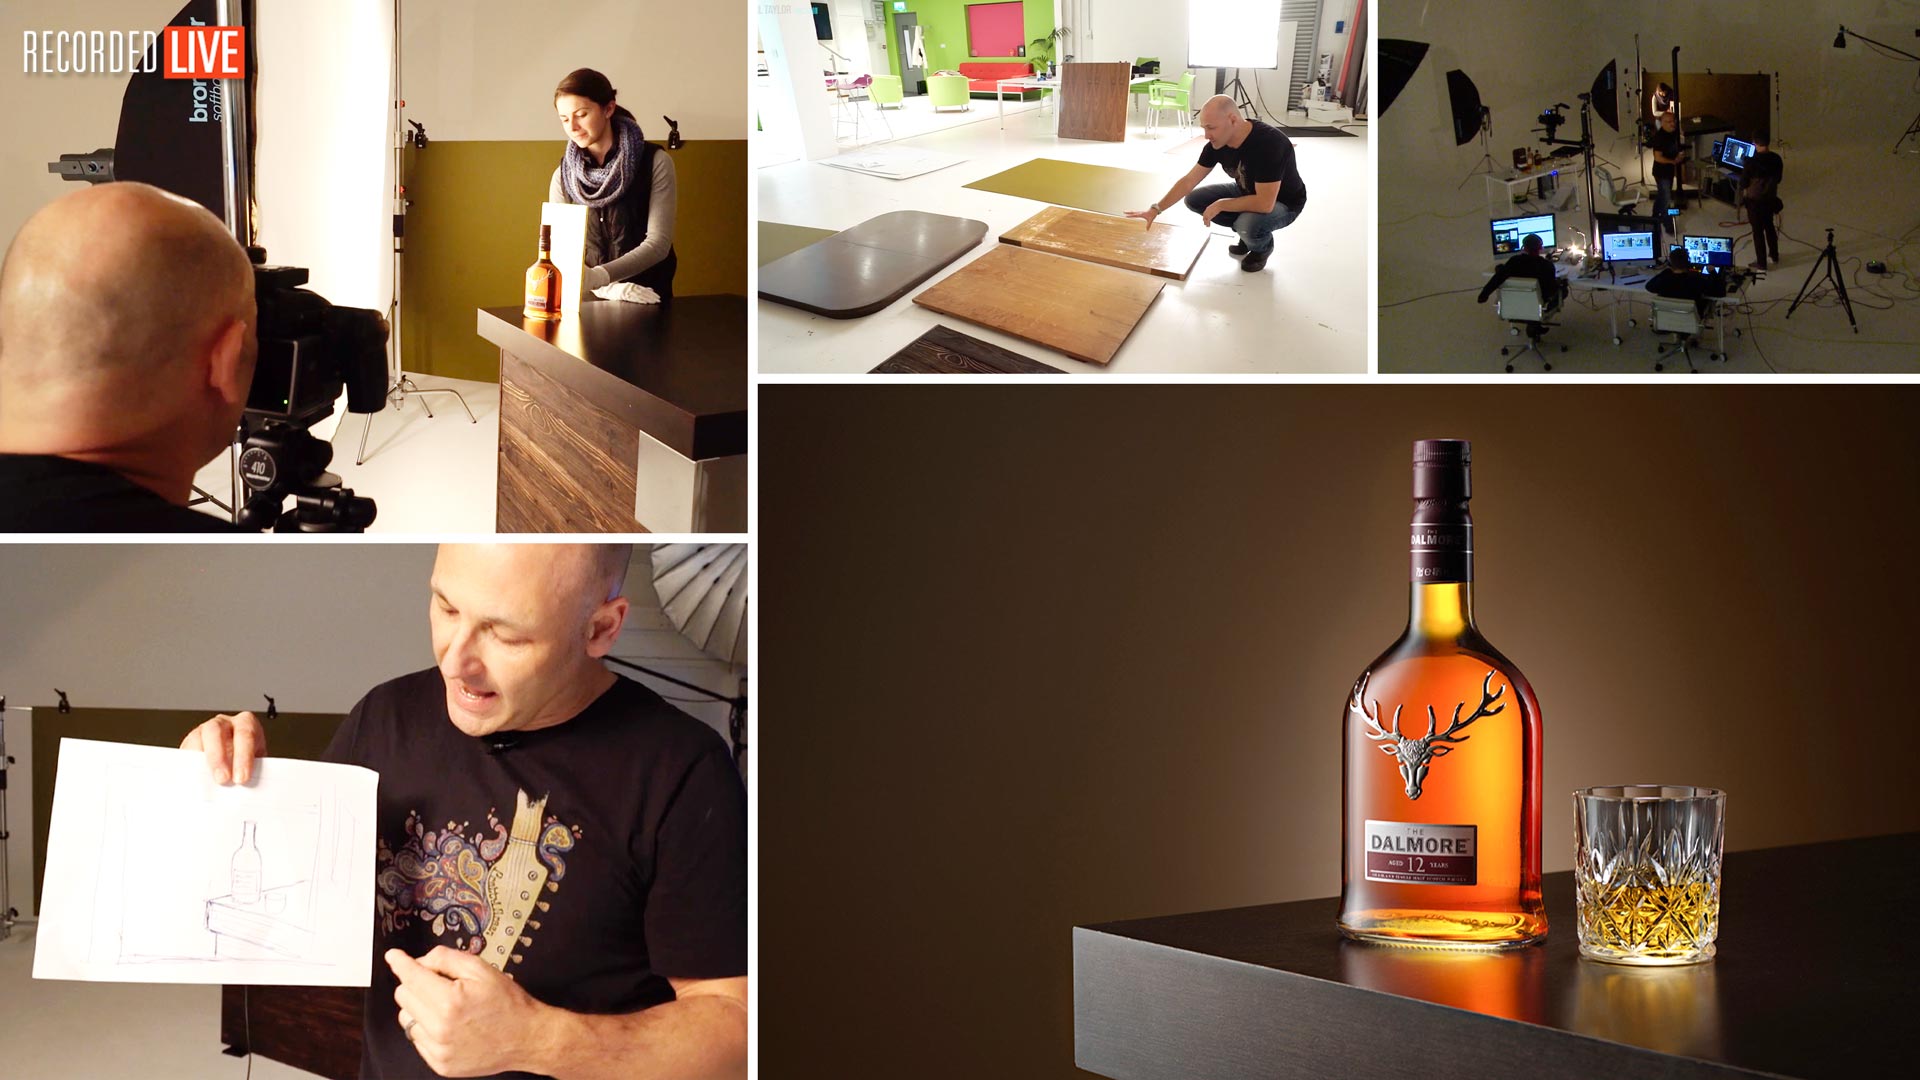
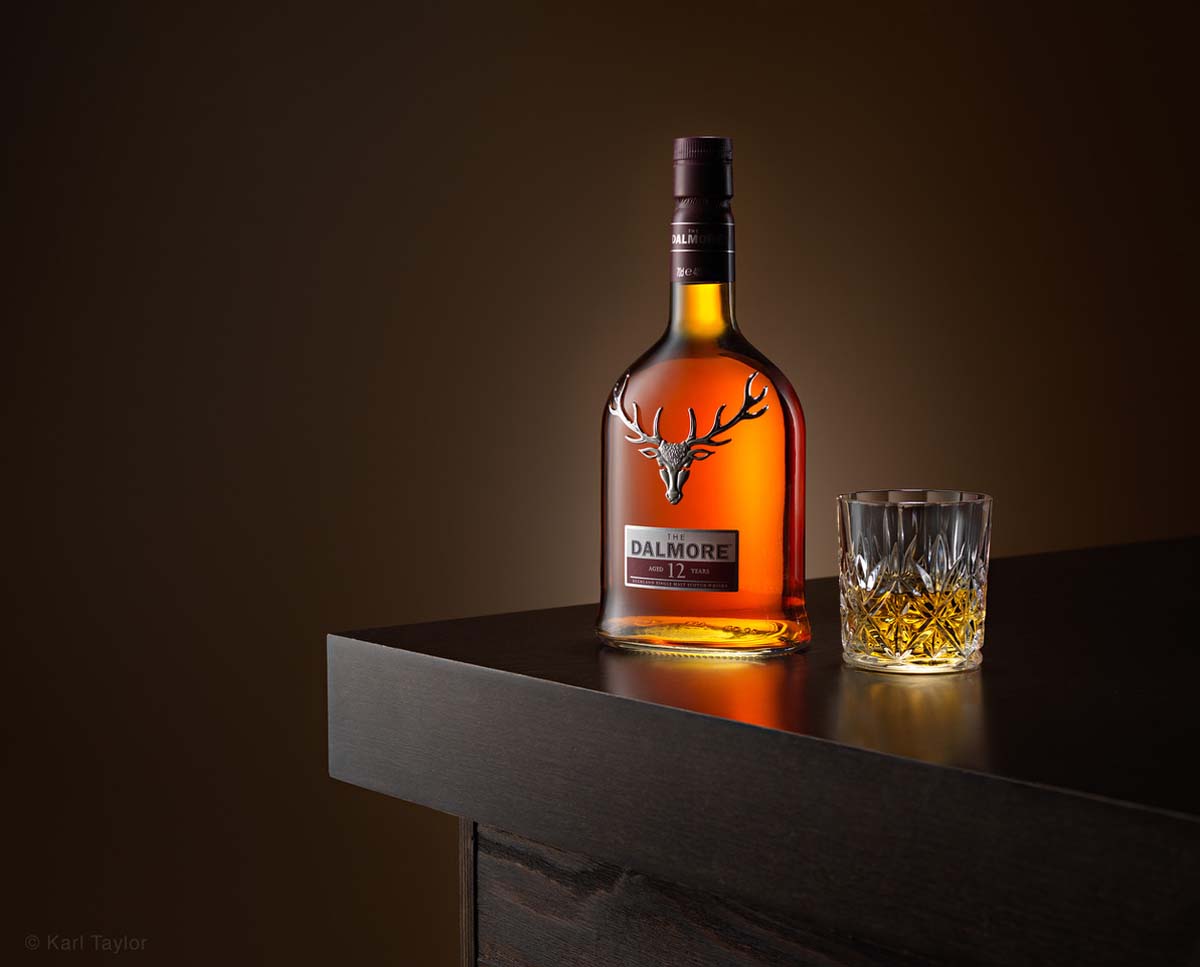
Recorded LIVE, this photography workshop covers the start-to-finish process of a product shoot, photographing a bottle of whisky to advertising standards, using a simple three-light setup.
Karl guides you through each step of the process, from planning and previsualization, to the retouching required to finish the shot.
How to light reflective surfaces, controlling gradient light, using reflectors and useful post-production techniques are all covered in this exciting shoot. Karl also shares a number of little-known industry secrets that help elevate a shot to advertising standard.
In this class:
- Product photography: How to photograph bottles
- Product photography lighting tips
- Lighting setups for bottle photography
- Photographing using multiple lights
- Useful post-production techniques for product photography
- Creating a composite image in Photoshop
Questions? Please post them in the comments section below.
Comments
HI Karl, I just renewed my subscription to your class because i feel that what you are sharing here is really a treasure. I am still making up my portfolio and would like to add pics like that to it but I have a very small space to shoot in…. since this is a lot of physics, as you always mention, is this something I can replicate in a very smaller space?
Hi, Thanks for joining us again and your kind comments. Yes it is possible but the room will need to have some form of black out walls and potentially ceiling to control the light. See this video – https://visualeducation.com/class/photographing-in-a-small-studio/
Hi karl,
I learned lot from your videos. I love the way you set up the lighting, composition etc. But i believe most of us face it difficult to visualize in our mind to what we want our pothograph to be, like what you sketched on paper in this video. The creativity that i am afraid wont come as easy as it comes to your head. Is there any suggestion how to train and drill the creativity? Or it just comes with experience? Or may be you suggest to see someone’s photographs as much as possible?
Thanks Karl,
I wont regret the money spent in this web platform
Hi Gilanka, thank you for your comments. Yes this does come with experience but you can take inspiration from many places such as other photographers websites, art, pintrest etc etc. This will help you develop new ideas of your own that you can then sketch.
1. what is the best technique to paint a background, so it will become smooth and looks contsant ?
like in this tutorial – the KONIAC colored background.
is it by spray ?
by brush ?
2. what kind of color ? acrilic ? oil paint? color based on water ?….
3. on what surface ? simple foam card ?
Hi,
1. We use rollers
2. Matt interior water based paint
3. MDF or hardboard or a plastered wall
thank you very much.
you are the best !!!
J’ai beaucoup appris de cette leçon . Merci Mr Taylor.Merci pour votre talent et votre pédagogie.
De Rien
Hi Karl,
Just subscribed. I had a question on how would you get the color of the liquid in the glass to be the same as the color of the whiskey? (as the bottle is sealed). Thank you!
Hi, You have a second bottle open already.
Hi Karl,
Nenad
I’m in Denver.
Can you please tell me where is the best place to go or what website is the best to buy Lee filter 216 diffusion material?
Thanks/ Hvala
Hi Nenad, I’d start with this – https://www.leefilters.com/dealer-lighting.html
I ordered mine from B and H.
https://www.bhphotovideo.com/c/product/1435058-REG/lee_filters_216rw_1_white_diffusion_filter_60_x20.html/reviews
Hi Daniel, thank you for the info but that particular one is quite small, it’s the correct material but the rolls we use are 1.52m wide by 7m long and are less expensive than that one?
Hello Karl,
An (maybe good, that would be up to the photographer) alternative for the Lee defusion paper could be white baking paper. It doesn’t come as wide as the Lee, but it doesn’t catch fire and if gives surprisingly good results on bottles. I use for the moment and you have to play around with the power of your strobe, but it gets the job done..
Regards
Philip
Great Cheers
Hello good morning Karl and team,
I have a quick question. Any tips on taking pictures from dark bottle. I did a shoot a couple of days ago with a dark brown beer bottle (Brown Leffe) and I was not able to reflect light through the bottle, but when I went outside and held the bottle the to sun I got a nice dark natural glow. But no matter what i did inside I was not able to replicate it. I tried putting the flash behind the bottle but that looked to much over the top and bouncing light back with a reflector was not strong enough. Any tips Karl? Thanks a lot.
Hi Philip, I think if you had enough light on the front of the bottle then some should have been able to reflect through, so the physics says you need more light through either off of the reflector or directly. You can weaken the power of any flash by using ND gels over them.
Hello from Finland!
I joined KTE few weeks ago and i have to say it´s really worth money!! Learning so much everytime, in every tuto and live workshop! For sure the best investement i have done seens the begening of the year.
Thanks Mark
Hello sir… your tutorials are too good….I just wanted to ask y did you feel the need to use colour balance card……and what difference does it make when you use diffuser instead of scrim in front of softbox???
Hi, Yes I generally use a colour balance card to measure the grey levels to check they are neutral before I process the file. I don’t quite understand what you mean a scrim is a diffuser?
Good job, a few useful tips for added finesse. How about a downloadable lighting diagram to help us remember?
Hi Barnymobil, thank you. Unfortunately we aren’t going to produce those, the videos are there for members to enjoy and reference for as long as they are members. Cheers Karl.
“don’t use a tea spoon to dig up the garden”, that is the best possible advice! hahahahaha
Karl you are the King! Have a nice weekend.
Ha Ha I liked that one too 🙂
i liked it too..ahahha
btw..i like the way u teach..direct easy to understand and no waisting time–with boring talk:)
Hi Karl and KTE Team, thank you for an amazing workshop ,the whole content here is amazing I must say.
Brilliant teaching skills – definitely my best investment in learning photography so far .
I do have one question in regards to the set up of this shot.
I managed to get a LEE 216 diffusion which is 122cm x 122cm -Now if I want to try similar set up of a beverage shot would I need slightly smaller Strip Softbox for example 30×90 ?
Am I right thinking that 30×120 would spill the light as it would be bigger than the scrim ?
And would that be sufficient size of a soft box or even the scrim for this type of shots?
Thanks
Michal
Sorry, regarding my previous question :
I meant that the softbox would almost be as tall as the scrim – only 2 cm difference is that ok ?
No I think that would be fine as you often have the softbox further from the scrim so it would appear smaller than the scrim from the subjects perspective. Why didn’t you go for the 150cm wide roll 7m long?
Thank you so much for answering my question.
In regards to size I had a decent offer on that size.
And to be honest this is going to be my first product shot experiment.
If I “pass the test” I will defenitly invest with and get the big roll.
Massive thank you again for sharing the knowledge with us.
👍
Hey Karl,
Any suggestions on a good substitute for the broncolor projection attachment? Not much on the market in the sub 300 range..
Hi I don’t know any specific ones but there have been a few comments referring to independent brands on some of our other shows in the comments sections I believe.
What a great video, with informative and clear instructions leading to a top-class product shot. Fun too!
Thank you Graham for the great feedback!
Great tutorial Karl! from one of my Fav Photographers, i love the way you teach!
Very kind thank you.