
Motorcycle Photography
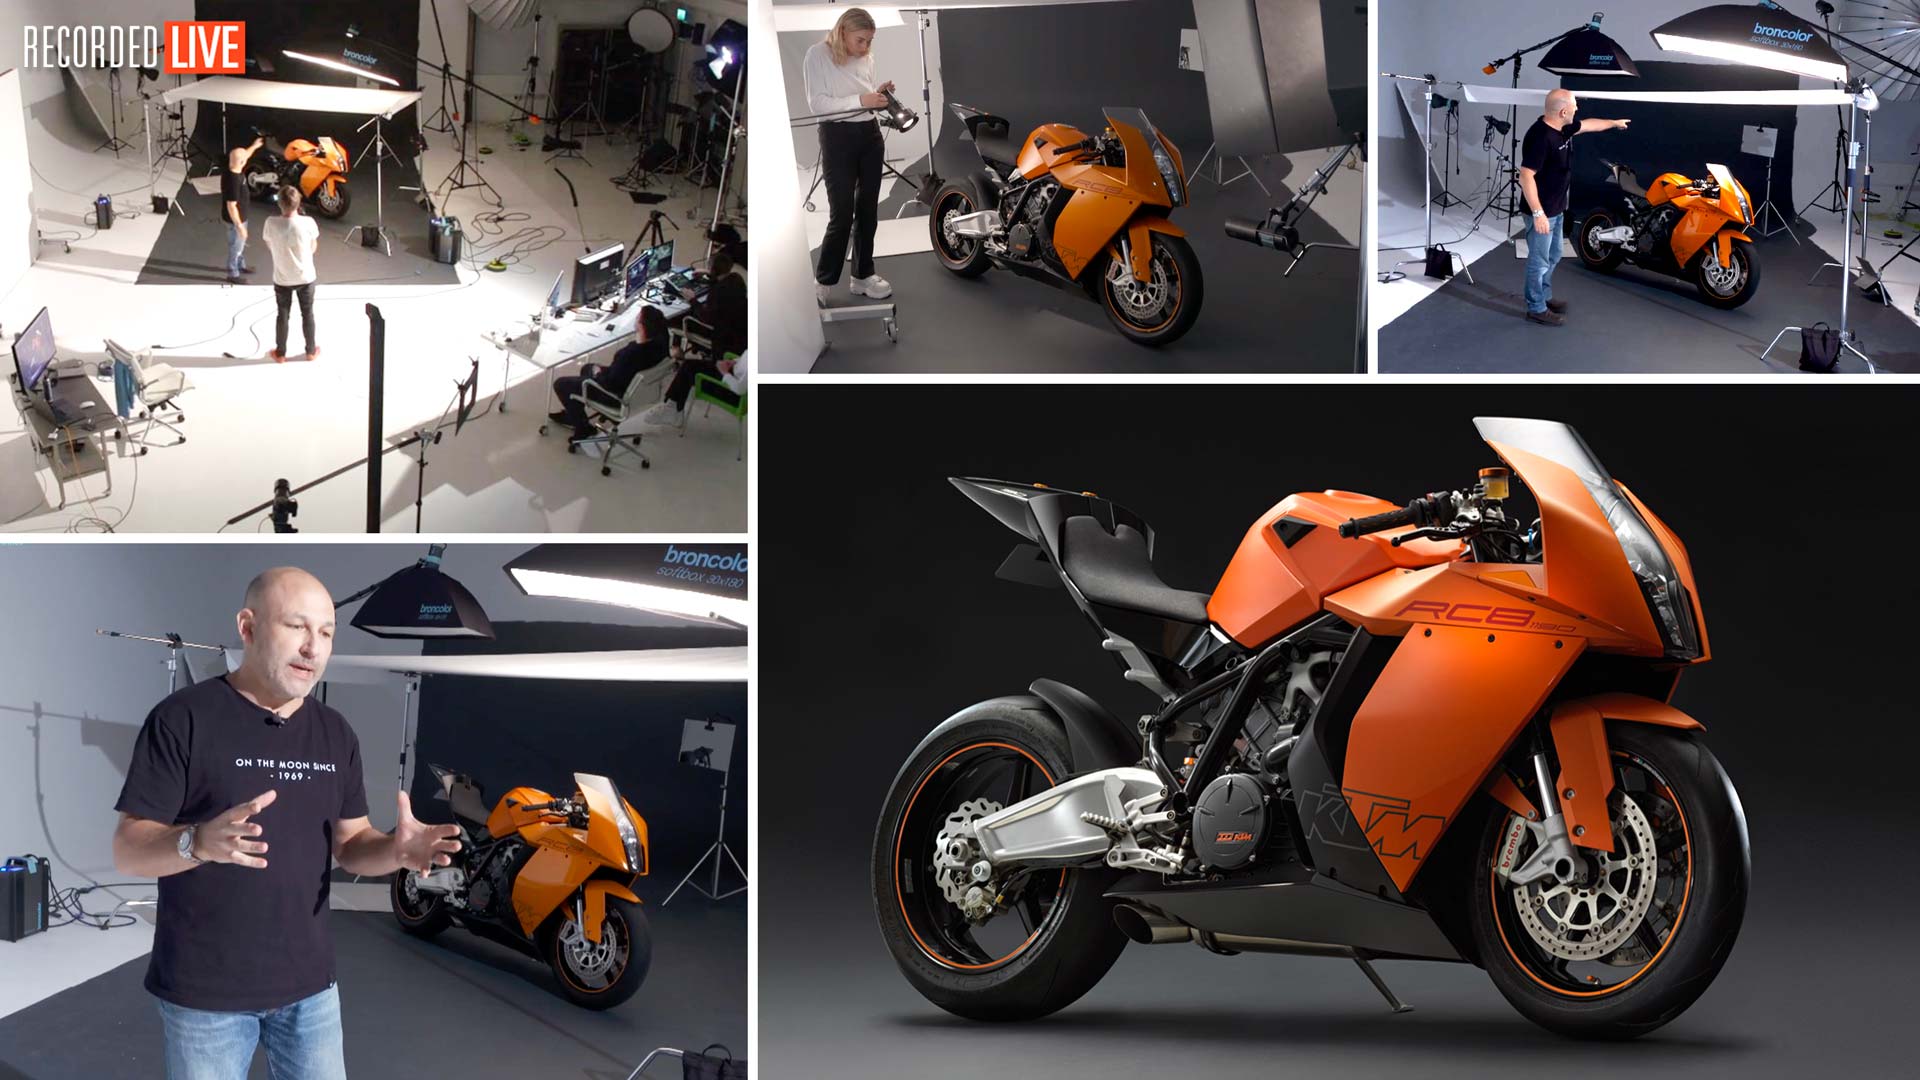
In this live motorcycle shoot, Karl demonstrates how he photographs a KTM RC8 sports bike.
A highly complex (yet equally enjoyable) shoot, Karl talks you through the entire process, explaining how to work with different lines, surface textures and lights to get the most aesthetically pleasing result. Throughout the shoot you’ll see what aspects Karl considers when it comes to the bike, the background, lighting and camera settings as he explains his thought process and workflow.
Starting with his key lights, Karl demonstrates how to create pockets of light to draw attention to the most important areas of the bike. He also demonstrates how to use accessories such as reflectors, flags and mirrors to precisely control the light to get the very best results.
This information-packed show covers valuable information pertaining to studio light and how to control it, which can easily be applied to numerous other products, including car photography.
In this photography workshop we cover the following:
- How to photograph a motorcycle
- Lighting setups for motorcycle photography
- How to photograph reflective surfaces
- Lens choice, equipment and camera settings for motorcycle photography
- Tips for controlling multiple studio lights
- How to recognise and prevent flare
- Using reflectors and flags for effective product photography
- What to charge for motorcycle photography

If you have any questions about this show, please post in the comment section below.
Read more in the accompanying ‘Motorbike Photo Shoot‘ blog post here.
Comments
Brilliant demonstration, Karl.
Those fine touches truly make a world of difference in the final product.
This reminds me of a light painting exercise I did many years ago to photograph a
single engine airplane in its hanger.
(on 5×4 transparency) Don’t think I’ll attempt that again.
Cheers
Thanks Michael, yes I can imagine light painting an aircraft would have been tricky especially on film!
Hi Karl.
Amazing class as always. My question: are clients actually willing to pay 10k for a shoot like this? I’m curious how often you encounter that kind of clients… in my experience, clients don’t want to pay, lol.
Hi Hector, it wouldn’t have necessarily been £10K unless it was for Honda, KTM or Kawasaki. It essentially could have been done in one day so you have to consider would you have been happy to do it in one day and charge your day rate to the client if it was a private client and not a manufacturer? You have to consider your studio space, time, equipment and post production and the standard that of the work you are producing. I don’t believe the ‘clients don’t want to pay’ because it depends on the clients. I recently had a client who was a little similar, they wanted to purchase a lot of images that I had produced for something else but I held the right to, they offered me £700 and I told them the price was £7000 and explained why. I didn’t hear from them for a week and then they came back with another offer I said no, in the end they came back and paid the £7000. There are many clients who will try to negotiate and get the best price, that is business after all – it’s up to you how firm you are with your prices and how much you believe in your own work and its value compared to your competitors.
Perfectly done, congratulations! Thank you Karl and all the team, cool and talented people!
Thank you very much!
Hi Karl. Another amazing live show as always. I was wondering if you have a video on how to construct that moving wall. That’s exactly what I’ve been trying to build lately and I’m wondering how it was done.
Hi Thanks, unfortunately I don’t but I can tell you I had my local metal workshop make it based on a sketch. It’s a metal frame with metal ‘T’ posts sticking out at the bottom for the wheels. We then secured timber inside the frame to screw the flat boards to ready for painting.
An impressive image and a spectacular photography lesson, thank you!
Thank you.
Oh this is massive! Many thanks for your efforts in bringing this to us. Alot of knowledge shared here. Superb 😉
Thanks again.
Enjoying my first day here and eager to learn more everyday .
Cheers
Great stuff.
Hi Karl. I absolutely loved this episode. It is one thing to take that much time to painstakingly create and shoot a masterpiece, but a whole different ballgame to recreate it from scratch within a span of 2 hours and explain it in the most lucid way possible. Hats off to you. I’ve learnt a lot observing your methods.
Thank You
Thank you very much.
Great learning experience again. Thank you!
Maybe it’s an idea to color code your lighting cables with little pieces of colored tape at both ends? Could save some time following the cables to the correct socket to adjust settings.
Good idea.
Great job, thanks! Did you post the retouch anywhere?
Hi Andrew, thank you – In our Product section https://visualeducation.com/product-photography-courses/ you may have noticed that we have a second motorcycle shoot coming on the black Honda Fireblade. There is a full post production tutorial coming with that one as I go in to much more detail and have to fix more things. The orange one didn’t need much work because of the way I shot it, in fact if you look on my instagram account and swipe the slides you can see the raw shot and the final. Cheers Karl.
So, finally got round to watching this as Im on furlough. Great show very informative and inspirational . Thanks Karl for sharing this with us.
Thanks John.
Hi Karl,
maybe i missed some messages, i would like to ask, what reason to use black background for this?
Hi, the background goes from grey to dark grey to black. You can maybe see the final image better here https://karltaylor.com/overview – I know why I’ve used this background and I’m happy to explain this but before I do may I ask what reason you are asking the question? For example did you think a white background was appropriate to this type of shot and why? The simple answer is about mood what type of emotion are you trying to convey. I recently completed a car project for an advertising campaign and that background was white, because the mood of those shots and cars was meant to invoke fresh, punchy, clean, bright, happy. But that is not the mood you want to create for a 200mph sports bike.
I’m thinking the subject is to be cut out, why not shoot in white background. Because thats too much work to repaint studio.
And now I understand d, shoot in white bg will getting white edge on the subject when placed to black background.
Thanks for the reply!
Hi, karl are those mini lights are continues lights?
I Love pre- empting where your going to position your lighting, and realizing how much I’ve learnt buy you lessons, Karl Thanks Mate
Thank you Mark very kind. I’d like to add that often when I’m presented with a product large or small, initially I don’t know where I’m going to put my lighting. There are two important factors that dictate where it will end up, the first is what is the overall mood that i’m trying to acheive; desirable, sexy, punchy, fresh, ominous, mysterious, bright, fun, dark, edgy, warm, cold, energetic etc etc. The context of mood can be considered through these words or words like them that immediately provide you with a feeling or an emotion that the style of the lighting will need. The second is the products intrinsic aesthetics and assets, its shape, its materials, its form – these are the attributes of the product that I can work with, exaggerate or diminish through lighting (or sculpting with light) and when I obtain the product for the first time I spend considerable time evaluating it from many angles discovering these attributes and considering its materials. In addition the emotion that the product should be invoking can often be deduced from the product itself – for example there is no point fighting what’s there – this motorbike is extremely fast and extremely angular, slightly menacing looking, yet bright orange at the same time. So it becomes that that is what I’ve got to work with and those are undeniable elements of the products character that need to be acknowledged. So it’s very much about evaluating the product first and I’ve almost finished my lighting mentally before I’ve even plugged the first one into the electric socket. Yes of course things change a bit along the way but by and large where I end up is where I wanted to end up. I hope that helps, cheers Karl.
OMG what a juicy live show. Thank you Karl for this one hope you are safe with all things going around in the world
Thank you, and you too.
Hello Karl,
I am loving these tutorials and live shows. The subscription really is excellent value for the money. When I signed up, I was thinking I’d cruise through the videos in the first year and that would be it but now I plan on renewing my subscription annually. As someone who started an academy in the Netherlands (for CG artists) I know how difficult it is to decide what the students need to be taught and how to teach it in order to understand professional standards and expectations. You do an excellent job in both these areas. If I had known about you when I was there, I would have tried to get you to come out to lecture our students on CG lighting. They would have been inspired I am sure.
This particular video pops up every time I go to your site but I have been avoiding it as I go to the subjects that interest me the most. That said, this is now among my favorite videos and I want to get my beautiful black Trek Madone (a bicycle) out of my garage and light it up for a shot. I’ve wanted to shoot it for a long time but its multitude of long thin shapes put me off. After watching this video, I have an idea how I might pull it off. The motorcycle has a much greater surface area though, so I remain a bit corned about how to do it.
Thank you, we have a racing bicycle shoot tutorial coming later in the year.