
Introduction: Keeping the Focus on Your Model
Master the essentials of natural-light portraiture on location.
This natural light photography course will help you master a number of different techniques when using just natural light and your camera. This section covers photographing single subjects, couples, families, children and group shots and will help you understand how to find the right location, know when the ideal time for photography is and identify the best light for photographing.
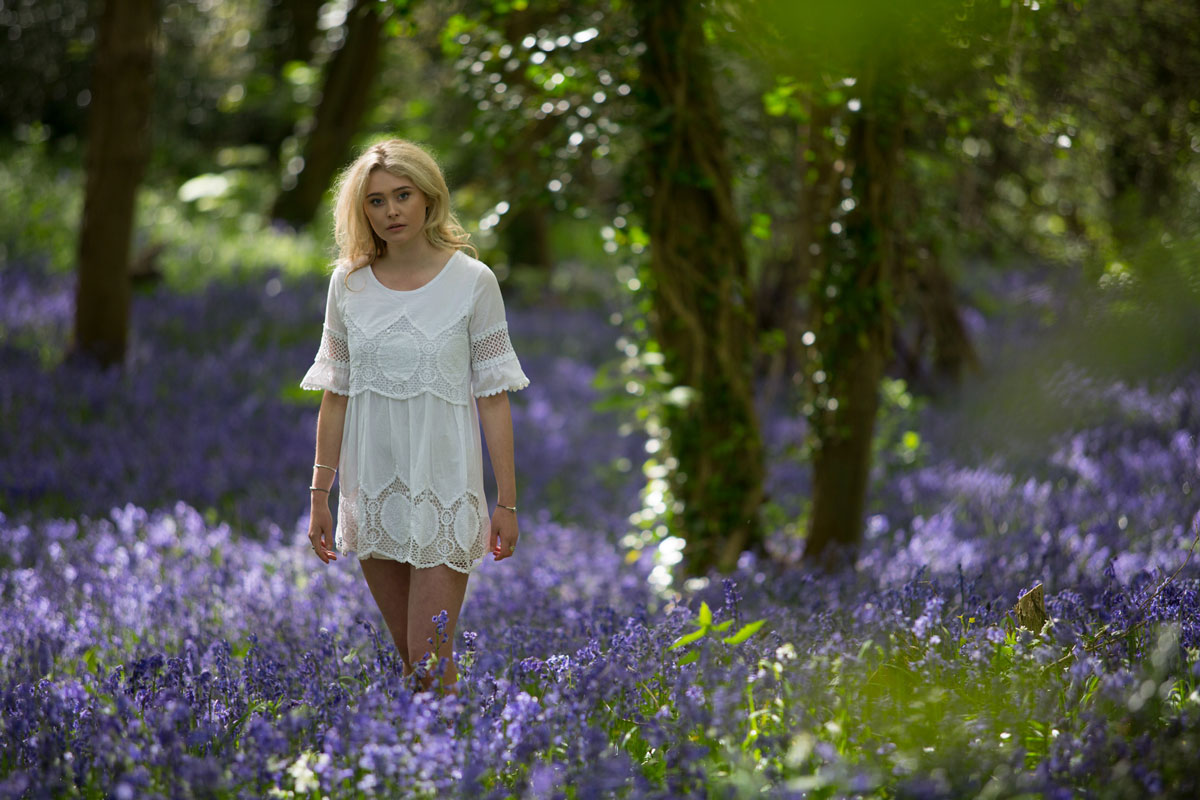
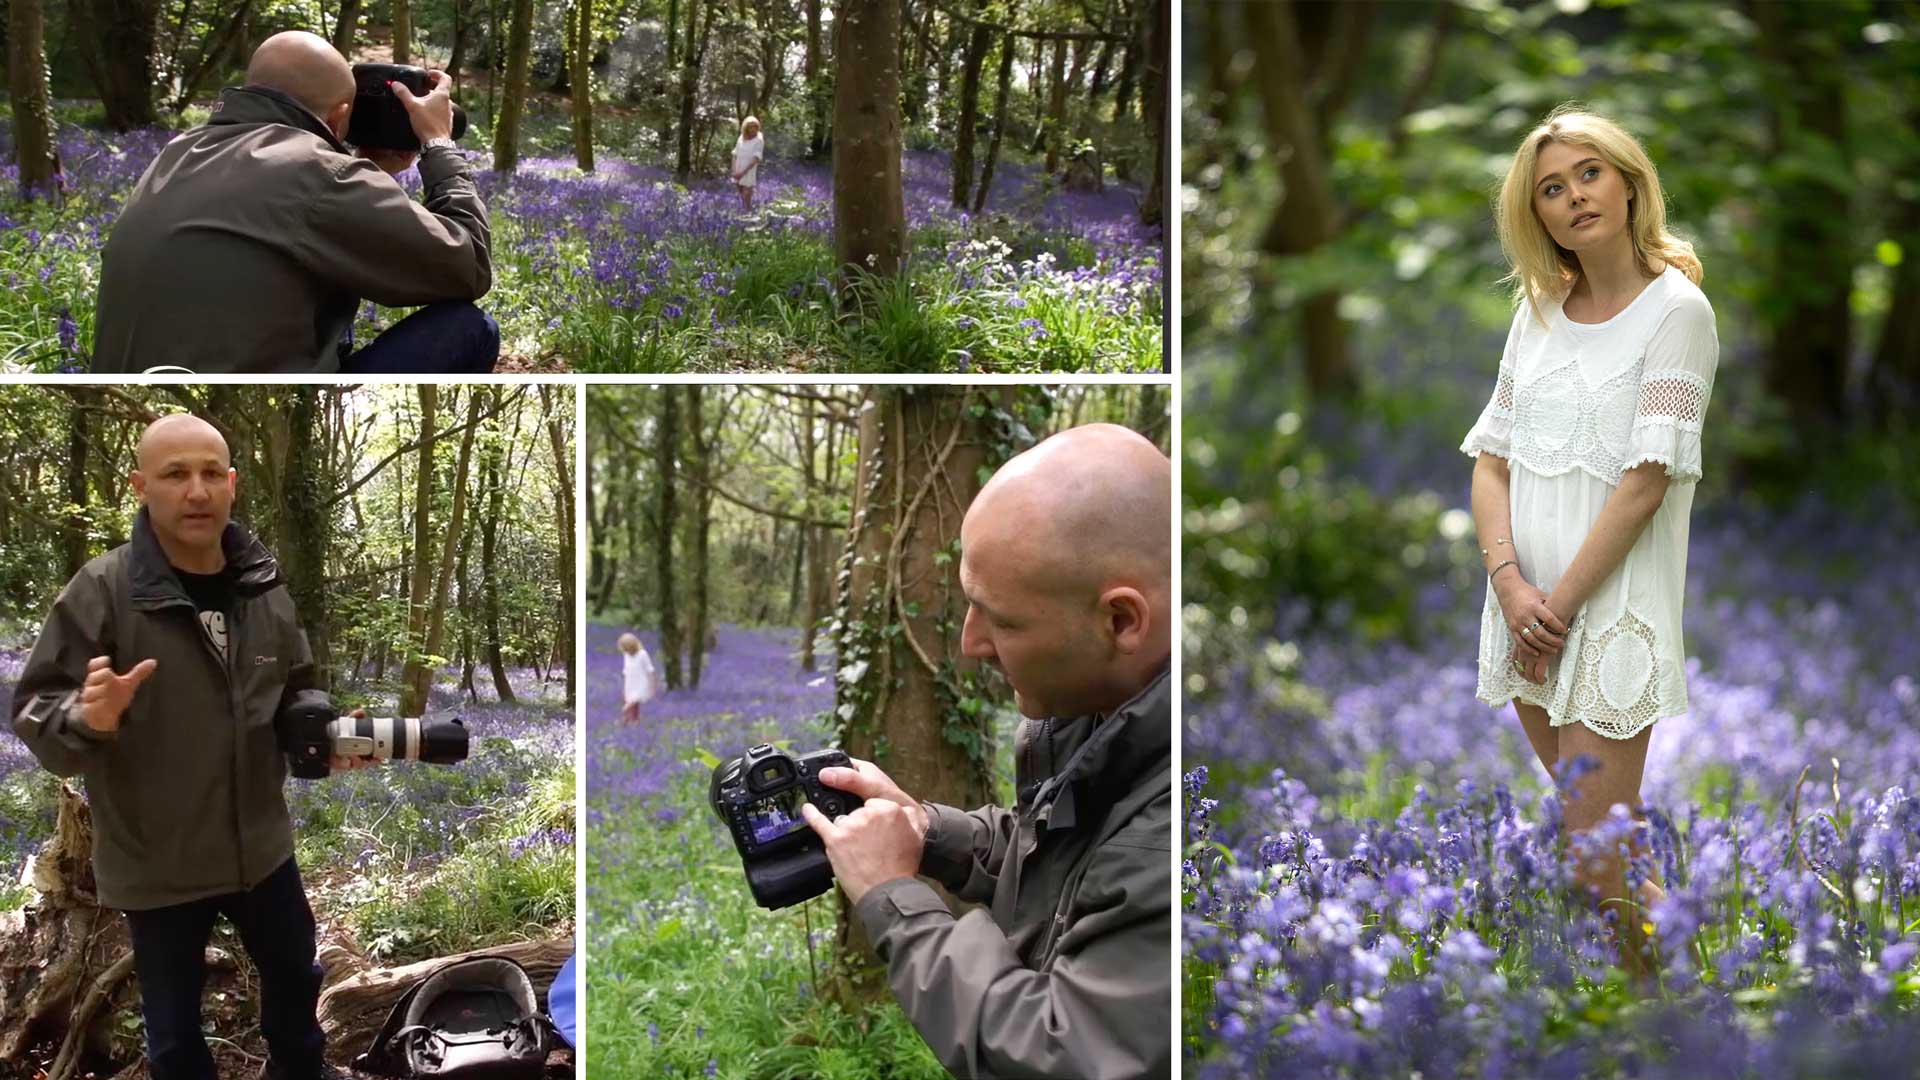
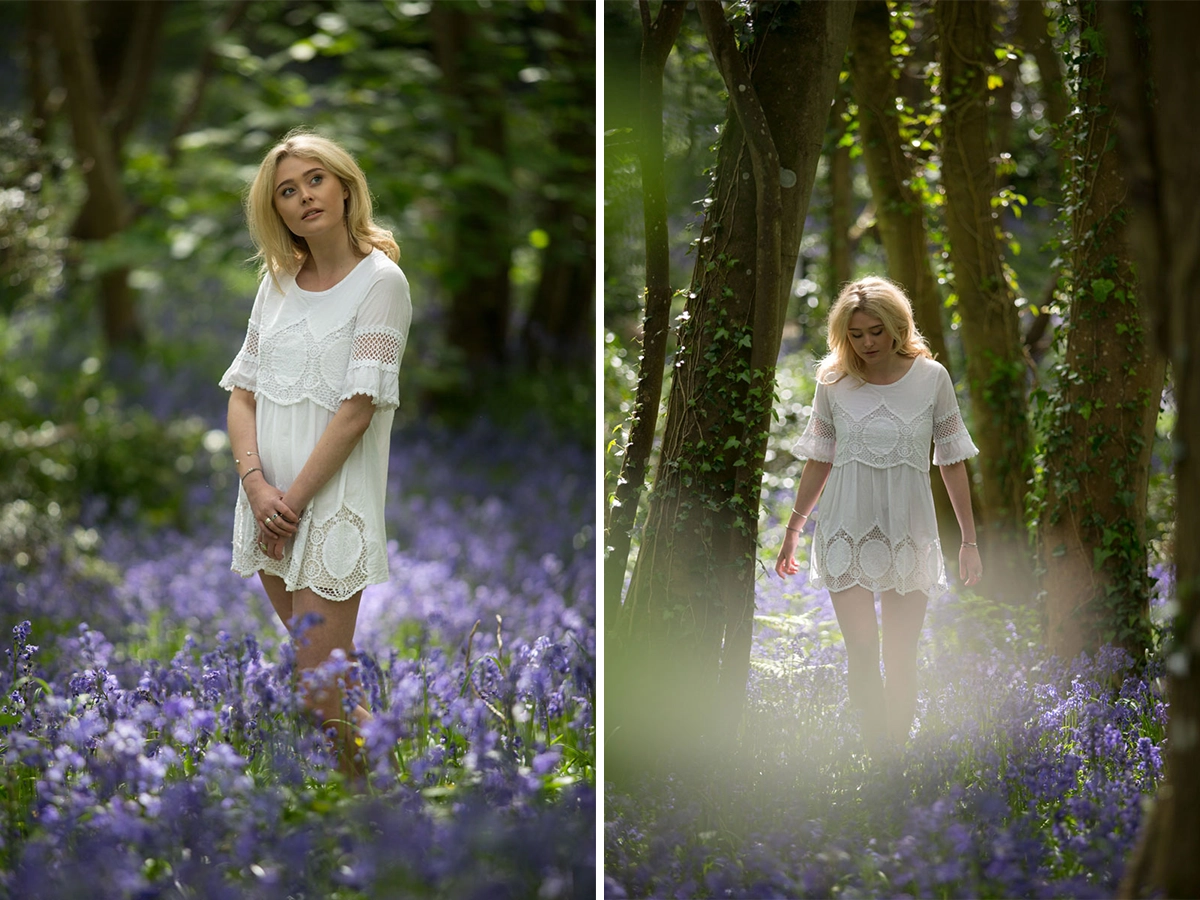
This photography class is an outdoor portrait in a stunning location, but beautiful locations can sometimes be tricky. They can be quite busy, which can make it difficult to keep the focus on your model.
In this photography class, Karl explains the basics of photographing with natural light before going into detail about how to isolate a model in a busy setting such as this. He also points out the best light to photograph in and explains why before showing you exactly how to make the most of available light by carefully positioning your model and waiting for the perfect moment.
In this class:
- Portrait photography using natural light
- How to use natural light for outdoor portraits
- Camera settings for outdoor portraits using natural light
- How to pose your model
- Creative composition for outdoor portraiture
Questions? Please post them in the comments section below.
Comments
Hi Karl,
Helpful tutorial as always.
Thank you Reza.
Hi Karl, another great instruction video. Do you ever find that you get a lot of green reflections/casts on models when you shoot in the woods? I have found myself having to correct the hue on skin tones that end up looking excessively green even when I neutralize the image colour temperature from the grey card the model holds up. Is there a good technique to capture neutral skin tones in camera whilst out in the greenery?
Hi Joe, yes this is a problem because all of the foliage acts like one big green reflector. A large grey card should solve the problem though as if you neautralize to that in post then you have eliminated the colour cast. If doing it manually I just pull a touch of magenta in on the curves or tint.
Hi. I just need to know that, if i don’t get such lighting conditions during my time of shoot. Then how to get good images.
Hi, you go back when the light is better 🙂
I recently found expodisc. Check it out. This one is used mainly to avoid color casting I believe. I bought one 3days ago still need to experiment 🙂 Google expodisc and watch videos.
Hey Karl, this is my first day here and this the first course i saw. It’s very interesting with good tips. And the resulting images are really great. But I have a question: The model is in the green forest with many bluebells. This results in a color cast of her skin, isn’t it. How do you handle the color cast in these images?
My english is not my native language so I hope you understand me. 😉
Thank you.
Oliver
Hi Oliver, if you are shooting raw files it is quite simple to adjust colour. You can do this with local adjustment brushes in Lightroom or more precisely in Photoshop. How to do this is covered in our post production section.
Thank’s you Karl. useful !
its my fascinate area of photography
I am so thankful to provide us a fantastic stuff
GREAT COURSE KARL? WELL DONE AND NICE VIDEO EFFECTS 🙂
Hey Karl great video one question are you a fan of backbutton focus on DSLRs
Hi Stephen, I know many photographers who are and it looks useful but to be honest I just haven’t got into the habit of trying it to see if I like it. As most of my work is product photography in the studio I’m often focusing in manual.
This is not the first online course about photography i do. I enjoy watching you but i have the same problem that i have with all the other tutorial.
You guys have to know that people who buy this kind of tutorial usually don’t have a full frame camera or a 1.500$ lens. We or I have a camera with APS-C sensor and a “normal” lens.
So just for once i would like to see a tutorial when professors use this kind on equipment. Otherwise it is just sad to watching this.
Maybe in a future, i hope to buy a 70-200 2.8 lens. But now its imposible for me.
I hope you understand my point. My english is limit.
Hi César,
You make a good point. I am lucky enough to have both a full frame and 70-200mm. Although, I find the tips on composition (framing the shot, keeping trees and obstacles away from the subject, and learning how to use the backlighting, much more valuable than the shots that were taken with a full frame and 70-200 lens. The tips here should be applicable to any DSLR camera and most lenses.
Did you use the daylight white balance because of the shadows/shades from the trees or you used it because your are shooting with the sun as your lighting?
Hi Laurenta, primarily because it was sunlight but to be honest as I’m shooting in RAW I know the colour temperature can easily be adjusted later.
can anyone tell me how the camera catch shot happened.
dear Karl,
just fantastic tutorials!
kind regards
Ramin
Whats the slowest shutter speed you find you can get away with hand holding the camera without camera shake blur in the image? I usually find I have problems if slower than 1/800 sec but I am rather shaky as well. I suppose I just need to practice being more steady but I just hate to risk losing a great shot and often sacrifice ISO to shoot at around 1/1000 to be certain.
Hi Jason, this will always depend on your focal length. In the Travel and Landscape course you will see me shooting handheld at 1/8th and 1/15th with a 16mm lens but this would not be possible on a 200mm lens, my general rule is don’t go lower with the shutter speed than the focal length such 1/200th with 200mm but that’s me being practised in shooting very still and composed. 1/800th should be absolutely fine on a 200mm lens?
great episode Karl this has been a massive help!
You are welcome Samuel.