

Natural Light Portrait
In this photography class, Karl explains how to take great portrait images using natural light.
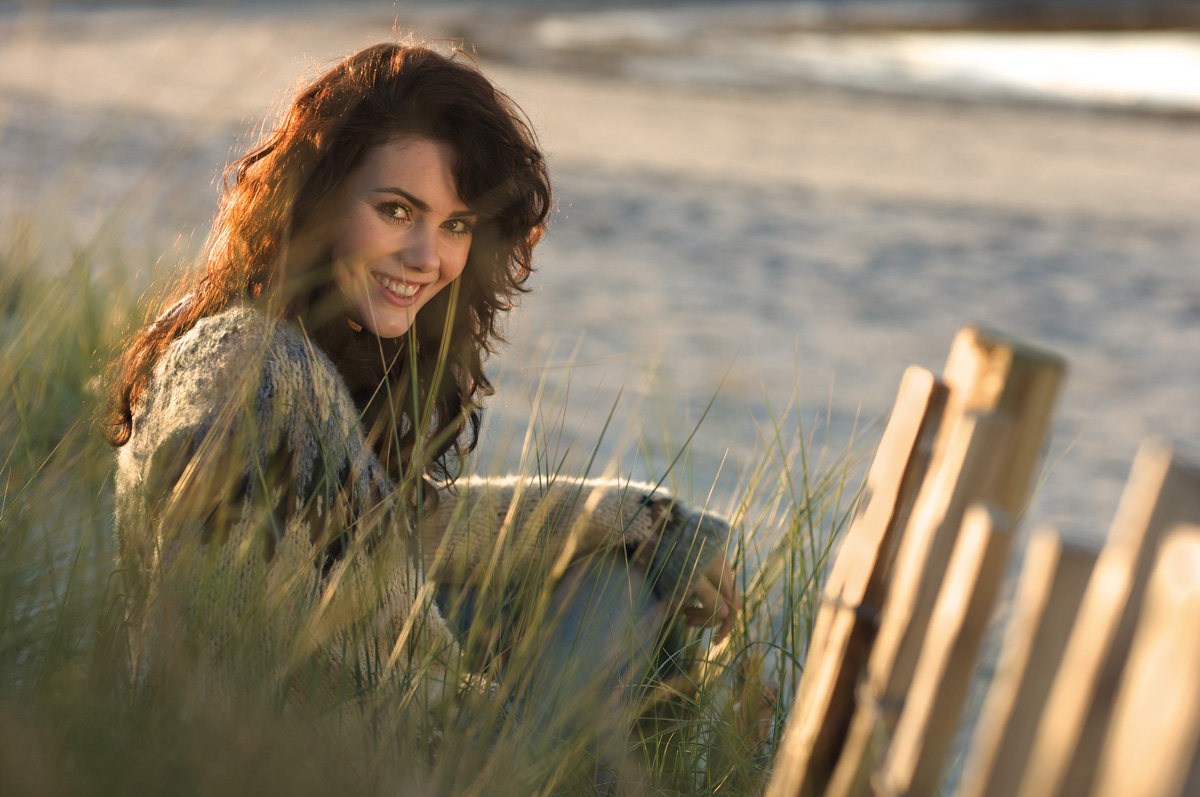
Beautiful natural light at the right time of day can go a long way towards creating the perfect portrait. Here, Karl explains five important factors he feels are key to good portraiture. This essential knowledge will help guide you when it comes to capturing your own great photos of people using just natural light and reflectors.
In this class:
- Portrait photography using natural light
- How to photograph people outdoors
- How to use reflectors for portrait photography
- Camera settings for natural light portrait photography
- Which lens to use for portrait photography
Questions? Please post them in the comments section below.
Comments
Hi Karl,
Do you think a 50 mm prime lens with a full frame DLSR is good for Portraits?
Hi, not really an 85mm would be better. A 50mm can be good for portraits where you are keeping more of the surroundings in such as in environmental portraits.
Hi Karl, you say the 85mm lens is perfect for your full frame, does that mean the 50mm lens is perfect for an APS-C?
Ric
Hi, yes more or less although you can use an 85mm but you will be further back
Hi Karl, I wish you could write the settings of each shoot in the same way of the gear you used. It would be great!
I’m really satisfied for being part of this!
Thank you so much!
Thank you.
I tried the Zeiss Batis 135mm portrait lens and all I can say is you need a lot of space if you don`t want to be restricted to head shots. I guess I had to be about 35 feet away backed up against a wall for full body shot, so large studio or outside location required. Maybe if you have a small studio and work there a lot then 85mm would be more suitable.
Hi Chris, I can imagine and I generally prefer 85mm anyway, it also makes communicating with your subject more sociable.
Hi Karl
Excuse me, what’s the difference between a reflector and a flash to fill light in this shoot?
Hi Wei, the flash let’s you put more or less light than a reflector, if you wanted less light with a reflector then you would have to move it further away but there will always be a maximum amount of light you can add with the reflector.
Hi Karl, I only recently signed up to your site. Very instructive videos. For this particular shoot, you were shooting quite rapidly. How did you ensure the focus was right, especially considering the shallow depth of view? Did you use manual focus or did you rely on the camera? Thanks, Richard
Hi Richard, thanks for joining. I often use manual focus and on shallow depth of field like this sometimes I just get the shot in the focus zone and then fine tune by rocking back or forwards until it looks sharp, that’s easier to do on Medium Format as the viewfinder is brighter and bigger, here I was using 35mm and I then I usually select the focus zone that I want to use, place it on the models eye and then use the AF. Focusing with AF zones is covered in the Introduction course. Cheers Karl.
Hi Karl,
Jorge from Argentina, here.
I wonder in a shooting like this, where do you position your photometer (the one built into the camera)? On the darker side of the face or rather on the lighter one? Do you choose multipoint or focal point metering?
Kind regards and thanks,
Jorge
Hi Jorge, It always depends on what you want to achieve. I generally just use the average metering mode and get a ballpark exposure to check then I adjust manually for example maybe make the shot half a stop darker if I want more sky detail. Obviously the model will become darker but this could be overcome with the reflector and flash. I don’t rely on the metering, often I don’t use it at all. I just set the camera to what I think it will need or a predetermined aperture for DOF effect and then work from there.
Hi Karl, May I ask was it around sunset when you took this shoot? Or the technique of shooting into the sun can apply for any hour of the day (morning, midday)?
Thank you Karl?
Hi Thi, it was fairly close to sunset and it is always better to apply this technique early or late in the day when the sun is low in the sky.
thank you so much Mr Karl!
Hi, Karl, I’ve read what you wrote previously, but let’s say you forgot your 85 mil at home (I don’t own an 85 🙂 ). What would you go for instead in this particular shot? Your prime 50 or your prime 100?
Hi
Amazing videos, what is the best focal range for portraits in a crop sensor?
Hi Alex, the best focal length for portraits in full frame 35mm is 85 to about 135mm and you can also use 85mm on a crop sensor but I think 135mm will require you to move to far back so I would say between 50 and 90mm.
Everytime you ask the model to smile i was smiling too :p
Hi Karl,
Your videos are great.
You always say look at the light meter to get the best exposure when shooting manual but when is it necessary to change the camera’s metering mode? (matrix, centre-weighted or spot) What was used for this shoot?
Thanks
Hi Sam, to be absolutely honest I only use my camera in the matrix metering mode and even if it wasn’t in that mode I’d doubt I would notice as I only use it to get me in the ball park and then I assess the image based on the preview and histogram and then I make all my exposure settings from there and forget about the light meter.
And a beautiful model*
Hi Karl,
What aperture is best to use for Patriots? I know it depends the situation but in a general view ?- what is used on this picture ?
Hi Prasantha, you are definitely correct that it does depend on each situation and what background detail you want to keep. It also depends on the camera format and lens used as they all have different depth of field ‘looks’. But if you had to push me then I would say f2.0 or f2.8 would be a good choice on a FF 35mm camera in the focal range of between 70-135mm.
Hey karl,
Would be great to see more tutorials on speed lights in coming videos,
Maybe a skate park or doing a city Night portrait scene with flash.
Thanks.