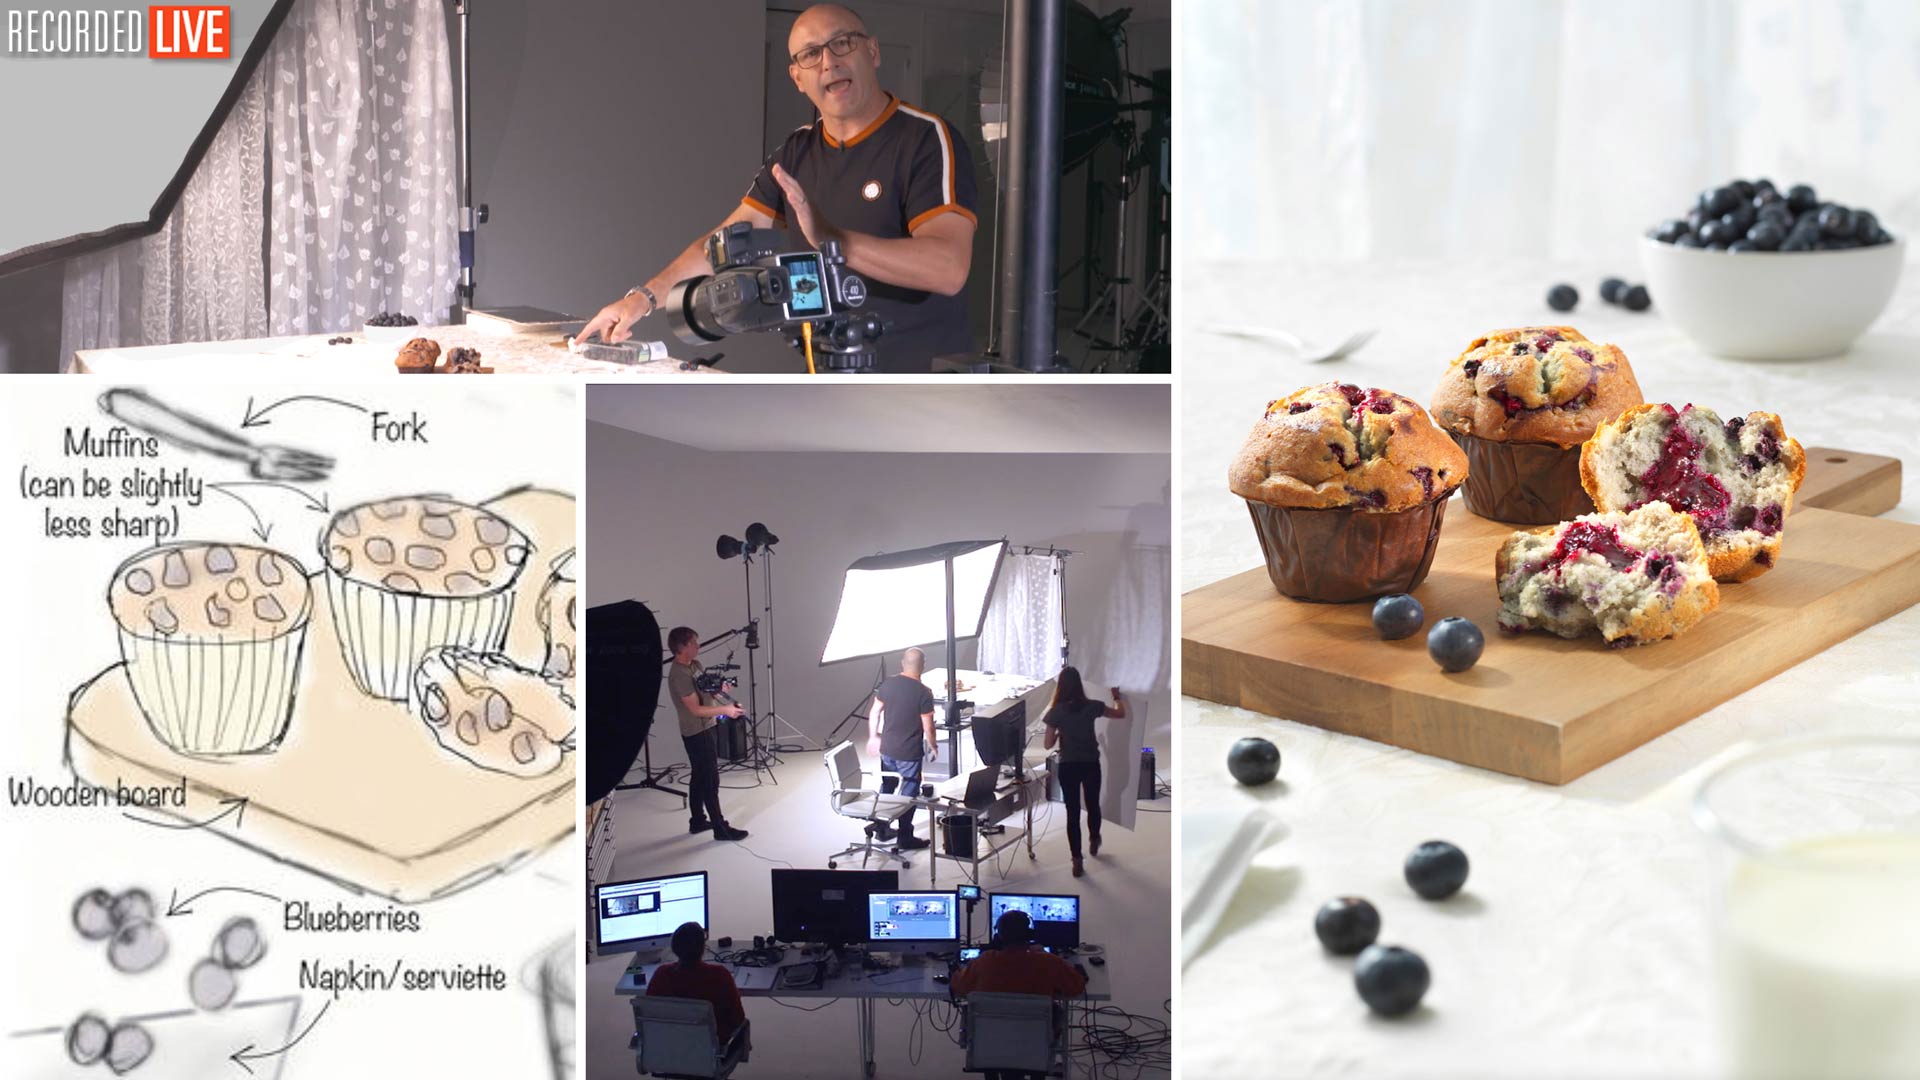

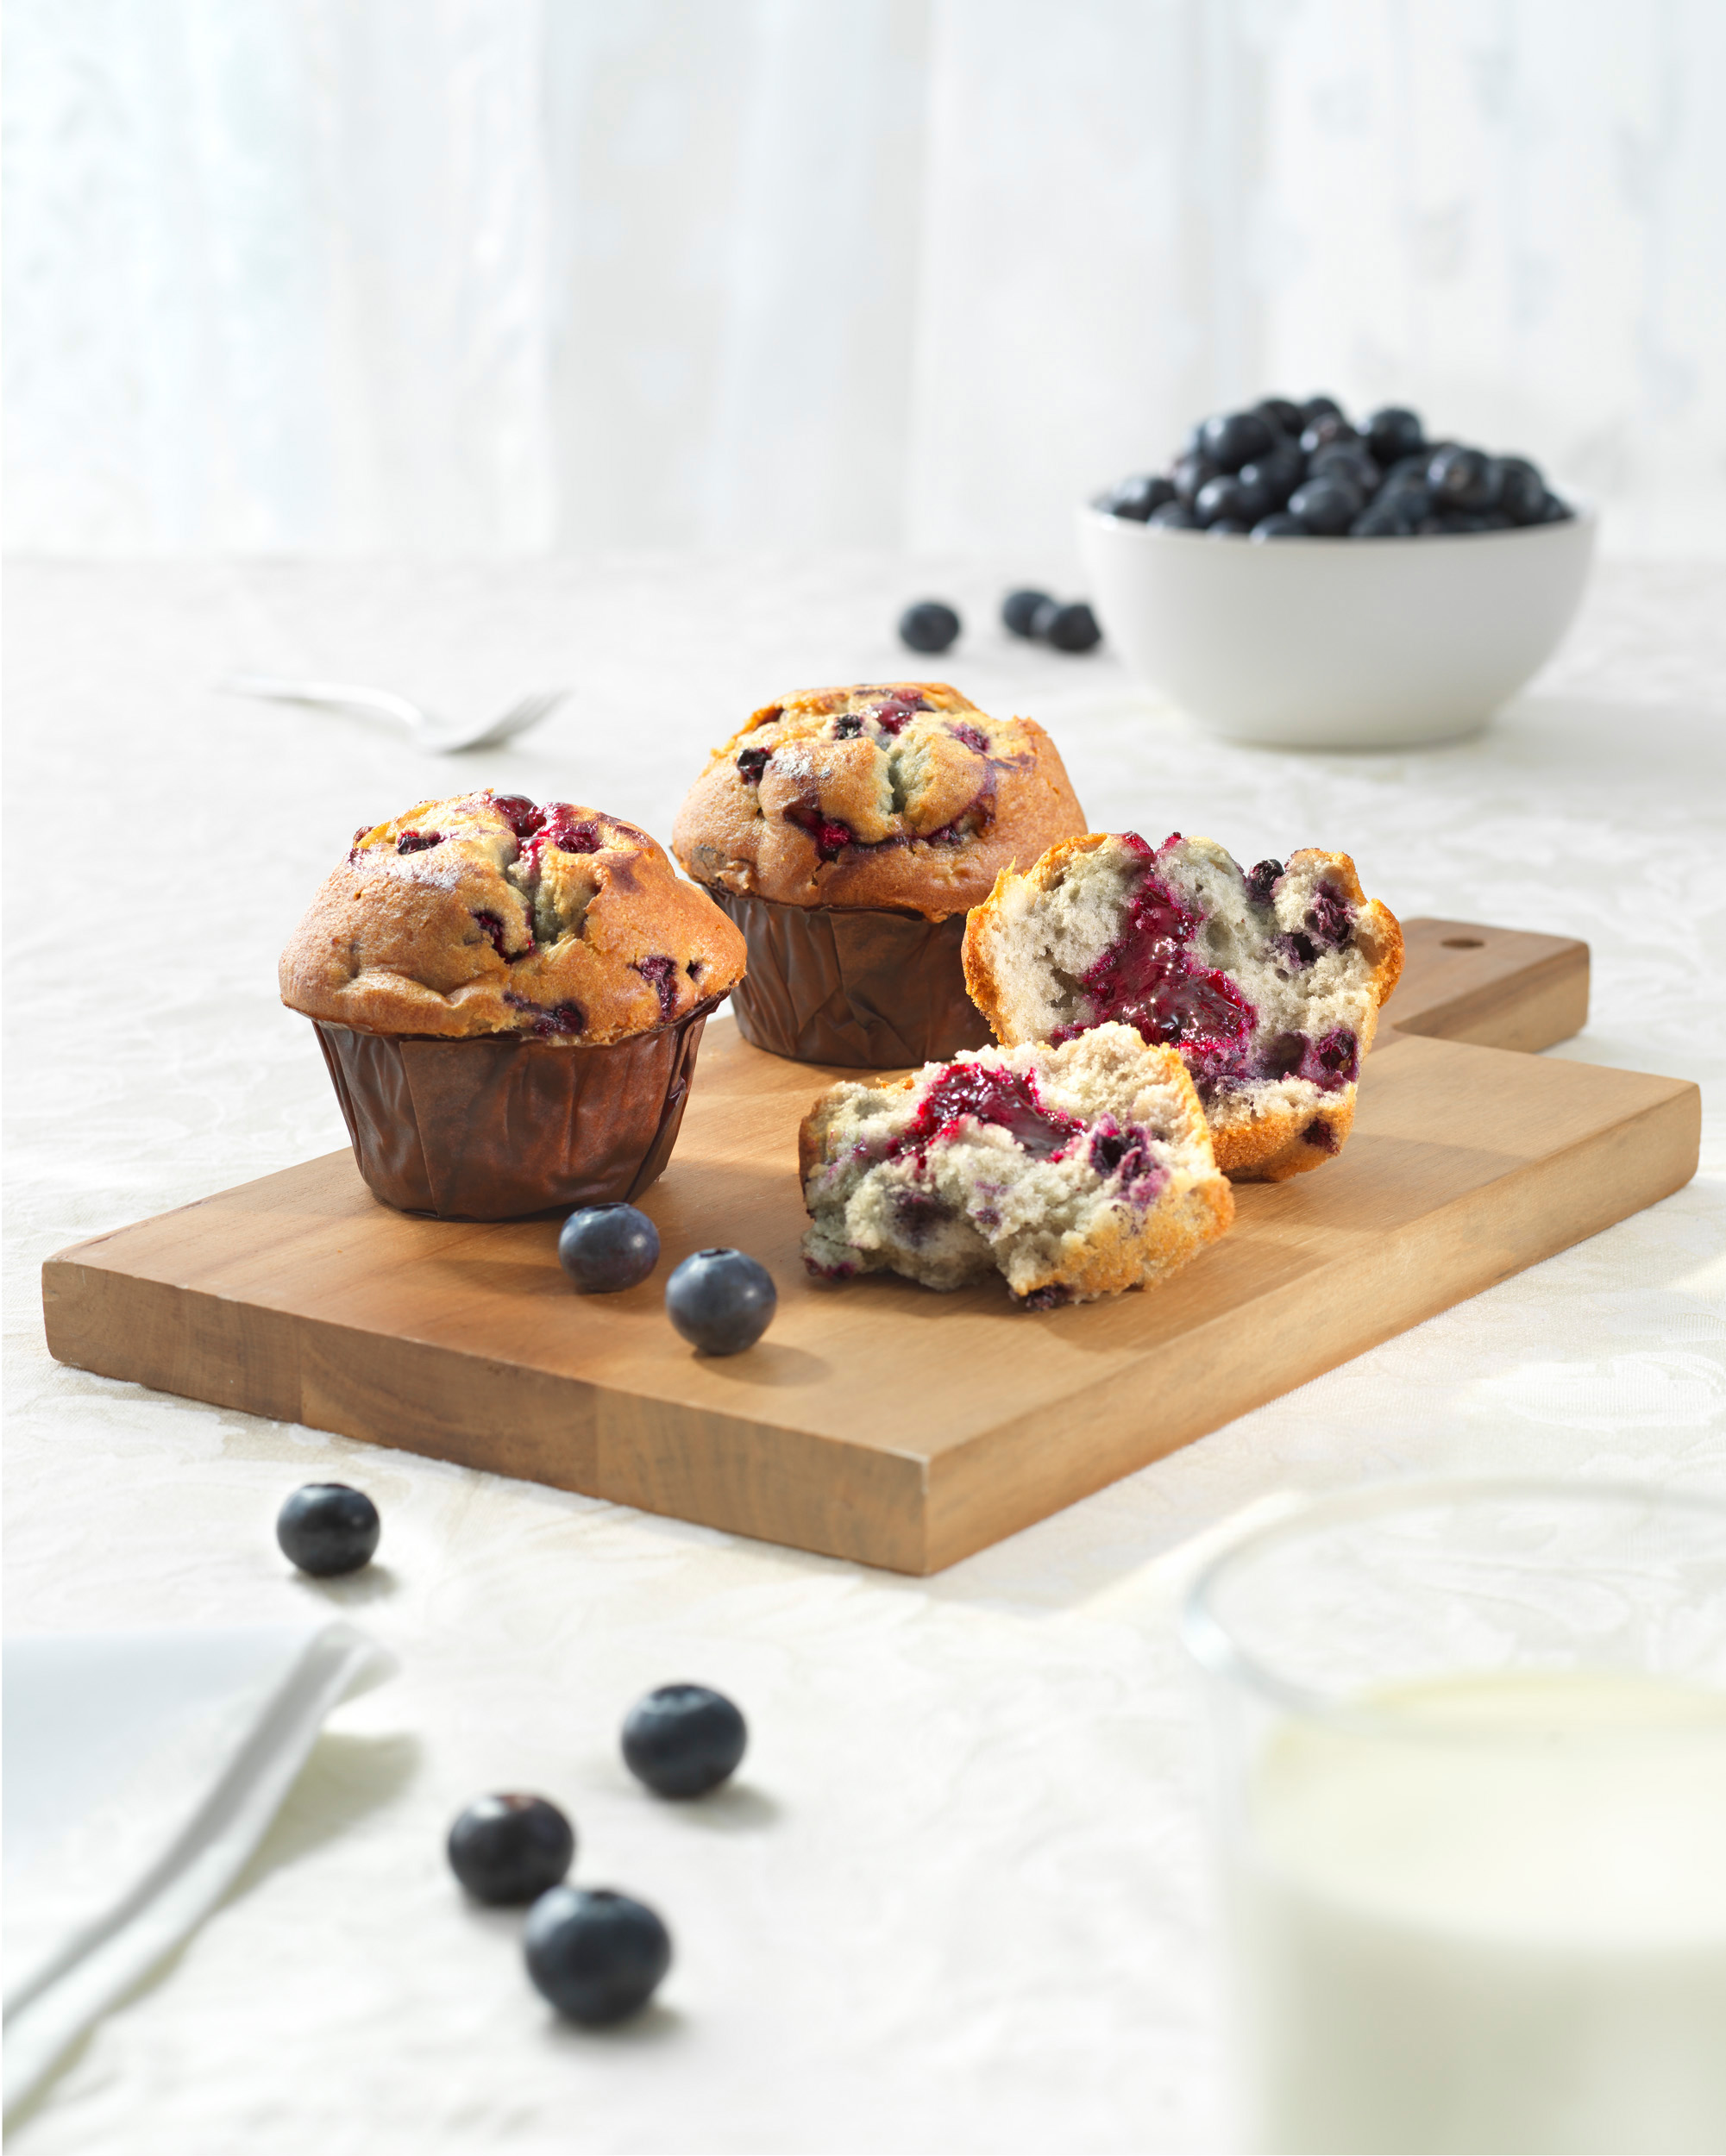
Muffins Live Shoot (Working to a Brief 3)
It’s not often you get to see exactly how a professional photographer executes a photography brief! After the review for our last photography brief challenge, Karl demonstrates exactly how he would have shot the image if he was working for a client and how you could overcome some of the common challenges associated with the shoot.
One of the biggest difficulties members seemed to face was controlling light fall off, so Karl shows three useful techniques to overcome this common problem. He also explains the inverse square law, how it works and how you can modify your studio to better control it.
Throughout this shoot, you’ll see Karl’s methodical workflow, how he identifies problems, and how he gradually builds up his lighting to arrive at the final image. He discusses what props and backgrounds to use, his camera settings and lens choice, how to control the softness of light and how you can use mirrors if you don’t have enough lights. This is an informative live show that completes our third photography brief challenge. For more of these challenges, please check our live show page.
Topics covered in this show include:
- How to work to a photography brief
- Understanding the inverse square law
- How to control light
- How to create soft light
- Equipment and lens choice for food photography
- Using reflectors for additional light
- Global illumination lighting technique
If you enjoyed this show, take a look at some of our other recommended classes:
If you have any questions about this show, please post in the comment section below.
Comments
Hi Karl,
I am planning to build a small home studio in my rented flat where I have wood textured laminated floor. Is that going to bounce back some brownish colour into my shots? If yes, what do you think is the most effective and easy way to solve that? Also if I would shoot a full body shot with the floor visible what are some good options to cover the floor with that look good on a shot?
Thanks
David
Hi David, yes the floor will bounce alot of colour back. I used to work in a studio with a red/brown wooden floor and I would just lay down white sheets to cover an area when I needed too. For full length shots where you want a white floor then a big sheet of white acrylic or white paper background rolls. https://visualeducation.com/class/simple-e-commerce-fashion-shoot/
Hello,
I’m definitely late to the party on this one. I am looking to continuously improve my skills and am looking forward to jumping into a lot of your projects and working alongside your videos.
I’m going to be doing this shoot in the next day or so however, as the course is now closed for submissions I am going to take some liberties as far as the type of muffins.
I am going to be using Cranberry Lemon muffins.
What I am wondering, or rather hoping for, is that when I am finished there might be a way to receive some feedback on what I’ve created? If not then I guess I will settle for my own comparison to what you have provided as your final image.
Thank you for putting this all together, regardless.
Hi Sherry, It’s great to hear that you are going to take up these challenges, they are a great way to practise. Unfortunately we can’t critique them if they are past the submission date but please check our ‘Live Show’s’ schedule to keep up to date with the current or next challenge that you could take part in and then you can submit for that critique. All the best Karl.
I really really really enjoyed this live session Karl. Thank you for taking the time.
I really appreciate you saying the comment about ‘physics of lighting’. Sometimes working with some art directors is very challenging because they expect magic, not physics.
Ha Ha yes and thank you.
Karl, despite some of the questions you got about lighting, I appreciate your taking time to show how you would light items as a professional. Anyone can throw up a single light and shoot; that’s not what most of us want nor expect from your shows. Thanks again!
Thank you Dean.
Hi Karl,
Would it work if you put the big softbox in the same position but a bit higher and parallel to the surface of the table, and put a scrim between them at an angle similar to how the softbox was positioned originally. Maybe it would create a more balanced light on the table?
Hi karl,
I did’t get a chance to do the brief but thoroughly enjoyed watching the summary. I learn a few valuable lessons, such as lighting & the mixing of milk & paint to get that cream milk like look.
I didn’t manage to get my image done in time because my kit was still on order….it arrived on Friday. I have done it now though and it was great fun. I am really happy with what I managed to do. Given it was my first time using my new camera, lens’ and lighting kit it went well. Can’t wait to be able to enter more challenges and briefs.
I see an error:
“Sorry
Because of its privacy settings, this video cannot be played here.”
Is that a temporary issue or did I miss this train?
Thank you Karl. Learned a lot from this and will continue to learn and fix things.
Thanks and glad you enjoyed it.
Hello Karl, I learned a lot from this workshop, I was able to ID my weakness (limitations) and also work with my budget to achieve the goal. Thank you very much. 🙂
Thank you.
Thanks, Karl… After watching this, it solidified for me that I had the right idea and used some of the right tools, but did not solve the problems that I had and was relying on my mediocre post-processing skills instead of problem solving while doing the shoot. Your time and energy in educating us to be better photographers is greatly appreciated.
Thank you, much appreciated.
Sorry, Simon.
Simone, what time zone are you on?
Hi Karl can i use the large Octobox to light the scene?