
Beauty Retouch (Part 2)
This Photoshop class continues from the previous chapter, where professional retoucher Viktor Fejes teaches you how to retouch a beauty image.
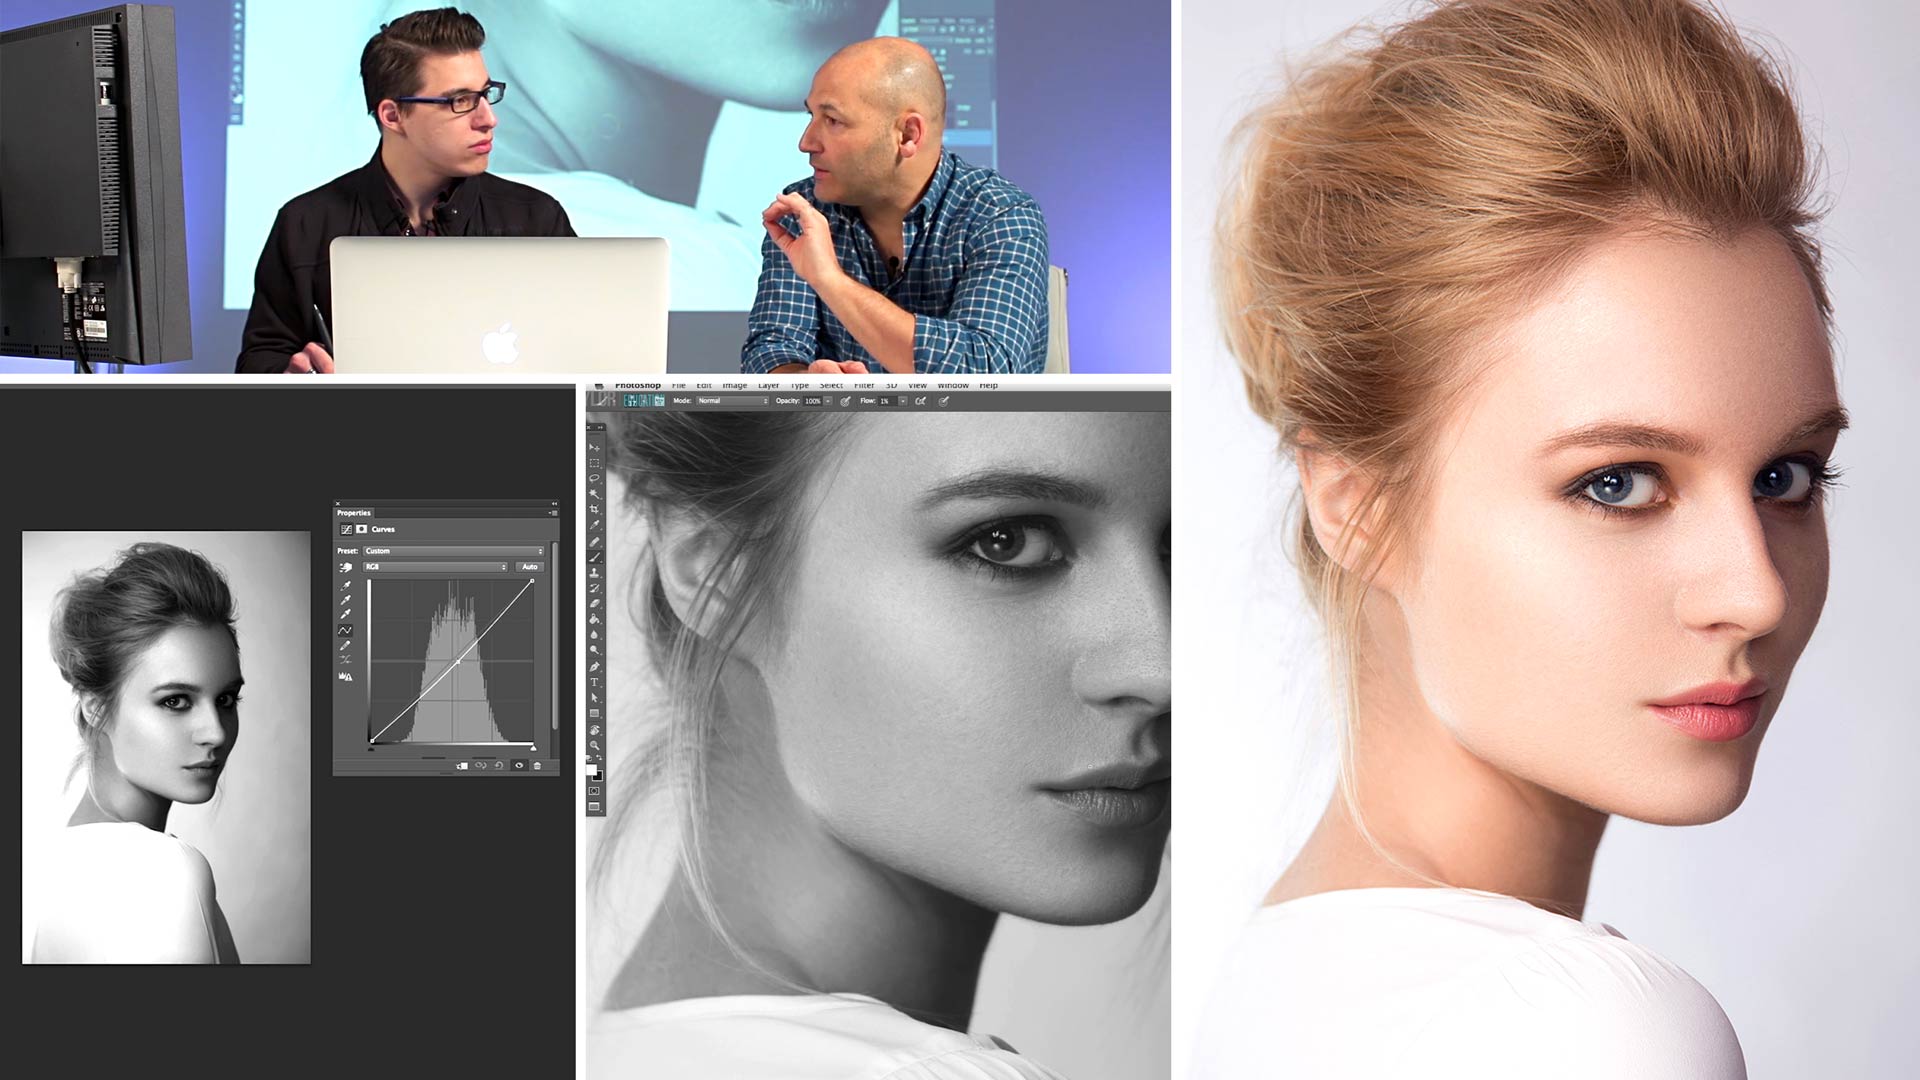
In this class Viktor clearly explains the concepts of Opacity and Flow, demonstrating their differences and revealing which offers greater precision for retouching, before continuing with his beauty retouching process.
Using Burning and Dodging, Viktor demonstrates how it’s possible to control shadows and highlights to enhance three dimensionality and how, using his visual aid layers (available for you to download here) he can achieve precise control over the changes he makes to the image.
In addition to demonstrating how to retouch skin, Viktor also shows how these powerful techniques can be applied to other aspects of the image, too.
In this Photoshop class we cover the following:
- How to retouch a beauty image
- How to retouch skin
- Shadows & Highlights: How to create three dimensionality in an image
- Using layers and layer masks
- How to use Burn and Dodge for skin retouching
- How to retouch hair using Burn and Dodge techniques
- How to use visual aid layers to improve your retouching workflow
To see the initial stages of this retouch, as well as the RAW processing of the file, please watch the previous class.
If you have any questions about this class, please post in the comment section below ?
Comments
Hi Karl, I tried to load the action file but I got an error that it is not compatible with my current photoshop version. I have the latest Photoshop version. I’m also using a windows pc.
Hi Cebufoodshot. Unfortunately, I can’t seem to replicate the error. My first suggestion would be to try re-downloading the actions file. If this doesn’t work, perhaps try a fresh install of Photoshop.
Just to confirm the installation process, with Photoshop open, choose the “Window” drop-down menu, then choose “Actions” to open the action pane.
From here select the four horizontal lines (“burger”) menu in the top right of this pane.
Choose “Load Actions…” (about halfway down the menu) and navigate to your copy of “Adv-Photoshop-Actions.atn”
The action set “VF Super Actions” should now be visible and able to use in the action pane.
Any issues, feel free to email me –
I had loaded actions before and didn’t have any issues. I did it the same as you instructed.
Sorry to hear you’re still having trouble.
Can I just confirm that you have extracted the action file to a new location from the zip file? Have you tried a fresh install of Photoshop?
Could you please email me the following info and I’ll get back to you via email:
Operating system
Photoshop version
.atn file name
Thanks
Corey
Hello karl, i would like to know if this works on dark skin too
Hi Duke, yes it would be the same techniques.
sir, as you mentioned that during dodge and burn the area gets desaturated, so by setting the dodge and burn layers on luminosity can we go around it??
Hi Anurag, yes by setting luminosity blend mode you will only have luminosity change.
I’m just curious, how long would it take Viktor to edit this image as he did just regularly working?
I’m guessing about 2 to 3 hours.
hi karl, just a question,
What about the visual aids? I just saw the videos of 1 and 2 of this series, but I do not know much about the visual aids, is there an explanation of that later? (apart from the download). Greetings from Argentina!! magnificent plataform!! and sorry my bad english!
Hi Mercado, yes there is an explanation later as you work through the course. All the best Karl.
If it had not been for this course I would have lost my money on a recent shoot as the model had extremely bad skin. Consequently I spent a solid weekend watching these videos and thank you Viktor and Karl for putting together such a comprehensive set of videos. The skills I have learned allowed me to retouch to a standard way beyond what I expected to achieve. Well pleased. Cheers.
Thank you James.
Why didnt use frequncy separation? isnt it harmfull for skin texture?
Hi Ganegodage, you will notice we have a chapter on frequency separation but Viktor prefers not to use this technique however his technique is a longer process than the frequency separation method I demonstrated.
Hello Karl,
Wouldn’t be better for dodge and burn section, change the blending modes of curve layers to Luminosity since curves when lighten or darkening change the colors as well ? ,
Thank You,
Hi Hooman, yes and that is covered in one of our other chapters. Generally speaking the colours will saturate more rather than change so it’s not always a bad thing.
Karl,
Do you have his actions available for download? Most retouchers share their actions.
Hi Gary, yes the actions are in the ‘downloads’ section.
Hi Karl,
as suscriber on your website, and following ‘Retouch beauty 2’ , I would like to know whether D&B is it possible to edit on all cases. My case is that the model I do a photo, they are some teenager which imply to have some blemishes on their face. On the example that Victor does, the girl should be a 24/ 25 years old with some blemishes but natural and soft face indeed. Mine is fully blemished so I can’t copy any part of the face. My technic on that case is based to convert layer as smart object and blurring parts which on the face are with acne (painting only the face with a pencil – opacity 25% flow 50%) I obtain a natural face .- not as soft as your model, but quite natural.
Is there any arduous technique I can apply on this cases ?
thanks in advanced
jordi
Hi Jordi, I think in all cases wherever possible I would try B&D even on acne, if you have no choice then use the clone or healing tool. If find there would always be something to use as the source of the clone though even if it isn’t the right tone you can still B&D it after.
Karl, Why do the 2 separate layers of different dodge & burn curves instead of using just 1 layer at 50% grey in overlay mode and painting just on that with white / black? Is there some big benefit to the first method?
Hi Paul the immediate benefit is you can flick each layer on and off independently without affecting the other or drop the opacity, you can also go in and adjust the curve or easily undo what you’ve done.
Hi Karl, this tutorial is amazing. Just have one question, that i have since the past tutorial, how do you make to affect the corrections of cloning to the layer in black and white and the color original one. The Black and White layer is above the layer you are cloning. (Sorry my english)
Marvin Girón
From Guatemala.
Hi Marvin, we are not cloning in black and white we are working in colour. There is a ‘visual aid layer’ on the image that allows us to preview the image in black and white to make it easier to see the areas that need fixing.
Karl after several tests I managed too. I understood that to get these photos you need a very smooth skin and then Dodge and Burn. thank you very much
excuse Karl there’s a video where you can see how you got the photo at 3:35 minute. sorry for the trouble but I do not speak English and only watch your videos
Hi Mario, no this particular photo is from Viktor, it’s his wife. 🙂
my question was how can I get the “shiny” effect I do not know how to define it.
Hi Mario, what do you mean ‘shiny’ can you direct me to the time in the video? Thanks Karl.
Hi Karl. The model skin’s is almost perfect so there is not so much to be done. what is the skin has pores and scares? Is it possible to make the skin flawless like that? From Meng, Cambodia.
Hi Meng, although this model has good skin there is still a clear difference between the starting image and the final image. As this chapter explains most of the ‘retouching’ is less about fixing blemishes and more about shading to achieve the final result. It is perfectly possible to use the same techniques for any subject if you take the time but the consideration is that the more work to do then the longer it will take. The style of lighting that you apply to the subject will also influence the amount of ‘texture’ revealed which will also have an impact on the amount of retouching required.
Also Meng, you should also look at the chapters before this as the skin start was very different to the starting point in this video.