
Simulating Sunlight With a Studio Light
All it takes is a bare bulb and some know-how.
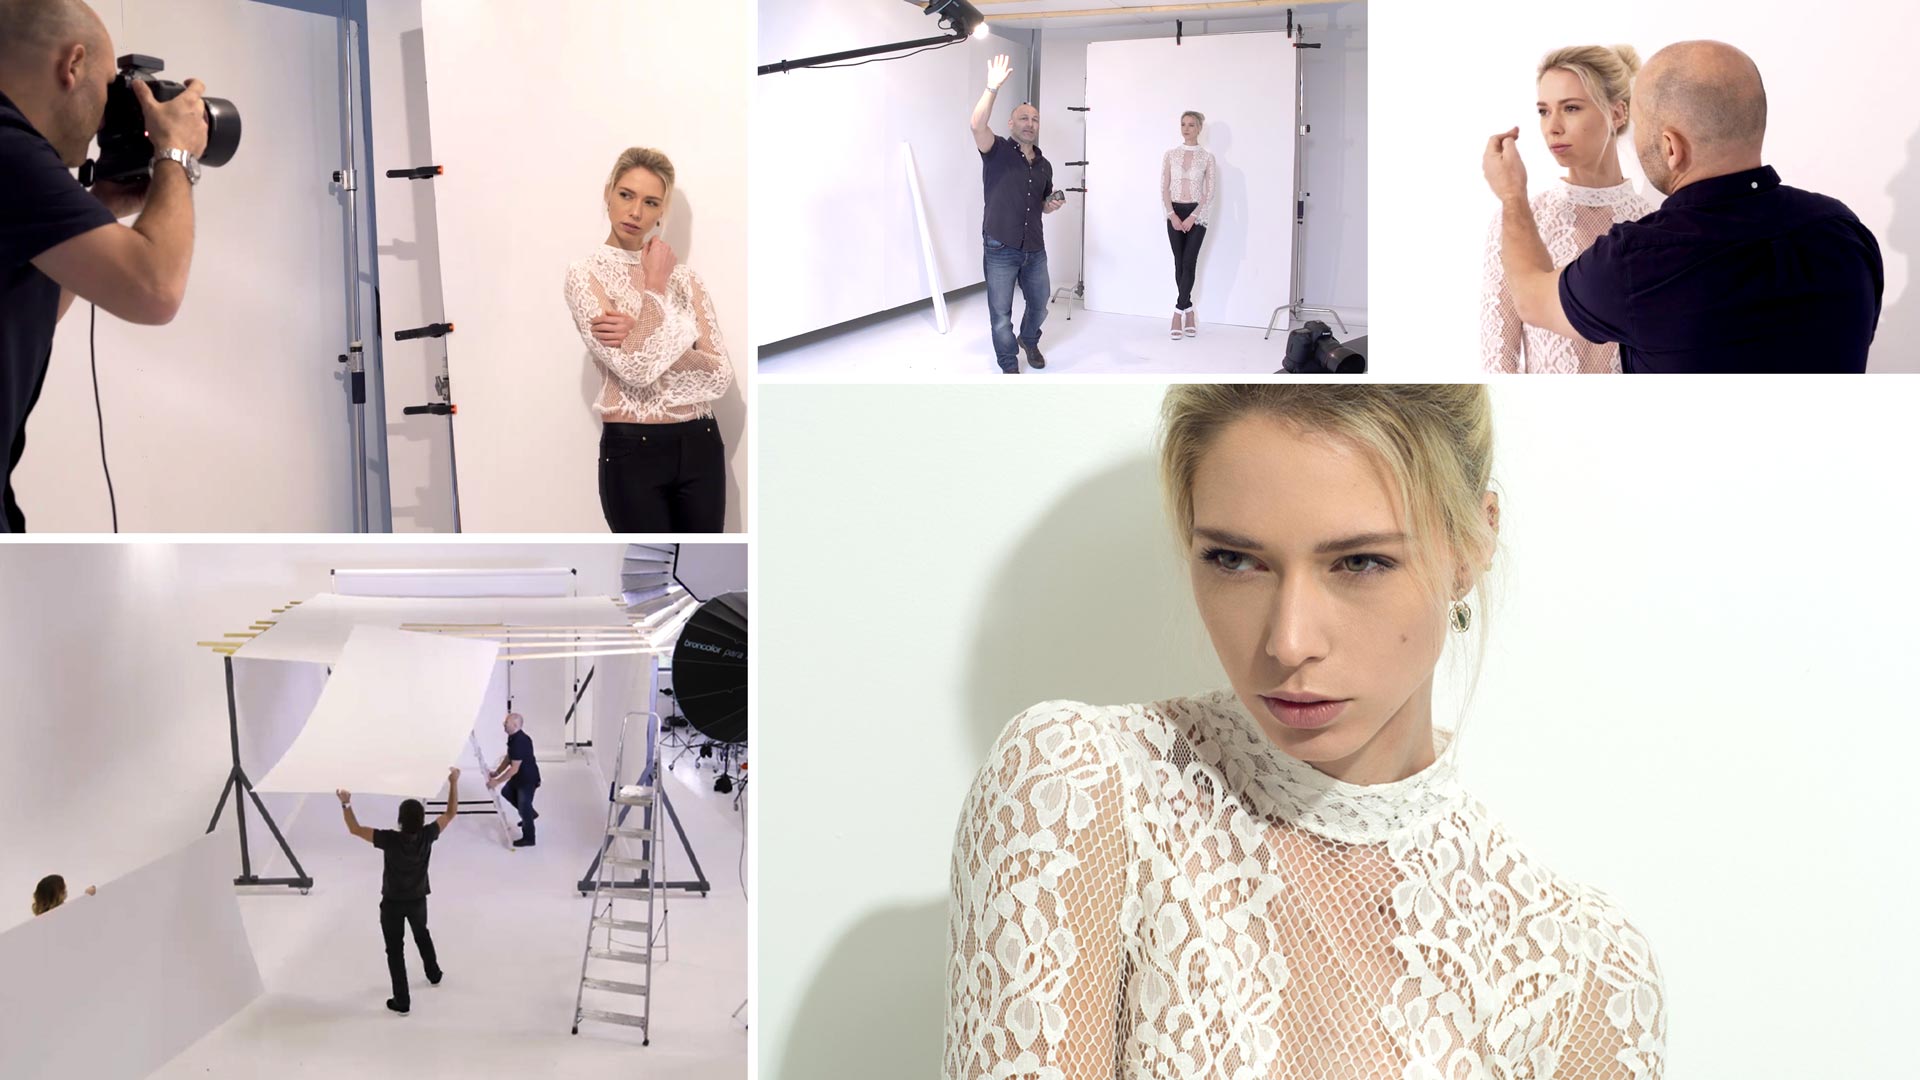
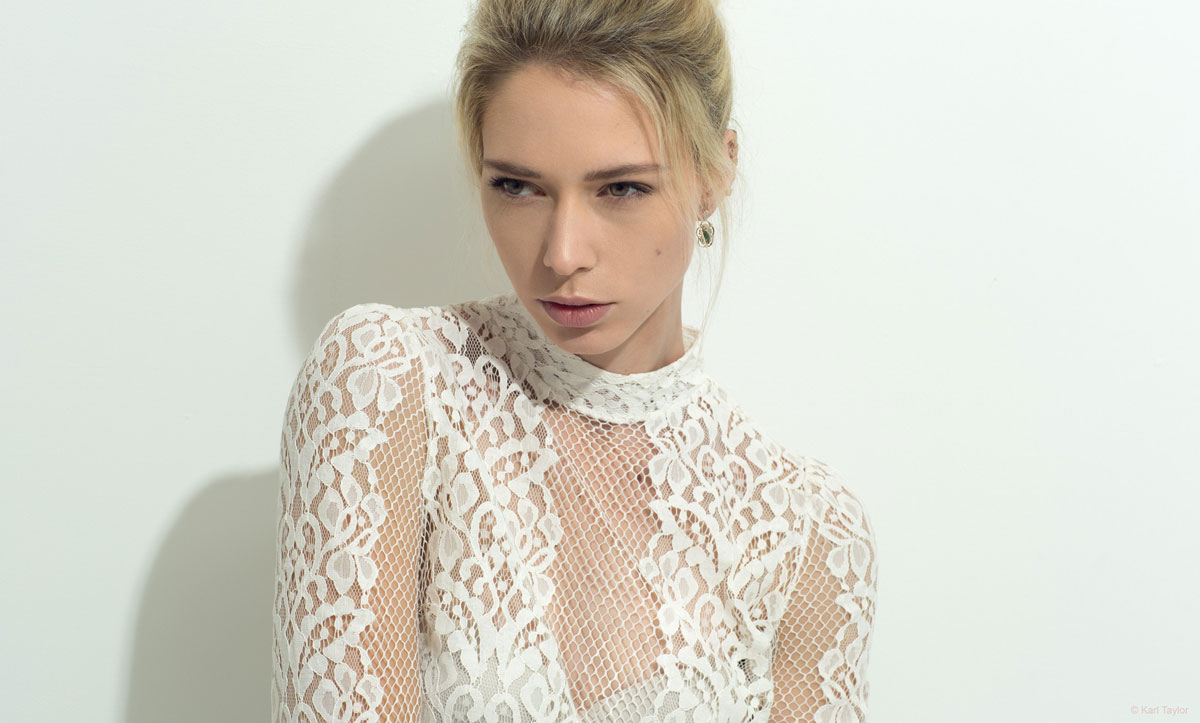
Discover how to achieve stunning portraits like this one with just one light – even if you’re working in a small studio.
Watch Karl use a bare bulb to simulate sunlight, demonstrating how to soften a hard light source to achieve pleasing effects evoking both harsh and hazy sunlight.
In this photography class:
- How to shoot creative portraiture using a single point light source
- How to soften a hard light source
- Photography in a small studio
- How to control light in a small space
- Controlling shadows with directional light
Comments
LOVE the courses so far!
Quick question – the walls in my home (studio) are an off-white/cream color – will the light reflection from the cream color walls be an issue? How important/beneficial would it be for me to re-paint white?
Hi Yahya, in a smaller space that will be a problem so I would repaint to pure white.
Hi Karl,
you have a lot of expensive gear, but the most important one in your studio and the one I’m jealeous of, is the little chair on which you stand to take pictures ! I didn’t see it on the Broncolor catalog, they must have created a special one in Switzerland for you ! hahaha…
Thank you for this very interesting video
Ha Ha I stole that from my daughter when she outgrew it.
Hi Karl,
Can I get Raw/Jpeg files to see it more clearer and understand?
Hi Chinmaydhayalkar, unfortunately we cannot give out our photographs as these are copyrighted images and contain, models too and we cannot risk the higher resolution images ending up in the wrong place.
For those of us without studio lighting could you bounce light from a reflector using a speedlight? Or would this only be good for fill in?
Hi Chris, just the speedlite would do, it just needs to be away from the camera similar to what I ddi here.
white balance is auto ??
Hi Anas, no it would have been set for Daylight or 5800K
Hi,Karl! Great training material! Does the model is using a makeup specifically for sunlight? That hard light didn’t show specular highlights on her face… additionally, does Lightroom is applying any presets while importing? Looks it has an slight green color cast on it….
Hi Luis, no the model just did a very good job on her own make up. Lightroom can import with a specific preset if you tell it but I don’t have anything set on mine to do that, I just import the RAW files and then adjust, I may have had the colour balance set slightly off in camera but I’m never too worried about that as I’m shooting RAW and can adjust the colour balance easily afterwards.
Karl where do you buy White Foam Board Background..?
Thanks
Hi Arthur, Sign Service companies.
The lesson’s are just PURE GOLD. The thoroughness is just unmatched. Every situation explained in great DETAIL. Just AWESOME!!!
Thank you Lance, spread the word please. All the best Karl.
On the light you took the reflector off of it looked like the bulb was covered with a clear cylinder that is frosted on the end. Is this cover some type of small simple modifier or is it for bulb protection or something else?
Siros 800 means 800 watts then. Thanks.
How many watts or joules is the bulb?
Hi Laurenta, please see the equipment list on the lower right side of the page.
Hi Karl, I have just just subscribed to your material – You are an amazing trainer and the material is comprehensive and thorough! I have a question on the first video – at point 20.9 you are saying that as you have brought the light higher and closer to the model and removed the diffuser you need to bring the exposure back down from 6.2 to 5.7 . This is not clear to me why you need to open the aperture to 5.7 and allow more light in this instance as your are closer and removed the diffuser rather than close the aperture from 6.2 to i.e.. 7 ? I am a bit confused on this. Many thanks Luciana
Hi Luciana, thanks for signing up and I’m glad you are enjoying the material. The numbers I’m referring to are not the aperture they are the power settings on the studio flash. So I am bringing the light power from 6.2 down to 5.7. Dropping from 6.2 to 5.2 would be equivalent to a one f-stop reduction in brightness (like going from f8 to f11) so in this instance I dropped the light by half an f-stop.
Totally enjoyed the Chapter 16. It was fun and a lot of learning…creating those shadows was the biggest takeaway. Karl you are so focussed and involved that you actually forgot that you could use your phone to control the intensity of the Broncolour light via broncolour app…you moved up and down several times…Pure Passion and 100 % commitment is what I could see…Well Done Karl. Fantastic !!!
Thank you.
Hi Karl, As a keen amateur photographer who has been following your work and training material for some time, I wanted to say that this training is amazing and FANTASTIC value for money.
As a recent grandad I wondered if you have ever done any newborn / baby photography? If not do you have any suggestions on lighting for this?
Hi Peter, I’ve only photographed my own kids when they were babies and I always found big soft light close to them looks most appealing, I would try one very large softbox of scrim roll on one side very close to the baby and a large white reflector close on the other side. The light can be side on or slightly above or above depending on the sitting position of the baby, you would need to experiment on this. Go for neutral soft backgrounds i.e. white/cream blankets, rugs, etc and a white wall/background. You can also use props like a wicker basket or a soft bean bag too. Try some very close up shallow depth of field shots f1.8/f2 focused on the eyes and then also the whole baby at f8/f11 I’m sure you’d get something good out of that. The most difficult part is keeping the baby happy! If you really want to go wild then check out some of Anne Geddes work for inspiration.
I’ve never even considered using bare bulb flash. This was another great lesson.