Two-Light Male Portrait
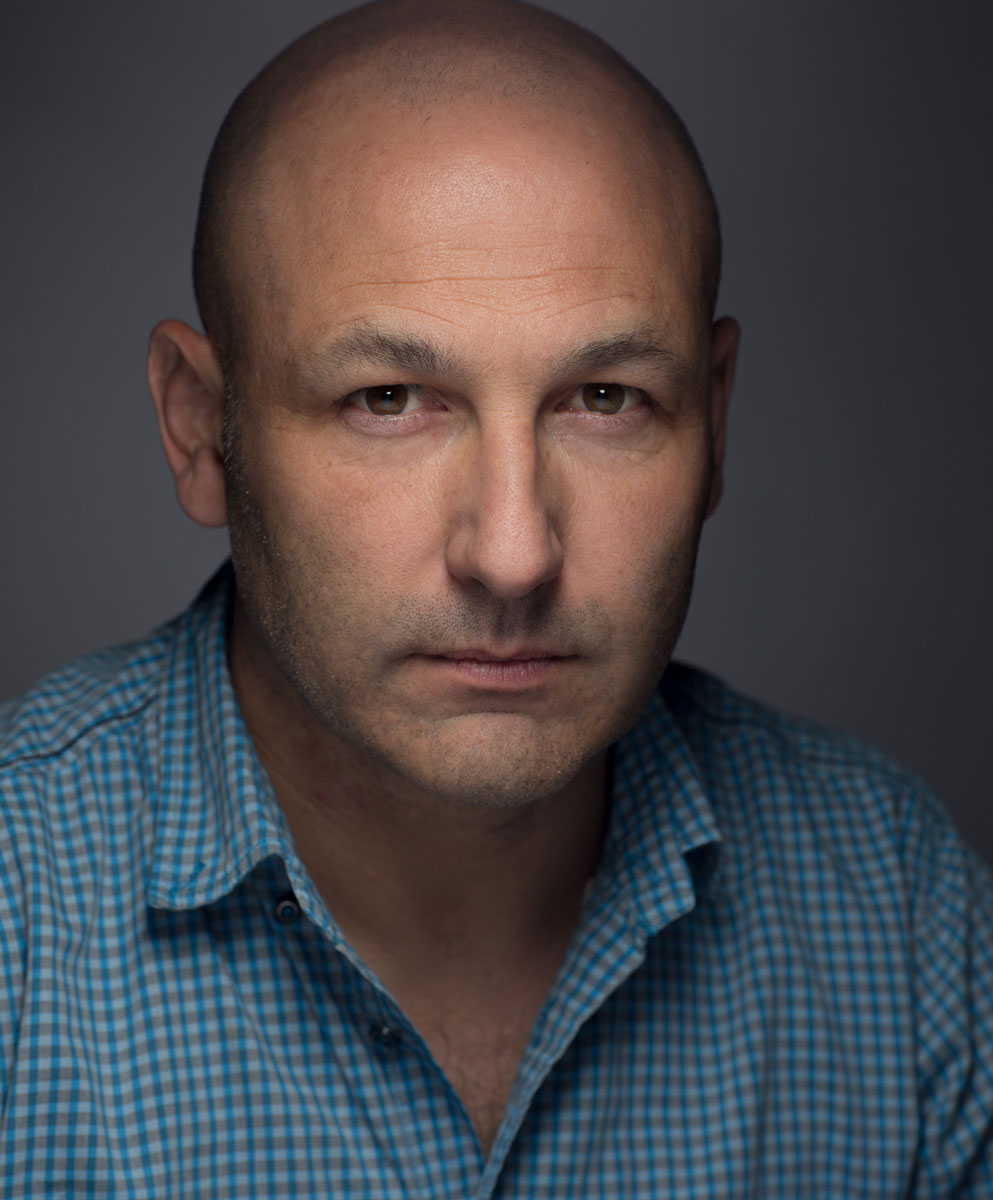
Master male portraiture as Karl Taylor switches from photographer to subject.
This portrait photography class sees Karl take the hot seat as he works with broncolor’s Urs Recher on a two-light setup demonstration.
Together, the pair demonstrate a number of creative yet simple two-light setups suitable for a variety of styles – from dramatic fashion images to flattering beauty shots.
Urs explains the simple modifications he’s made to the key light and why the resulting effect is effective for a variety of subjects. He and Karl then go on to demonstrate how this setup is ideal when you’re working in a small studio space.
In this class:
- Studio Lighting: How to set up multiple studio lights
- Two light setup for portrait photography
- Simple & affordable modifications for softboxes
- How to create contoured light for flattering portraits
- How to photograph in a small studio
Questions? Please post them in the comments section below.

Comments
Thanks Karl,
Being over 50, I’ve got a lot of bald friends, good to know how to take nice portraits of them and their wife and family. Can’t wait til I’m finish with the two lights classes and start looking at what can be done with 3 and four lights.
Great to hear, and lots for you to explore!
Karl You´re handsome! 🙂
Ha ha I haven’t heard that for a long time thank you.
Karl, you have such a nice smile brother. Great video
Ha Ha thank you. 🙂
Enjoyed session and great to see what can be done with minimal gear and space. Noticed in 2nd shoot Evie held a black board as well as white. Was this to block possible lens flare.? Thanks.
Hi Marie, thank you. At what time in the video and I’ll check for you.
I noted the black board as well. It is at 6.50 or thereabouts, in the second ‘session’. There is some extra flare caused by having the ‘ceiling’ white board brought in to make the ‘small studio’ space? Thank you
Hi Simon, yes the board Evie is holding (the black one) is a flare blocker and the white one of course is a shadow fill.
Excellent! Which Has camera/lens was he using? Also, I know you use Phocus, but do you then finish in Adobe or something else?
Hi Doug, he is using a Canon 5dmk3 with an 85mm 1.2L portrait lens. We were using Lightroom for these as Canon cameras don’t work in Phocus.
Good tips you use some boards and a reflector. I will do some self-portraits next 2 weeks. Have some problems with an over 10-year-old camera but will use backup if the focus does not work. Thank you for sharing your expertise.
This was a very helpful video to show how one could shoot not just acceptable but excellent headshots with a minimum amount of space and lighting. Karl is a handsome man!
I really like this setup, simple and repeatable. My own preference would be a bit punchier light for male portraits. I assume removing front diffusion panel from the softbox would add more contrast (assuming the inner walls of the softbox are silver. As always, great lesson, and enjoyable to watch. Thanks Karl.
Hi, Thanks and yes removing the front panel would do it.
How good it is to be able to see the content with subtitles in Spanish. That being the case, I think I will be subscribed to the web for a lifetime. Excellent work!
Great, we keep adding more all the time.
Great video, photo came out great.
Really cool light setup. Definitely very appealing for male portraiture.
Hi karl,
I really like this setup, you need to add more setups for male models. The result is great!
I think it must have been down to the model on this one ?
hahahaha
Looking forward to the nude modelling now?? Great video, the three of you have a great rapport.
Thank you Karl and Urs (and team!),
What I find most exciting about this one is that in all the other portrait lighting modules, the models are beautiful young, thin, pale-and-smooth-skinned women. And although it’s really helpful to see what light control can do with these broadly similar kinds of subjects, I would be interested to hear more about what light character, distance and angle can do when exploring, perhaps, fuller figures, older skin and darker skin tones.
That said, I’m really grateful for this amazing course you have developed. Thanks again!
Hi Halford, Thanks also check some of our previous live shows for some demonstrations with an older male model. And the ‘Emotion of Light’ one has some other interesting theory stuff that I think you will enjoy. We also have some ‘real people’ courses in the making.
Hi Karl,
I’m loving this course..Thank You
In regards to this shot: Is this achievable at a further distance with a larger rectangular softbox? Could you use two pieces of black cardboard up close to someone while the large softbox was further away?
Hi Stephen, no it wouldn’t because of the fall off of light and the inverse square law. Please watch the theoretical chapters 1-15 of this course and then come back to me if you have further questions.
it’s just amazing, am learning a lot, and am very happy to learn from one of the best photographer, thanks again
Thank you Kamel.
Hi Karl. How do you modify this setup if your subject wears glasses? Wouldn’t the large reflector show up in the subject’s glasses? Any tips on dealing with that?
Hi Douglas, I photograph a lot of people wearing glasses and some glasses with good antireflection services are less of a problem and of course if you adopt the principle of very close softbox as in chapter 21 of this course then the reflective effect of glasses will be minimal compared to the exposure level of the skin.
Nice portrait Karl. Great technique and use of the strip box.
Great technique making small softboxes smaller. Also, it’s an absolute joy watching you and Urs work together. 🙂
wow every single episode is blowing my mind, is great all this work thanks, Karl, I use a similar setup for my visa pic, I use speedlights, so far is one of the best pictures I had
Cheers Ivan.
Great idea using the card to make a smaller lights. As someone with the same carefully groomed hairstyle, costs a fortune in hair gel, this video is definitely worth watching for future reference.
🙂
Is this the best model you could find. I feel for the ladies.
It’s the only one we could afford 🙂
Great humour and relaxed feeling as always with videos of you two. Great example of how useful the falloff of light can be with working in a small space.
hahaha! I enjoy Karl’s sense of humour so much! Thanks. Another great video 🙂
Super nice how this long and narrow softbox creates such a sharp catchlight in Karl’s eye.
Great to see some humour in the lessons also. When shoot and crop a business portrait, is it any kind of “rule” where to crop by the shoulders? Should I crop the arms away or should I keep them in the final photo?
Hi Svein, if they require a ‘headshot’ i like to supply similar to the example shot that Urs took of me here, although sometimes the client doesn’t want the top of the head cropped, but in fashion or artistic portraiture this is quite common as it brings more focus to the face. If the arms and hands don’t look clumsy then it’s perfectly acceptable to do a wider crop but every shot or set up should be thought about in advance. Here’s some examples that might give you some ideas https://karltaylorportfolio.com/business/
Thank you very much for the answer. 🙂