
Sunset Seascape Photography: Post-Production
Karl sits down to review and edit the sunset seascape photograph he took in the previous class, recapping on his camera settings, compositional decisions and filter choices too.
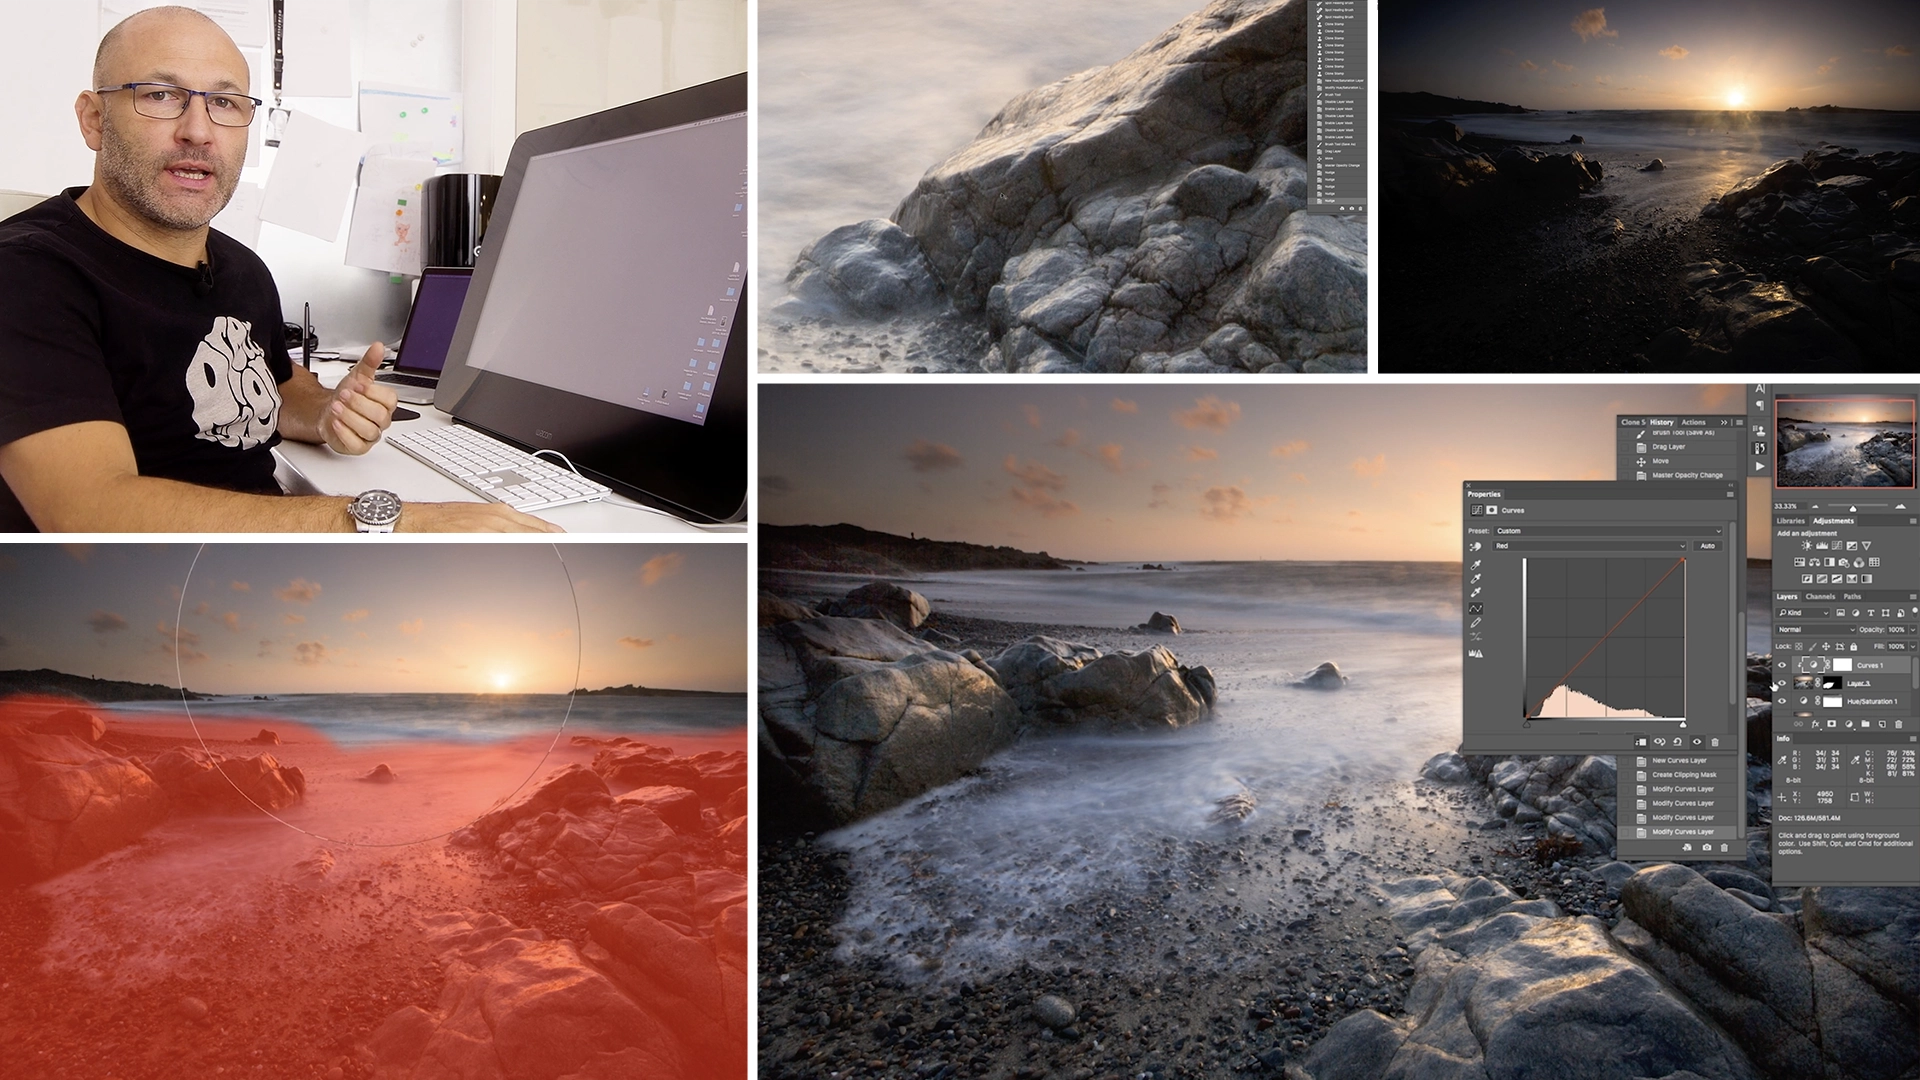
Working with both Lightroom and Photoshop, Karl shows you his post-production process on a landscape image such as this, including selecting his top images, making initial adjustments to colour and exposure as well as correcting lens distortion and chromatic aberration.
Working in Photoshop, he then demonstrates how to combine and blend elements from different images, work with layers and layer masks and use tools such as Transform and Liquify.
In this class:
- Post-production: How to edit a landscape image
- Landscape photography tips
- Working with Lightroom and Photoshop
- Making color adjustments in Lightroom
- Lightroom lens correction feature
- Using layers and layer masks in Photoshop
- Merging and blending layers
- Using curves for color correction
- Correcting image distortion using Transform and Liquify tools
To see how this image was shot, please watch our Sunset Seascape class. If you’d like to learn more about landscape photography, you may be interested in our Coastal Sunset Shoot or Painting with light classes.
Questions? Please post them in the comments section below.

Comments
Hi Karl,
Thank you for this interesting course.
We can see in the final image some noise (quite visible on the left, especially on the rocks) that looks like high ISO noise.
I don’t get why you’re using strong ND filter to block some light if it requires you to shoot in high ISO mode. Wouldn’t it have been possible for you to achieve same long exposure with low ISO settings by using weaker filter?
Best regards,
– Lio
Hi, the image was shot at 100ISO. It wouldn’t make sense to shoot at higher ISO’s when you are trying to achieve longer exposures which is the reason for the ND filters. I’m not aware of any significant noise in the image. You do get an increase in noise (even at low ISO) when shooting long exposures but I think what you are seeing may be an artefact of the video not the image.
Nice tutorial Karl. Do you always shoot in RAW file? I tend to use RAW+L , does it make any difference apart of size and what would be the biggest benefits or setback from shooting only in RAW? thanks in advance.
Hi Magdalene, RAW + L gives you a RAW file and a Large Jpeg. I only ever shoot in RAW and then process the files. RAW gives you far more control over the image in post production than you can get from a jpeg, a RAW file holds more mathematical data about the shadows, highlights, colour temperature etc that can all be adjusted later without any detrimental effect on the image. Please see our post production section and Lightroom tutorials for more information.
This editing lesson was clear and I was able to follow along. I was able to pick my best shots based on the lesson, but once I do this, even when I am careful I am often concerned about then over processing my chosen images, and also risking them appearing over proccessed. How can I avoid this?
Hi David, don’t go to heavy with the saturation on the whole just be more selective with colour for example where you want to draw the eye. Don’t lift shadow areas to an unnatural level, or the same with highlights. Take a break every now and then for a cup of tea and then look at the image with fresh eyes!
Really enjoyed seeing your process here Karl, and looking forward to diving into your post production videos soon!
Thanks Alex
Very helpful tutorial, I am definitely going to see more in post production section. I just bought Lightroom CC and Photoshop CC, I used to just use photoshop elements 15…. BTW, is there any discount code for photoshop through your web site, just curious and that I didn’t miss it. And I love the idea to wet the rocks to bring out the hue, something new to me but will make a big difference as no way in post production to do it.
Hi Yi-Chen, thank you i’m glad you enjoyed this one. Unfortunately we don’t have any discounts available on Adobe CC membership.
Karl how do you decide what to make black and white and what to keep color? B?W is my favorite to shot.
Hi Teresa, to be honest I very rarely shoot black and white. However sometimes I just recognise that a scene or composition looks interesting but the combination of color has led to distraction in those instances if I can’t make the colours work then I will take a look at a black and white version. However how you undertake your post production conversions to black and white is important, you can find more information on that in the ‘post production’ section. The positive thing is that all digital cameras have to capture in color so you’ll always have both options, you just have the luxury of trying B&W after shooting.
Oh, and you have to have “show guide” checked in the liquify settings.
Beautiful image, and thanks for all educational videos. My only offering is that you can use a guide with the liquify tool if you apply a new guide to the image prior to opening the filter. Choose “view / new guide / ” and then select horizontal or vertical. Place the guide and then open liquify. The guide will be visible while you make the adjustments.
Superb tutorials. I’m very glad that I found your website and signed up. Thank you.
Thank you Adam, please spread the word! 🙂
What screen is it Karl?
Hi Kriz, this is a Wacom Cintiq. It’s a retouching tablet and screen at the same time.
Hi,
At 15:55, you say you want to correct the optical distortion, but when you click on “Enable Profile Correction”, it also removes the vignetting you like.
Do you know that when “Enable Profile Correction” is activated, below you have 2 cursors under “Advanced”:
“Distortion” and “Vignetting”, which allows to dose or cancel the effect of one or the other of your correction profile.
So you can correct the distortion independently of the vignetting.
Regards
Nico
Hi Nicolas, yes I know the other settings are there. Sometimes it’s just the way these things get edited, what I may have liked at the start of an editing process can change when I get near the end because other factors have influenced the image and the perception of the image.
Hi Karl
I’ve never seen the power of photoshop before, really good to be walked through from shooting to the end image. Great tutorial but also emphasising why your composition and the colours in your image make it work too!
Enjoying the subscription!
Matt
Cheers Matt.
thanks again , its was great from start to print ready , action , duel filters was something in did not thinks instead of washing them each time they got splash nice one
thanks again frank
Hi Karl, nice to see the workflow for post processing that seascape.
I was just curious about two things.
First of all, why use the black background? I thought it was a bit hard to see the edge of the image with the black background.
The second question was about alignment of the two image layers. Is there a specific reason why you don’t use the alignment function in PS? I’ve used that in the past for aligning traffic trail shots.
Nice! First day here since I subscribed and can already see it was worth it to learn more. Really have to upgrade to Lightroom CC (is this the last one that includes photoshop?…) and learn to also use photoshop tools on some of my photography.
Looking forward to check all the videos and other stuff here.
Cheers,
Francisco
Hi Francisco, welcome aboard. Yes CC package you get LR and PS. We have courses on both in the ‘post production’ section.