


Tilt and Shift for Flat Lay Product Photoshoot
Tilt-and-shift lenses and adapters are most commonly used for architectural photography, but they can be a useful tool when photographing products too.
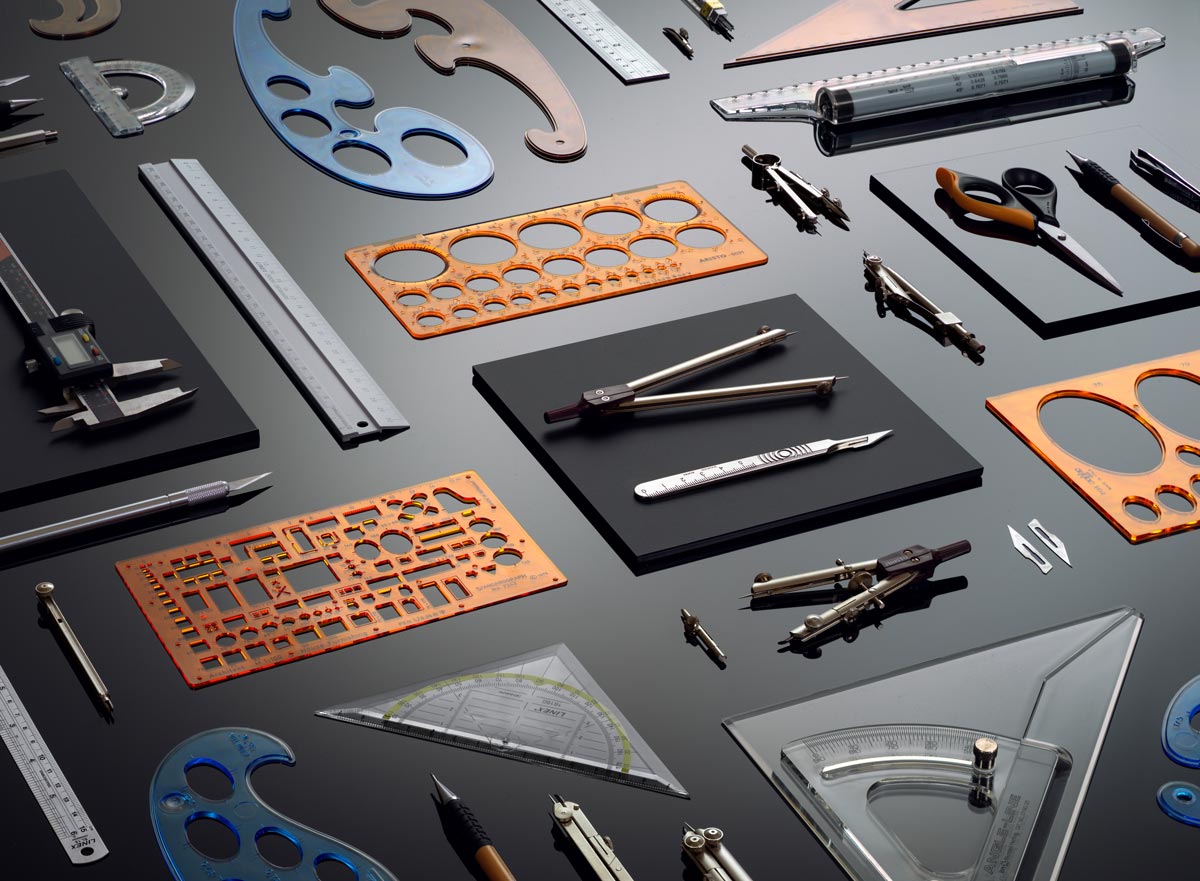
In this product photography class, Karl makes use of a tilt-and-shift adapter to overcome two particular challenges. He gives a clear explanation of what the adapter does, the benefits of using one and how to use it for product photography.
You’ll see two different lighting setups, one that makes use of largely indirect light for a broad, even effect, and one that makes use of small, carefully controlled pockets of light for a far more dramatic result.
In this class:
- Product photography: How to use a tilt and shift adapter
- How to photograph architectural instruments
- Scheimpflug principle
- How to avoid reflections in shiny metal objects
- Two light setup for soft, even light
- Lighting setups for dramatic effect
If you’re interested in learning more about tilt-and-shift adapters or technical cameras, check out Interview With Architectural Photographer Sean Conboy.
Questions? Please post them in the comments section below.
© Karl Taylor
Comments
Hi Karl,
Very interesting to note the results of Tilt Shift Lenses. Do you have a demonstration of using the swing feature of these lenses? say, like, you are attempting to shoot bottles placed at an angle, or like a V, where one particular direction of the bottles are all sharp…
Have requested the TSE-90mm L macro (the latest version of Canon TSEs) from a friend of mine to try it out for few days. Would like to work with them and attempt flat lay setup as well as understand if it can be used for bottles.
Thanks
Hi Ravi, the swing feature works exactly the same although on a ‘V’ of bottles you will only be able to make the plane of focus run down one side of the ‘V’ not both.
Hi Mr Taylor
Another great tutorial here. Thank you. One question.
As a T+S lens is expensive and beyond my finances (shooting on a Canon) at the moment, would a focus stack be equivalent to a tilt and shift or is it very different to a point that it would be very noticeable? I can understand how useful a T+S lens is as I have a shoot to do and only two lights, meaning that I would have to focus stack each time I move the lights to create the pools of light in different areas and then composite once all of the different lit images are stacked.
Hi Karl!
I am about to buy the Canon TS-E 90L.
But I wanted to know if there is an alternative, such as a 3-way TS adapter, to use my 50 and 85 L 1.2.
What length does my advice focus between 50 and 85 as the primary choice (Food and Still Life photos as minimal as possible)
Thanks a lot in advance
Hi Lucas, The TS-E 90L lens is mean to be an excellent lens. I don’t know of any adaptor for Canon that would attain the same quality. Also that lens will be good for Food and still life.
Thank You very much Karl 🙂
Hi Karl,
How do you store your acrylic sheets to avoid getting scratches on the surface?
Also what do you use to clean them?
Hi Askaraz, that’s never easy. I have keep them upright in a purpose built rack and they are touching each other. That won’t scratch them but if there is something hard like a stone etc between them when you slide them out then yes they will be scratched. They mostly get scratched from the products you place on them during a shoot. I clean them with a microfibre cloth and methelyated spirits.
hi Karl , i have been making Ambrotypes /tintypes with my Sinar x for last 2 yrs and now i want to try doing food photography with the camera and want to use scheimpflug law to get edge to edge sharpness . But after referring so many books videos still am not satisfied .
would it be possible for you to explain scheimpflug law practically ( in more depth ) with a large format camera where there are multiple movements involved ? kindly let me know .
regards
krish
Hi Krish, in simple terms you need to tilt the lens angle to more closely match the angle that your subject is running at then adjust the shift to ensure the image circle is in the right place on the film. When I have a view camera in the studio again I’ll look at doing something in-depth.
Hi Karl, will you be doing more courses on using T/S lenses (or adapters) for product photography?
What do you think about the usage of T/S in food photography?
Hi Sammy, we will certainly keep that in mind as yes it is very useful in product and food photography, it gives you extra creative options.
Hey Karl, Wondering if you could explain how to properly focus the tilt shift for the high DOF shot you first did.
Hi Danielle, I focused on my main point of interest which was the scalpel. Then I just let the HTS do it’s work for the extended DOF.
ouhhhh that’s a cool one! I will apply this even for portrait and see how it works ☺️
I have been considering a Tilt-Shift lens for some time. I get what they do, but I am still mystified about the physics of it all – need to do more research on my end.
Not sure exactly what you mean by 80mm DOF “REVERSED” example? Are you saying that the 80mm is mounted to the Tilt-Shift adapter with no T-S correction added and just focused in the center?
Also is the background some type of matte or frosted black plexiglass?
Great results!
Hi John, essentially there are two ways to send the tilt, one is in a direction that is more parallel to the subject than the camera and this will give greater depth of field over the subject. The other is to send it in the opposite tilt which then results in the strange shallow DOF, you can see me do this at 4:51.
Ah! That explains it. I guess I just never thought of reversing it that way.
Thanks Karl for your prompt reply.
Hi Karl,
Is its possible you could demonstrate how to photograph small black shiny cosmetic items, for example, an eye liner pen, mascara container a clear glass eye shadow pot against a white background.
Are you also able to explain what lighting conditions you view the product under when matching the colours to you colour corrected monitor?
Thanks Karl for your enthusiastic presentations.
Hi Charles, I think there are plenty of other modules here that will cover what you need to know of black shiny or shiny objects. With regards the products I simply place an X-rite color checker card in the first shot when I’m set up and then measure and neutralise that in the RAW file. My monitor is self calibrating and is always accurate to I know with those two processes that what I’m looking at is correct. I will be covering more on the colour checker card process soon in a future tutorial.
when is this one coming ?
Looking forward to this one!
Hey karl,
when is this one coming ?