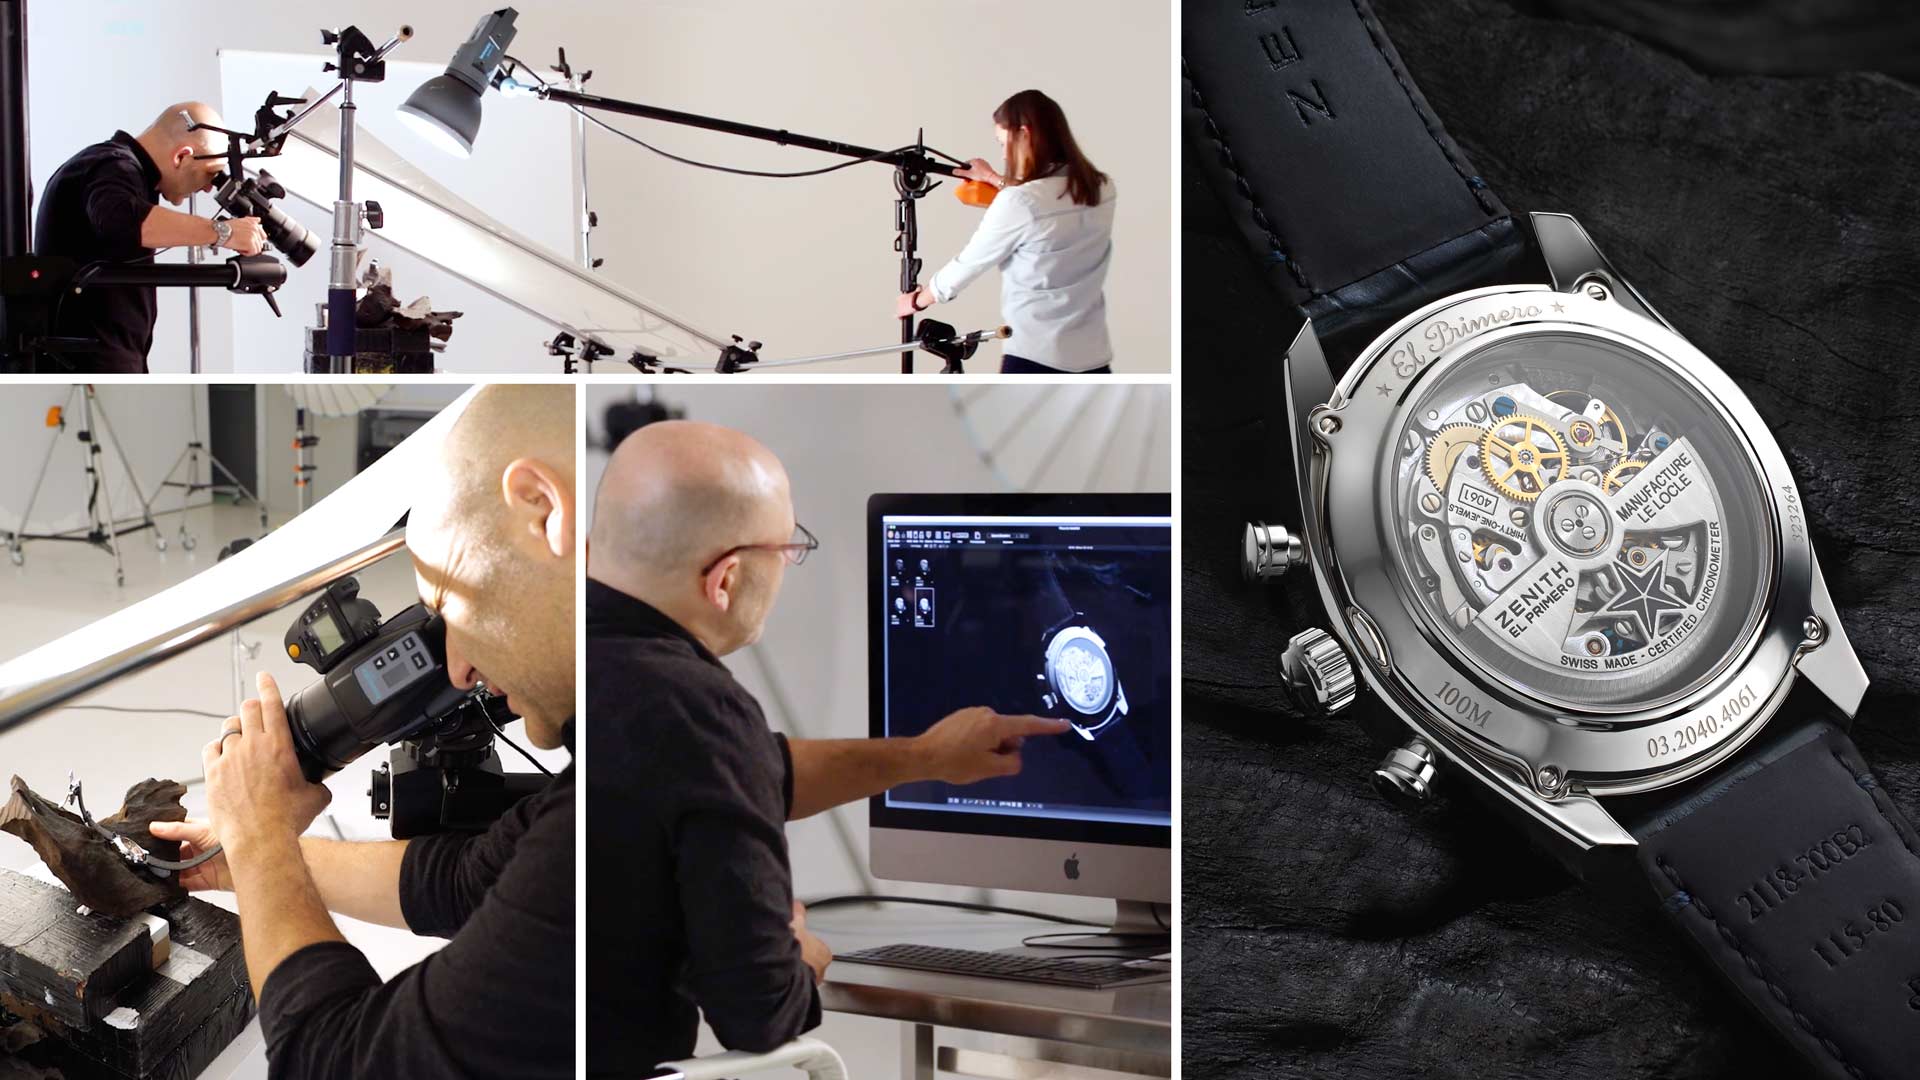

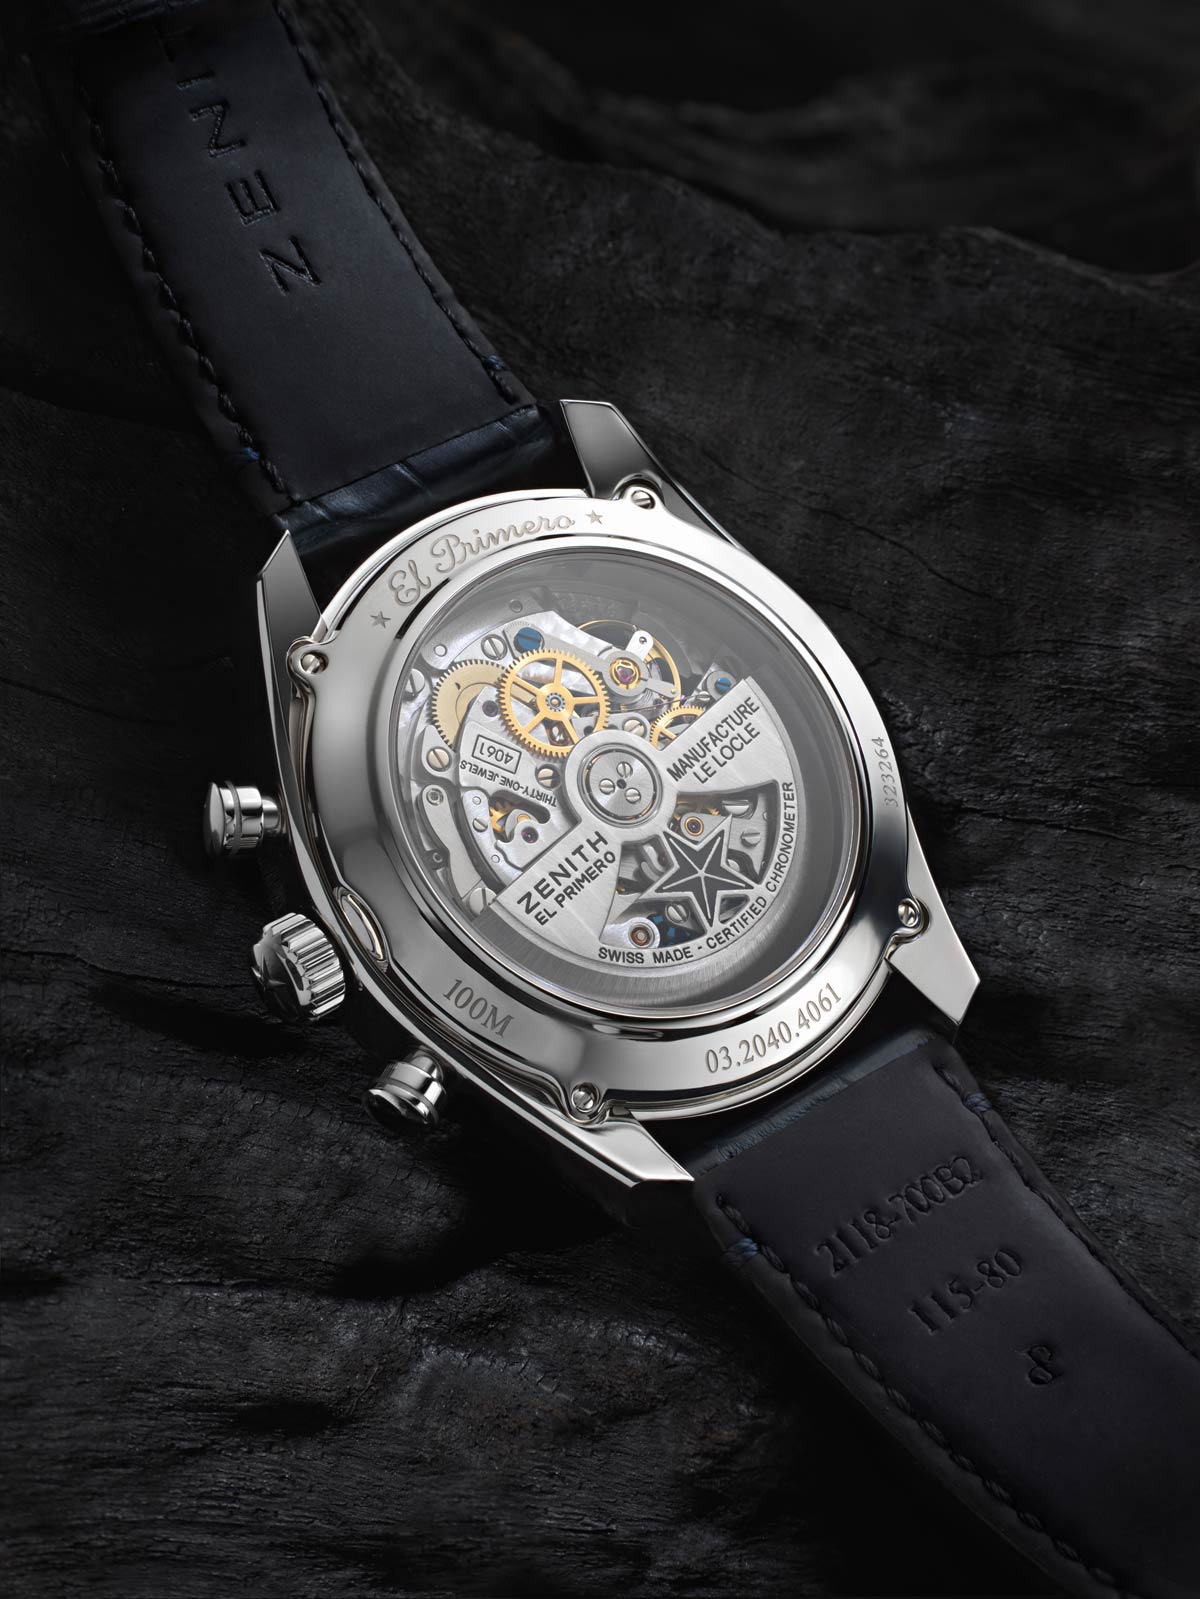
Zenith Watch Product Shoot
In this product photography class, Karl photographs the detailed inner workings of a luxury Zenith watch.
Karl highlights the common difficulties one might face, including how to photograph shiny metal surfaces, how to achieve sufficient depth of field when photographing small items and how to balance multiple lights.
This detailed photography class addresses each of these challenges and clearly shows you simple but effective techniques to overcome them. Karl details each step, from selecting his props to how to balance his lights. See the result from each stage and follow along as he guides you through this intricate high-end product shoot.
In this class:
- Product photography: How to photograph a watch
- Macro photography: How to photograph small objects
- Equipment for product photography
- How to focus stack an image
- How to balance multiple studio lights
- Lighting modifiers for detailed product photography
- How to use reflectors for product photography
- Live view function in Phocus software
To see how Karl retouches this image, check out production process for this image, Zenith Watch Post-Production 1: Focus Stacking and Compositing.
If you enjoy this class, you may like Luxury Watch Photography Using One Studio Light or TAG Heuer Luxury Watch Shoot.
Questions? Please post them in the comments section below.
© Karl Taylor
Comments
Hi Karl, why would you choose to focus stack when you have a tilt shift lens?
Hi, a tilt and shift lens only extends depth of field along one plane which is fine if your surface you need sharp is flat, whereas focus stacking is building up focus in every direction (if you do enough of them) also focus stacking is very easy now especially with software such as Helicon.
Karl, great tutorial as usual. Do you have any videos about using the xrite color checker? Ive used it in capture one to get my white balance but I wanted to know if I need to calibrate my camera as well?
Hi Kyle, we have a new course exactly about this being released this coming Friday. It will be posted in the ‘Product’ photography section. Don’t calibrate your camera until you’ve watch it! 🙂
Hi Karl,
Thank you for your excellent photography tutorial. I am a new watch photographer as I don’t have much experience photographing watches; this tutorial really does help a lot. I do have a question about setting up the watch. I photograph steel link watches, how can I photograph it in such a way that the inner links are visible on the 3/4 view? Please see link: https://www.audazwatches.com/collections/octomarine/products/adz-2070-02
Thank you.
Hi Kevin, you can use a rod/wire that you can bend but is still stiff enough to support the watch and then retouch it where it is visible.
Hello,
I can find different type of acrylics, each one has a different type of transparency (110,130,140,160,190)
Could you please let me know which one did you use.
Thank you
Roberto
Hi Roberto, the honest answer is that I have no idea. My supplier does 3mm thick and 5mm thick in solid or semi opaque and gloss and matt. I have a lot of sheets of different stuff, if you’re not sure go for the mid strength.
thank you very much
woww… 1 whole hour…. im pack. So Respect because so much detailing work. Learnt a lot. Thanks Sir Karl
Thank you
Hi Karl, great informative education in this video.
wanted to ask something in particular, the conical diffusion structure/setup which you had used in the ring jewellery video, wouldn’t something setup like that work for this watch aswell which has alot of chrome surfaces/parts to get even lighting and results similar to that ring shot?
Thanks.
Hi, Yes if the watch is elevated with in the cone it has the ability to be a quick solution but it would not have the same precision as being able to angle the mirrors and choosing if you wanted refelctions or not as in some of our other watch shoots.
Is there an explanation of the Fox Stack process and its method?
Hi the ‘fox’?? I’m not familiar with this. I use two types of stacking Photoshop or Helicon.
I mean the right way to take more than one focus on the camera
Hi Abdullah, you simply need to shoot each image in steps that go in small increments of focus, enough that the depth of field covers from each shot to the next. https://visualeducation.com/class/jewellery-photography-rings-focus-stack/
https://www.instagram.com/p/BzfP-aCgLVs/?utm_source=ig_web_copy_link
Is it possible to get an explanation for this product
Hi, here you go https://visualeducation.com/class/high-end-headphones-product-shoot/
Like if you wanted to shoot a ring
Great tutorial Karl
Thanks for all great efforts!
Hi, Karl, I’m watching the Zenith Watch Product Shoot video, I wanted to ask you why you don’t use the 120mm Macro? Thanks in advance Aquilino
Hi Aquillino, I’ve tested and compared the 120mm but I couldn’t see a great deal of difference so I’ve been happier with extension tubes and different focal lengths.
Hi Karl
Thanks for the replay
Best regards
Aquilino
Hi Karl,
I need to start by saying that your work is absolutely incredibly beautiful!
The question I have is with respect to Focus Stacking vs. using a Tilt/Shift lens. I realize that in focus stacking, it’s not only the focus plane, but also the depth that comes into focus assuming that it was imaged that way. Does the Tilt/Shift lens also capture the depth as well and does it make sense to invest in a tilt/shift lens when focus stacking software is so much less expensive? I’m more interested in the quality of the final image.
Thanks,
Len
Hi Leonard, focust stacking can only add ‘depth of field’ in the same direction that you can focus. A tilt and shift lens can add depth of field in a different direction to that of the normal focusing direction.
Hi Karl, do you have a link for the bendy arm grip please. Great tutorial. Thanks
Hi Wayne, https://www.manfrotto.co.uk/flexible-arm
I had quite a laugh when you were searching for the name of the burner that chefs use… Because in the US we call those TORCHES… but of coarse that would be a flashlight in the UK. haha!
Also… Love the detailed reasons WHY you do what you do. That is the most helpful thing. Any other lighting tutorial can tell you how they did it… not why. Thank you!
Thanks Jayce.
have you ever tried using the laser from a distance measuring device to find the angle of reflection, works pretty well on most items, simple point it from the camera onto the surface you want to find the reflection from, just follow the bounce 😉
Hi Karl
On this shoot, you used a reflector instead of a bare bulb, is it because:
1. the acrylic is thicker then diffusion material (that you normally use) and needed more energy output in a small area,
or
2. the object to illuminate is so small that a bare bulb would not have given the desired gradation?
Amit
Hi Amit, yes partly because of number 1 the acrylic is thicker but also as it is thicker it diffuses better anyway.
Hi, Karl. You always make everything look easy, though it’s not. This time is obviously complicated; I did not fall into the trap :)) An excellent achievement!
Thank you Bogdan. We have more and different types of jewellery courses coming soon.