Sports Product Shoot With Paint Splash
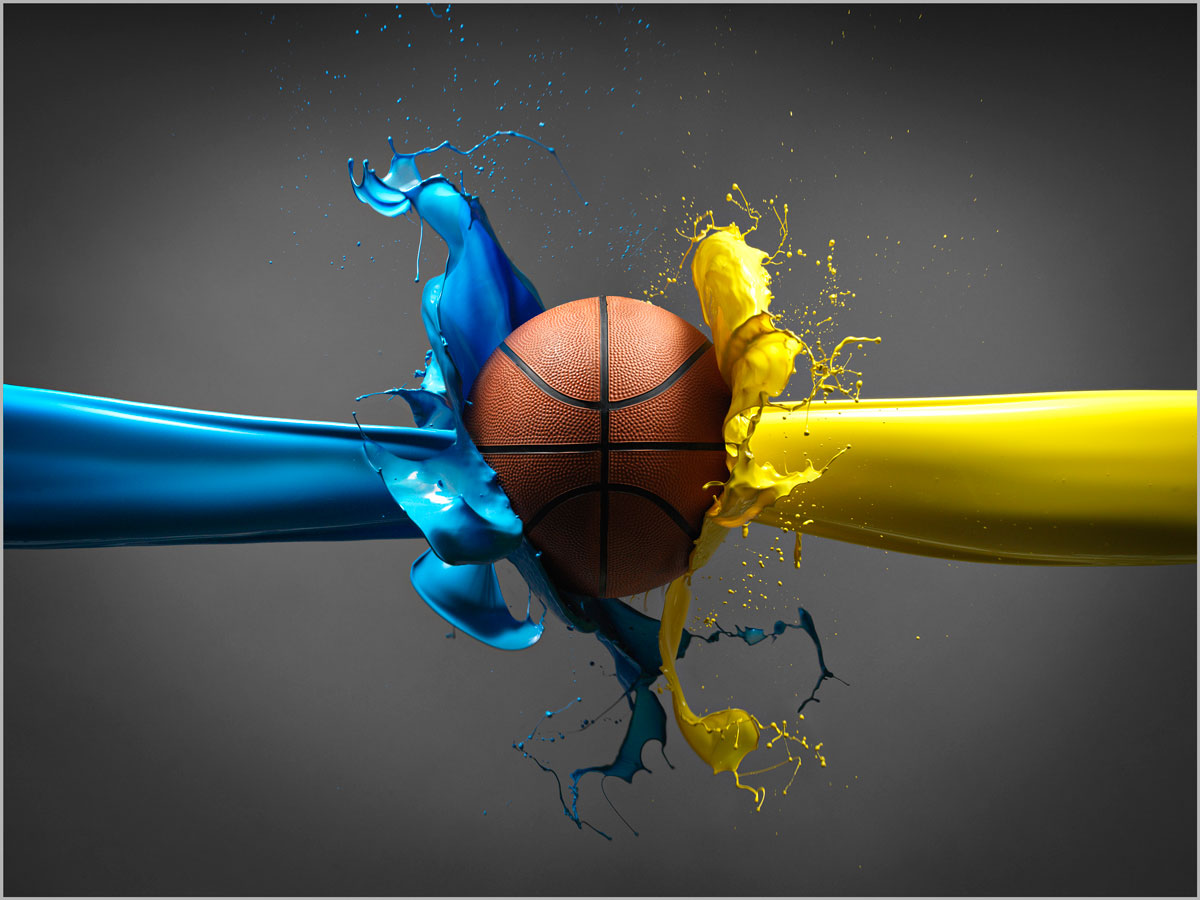
Would you like to create an explosive image like this one? This class shows you how.
Discover how to make the basketball float, how to get paint splashes from each side, how to freeze the motion perfectly, and much more.
In this class:
- Creative product photography ideas
- How to freeze motion
- Using speedlights for fast flash duration
- Problem-solving for creative results
- Using juxtaposing colours for creative effect
If you enjoy this splash photography class, be sure to check out Model Throws Paint and Paint Explosion.
Questions? Please post them in the comments section below.
© Karl Taylor
Comments
I have been on my photography journey for over 12 years now. This might have been the first video I watched from you. I think I have the DVD somewhere. It’s neat to be able to watch it in high definition after all of these years. We both have grown quite a bit. I remember when you still used Elinchrom and only had 50 megapixels! And I miss all of your assistants who have moved on to bigger and better things. Fab and Lucy and all the rest should do a Karl Taylor assistant reunion. Perhaps they can take a cool photo of something and you have to move all the lights for them.
I can honestly say no other teacher has expanded my photography knowledge more than you. Every YouTube photography educator stops at beginner/intermediate tutorials and it was difficult to find more advanced techniques. But when I found your courses I felt like this entire new level of photography unlocked. I built my own studio in my basement and used just about every trick you taught me.
After I got through all the DVDs, I was only able to follow you on YouTube until now. I am disabled and didn’t really have the budget to sign up for this site until recently. I can’t believe how much new stuff there is. My brain can’t absorb the knowledge fast enough.
In any case, I just wanted to thank you for all of your teachings over the years. Photography is how I maintain my sanity and your mentorship has been invaluable. I’ve been dealing with a lot of loss in the last few years. Both my parents passed as well as my beloved pooch. But I felt so lucky I was able to capture nice portraits of them so I can always remember them at their best. You might even notice some of your teachings in the photos.
https://imgur.com/a/sikhjSI
Here’s to another 12 years of learning. Take care, Karl.
Hi, firstly thank you for following and supporting the team and I all these years. Yes some of the team have moved on but we still see them from time to time and they are all doing well. Tim and Jon (my fellow directors) are still here from day one! Ben has been with us more than 8 years now I think. Thank you very much for your kind words about our content, we are very proud of what we have built here and the feedback we receive and it’s always great to hear positive feedback like this, thank you. Sorry to hear about your losses, memories are obviously very important and photography plays a big part in that. All the best for the future.
I don’t understand why Karl didn’t use SCORO S but speedlights ???
SCORO is faster than these…
Hi, because this class was made before I owned a Scoro S
Mr. Taylor, I forgot to ask, what sort of paint you are using? is it waterbase?
Good day Mr Taylor,
I was wondering, what were your camera settings? and what lens did you use? also, was it spot metering?
I am excited to try this shot 😉
thank you
Sorry, I have just noticed all the answers to my questions on the side. this was my first tutorial to watch
Hi Jacqueline, no problem everyone does the same, but if you have any questions just let me know.
which model laser level is that? I have only seen lasers with red pin point, not the “line” that this one appears to have…
Hi, I’m afraid I don’t know the level but it’s a high powered laser pointer. I’ll check the miliwats.
AWESOME! ❤ Thank YOU very much 😁
👍
Perfect …wonderful…awesome explanation ….awesome job …..God bless you
Thank you!
Hi Karl! How you manage the focus and how you know what is right time to press the shutter button in this very fast shoot?
Love from Pakistan.
Hi Abu, I focus in manual because we know exactly where the action will happen. The timing is just done by eye and requires a bit of luck, you will see in other tutorials where we use sound or motion triggers to capture the exposure. Kind regards Karl.
Hi Karl, your classes are really helpful! just a question, why did you use 4 flashes instead of one more powerful strobe light?
Cheers
Hi Davide, now I do currently use more powerful studio flash with fast flash duration capability but at the time this video was made some years ago my existing studio flash were not capable of achieving the fast flash durations necessary to freeze liquid movement like this. Speedlites were capable but can only do so when on low power, hence having to cluster 4 together. You might find this chapter useful – https://visualeducation.com/class/understanding-flash-duration/
Thank you Karl!
Hi Karl, I notice on your paint splash shots the camera is covered in protective plastic but the lens doesn’t seem to be. Are you taking any measures to protect the lens from a paint splash?
Hi Jeff, I sometimes put a clear filter or shoot through a piece of glass but if I don’t think it’s going to be too bad I just stand by with a cloth and wipe it off if there’s a splash. Lenses are pretty well sealed.
Il ne me reste plus qu’à le faire ! Merci Karl
PS : Je vous montrerai bientôt …
Bon chance!
Amazing work, Karl! What type of paint did you use (oil-based, water-based, latex, acrylic)?
Hi, this was water based emulsion
Hi, Karl. Great shoot!
I was wondering, would the same effect be possible to achieve with a single paint color, but using post to later re-color the different splashes? Say, you pick vivid pink or orange paint and then recolor that using HLS to be blue on one side and orange on the other. Would that yeld a good result, or is there something that would prevent doing so, such as perhaps image degradation or something along those lines? Just though some time and paint could be saved by doing this in post 🙂
Hi Rimantas, my question would be ‘do you really think doing all that post work would save you time?’ I don’t think it would and it would require a lot of masking and the potential for problems. I’d always recommend doing as much ‘in camera’ as you can. Cheers Karl.
Big thumbs up on this shoot. I’m glad I read the comments sections. I very much needed to know you had a course on all the lighting but since I’m not into portraits, this was not my 1st, 2nd, 3rd, etc., choice of sections to look at. It looks like all the questions I’ve been wondering about in respect to lighting and syncing flashes and how to use them will be answered there. I’m thrilled to now know about this course. I don’t feel so overwhelmed with equipment after knowing what is in the Light Course. Really great information here and I’m so glad I’m a member of your education site. I have a sharp learning curve and a short time to learn in. Your courses will help me achieve goals that would have taken me a whole lot longer.
Thank you Gina.
fascinating and creative.
Curious if you have used some form of beam trigger rather than your keen eye/reflex?
Hi Peter, we often use triggers, most recently the Miops but sometimes not using a trigger gives an inconsistency that can yield interesting results. See our recent Chanel splash shot tutorial as an example.
Hi Karl! Photography is not that simple as I used to think. Your photography is adventurous! You are taking risks-especially the Iceland shooting.
In this shoot of volleyball, I noticed the shutter speed was 1/500th of a second. Do the flashes synchronize at this shutterspeed? Please explain in detail how and where you are connecting the flashes.
Hi Waris, on a medium format camera you can sync at any speed, if I was using a 35mm camera then I would have been limited to the 1/250th sync speed, but as you would have understood from the video it is the flash that is freezing the subject. I was connecting to the flashes with a wireless trigger on the camera and receivers on the flashes.
Karl
What were your camera settings …. How fast was your shutter and why did you choose that speed in conjunction of the flash power and what was the iso
those would be great details to have
Hi Manuel, to understand these concepts of shutter with flash you need to start on the first chapters of our course ‘Light Source’ in the ‘portrait’ section. As you are currently thinking along the wrong lines and this will help you. Thanks Karl.
really awesome shot and explanations ! too bad there is no retouching tutorial. Would have been interesting to see how you composed everything.
Hi Loic, thank you for your feedback. I can tell you that the retouching on this one was quite straightforward. Based on the centre split of the image it was just a case of joining the two shots and then a little bit of masking where the overlaps of paint were at the bottom, that was about it. Some of the other retouching tutorials in this course and our ‘post production’ section give you all the information you need to make it a breeze. Cheers Karl.