


How to Cut Out Objects in Photoshop Using the Pen Tool
The next stage of this composite demonstrates how to use the Pen tool to quickly and accurately cut out the subject before starting work on blending that with the rest of the scene.
In the class:
- How to select objects in Photoshop
- Why and when to use the Pen selection tool
- How to use the Pen tool
- How to create points and curves using the Pen tool
- Refining selections
There are a number of ways you can select and cut out objects in Photoshop. For this particular subject, Viktor’s tool of choice is the Pen tool – a powerful yet often overlooked tool in Photoshop. Viktor explains why he uses this tool and demonstrates his method to quickly and effectively use this tool. He also explains why it’s important to work with masks when cutting out objects, especially for composite work, and what to consider when cutting out objects from a dark background to place on a lighter background. This is a useful class for anyone unfamiliar with the pen tool or those wanting to learn a slightly different yet highly effective way of using it.
Before cutting out the subject:
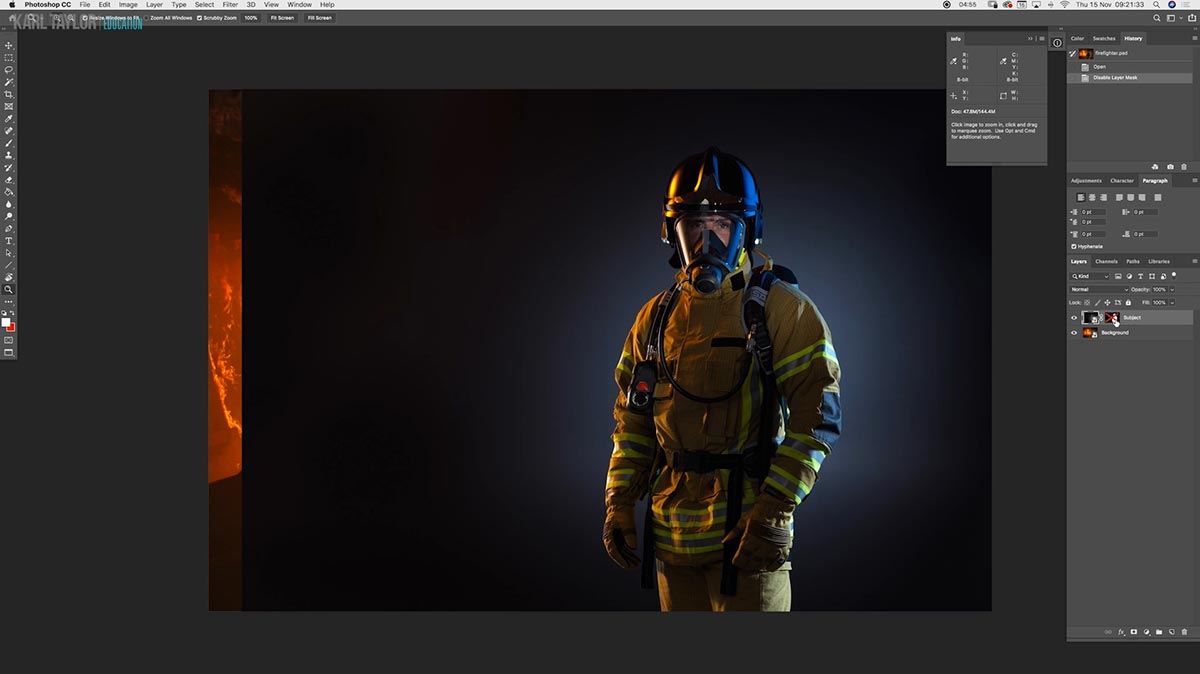
The firefighter, placed in position, not yet cut out.
Using the Pen tool to cut out the subject:
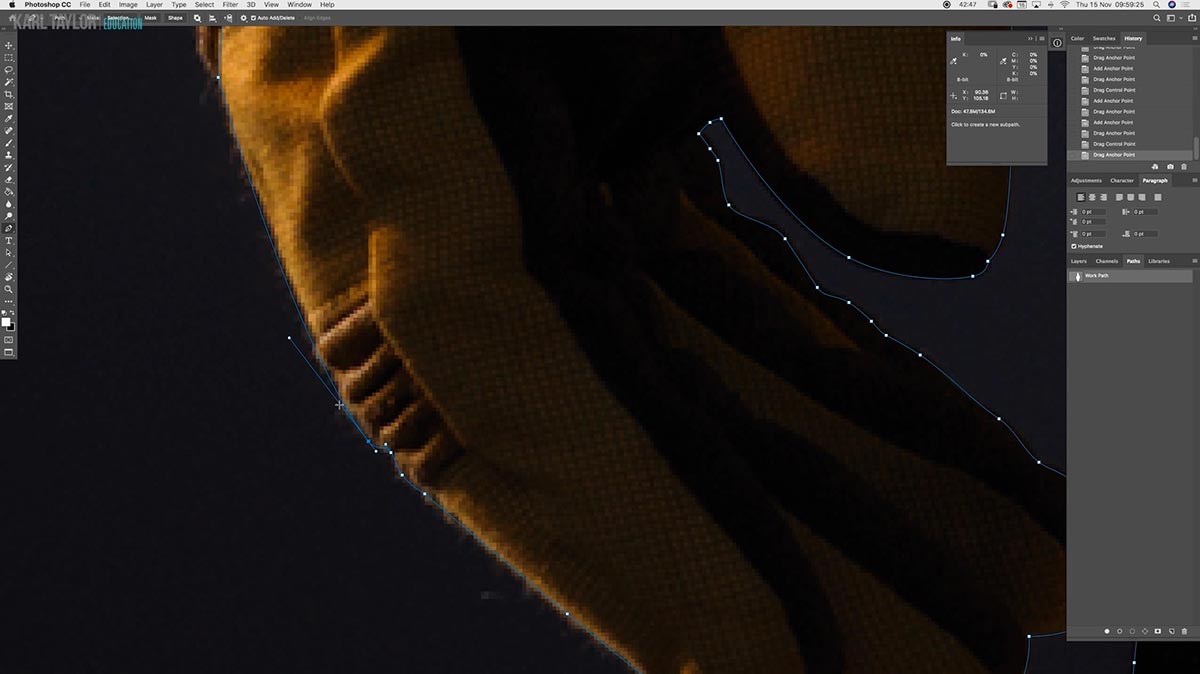
The Pen tool is a powerful tool for cutting out subjects that have low contrast edges, as you can see here.
The subject cut out:
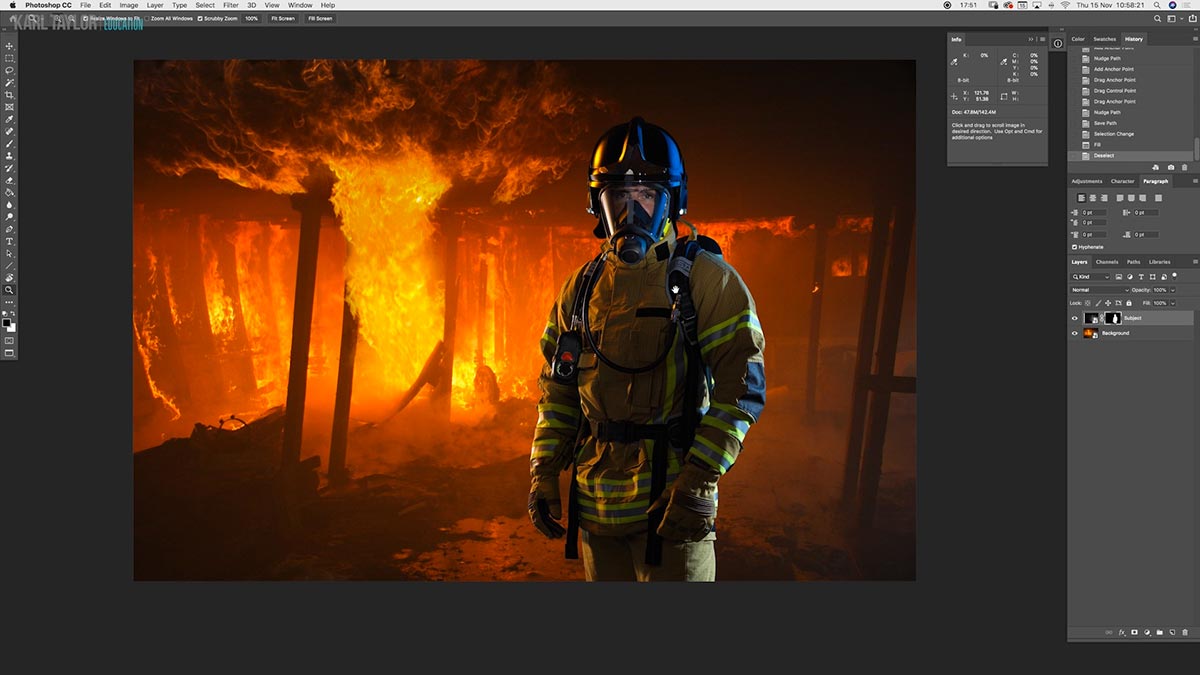
The Pen tool allowed for a quick and accurate selection of the subject.
For more tips on creating composite images in Photoshop, read our ‘Top tips for compositing‘ article.
Questions? Please post them in the comments section below.
Comments
definitely the best explanation I’ve ever heard about the use of Pen Tool so far. I’m surprised about what I started to do with the PT after this video. Thanks a lot Viktor and thanks a lot Karl as well. This is why your learning platform is unique.
Thank you Roberto. You might also like this follow up video – https://visualeducation.com/class/master-the-pen-tool/
thanks a lot for the suggestion, Karl. I’ll watch it for sure. Have a nice day. Ciao from Italy.
The great thing about Viktor’s work is that it is like working with a scheme or plan. Everything is segmented for each step. Cutting the subject involves a series of stages in which you have to organize and follow an order. Same with the backgroud process. And it is the same style that he used in the facial retouch work. It takes time but it is worth the effort. You even use those steps in your photos, step by step process, and each step involves other steps. Love it.
Good to hear Peter, we have more from Viktor soon!
Thanks Karl. I am really very satisfied.
What I was able to learn in this short time is incredible. To consolidate and expand my Photoshop skills, I worked through all the compositing. Victor’s way of teaching is so motivating. His precise eye, didactics and methodology and his inspiring way are great. The pen tool has become one of my favourite tools.
Karl, I am so happy to have chosen KTE for my training. Thank you and your wonderful team for this fantastic opportunity and the variety of courses. I can learn and improve in my own pace – great!
Hi Felice, that’s great to hear thank you very much. If you liked this class there is another on the pen tool in these classes here – https://visualeducation.com/section/photoshop-tools-and-techniques/ and I hopefully can encourage you to consider the ‘Fundamentals of Post Production’ too which was recorded live.
Viktor’s approach – which aligns with Karl’s Pen Tool training video is outstanding! The concept of laying down anchor points then zooming in to reposition them and adjust the curve handles almost at the pixel Level is brilliant. I have been practicing and using this technique with great success. Karl sitting next to Viktor provides a practical dialogue merging and clarifying expertise from two professionals. The whole compositing series of videos are great – this one is my favorite. Thanks so much for producing such valuable training material!
Thank you for your kind words and feedback Tom. Cheers Karl.
Watched the pen tool lesson twice and almost nailed it. This technique is so simple, that it’s complex in its simplicity!
Glad you are getting the hang of it! 🙂