


High-end Headphones Product Shoot
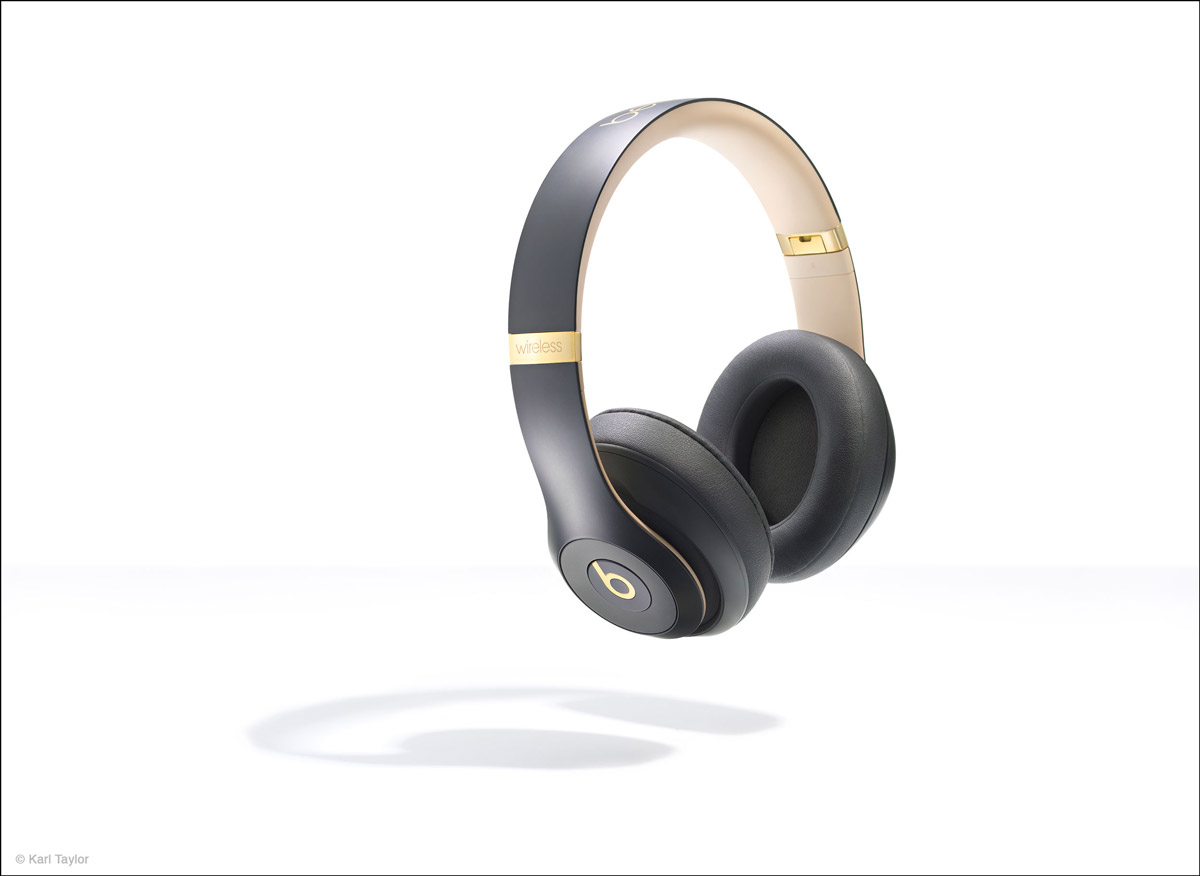
In this photography workshop, Karl undertakes a product shoot of a pair of headphones on a white background.
This technically challenging advertising-style shot presented a myriad of challenges, including positioning the product to find the best composition, creating a white background without introducing flare, lighting both matte and reflective surfaces, controlling shadows and balancing multiple lights.
Karl details the step-by-step process of creating this shot, explaining his creative decisions, how he plans to overcome each challenge and the lighting setup. He also shares the post-production work required to reach the final image so that members can see the complete start to finish process.
In this class:
- How to photograph a pair of headphones
- Photographing products on a white background
- How to light and photograph matte and reflective surfaces
- How to create gradient lighting
- Using ND and polarising gels for product photography
- Controlling shadows
Questions? Please post them in the comments section below.
Comments
Hi Karl, thank you for all your precious lessons. I’m a beginner photoshop user and i don’t know how do you have replaced the stand with headphone inside. Can you “light” me? Thank’s again, you’re my addiction!
Hi, I’m very happy that you are enjoying our classes! For the Photoshop lessons you need to go here: https://visualeducation.com/post-production/ and start with the ‘Photoshop for Photographers’ lessons which are for beginners. All of the techniques you learn here will cover 90% of everything you will ever need to do in Photoshop. After that for the last 10% expertise then you can do our ‘Advanced Photoshop for Photographers’ class and then we also have other example classes with some of the product photography classes plus a few individual classes that focus on specific Photoshop tools.
Hi Karl, many thanks once again for this video and the amount of info in it.
I left the UK as my job been transferred to Qatar, I left my home studio in London, sadly here I have very minimum equipment but still absorbing so much information from you..
Thank you so much again
Thanks Aby and best of luck with your job in Qatar
I don’t understand at 41min 33sec you put light higher from the scrim and get softer gradation??? It should be the inverse as light get smaller in relation to subject, contrast should be greater, is this because of the scrim?
Hi, lets start with one thing at a time here. If any light get’s further away it gets smaller so light gets harder (sharper shadows) not more contrast. Contrast as in exposure intensity variation is actually greater when the light is closer due to the inverse square law but is less noticeable if the light has become larger. Please watch this section https://visualeducation.com/class/understanding-inverse-square-law/ also the effect of contrast is reduced in a white studio space when the light is moved further away due to the inverse square law, as explained in this video. Your next question about the scrim is the graduation is softer because as the light is spread out more on the scrim when the light moves further from it, light graduation has enlarged because the angle of incidence of the light hitting a bigger area of the scrim has occurred. Please watch this video https://visualeducation.com/class/gradient-light-for-products/ the effect of gradients on scrims though is really only relevant to products which have ‘image forming reflections’
I need to buy mirrors, reflector mat and glossy plastic sheets of different textures basically I am missing all the little stuff Karl is using to light up the products ; do you know a store in US where I can order these all in one place?
Hi, Plastic supply companies or sign service companies.
Hi Karl, excellent tutorial, thank you. For shooting jewelry, would there be any benefit to using acrylic instead of the Lee 216 diffusion? The 216 is quite easy to find but acrylic diffusion seems to come in more varieties and I wouldn’t want to get the wrong one.
If the acrylic is better for jewelry, can you provide a bit more detail on what type of acrylic works best?
Thank you!
Hi, you will see me use acrylic in some of our other shoots including a jewellery one. Any standard white opal 5mm acrylic is good.
Karl, I am an enthusiast from Myanmar. Although I want to go further in product photography, I am encountering a lot of problems to solve. One is “scrim”. Currently I am working in a tight space, I can’t fit one large enough.
With all due respect sir, what would be the best solution for a scrim?
Hi Aung, with photography we are bound by the laws of physics. Some shoots are acheivable in a small space and some are not, alot of the decisions on how big a scrim needs to be (or how close) are dictated by ‘angles of incidence and angles of reflectance’ as such there will be situations where there is no alternative to a certain size scrim or ‘wall’ as a reflector etc and that is it i’m afraid, because we can’t break the physics.
Hi Karl, when the background was to dark, you said: “we are going to have to adjust the lighting or the ISO to suit. (not the aperture).
As a beginner, I ask myself, why is adjusting the shutter speed no option?
Thanks in advance.
Hi Bambule, if you are a beginner with studio lighting then you must watch all this section before watching too many classes otherwise you’re not going to understand some key things https://visualeducation.com/lighting-theory-and-equipment/ the 5th class in this section will answer your question as to why shutter speed has very little relevance it studio photography.
Thanks a lot Karl, I rewatched the class you mentioned now and this time it clicked. 🙂
Some absolutely stellar advice in this video. I particularly like around 17mins — and your shooting area / surface. Many times in the past I’ve made it difficult for myself with larger surfaces and difficulty getting lights close enough.
Remember, Photoshop exists.
This is the kind of advice only an experienced pro can give…
Thumbs up emoji, Karl.
Thank you Philip and glad you enjoyed it.
AWESOME! ❤ THANK YOU VERY MUCH 😁
Always learn something from your courses. I am glad I sign up again. Just in case I look for work this be great additional skills for social media work like Levis, electronic company, or others. I have used some of the techniques with my speed lights on test practice products and for social media. I mostly do photography as a hobby but know a little about video in case I look for work part-time in retirement.
Karl, question about the scrim placement. I had just watched the sunglasses tutorial where the scrim was above and very close.. mostly to add the gradient & control the reflections in the lenses. In this case, the scrim is around 60-80cm above the headphones. Is it strictly a matter of comfort and space available for that distance or a specific lighting reason? There are some chrome reflective bits. Did you choose the distance to work on those separately? Could you have shot this with the scrim far closer, for instance, because your studio is more confined?
Hi Gary, with the sunglasses the main reason the scrim was so close is to increase its apparent size to the subject. Because the sunglasses were almost spherical and highly mirror like then having the scrim close meant I would fill more of the lenses with the scrim. In this case the tops of the headphones were a matt/lustre finish so not so essential and the chrome parts were to the side or underneath and much smaller so I knew I was going to use mirrors to bounce back into those areas. Working comfort would also have been a factor but only secondary to the results needed.