
01. How Do Cameras Work?
Cameras, no matter how much they cost or what brand they are, all work in roughly the same way. Understanding the simple mechanics of how cameras work will help you realize just how similar they are and how you can get the best possible results out of yours.
But before you head out to start taking photos, it’s important to understand the six essential requirements needed to record an image.
Understanding these requirements, regardless of whether you’re shooting on a DSLR, compact camera or iPhone, will make your photography so much better. These requirements are:
- Light: Light is an essential part of any image but there are many different types of light. How we use this light is important.
- Subject: The subject is what we take photos of and refers to how we compose the image.
- Optics: This refers to the lenses, which are used to focus the light and capture an image.
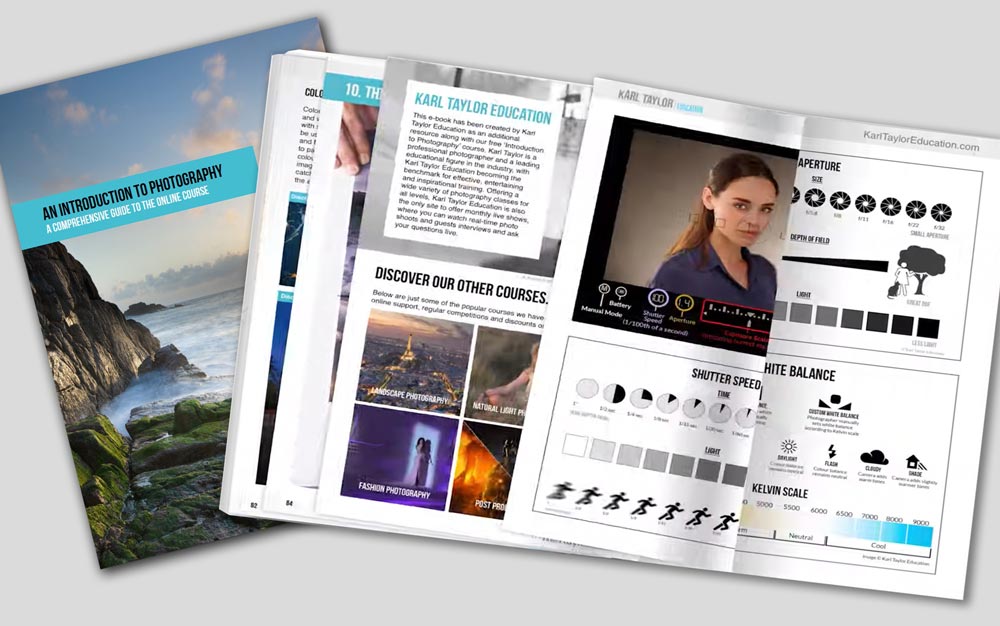
- Aperture: This controls the amount of light getting into the camera and the depth of field of an image (the sharpness range either side of the point of focus).
- Time: Time relates to the shutter speed and how long it takes to record an image.
- Medium: This is what we record the captured image on to (this used to be film, but nowadays is usually a CMOS or CCD chip).
Once you understand these concepts and how they relate to one another, you can better start to understand how cameras work.
Below we explain in more detail these 6 key elements essential to your photography.
Light
An essential part of photography that we use to create our images.
© Karl Taylor
There are two types of light that we can use to create images: natural light (such as the sun or daylight reflected off of buildings) and artificial light (candlelight, car headlights and even studio lights). Each of these types of light produce either hard or soft light. This refers to the strength and density of the shadows. Soft light results in soft, very light shadows, whereas hard light results in the opposite — strong, dark shadows. When taking photographs, it’s very important to think about and identify the type of light as this can have a big impact on the final result.
Subject
What we take photographs of.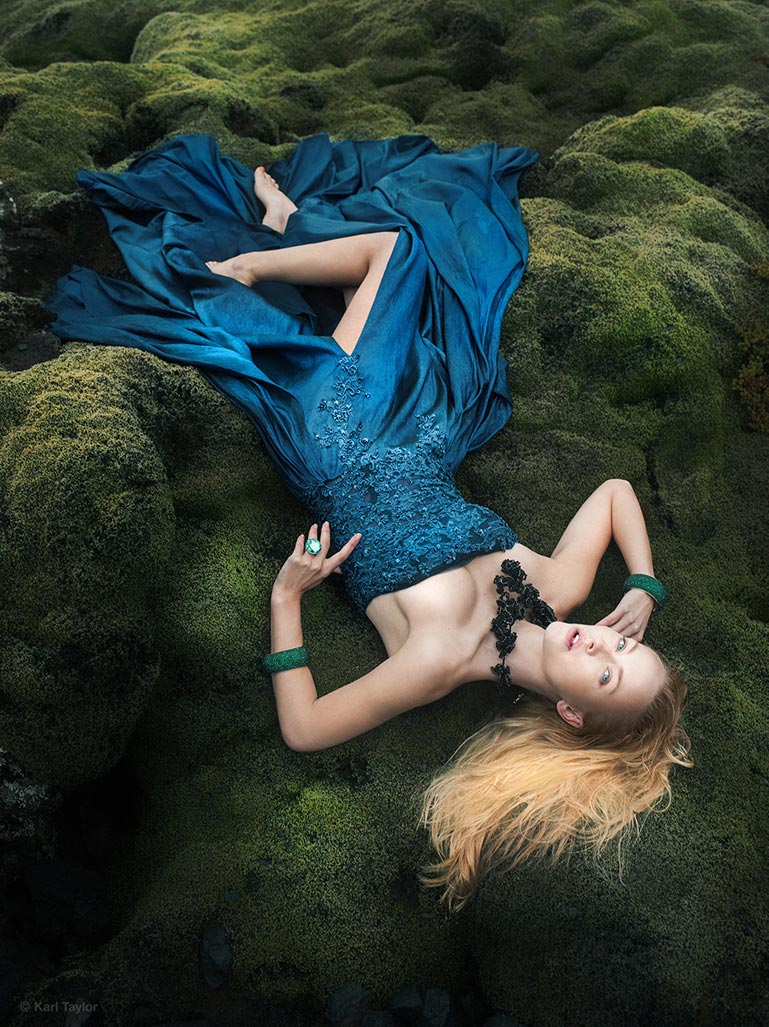
Interested in fashion photography? Click here.

Interested in natural light portraits? Click here.
The subject is the thing that we take the photograph of. This relates closely to composition (we’ll look at this later in this course), which is how we arrange, or compose, certain elements within the frame. The subject (or subjects) can be anything — from insects to landscapes, people to products.
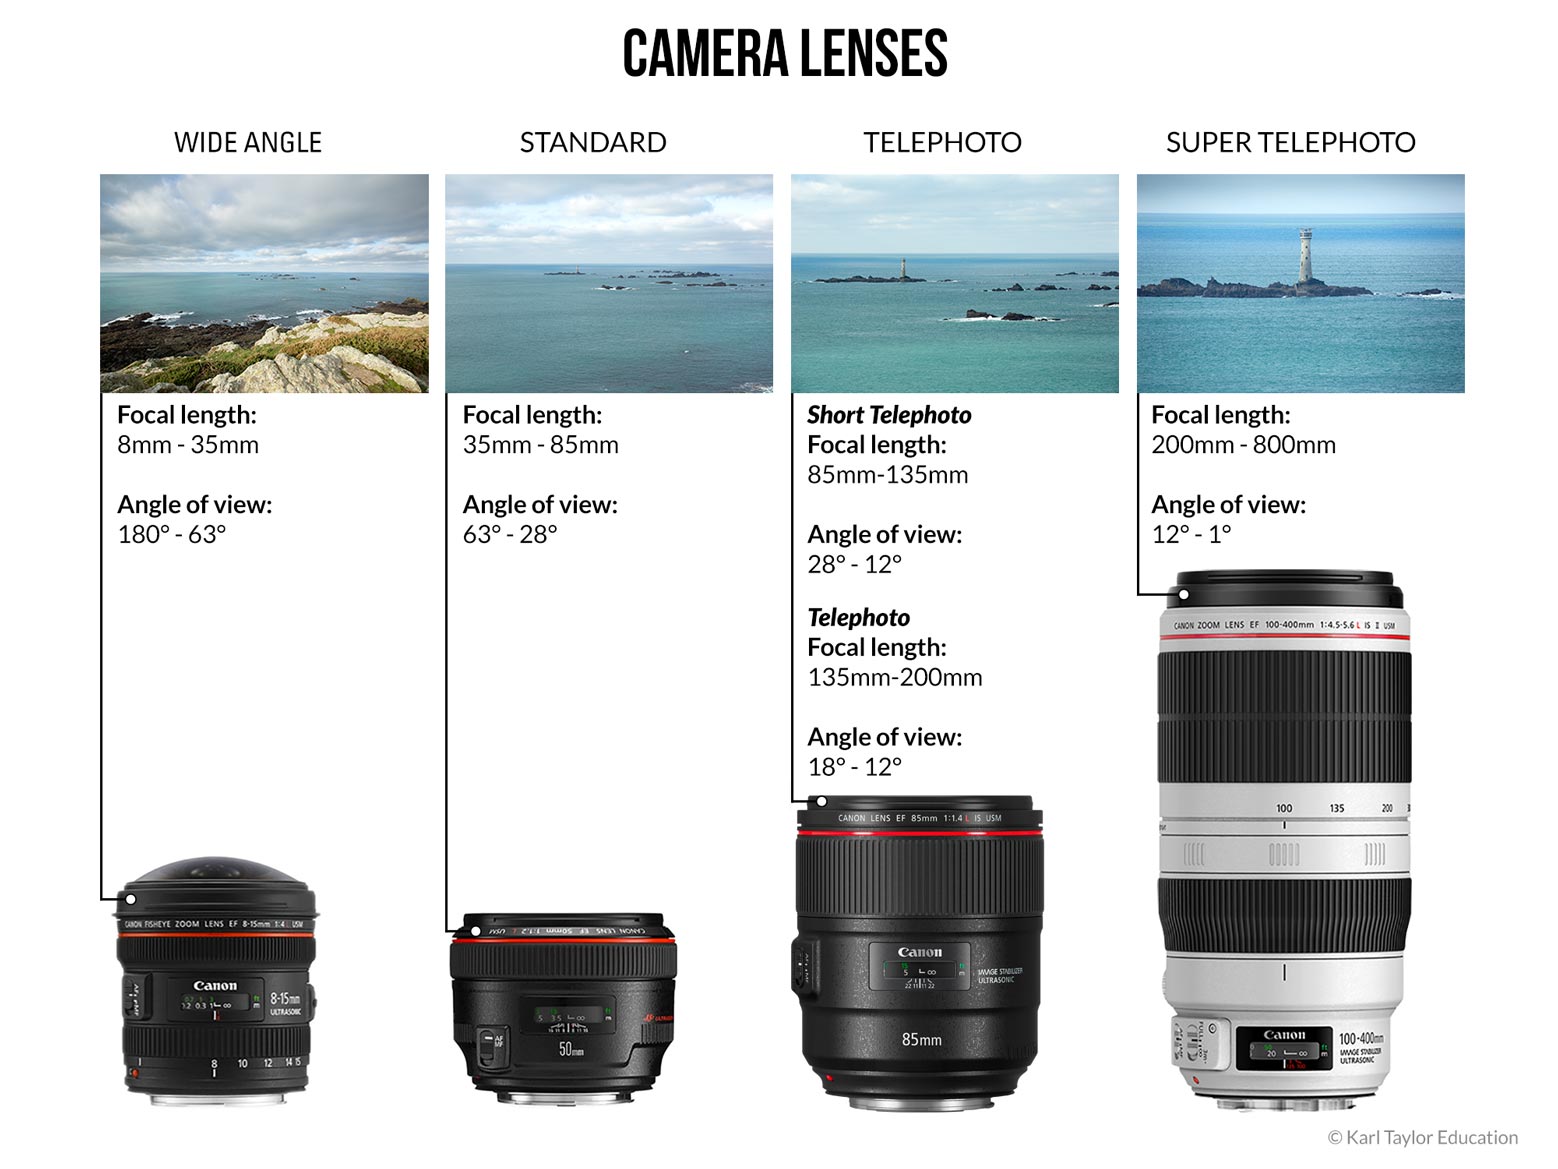
Lenses
Used to focus the light and capture an image.Optics, generally referred to as lenses, also play a part in how an image is created. They serve to focus the light onto the recording medium. Lenses control the focal length of an image, the angle of view, magnification and help describe the image based on their particular characteristics. Lenses come in a variety of different focal lengths, ranging from ultra wide angle to super telephoto, and different lenses can produce very different results depending on the configurations within the lens barrel.
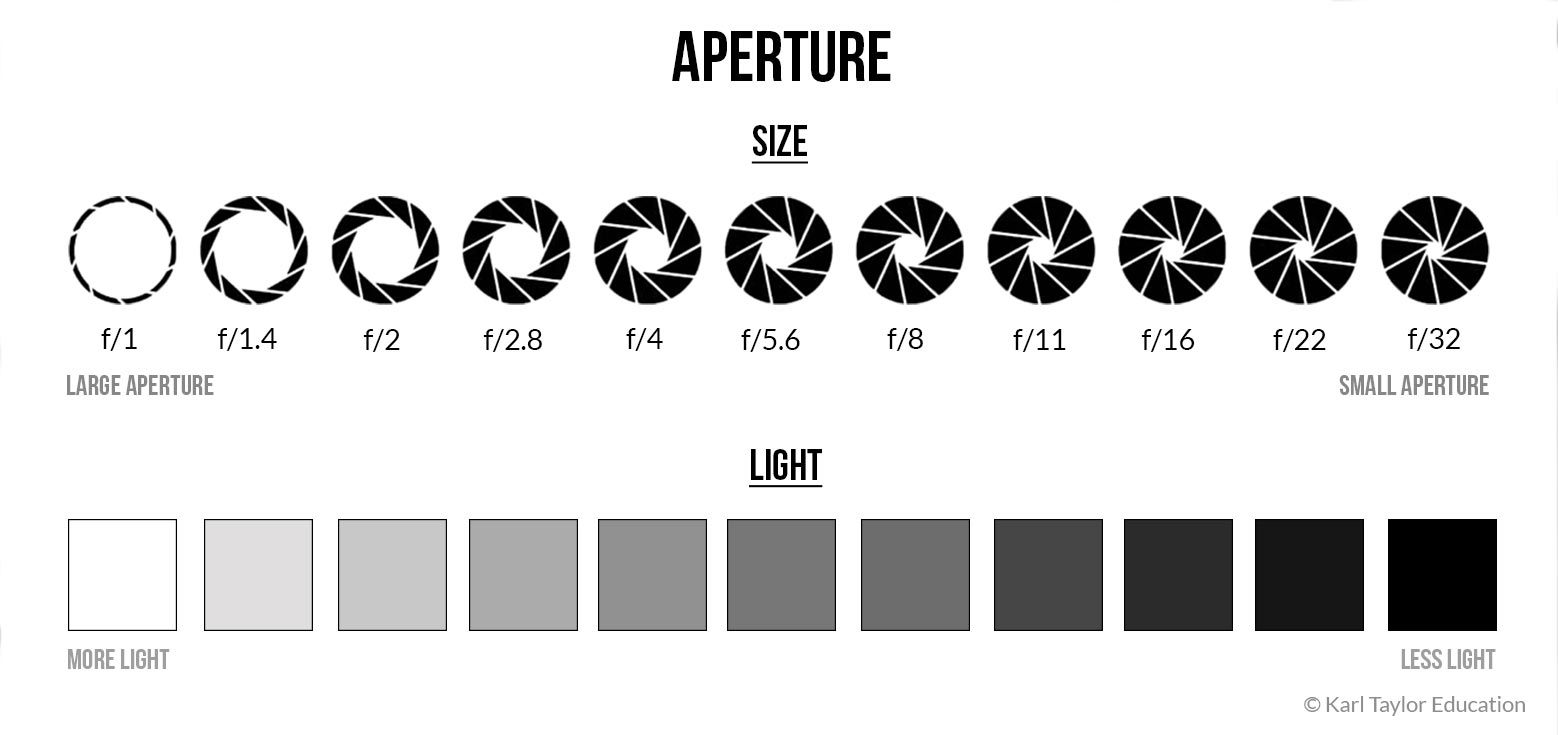
Aperture
Controls the amount of light getting into the camera and the depth of field of an image.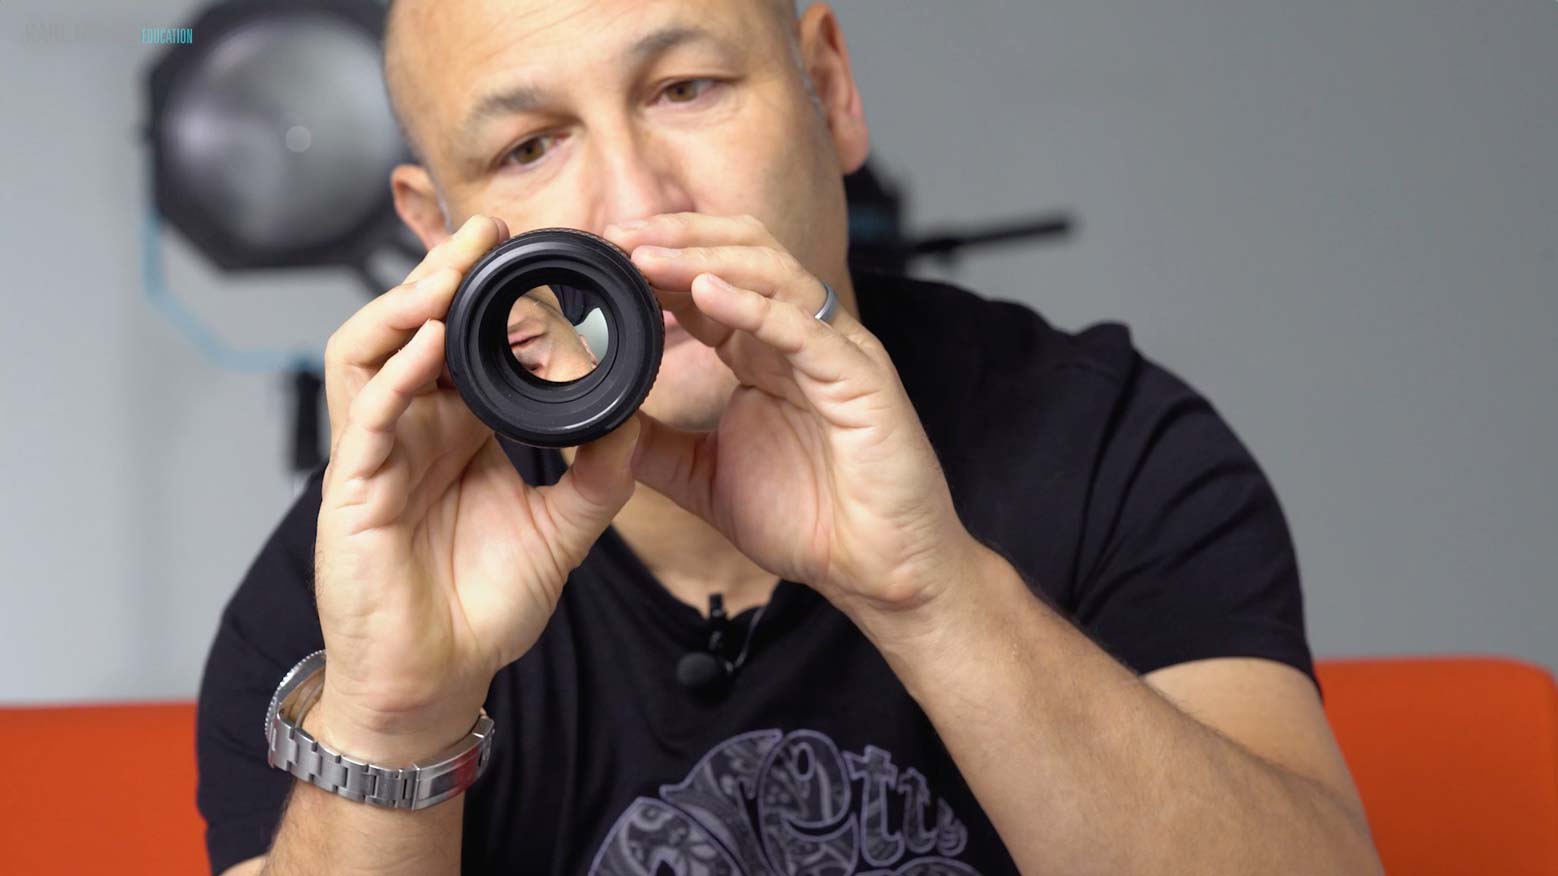
Aperture refers to the size of the opening in the lens that light passes through before hitting the sensor (or film). It is measured in f-stops and is shown on your camera by the symbol ‘f’ (for example f1.2, f5.6 or f22). The lower the number, the larger the aperture (you can see this in the image below) and the more light that can be recorded. By controlling the aperture, we can control not only the amount of light recorded in an image, but also the depth of field in an image (the sharpness range either side of the point of focus). Larger apertures, such as f2.8, allow the most light through the lens and result in a shallower depth of field, whereas smaller apertures like f22 allow less light through but have a greater depth of field. This may seem confusing at first, but it’s an important concept to understand as this can have a great impact on your image.
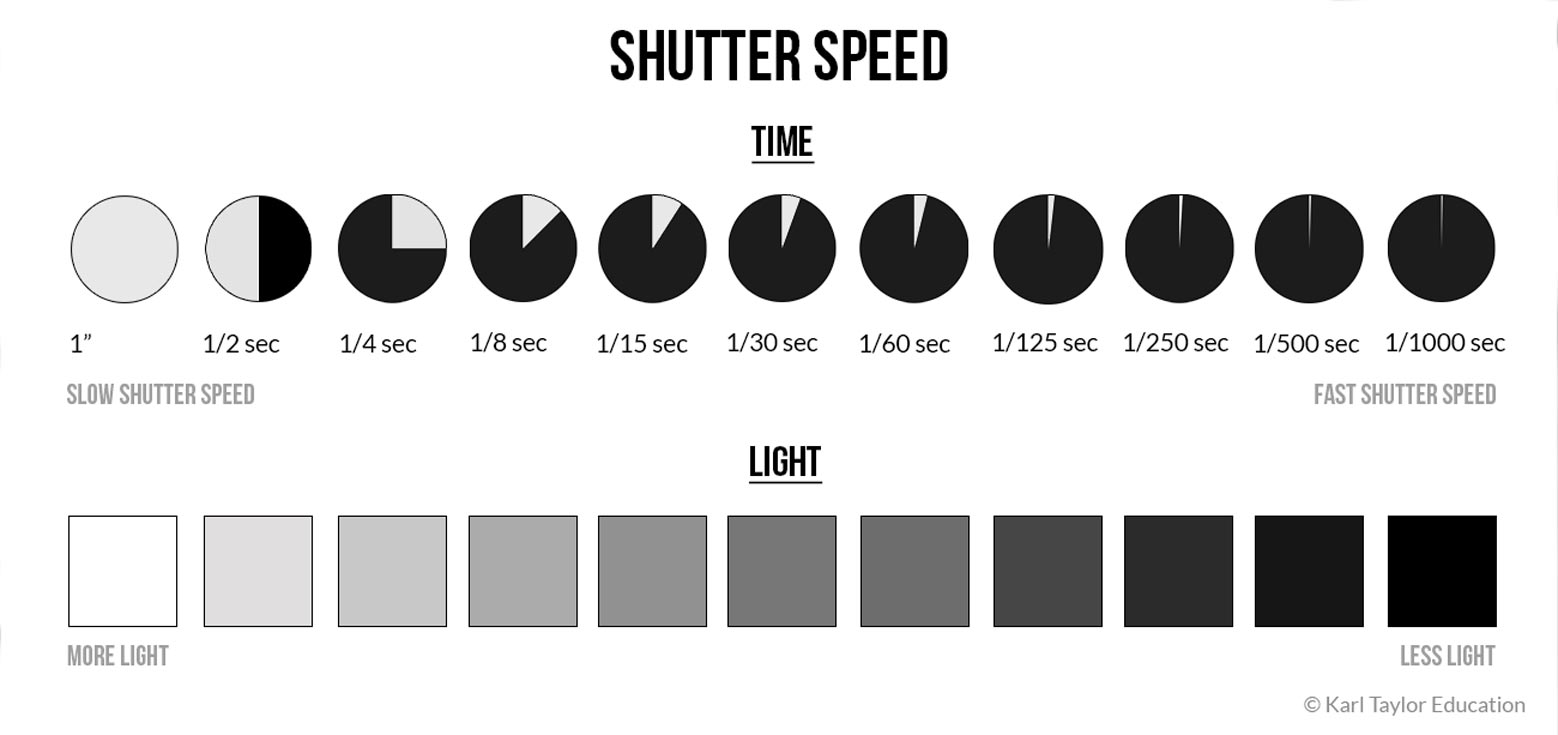
Shutter speed
Controls how long it takes to record an image.
Time is an important part of recording images and is controlled by adjusting the shutter speed. The shutter speed refers to the duration that the shutter remains open to record an image. This is recorded in tenths or hundredths of a second (for example 1/10, 1/250 or 1/1000) or seconds (for example 1”, 10” or 30”). The slower the shutter speed, the longer the shutter stays open and the more light is captured. Faster shutter speeds freeze movement, while slower shutter speeds allow for motion blur.
Medium
What we record the captured image on to.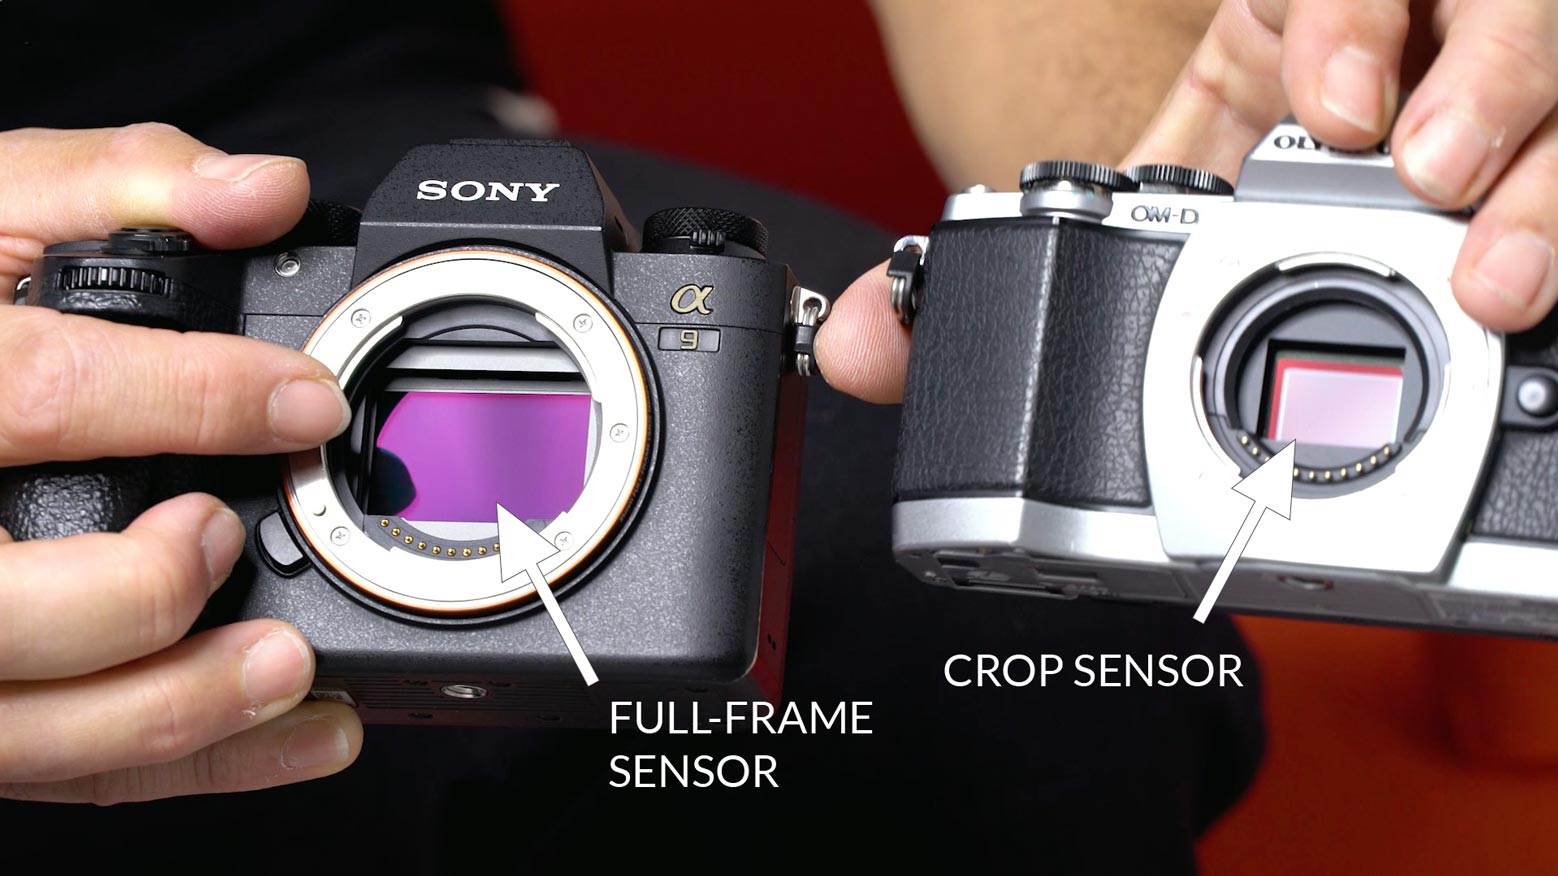
Photographic images are created by light passing through the lens and reaching the recording medium, which is what records the image. Traditionally, this was film, but nowadays images are recorded onto sensors. Modern cameras use mainly digital sensors — either CCD (charge-coupled device) or CMOS (complementary metal-oxide-semiconductor). There are a few different sensor sizes, but the three most common ones are full-frame, crop (or APS-C) and medium format (these different sizes are all covered in more detail in the video above).
Regardless of what camera you’re using, how each of these six essentials work is very similar and you’ll soon see that everything in photography relates to one, or a combination, of these six things, so a clear understanding is vital. We’ll be looking at each of these in much greater detail throughout the remainder of this course.
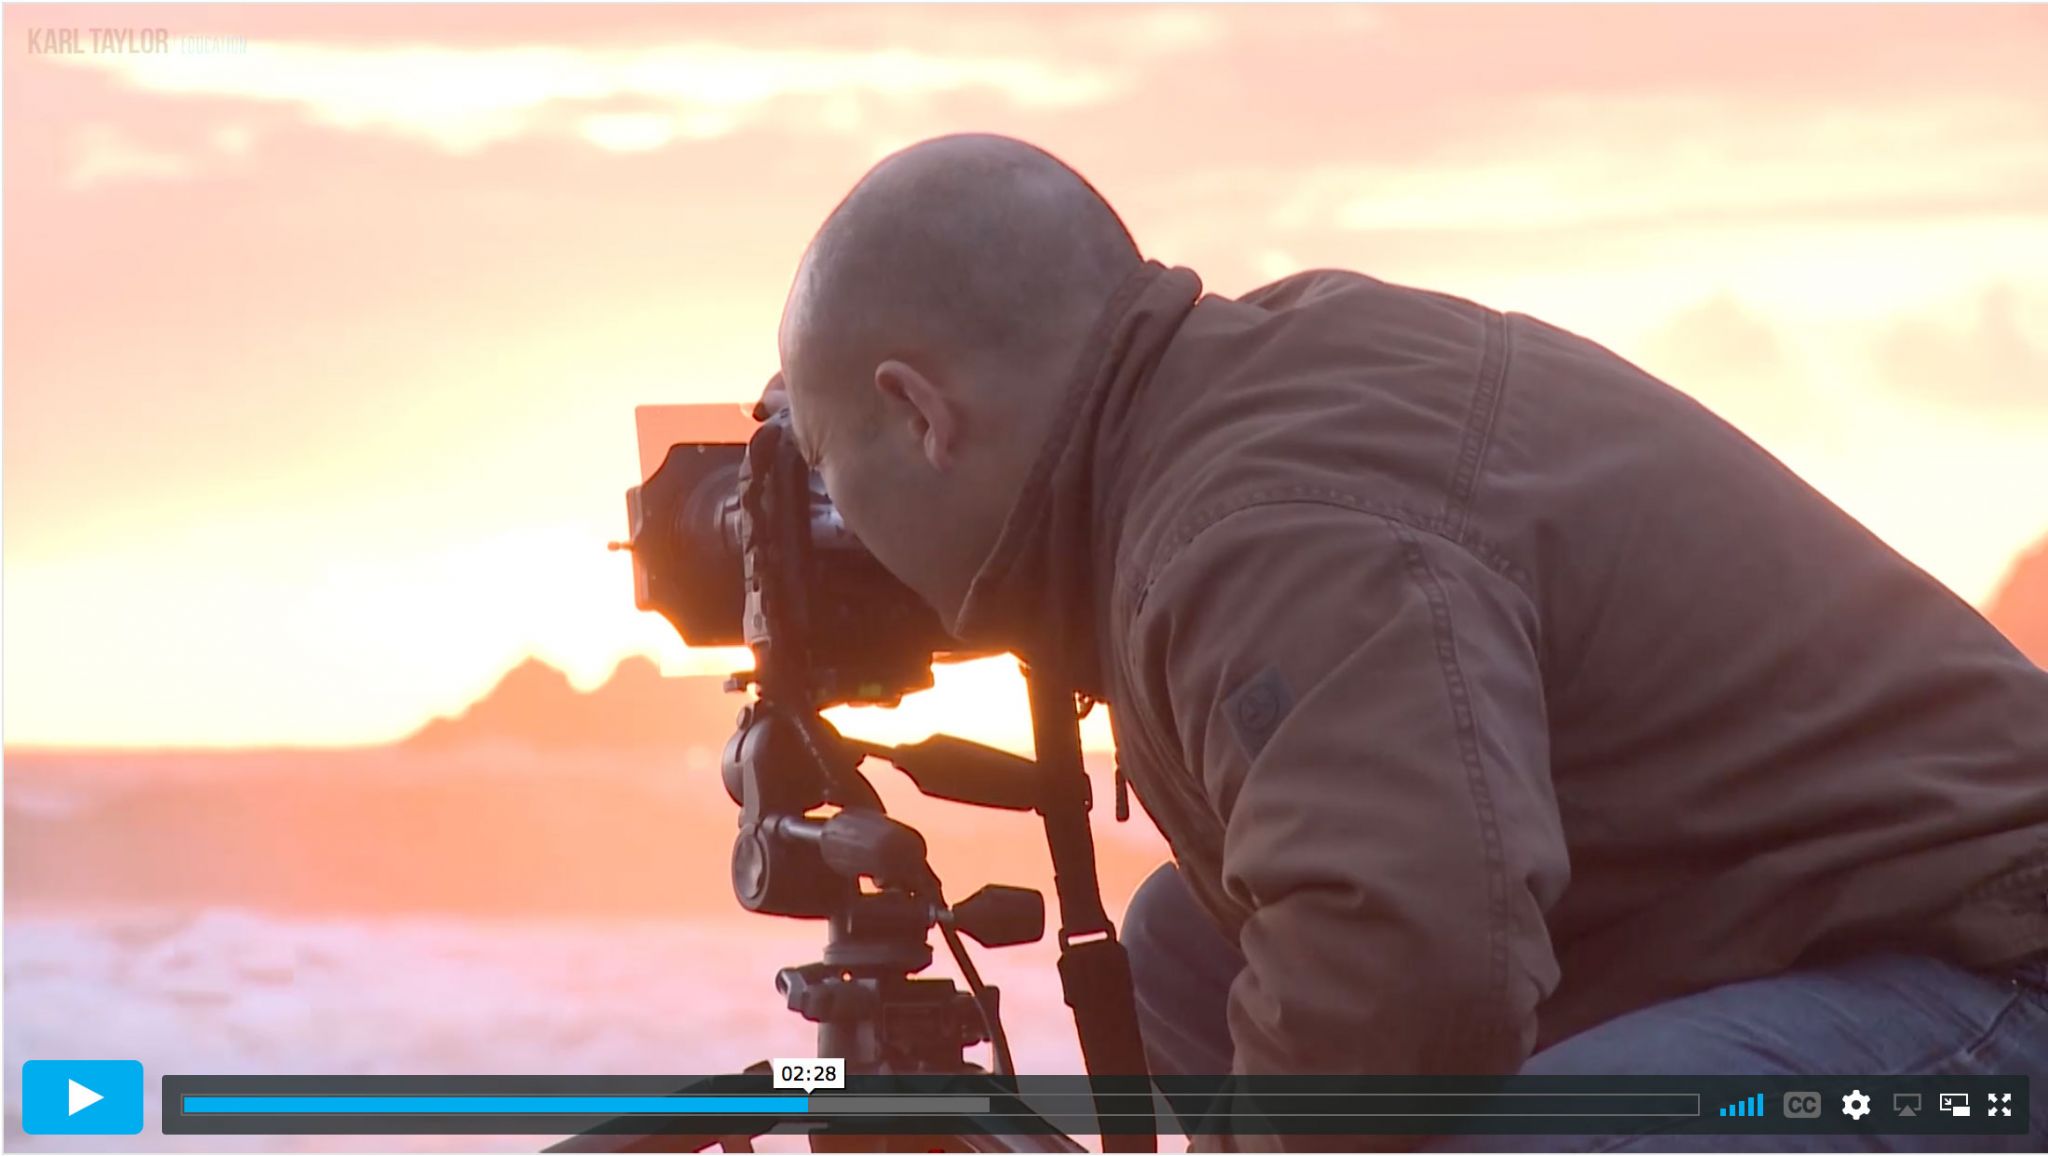
Before moving on to the next chapter, make sure to watch the video above as this contains vital information additional to this page. There is also a useful PDF guide that contains some great supplementary information and infographics that you may want to print out and refer to when out shooting.
All content © Copyright Karl Taylor Education.
Get the e-book!
Introduction To Photography
To get your copy of this 90 page e-book click the download button below.
Comments
Karl, thank you for your videos. I’ve been learning through practice and taking shots but I am working on my technical skills to improve my images so I’m going back to the basics through your courses. Loved being able to see the mechanics of the camera in this first video – normally I try and keep my lenses or caps on at all times without exploring inside so I don’t get dust on the sensor.
Hi May, yes that makes sense but sometimes they do need a clean so don’t be afraid if they do. We have a video showing how to do it. Also yes it’s a good idea to start at the beginning even if it’s just to recap it can be useful. I hope you enjoy working your way through and do join us on some of the live shows too, everyone seems to find them very entertaining! All the best Karl.
Wonderfully explained!
Hi Karl, I have been looking at different pro photographers sites for awhile, and when I found yours I knew I found gold. Joined today and excited to learn from you. Thank you for your expertise and teaching methods.
Thank you Mark, spread the word and we can keep making it even better 🙂
Hi Karl, I just joined last night. Really enjoy your classes and tutorials on YouTube, so looking forward to getting lots out of your training. ???
Cheers Todd, you won’t be disappointed, there is far more professional level content here than on our social media, plus our live shows and other member benefits
Hey karl, been watching you and a few others on youtube for a little while. I just got back from a 10 day holiday/photo shoot in Northern Territory, Australia, look forward to going through the full course so on my future travels I get an even better result in my photos
Hi Karl.
Been watching you on YouTube for a couple of days. Impressed! Signed up and looking forward to picking your brain.
Cheers,
Graham
Thanks Graham, enjoy the courses and live shows.
Hi Karl.
Just want to say hello/Slainte (Ireland) to you and I am delighted to sign up on your program here.
I look forward to unraveling the big mystery of understanding photography in greater details.
Your training program here is just perfect for me. I look forward to developing my skills here and hope you will like the photos as time goes by. Thank you, Karl.
Shane
Kildare, Ireland
Hi! Karl , Thank you so much for your clear , crisp teaching . Love the way you teach and educate. It practical and very informative. Everything stem from your deep experience and passion. A big thank you once again from INDIA.
Thank you.
hi karl.
I have bought a couple of your courses in the past and gotta say I loved them. photography has always been a passion of mine and I am forever learning. I now intend going for it in a big way and will be paying serious attention to all your stuff.
regards
ian
Good stuff Ian, we look forward to you learning even more here.
Easy to understand.
?
Hi karl … as i m confused to choose either mark 3 or mark 4 …
Frankly speaking only photography is main concern for me for next 2 year …
Give me idea to choose 3 or 4
Hi Reetesh, the Mark 3 will do everything that you need, I use this camera and it is an excellent camera. Yes the mark 4 will have a few extra features and slightly better resolution but nothing that is going to make a huge difference to your photography. The difference saved would be better spent on good lenses.
First i read ur basic introduction nd reference Guide carefully nd understand essential 6 requirements of Photography… nd thn this first Lacture of urs sir ….
Got it
Excellent insights