
Perfume Bottle Photography
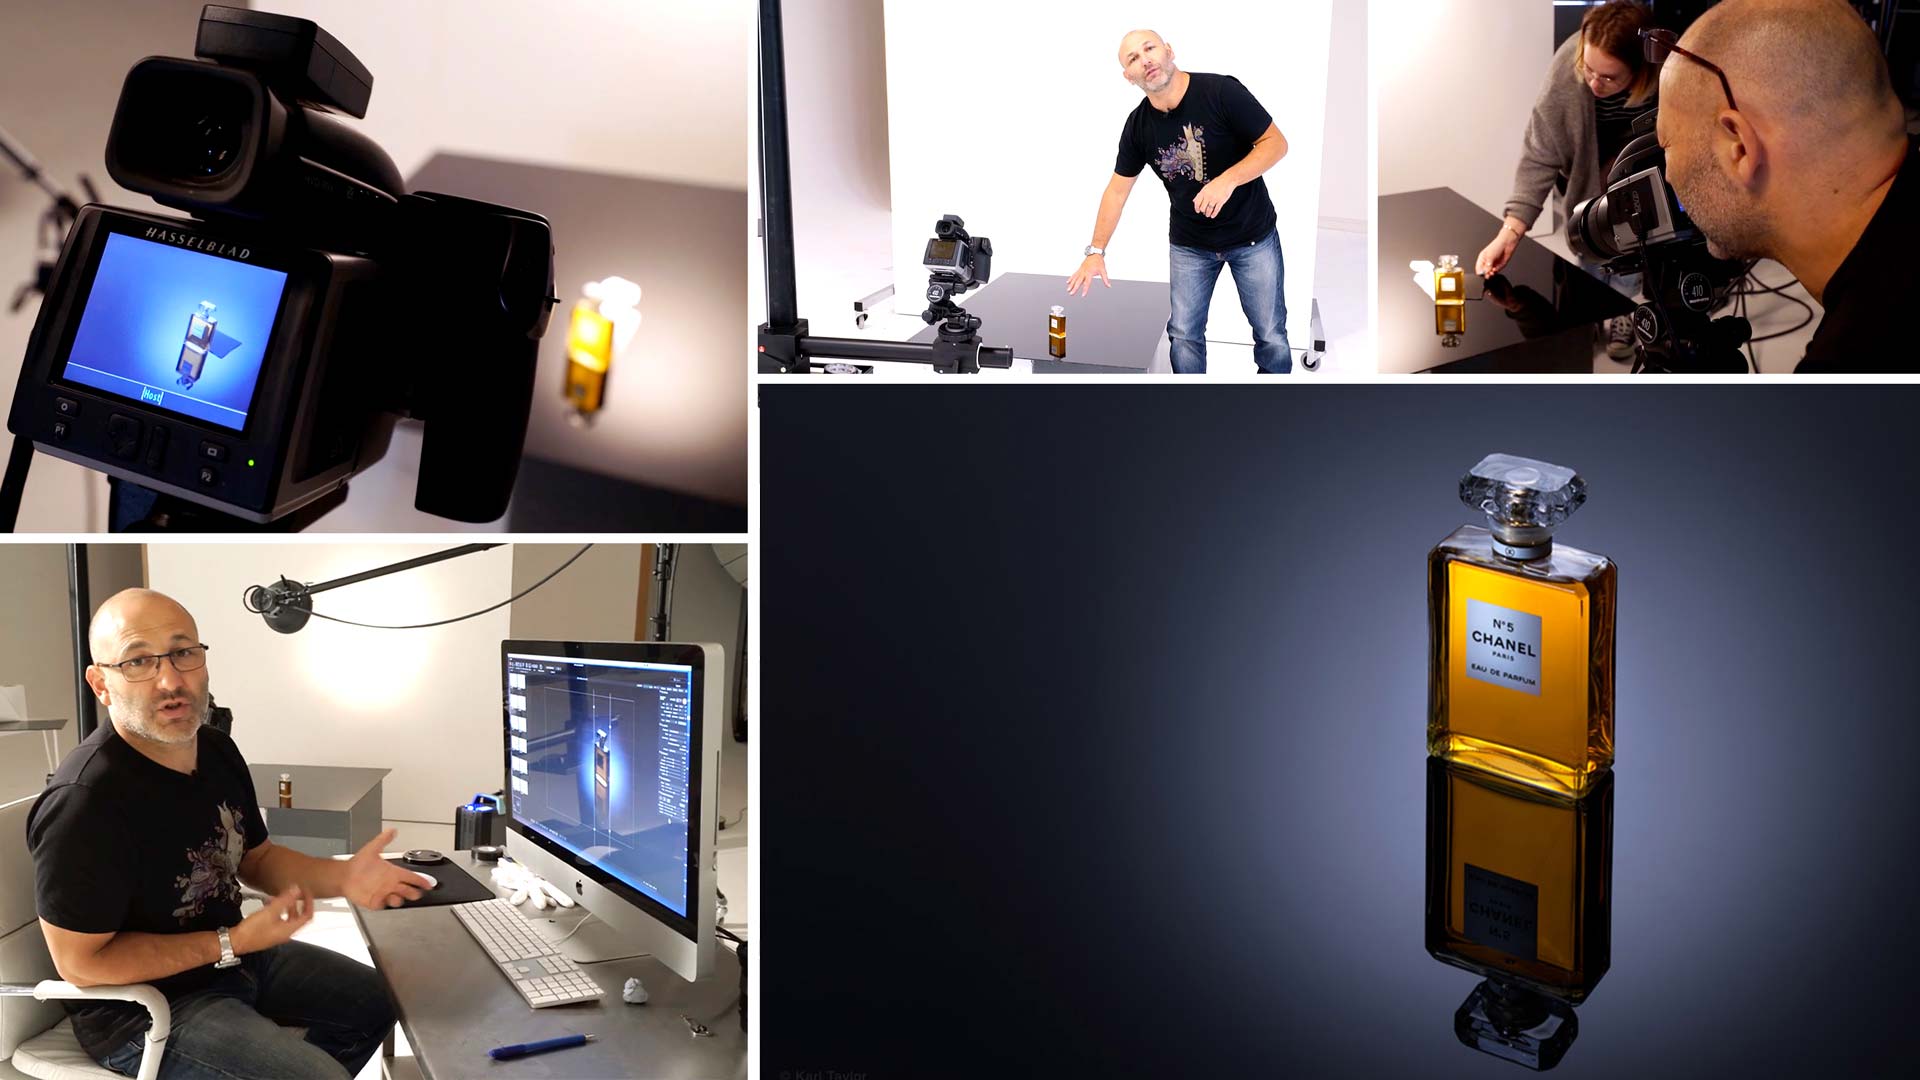
Chanel No. 5 is one of the most well-known perfumes in the world – an icon in its own right. In this perfume product photography class, Karl aims to create a series of images that are as elegant and beautiful as the fragrance itself.
With meticulous attention to detail and precise control, he demonstrates how to light this bottle perfectly in order to accentuate its key features. He also reveals a number of essential techniques that can be used to elevate the shot.
This class is a must-watch for anyone interested in product photography. Why? Because it provides a solid base of knowledge, recapping the basic principles before building to more advanced techniques that can be applied to a range of different products.
In this class:
- Product photography: How to photograph a perfume bottle
- Product photography tips
- How to photograph with multiple studio lights
- Lighting setups for product photography
- Using reflectors and flags
- Minimising reflections in glass objects
- Creating a composite image
To see how Karl retouches this shot, check out Perfume Bottle Photography | Post-Production for this final image.
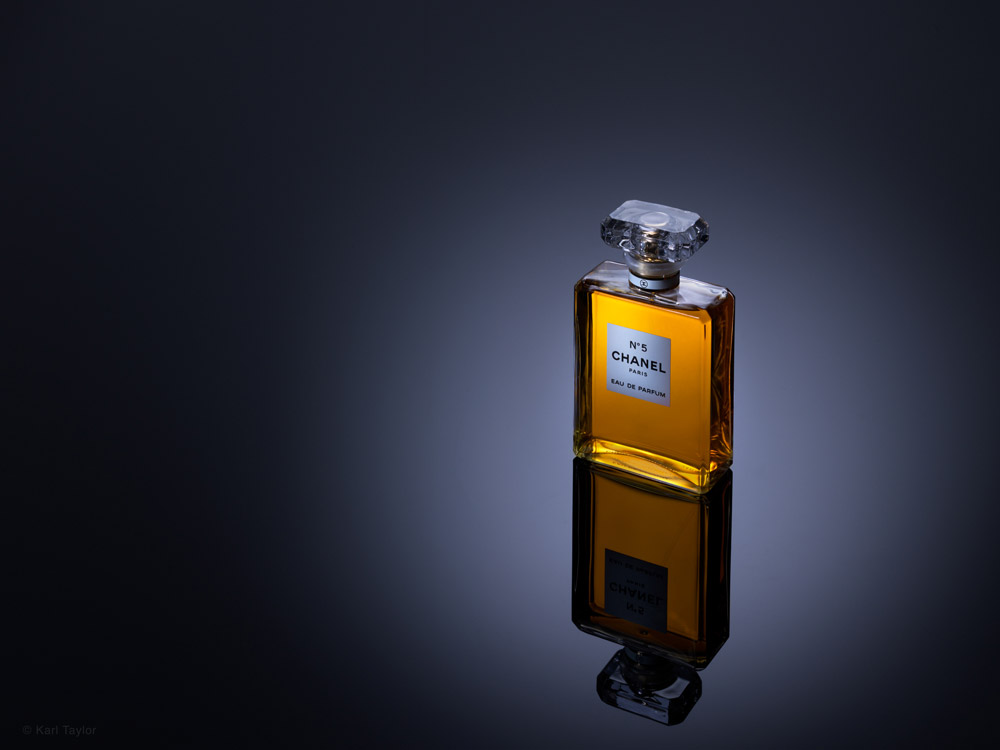
© Karl Taylor
Comments
Thanks a Karl, the best thing I love about your tutorials are your honest answers ☺️. Eagerly waiting for more videos.
Ok I watched and watched this tutorial over and over again and I finally got. It finally dawned on me that what Karl is doing, with the shadow behind the perfume bottle, is the same thing I do when I’m trying to hide my shadow when the sun is behind me when I’m out doing Landscape Photography. I totally get what Karl is doing. I’ve been doing the same thing all along but just never in a studio. Great learning experience with this tutorial.
Hi Gina, I’m glad it clicked! 🙂
Answering to Russel: I’ve already tried but the results are far to be the same. The transparent surface thickness creates a double reflection of the object (like in a mirror) and, moreover, the glossy effect is quite different.
Hi Karl, Firstly great work. I’m a big fan of your work. I was just wondering, in one of your whiskey tutorials earlier you taught us how to bounce light via reflector card, placed behind the bottle and then we bounce lights through the liquid to create the glow. Why didn’t we use the same method in this shot? is it because of the camera angle or some other reasons. Thanks in advance.
Hi Sourajit, simply because back then I hadn’t thought of this new technique, it was only when I was thinking about the physics of light and perspective after having done a project on image projection for the BBC that I realised how much easier it would be to do it this way!
Would black card under some clear perspex achieve the same results as black perspex?
There might be double reflections to be seen then, because black perspex only shows ONE surface.
I found the flashlight that you are calling a torch. I think what Ryo, up there, wants to know and I want to know is how does the camera not see the paper cut out. Look at about 18:40. I heard what you said was the reason the camera doesn’t see the paper cut out but I don’t get it. I know or think you said it’s the perspective of the way the paper cut out is sitting in relationship to the camera lens is why the camera doesn’t see the paper? Sorry I know you are busy so if anyone wants to jump in feel free. I just need you to explain that again. Thank you.
Hi Gina, the reason why the camera cannot see the paper is because the bottle of perfume is blocking the paper (which is just a projection of the bottle) from that perspective. If the camera or the bottle or the paper were moved, it wouldn’t work.
Is the smart phone torch an app for the iPhone?
Hi Gina, no it’s just the built in torch.
I know the torch on the iPhone is the beam of light but how do I access the torch on my iPhone? Until recently, I was an Android user.
Hi Karl, my previous question about the mirror of Hasselblad camera, had some meaning, although not well explained. Why don’t you use a light source through the viewfinder of the camera to light up the subject and project the shadow needed to shape the reflector?
Hi Riccardo, i’ve never tried this but I’ll take a look 🙂
… my thought, exactly 🙂 That’s what i do for cutting the shadows. The only problem is, the light gets darker and it’s getting harder to draw the lines.
Great tutorial, Karl – thank you!
Hi Karl, great tutorial, really.! Just one question: Is your Hasselblad mirrorless? I’m just asking ‘cause I already knew the technique’. Thanks for sharing your expertise with us.
Hi Riccardo, the H series cameras have mirrors.
Hi Karl, one question. I am not really understand what is the shadow paper mean. Could you please explain more about it ?
Hi Ryo, I’m sorry I don’t understand what you mean can you tell me what time in the video you mean and I can check to see what I said.
Neat shot Karl. Have a question here, for minute details also you were trying to work on lights and reflections, why couldn’t you opt for fixing it in photoshop ?
Like the label glow, couldn’t that be fixed in post ? We could have eliminated the pico light altogether. Please share 🙂
Hi Vishwas, quite simply when you artificially create this in post it looks artificial. The more post work you do the more it looks like post work is done. The more work you can do in camera the more real it looks. Finally and probably equally as important is I can not only make it look more real by doing it, I can also do it quicker than I can in post.
Another great tutorial Karl. What I love about your explanations is not only the ‘what’ but also the ‘why’. You also mentioned buying a larger than one thinks sheet of perspex. What is the size of the sheet you used? It looks about 1×1.5m.
Thanks Ted yes this one was about 1×1.5m a bigger one would have meant I could have moved it a little further back.
Wow I never even thought about that technique of iPhone. You really are master of photography physics!
Super tutorial! I really enjoyed the bit with the iphone. Seems like a bit of a faff but works really well.