
Packshots: White Background Product Photography
Packshots can be a reliable source of extra income – if you know how to set them up and shoot them to perfection in minutes instead of hours.
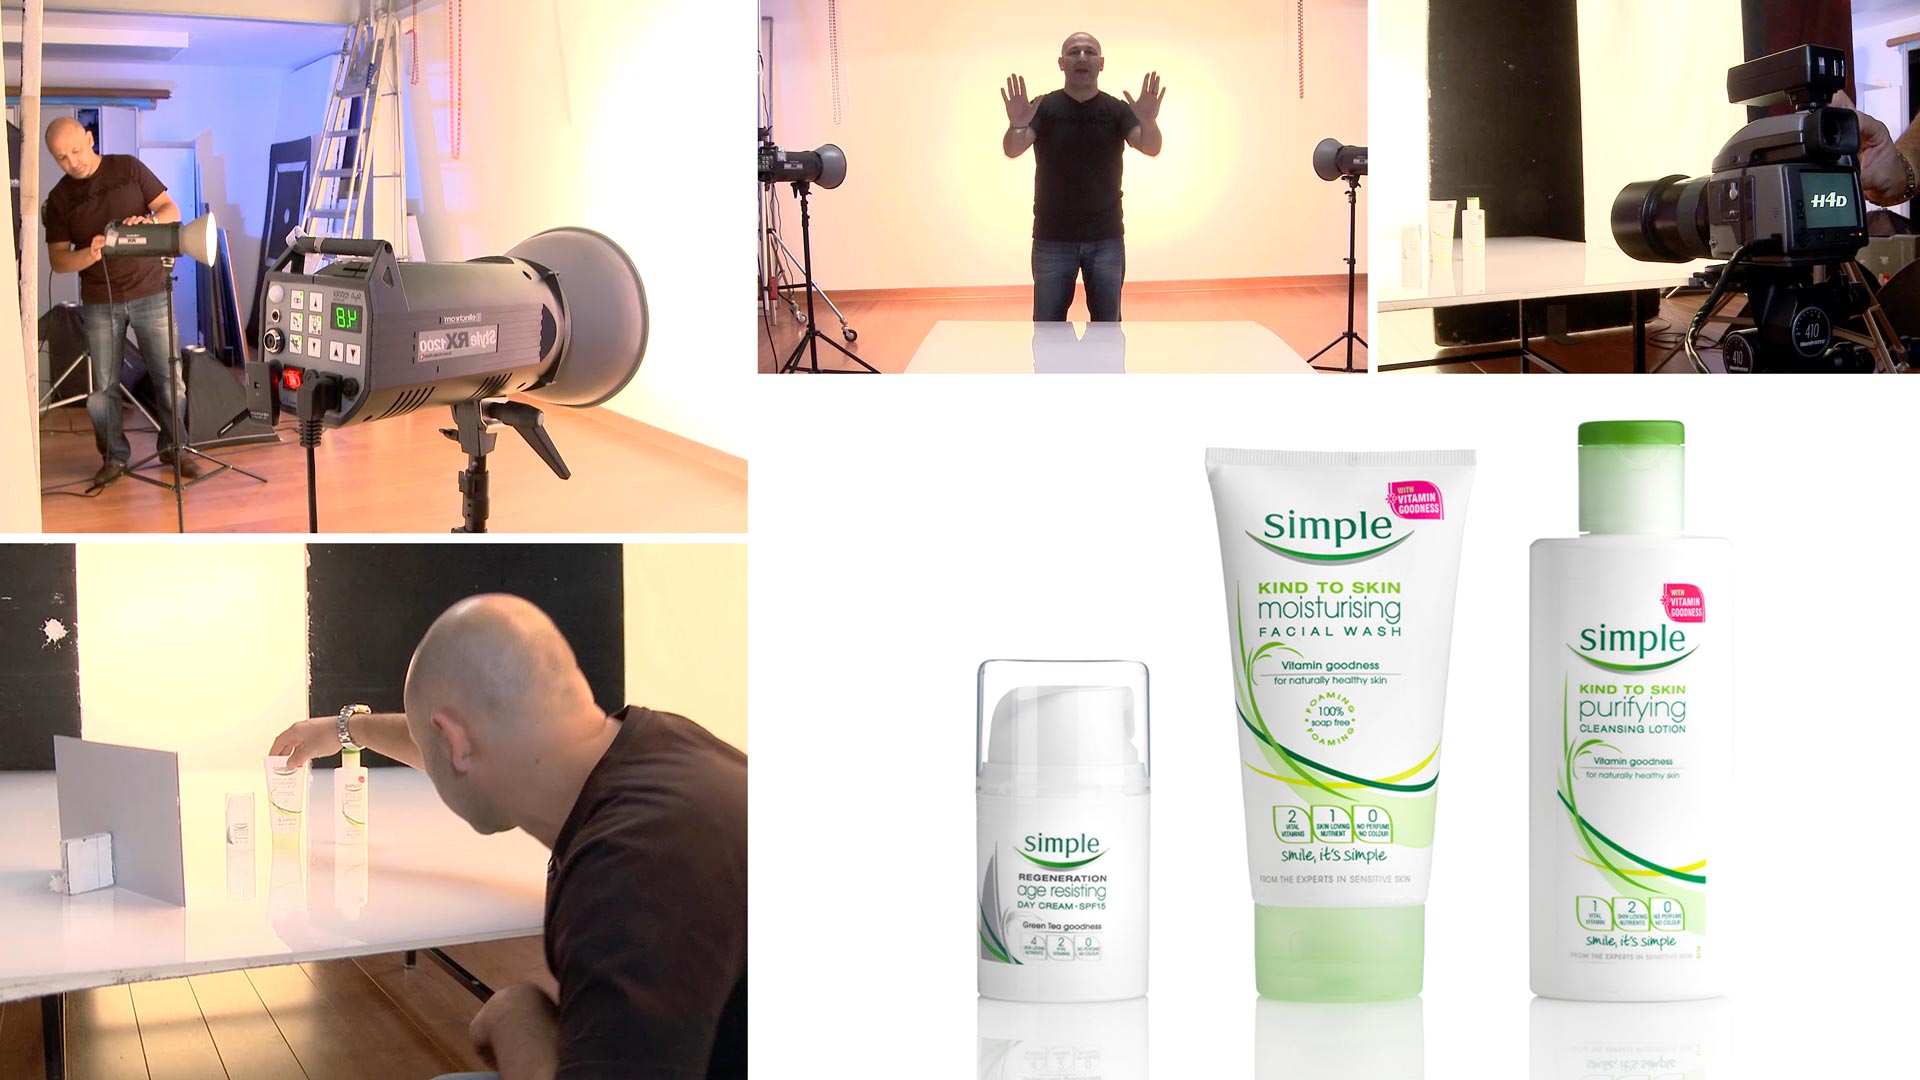
In this packshot photography class, Karl discusses his preferred backgrounds for these white-on-white product shots before getting into the simple but effective three-light setup he uses for this type of work.
You’ll see how he achieves white backgrounds for product photography, how he avoids flare and controls excess light, how he prevents overexposing his shot, and how he uses just one light and a reflector to light the product itself.
In this class:
- How to photograph packshots
- Creating white backgrounds for product photography
- Techniques for photographing white products on a white background
- How to prevent flare
- Using reflectors
To see Karl’s retouching process for this shot, check out Packshots: White Background Product Photography | Post-Production.
If you enjoy this class, be sure to check out Packshot Product Photography and How To Use Continuous LED Lighting For Packshot Photography.
Questions? Please post them in the comments section below.
Packshots – White background product photography. © Karl Taylor
Comments
Hi Karl,
If I needed to shoot pack shots with a clean black background, would the technique be similar to your whiskey product shoot (minus the background gradient)?
Simple, clear and right to the point instruction.
Thank you so much!
Thank you Shermin, you are welcome.
Thank you
Hello please tell me where i can buy that reflection kind of board in UK please ?
May thanks.
Hi Baryalay, if you mean the foamboard then your local signmaking company will have it. If you mean the big ‘poly’ boards then you can try builders merchants.
Hi, Karl as you said at the beginning of the pack shots video there is no hight budget in it, my question is as a photographer if I have been asked to do it let’s say 40 shots a day for 3 weeks how can I calculate what to charge the client?
Hi Cheick, have you watched our business courses yet?
ok thanks
hope you noticed my question.
Hi Karl Taylor thanks for this tutorial, I wanted to ask, will it be fair to say that you overexposed the white background? for this shoot to get the perfect white? what about the products themselves did you color balanced them? thanks
Hi Cheick, no I think the tutorial demonstrated that we took the white exposure from slightly below pure white and then gradually increased it to just pure white. So it certainly wasn’t overexposed or this could have an adverse effect on the products and contrast of the image. Each shot is checked for neutrality using the color measuring tools in the software and also by placing a grey card in the shot at the start for reference. We will soon be releasing a tutorial on the process of using color test cards. All the best Karl.
thanks
how can i get the front of the product white without a shadow and the same time not over expose the product face?
Hi Abraham, I don’t fully understand your question? First of all is your product completely pure white? Secondly is the product flat or curved and are you saying you don’t want any shadow anywhere on your product? This doesn’t make sense to me as without any shadow there will be no three dimensionality or form. Can you provide a link to an example photo of what you mean?
thank you for your reply. in the example above you have a reflective shadow under the product. I would like for the product to have a pure white background all around including the bottom. I get better results when adding a light in front or above of the product but then the face of the product becomes over exposed.
Hi Abraham, no not easily. If you replace the reflective white acrylic with matt acrylic then you don’t get the reflection but it may still not be white enough without additional top lighting. However this tutorial shows you how to overcome the problem in post https://visualeducation.com/class/clean-white-background-pack-shots-retouching/ you can also try lighting through your acrylic from underneath but you need to be careful of light hitting the product. Alternatively you suspend your product in the air on a thin rod and shoot it against a white background only and retouch the rod later.
Hi! Thank you for this tutorial. Have you done any apparel on white? The reason that I’m asking is that there’s a fair amount of e-commerce work in my area these days and it would be great to study that just to be able to pull it off if needed. Any tips on shooting fabrics and clothing?
Hi Olli, I prefer a higher contrast light like a Para or a silver brolly for fabrics as you generally want to reveal more texture, but be sure to control your fill light. I’d suggest watching all of our course ‘Light Source’ in the portrait section first as this will cover a lot of that.
Hi Karl, could you help me out on getting perfect white backgrounds and how to avoid reflections when shooting metal watches
Hi Waqaar, this video will help you understand how to achieve perfect white backgrounds and we have 2 other tutorials on watch photography in the ‘product’ section. You may also use our forum to post images describing your problem to get advice.
this video keeps freezing, its really frustrating! sound but frozen screen!
Hi Karl
Excellent tutorial, thank you.
I wonder if you could assist me with the following.
I do a lot of white background catalogue photography for a shoe brand, and am struggling to find a time effective way to place the shoes to get a consistent result. My client has a large range of shoes and slippers etc, and everytime I do their seasonal ranges it is not time effective. They are picky and dont want any shadows or reflections underneath the shoes. Pen tool takes to long per image. I have devised a set that works well for the elevation to create the images without shadows and reflection. My problem is placing the shoes in the same position and angle in the shortest amount of time to get the 200 images out quicker.
Hope you can advise
Many Thanks
Hi Jaco, check out some of the product photography courses for some tips. But from what you have told me it sounds like I would have my metal worker create and elevated shoe stand that has thin metal plates to stick the shoes soles to and are already correctly angled so that you can repeat over and over quickly. You may then have two or three of these shoe supports for different angles etc, but the main this repeatability. Having the elevation on a thin metal stand will also minimise retouching and allow a clean white all around the shoes and lighting from any angle. Whenever I’m faced with a problem like this I simply design a solution and get my metal worker to build something, whilst this may cost some money in the long run it is worth it.
Thank you for the advice, much appreciated
..I would do it with transparent plexiglas
Hi Heinz, yes you can but you need to keep it far away from your products otherwise it will ‘light’ them from the back and in having to keep the plexiglas far enough away you inevitably need a much larger piece which can be expensive and more problematic to clamp in place. A white wall or roller of paper is large enough to keep some distance away.
Why can not I watch high quality video?
Hi Quang, we don’t understand, our video are in 1080 HD, if you have a good internet connection then they should play fine. We and our members watch and test them every day from our service provider so we would see if there were any issues. What sort of problems are you having and which country are you watching from?
Hi Quang! I am in Saudi Arabia now, the video quality is exceptionally good. I have no issues. Please check the internet speed.
Very nice. I had a question how about if we need a higher camera angle say for jewelery or for shoes, how do we proceed
Congrats! Great! Thanks!
Great tutorial, very well explained and shown, Karl!