
Introduction and Understanding Light
Want to be master studio lighting? First, you need to understand light itself…
In this opening chapter of our Lighting Theory and Equipment course, you’ll discover the fundamentals of light, equipping yourself with the knowledge you need to start getting amazing results with your lights.
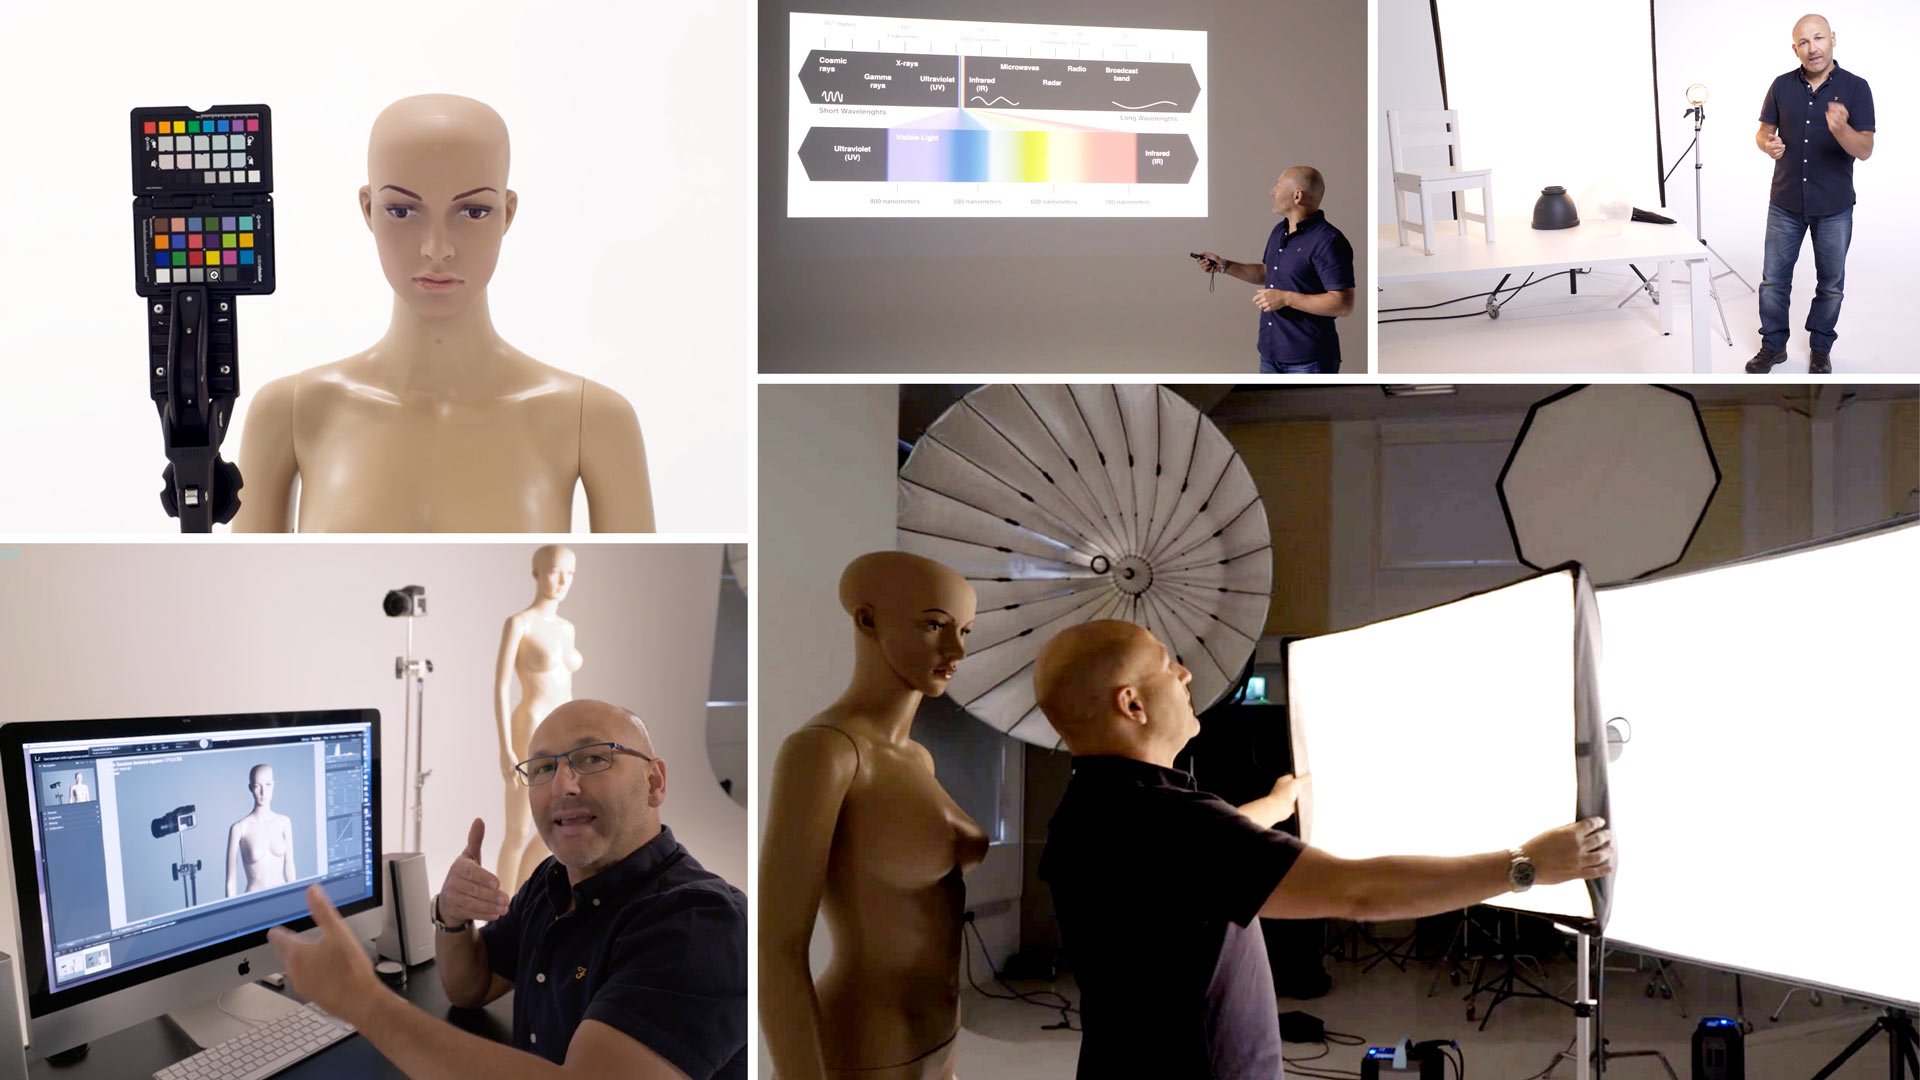
Through a series of easy-to-follow visual demonstrations, you’ll learn about the practicalities of light, exploring the different effects hard and soft light have on shadows, texture and three-dimensionality. You’ll also learn how to achieve precise control over reflections, shadows and highlights.
Karl’s explanation and demonstration of the inverse square law, as well as of the colour spectrum of light, will equip you with crucial knowledge that will set you up for success in the studio and beyond!
In this class:
- Different light sources and their effects
- Hard light vs soft light
- Careful control of light and shadows
- Using reflectors and negative fill
- Revealing texture
- Inverse square law
- Colour spectrum of light
If you enjoy this class, check out A Deeper Understanding of the Inverse Square Law and Angles of Incidence and Reflection.
Questions? Please post them in the comments section below.
Comments
What Color correction recommendations to use under florescent lights, be it camera settings or flash gels?
Hi Steve, I don’t recommend shooting under fluorescent lights at all for the reasons pointed out in this video! If you absolutely have no choice then depending the tubes it’s usually around 4000K but as pointed out there is a large put of the spectrum missing so results will never be perfect.
This was a terrific explanation on the basic principles of lighting. I love how every basic item was covered. My only complaint is with the comment section. Having to scroll to the bottom takes some time, I feel if you move the box to the top of the comment section it would be easier to find.
Hi Joseph and thank you, yes this particular class has a lot of comments. We’re introducing a new button under the video player soon that will take you straight to the comments box at the bottom. The reason we encourage people to scroll though is often they will find their question concerning something already answered in a previous comment. Many of the other classes have far less comments so it’s easier to navigate! Cheers Karl.
Signed up today for a try out month. Wow, after just this one video I am already considering the Platinum Plan … 🙂
Thank you for making us photography smarter
Thank you for signing up! If you have any questions relating to any of the classes please leave a comment below the video. In your ‘Home Page’ you will find links to all the important stuff and membership support for non tech questions with Sara. Enjoy your stay Karl.
I’ve been fiddling around with photography for many years, but I can’t believe how much I just learned in 1 hour. So excited for more videos. Quality of instruction is fantastic.
Thank you very much and glad you could join us! Any questions on any of the classes just leave a comment like you did here and I’ll be back to you. All the best Karl.
This video is very informative and engaging to watch. I gained a much deeper level of insight into the fundamentals. The Karl Taylor Youtube channel has so much fantastic information that has been impactful to me as a new photographer. After watching this first video as a subscriber, I am very excited to continue learning here. Thank you!
S
Thank you and I hope you enjoy it here!
I consider this video a true encyclopedia of studio light for professional and non-professional photography. What I am getting from this academy is a thousand times higher than other courses I have attended in my life. Thanks Karl.
Thank you, much appreciated. I have another course continuing on some of the physics of light coming later this year that you should enjoy!
Very useful, helpful, clear and direct information i have never found at any other tutorial. Thank you! 🙏🏻
Thank you.
I’m a new annual plan user from the midwestern USA. Just wanted to say that I discovered your course of trainings when you graciously opened them for free during the pandemic in 2020. My advertising job disappeared due to COVID (it’s okay, I hit a healthy 70 years old this year), but had to wait until now to invest in your courses. Very much looking forward to learning so much, even though I’m at best a hobbyist. I’m old enough to remember when my university courses were taught using film and darkrooms (when I was in my 30s after leaving the Army) and we shot halftones to print photos. Thanks so very much for opening your classes last year; it was an incredible act of generosity, and I hope it gets repaid to you many times over.
Hi Ron, Thank you so much for signing up and glad you enjoyed the free stuff. We’re back in another lockdown here at the moment but I managed a live show on my own yesterday! Hopefully you can join us on a future live show too and of course if you have any questions just let us know. All the best Karl.
I watched the replay of the decayed fine art photo, because still life is my main interest (that video is worth half a year’s subscription alone). You really chided me about not getting it right in camera instead of relying more on P’shop. So many great tips in a single video! I’m starting with the lighting theory course so I get a better knowledge of using my strobes. Fortunately, I have a ton of grip gear left over from shooting video, just need some more poster board for flags and black cloth for the floor. Best of luck to you and your team with the lockdown, we’ve been very fortunate out here in The Middle.
Hi Ron, thanks very much and glad you enjoyed the show.
Ron, Where in the Midwest? I’ve also just join with an annual subscription, I’m based in St. Louis?
Hello, Ian! I’m on the east side of Kansas City in rural Independence, MO. I was born in St Louis, and have quite a bit of family there, as well as a good friend from the military who’s a former St. Louis radio host and is now the home announcer for the new Arena Football team, the Bandits.
Ron,
I’m originally from England, been in the US for the past 22 years and in STL for the past 8 years. I occasionally out your way, or if your this way maybe we could get a coffee and talk about Karl ….
All the best, Ian
Hi I just joined the community today.
I’ve been binge watching your videos on Youtube for a while now and made the decision to become a member. Really chomping at the bit to expand my photography skills.
Just want to commend you and your team on such great educational content.
keep up the great work!
AL
Thanks Al, and thank you for signing up. We hope you enjoy the content and live shows. If you have any questions do not hesitate to ask in the comments section below the relevant video. All the best Karl.
This is the master lighting master class. This course has 3 main pillars: highly subject understanding, a deep skill transfer method, and clear communication skills. Million thanks. In photography, if you master light skills you would be a creative and professional director.
Thank you much appreciated.
Very well done!!! Today was my first class and I’m so happy!!! Excited to see what is next!!!
Glad to have you aboard and let us know if we can help.
When describing reflectors, and negative fill light, I also wonder if the surface of the object isn’t just actually reflecting the actual light modifier itself?
When you bring in the reflector close, the chair would reflect that and show up lighter in camera.
When you bring in the black flag, the chair would reflect that as well, and show up darker in camera.
I’m unclear on how much of the darkening/lightening effect is the blocking of light photons, vs reflecting the actual light modifier itself.
Does that make sense? Any insight would be awesome.
Hi, Negative fill isn’t really fill it’s blocking light that is reflecting from elsewhere. If you use black velvet boards then most of the light is absorbed into the board so there’s nothing left to reflect. White objects will bounce light from themselves onto a white or silver reflector and back but this would be minisucle compared to the light bouncing back off the reflector from the key light. On gloss surfaces they act as a mirror so an image is formed from something that is at the correct angle or reflectance to the camera, so you will see the white board or black panel as a reflection in that gloss surface. Which is why we often light gloss surfaces differently to other objects as you will see in many of our product classes. I hope that helps, cheers Karl.
Wow! I loved watching this educational video. I joined today and it took most of my day to watch (along with family tasks), but I took 9 pages of great notes! I’m restructuring my photography to focus on portraiture and so many questions about my past lighting (or lack thereof) were answered here. Thank you! Now on to the next video…
Hi, that’s great to hear. Thanks for signing up and if you have any questions don’t hesitate to ask.
How do I determine what to set my white balance to on my camera? Also, when shopping for lighting how am I able to determine if I am purchasing lighting with full/broad spectrum? Do I go by the Kelvin? Ash
Hi Karl, I really enjoyed this course and I’m looking forward to continue learning alongside you.
I have a question, I got a little bit confused In the color spectrum chapter of the video.
So, are flash lights and strobes are calibrated (I don’t know if Im using this word correctly) to spread their light in a daylight full spectrum of color? And also, does the continuous light of the strobe will also have the same spectrum of light, for instance if a shoot a video with that lighting will I get so much detail in the colors?
Thank you ver much Karl, greetings from Mexico!
Hi Momo, thank you. Yes strobes/studio flash/speedlites are all putting lightout that is the same as daylight at midday on a clear day, that is it is full spectrum and 5500K colour temperature. The continuous light of a studio flash which is called the modelling lamp (if it is a tungsten bulb) will also be full spectrum but it has a warmer colour of around 3200K but this can be corrected in post production because it is still full spectrum. High quality LEDs with a CRI of 90 or more can also be considered full spectrum and they can usually also be adjusted in colour temperature from 2800K-6000K. Other low quality LEDs or things like fluorescent lights are missing large parts of the spectrum and will never record colour accurately throughout a scene.
Can the video be set with Chinese subtitles
Hi, Yes they are being updated with Chinese subtitles next month.
Hi Karl 🙂
New to this membership, so just wanted to say thank you so much for an awesome lesson…
I also wanted to ask a question, apologies if it has been asked before but I couldn’t find it in the comments-
I have always been told that if you shoot in raw you can correct the colour balance in ps or lightroom afterwards? Is this correct?
Thanks again
Tarryn
(South Africa)
Hi Tarryn, welcome aboard. Yes that is correct and you will see that covered in some of our post production courses and other shoots. It’s always better to shoot in RAW as there is so much more in the image file that can be extracted later. Kind regards Karl.
Brilliant 🙂
Thank you
Thank you. You are a great educator.
Thank you – my very first class. Learnt so much through your clear explanations and demonstrations. THANK YOU!
Thank you Michelle, glad to have you aboard. If there’s anything you don’t understand in a class you’ll often find it answered in the next or a later class but if not just leave your comments below a relevant video and we’ll come back to you. All the best Karl.
Karl, i enjoyed every second of the course. The way you explained was just awesome.
Hoewever, as the new subscriber, i foumd it ultra difficult to get back to the last section of my lewrning everytime i turn off my ipad/mac. There is no history which course i am learning now. As i am writting this, i have spent 20 minutes to find where should i get exact course i took 20 mins ago before i left for dinner. Hope it’s me who is not into web that good…
Hi Gilanka, thank you. This is something we are looking into about creating ‘bookmarks’ in the meantime you can use your browser to ‘bookmark’ the chapter you were watching and then make a note of the time at the bottom of the video.