
Gemstone Necklace Photoshoot
This beautiful blue gemstone necklace photography class is the first in a series of jewellery photo shoots.
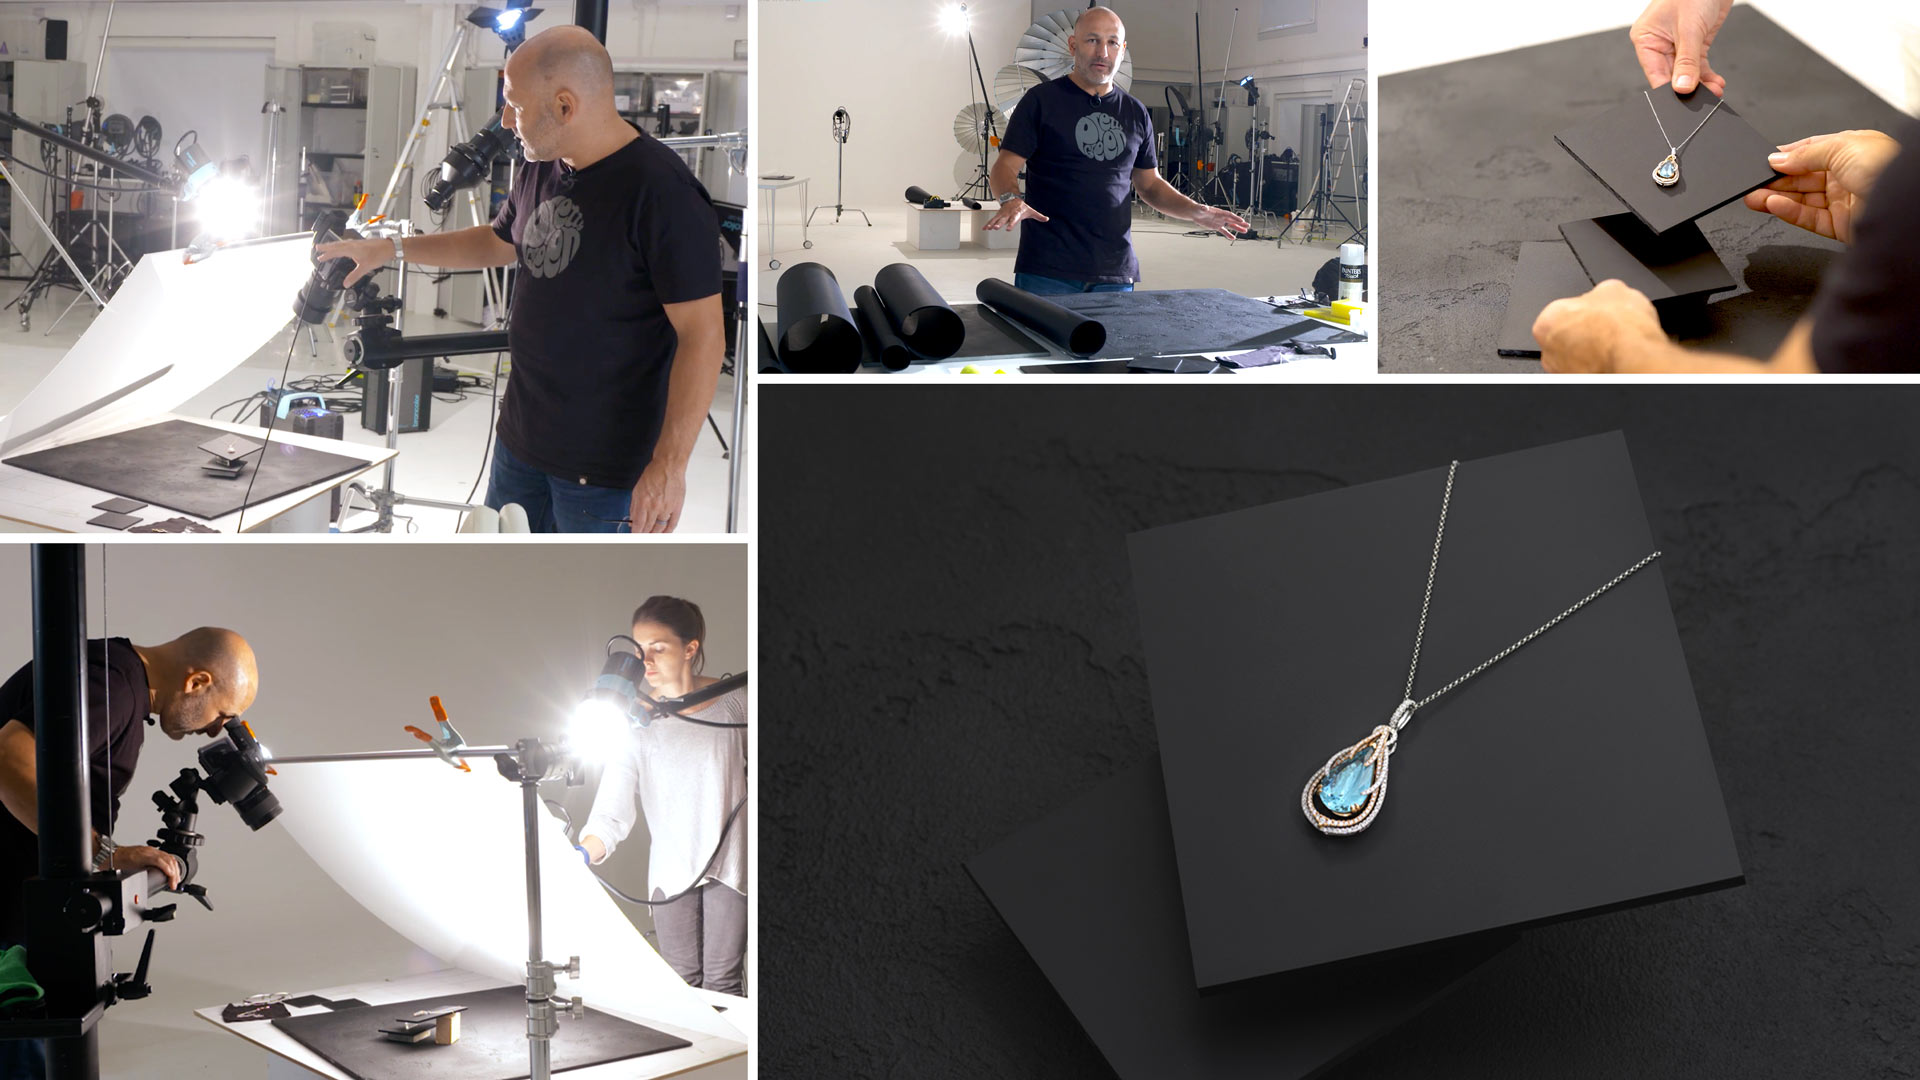
This class provides a detailed explanation of the entire process, from selecting and creating backgrounds to testing lights and adding interesting props. Karl also explains a few common mistakes when it comes to jewellery photography and how you can overcome these.
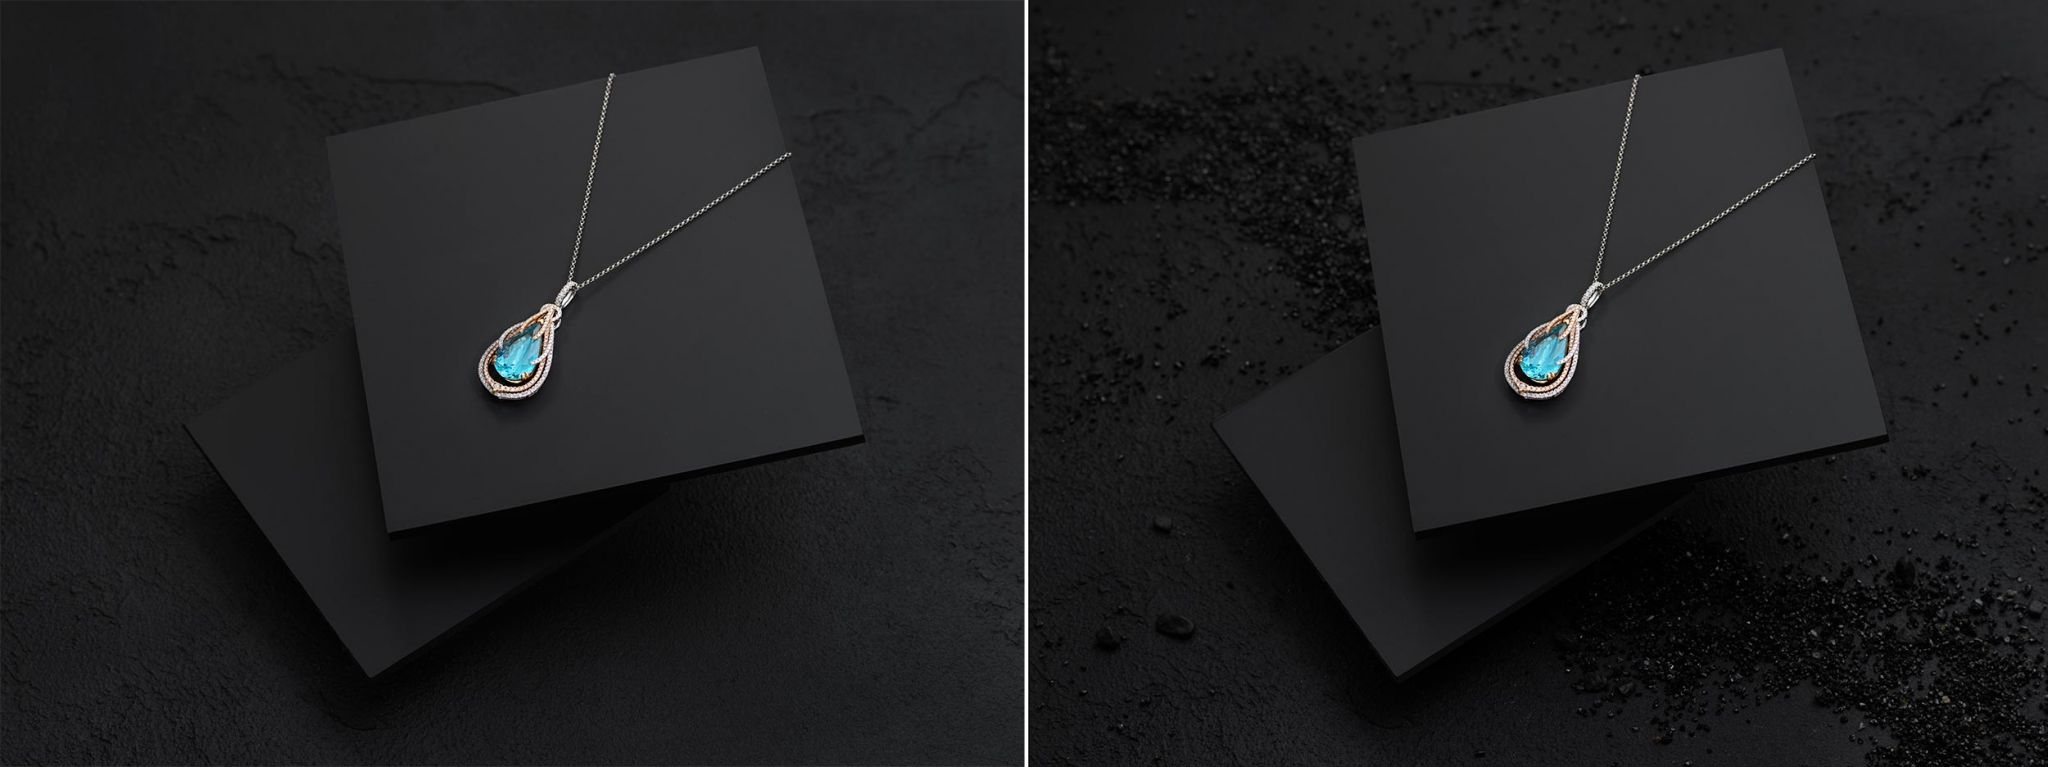
Using just three lights, he combines a graduated ambient light with a few extra light sources to make the gems sparkle. He then experiments by adding small black stones for a more interesting final shot.
In this class:
- Product photography: How to photograph jewellery
- Jewellery photography tips
- Common mistakes when photographing jewellery
- Lens choices for jewellery photography
- Studio lighting setups for jewellery photography
- How to make jewellery sparkle
- How to photograph juxtaposing textures
Questions? Please post them in the comments section below.
Comments
Hi Karl,
you are using a white, glossy acrylic here.
Would there be a visible difference if you took your 5mm matte frosted Acrylic?
A big thank you for your outstanding education platform!
best regards,
Jens
Hi Jens, thank you for your kind comments. Matt acrylic would work and it is likely you would just have a very soft light shadow and no reflection if using the same set up.
Lens question: on a 35mm sensor, would a 24-105 or 70-200 be sufficient in focusing closer? I don’t own any prime lenses at the moment and I’m assuming the sharpness isn’t going to be as good, but would be interested to hear your thoughts.
Thanks
Hi John, some 70-200 lenses have a good close focusing option on them but you’d have to check yours. Also you could consider using an extension tube (which are inexpensive as they have no glass) these allow you to focus close.
This is excellent, thank you. I joined just two months ago and have l learned so much, but the best thing of all is the amount of inspiration you provide. Certainly got me fired up again.
Thank you Nigel.
Karl, amazing lessons thank you so much !!!
is there any pico lite for Elinchrom or for speedlight ?
Thank you. This is possibly a cheap alternative but I’ve never seen one or used one so can’t be sure https://www.essentialphoto.co.uk/product/ef-mount-optical-snoot-spot-projector/
I think the closest thing Elinchrom had (it’s discontinued) is the minispot projection attachment https://www.bhphotovideo.com/c/product/16844-REG/Elinchrom_EL_26420_Minispot_Projection_Attachment_for.html. It “produces a hard edged but even circle of light”. The pico is probably more flexible as the minispot doesn’t have any blades, but you can use gobo’s. Maybe you can find one second hand (I’m not selling mine 😉 )
Hello Karl,
I remember you did a review on Siros lights.
I know own a bunch of them and I would like to know one thing.
I sometime need an extra light coming from top and I was asking myself if those big chunky light source would be ok at the end of a C-stand arm while having a sand-bag at the bottom of this one.
If you, or anyone else has the answer I would be glad to read it.
Thx
Hi Florian, you could but it would be a bit unstable but it would be OK if you put this on your C-stand https://www.manfrotto.us/avenger-mini-boom-arm-with-sliding-attachment-black
Thanks Karl,
Just to be 100% sure we’re on the same page, I was talking about this one :
https://www.manfrotto.us/avenger-c-stand-kit-33
One guy once told me you could hang yourself with it and it would not bend, I was actually a bit sceptical about that one…
Yes that could hold a Siros light but it won’t be very functional and a bit unstable even with a sandbag. You’d be better going with the mini boom I showed you that fits onto a C-stand.
Great video Karl, as always. One of my main struggles is to find/make backgrounds. It would be great if we could have a tutorial with all your tips on backgrounds, how to choose and make them ?
I work in a fablab, it allows me to get custom-made acrylics and other materials.
Thanks Karl.
After posting my question I further gave this suggestion some more thought and as an alternative to the crumpled metal foil wondered if one could also try a long exposure and then using a hand held speedlight on a low power setting, fire off a number of flashes in random positions around and behind the camera to create some extra sparkles.
As always, thanks to you and your great team for wonderful learning experience
If you were to try that Peter, mask the speedlite front to be smaller with black tape and make sure you were wearing black sleeves and gloves.
Hi Karl, That’s a amazing tutorial thanks a lot!
From business perspective , should jewelry photography be charged a premium, and how much % wise , versus other types of product photography considering the complexity? It would be great if you can talk about that in your upcoming tutorials.
I am specializing in jewelry and gemstones so it would be great to know how to negotiate future contracts.
Thanks again!
M
Hi Marya, thank you for your comments. If you check the business section of this website you will find a chapter where I discuss pricing. As you will find my day rate is the same for nearly all work with the exception of higher profile campaigns and/or levels of responsibility that may incur an increased day rate. However I do not have a different rate for product, food or jewellery it is simply the time it might take to shoot a given product properly will be longer and need to be quoted as such. Kind regards Karl.
Hi Karl. What an interesting tutorial.
To add some extra sparkle, would it work if one was to bounce a point light source into some crumpled metal foil positioned in front of the scrim or somewhere above the camera so that the resultant multiple sparkles in the foil are then reflected in some of the facets of the stones?
And yes, as one of many of your South African based students, we would certainly like to put in a group bid for our fantastic home grown girl, Ashleigh. She really knows her stuff and is a great helper. Keep up the great work Ash.
Hi Peter, good thinking. The physics of what you describe makes sense. The opportunity for more reflections (sparkles) off of the facets of the gem stones could come from multiple point light sources so in theory yes if the crumpled metal foil created that but it would have to be tested to be proven! And yes Ash is a very good assistant, I will pass on your fellow South African regards.
I really liked this one; I occasionally make wire-wrapped or beaded necklaces/earrings and have struggled with the lighting. As far as the aquamarine color grading, is this an example of where you may use the color checker for its color specifically instead of the regular neutral gray method? I know that high end gemstone dealers are adamant about accurate color to avoid misleading the customer, at least for sales of loose stones.
Hi Peter, my experience (other than for auction) is that they usually want the colour enhanced for advertising. Using the colour checker and the colour samples is an option for measuring the expected values from the checker yes.
Hi Karl, Big thanks for this. Maybe in the future, you can demonstrate us an e-commerce way. Shot with white background and with shadow or reflection. Thanks a lot.
Hi Eduard, I think the forthcoming rings tutorial will be good for you. But simply if you had put the product on white acrylic and used the same lighting setup you would have got what I think you needed.
Hi Karl, another useful tutorial – many thanks.
From a business point of view:
How might the insurance work in this case? Is it the jeweller’s or the photographer’s insurance that covers the item ?
Also, would a jeweller ever expect a shot of their piece ever to be done on their premises, therefore being able to keep the piece secure ?
Thanks, again
Hi Barry, it is the jewellers insurance that should be covering this. Personally I think it would be very difficult to undertake jewellery photography at a Jewellers shop. I once had to photography 2 diamonds worth $25million, they sent a security guard for that job!
Thanks Karl, that helps. I was hoping it was the case.
Well executed… I am just short one Picolite and an Ashleigh for my kit now to replicate the shot!
Hi John, you can start bidding for Ashleigh but she’s very valuable to us, so you’ll need to put in a good offer! 🙂
Well, on the plus side, it puts the cost of that whole “picolite thing” in perspective!
Hi Jared. I have personally tested all 3 different types of diffusion material (Tracing paper, lea diffusion paper and acrylic sheet) Any one of them will do but the tracing paper can catch fire if the modelling light is to close to the scrim. I don’t think there is much a difference in terms of gradation of light between the acrylic and the paper. But the acrylic sheet is stiff and can work better in different scenarios. But this is the challenge with product photography as there is no one size fits all.
On a side note.. Can you imagine the client saying. “Wow I love how blue you got the gemstone on our £14,000 necklace! How did you do that?” Karl would be like. ” Yeah we stuffed it with white tac.. 🙂
🙂
So your going to laugh Karl. I had some drop off some antique jewellery for me to shoot today about 2 hours after my comment. Guess what! It had a purple stone on it and I needed to make it look lighter as I was shooting it on black. So what did I do?? Yeah. I stuffed it with white tac. Hilarious….
Fantastic, perfect timing!
Nice shot. Seems fairly simple. Will practice it this week. Curious if there is a difference between the tracing paper you normally use versus and that acrylic white board in this shot as far as lighting goes ? I guess why did you choose this white acrylic sheet ? Ease of use?
Hi Jared, in something as mirror like as jewellery then it reflects anything such as even a ripple in the paper or the texture of the paper, acrylic doesn’t do this as it is smoother and flatter but it has disadvantages that it is heavy.