
Packshot Product Photography
Want to perfect your packshots? Find all the tips you need in this comprehensive tutorial.
Discover how to achieve a clean white background, photograph reflective surfaces, control unwanted reflections and shadows on your products, and much more!
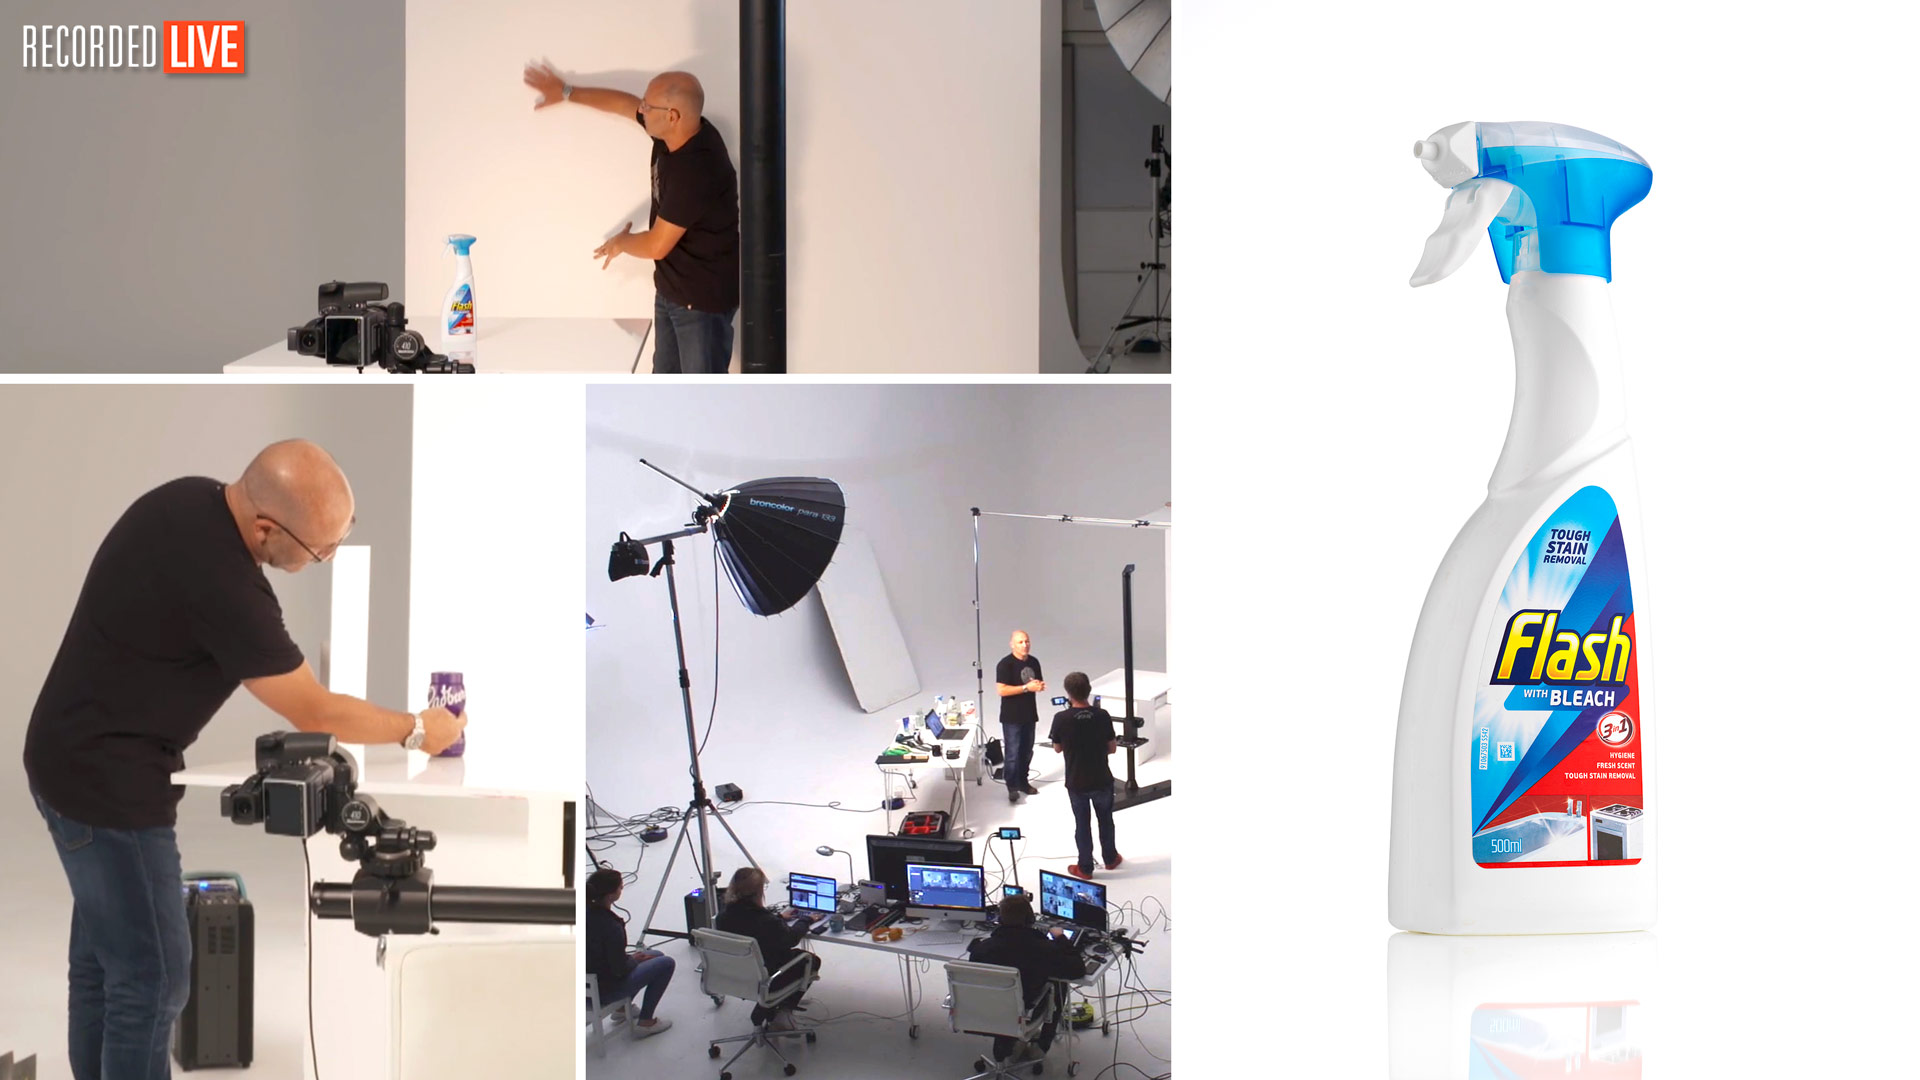
When you’re shooting packshots, speed and efficiency are key. That’s why it’s essential to have a lighting setup that’s both suitable and simple.
In this class, recorded LIVE, you’ll learn how to set up, light and and capture successful packshots.
Working through multiple products, Karl demonstrates just how important perfecting your lighting setup is. Starting with a simple two-light setup, he shows you how to achieve a professional result quickly – even if you’re working in a small studio and using basic modifiers.
In this class:
- Product photography: Packshots
- How to photograph packshots
- Studio lighting setups for packshots
- How to achieve a pure white background
- Small studio photography
- How to control shadows
- Controlling reflections on shiny objects
If you enjoy this class, check out Packshots: White Background Product Photography.
Questions? Please post them the comments section below.
Comments
Hello Karl, How about this kind of product? Do you think a white board with a whole in the center for the camera is going to be enough? Thank you.
https://www.dropbox.com/scl/fi/kuydjh64h6k8vklr2gwf3/IMG_7239.heic?rlkey=5se90z4g7lpu3rompdklhr3yt&dl=0
https://www.dropbox.com/scl/fi/vtgra81wbozsiag7vshi6/IMG_7240.heic?rlkey=18qwp2qvr2bacpipkd7jigpbt&dl=0
Hi, no I think you will need to completely surround the product because it has mutliple facets/angles that will reflect from all over the place. You could surround it with a home made box of diffusion material or use a Lightcone.
Thank you so much. I’m going to try it.
Hi Karl
Thanks for your videos! Very useful .If I achieve 255 on the background, I have insane amount of flare. I have put 2 massive plyboards painted back on the sides- did not help much. The ceiling is very low in my studio (it`s my garage, so it`s quite small in general) and I separated the background as much as possible. Does this mean that I just need to move my studio elsewhere?
Many thanks
Kseniia
Hi Ksenniia, what happens if you acheive R250, G250, B250 for your background? Do you still have flare? This is a very important question because if you do then the flare is not from your background, so test that first and come back to me.
Hi Karl
Thank you for coming back to me. I have done more tests and, unfortunately, it’s flare from the background light. After achieving back background at around 230, I started adding light slowly (2/10 of a stop) and flare was growing very noticeably.
So I have found out the following:
– it helps a bit if I move background light closer to the background and further from the subject. As I have only 2 light sources at the moment (one for back, one for subject), I tried just exactly like on the video- the light is under the shooting table. This gave a lot of flare even when background was 245-250. So I moved it away, closer to the background (but could not move too close at the same time, as it was getting visible on the shot)
– I also made the longest possible distance between the background and the subject. It turned out about 2,5 meters
– I have also noticed that you shoot with a hood. So I change my lense from 85 mm to 24-70 just because it has got quite a large hood.
– of course, 2 large polyboards painted black on both sides
So all this in combinations helped a lot. But flare is still there and technically does not let to achieve a picture with a good contrast and pure white background.
I guess a very low ceiling (I think it’s about 2m only, or a little bit higher) and close walls bounce a lot of light from each other.
So I thought maybe to try 2 light sources for the background but with barn doors? Do you think it might help?
Many thanks
Kseniia
Hi, if you think it might be coming from nearby walls and ceiling then it would be best to black theses but I don’t think it is. Flare only occurs when a light that is over 255 goes into the lens directly or grazes the lens at an angle. Or if it is light reflecting off of a wall I (such as your background) with a value higher than 255. Other things that can affect flare are dirty lenses, damaged lenses etc as well as the working aperture. Smaller aperture is usually less flare. I would like to see a wide angle photo or two of your entire setup to see if I can spot anything obvious.
Hi Karl
I shot at aperture 14. I also cleaned lenses (not inside though) but I tried 2 different one and they give similar result.
Please see pictures of my set up here:
https://drive.google.com/drive/folders/13qvSoQODFy_ohCGGLqj5SbJ0lUrGLD6_?usp=share_link
Thanks a lot for your help!
Kind Regards
Kseniia
Hi, your main problem is that you are trying to light an imperfect background that has wrinkles and ripples and you are trying to do it with one light from a very low angle and with the light much too close to the background. This type of background setup would never allow you to get an even 253 exposure across the background area which means you would then have to increase the background light to compensate for the ripples and the steep gradient. First of all I would recommend a solid white background (flat) and then moving your background light much further away from the background. It is much better to light a flat background with two lights too if you have them. Alternatively if I only had one light then I would set up my background with the light as in this video to get an even background https://visualeducation.com/class/how-to-use-continuous-led-lighting-for-packshot-photography/ (ignore that this one is LED and pretend it is flash)
Hello Karl! Is there a tutorial on how to shoot the one at 1:07mins with one light?
Thank you so much!
Hi, yes. In our portrait section this class uses the same technique: https://visualeducation.com/class/studio-lighting-setups-portraits-one-light-setup-22/
If the walls of my studio aren’t pure white but slightly broken white or slightly yellow / warm tone, I am afraid of color casts on pure white product photography, how do I correct this ?
Hi, you can’t you can apply a neutralise colour setting on the RAW file if you have used a colour checker card but this is not ideal it would be better to paint the walls pure white.
Your video worked great for my shots. But my client wants these shots delivered in a clipping path.
I have no idea what this is. I usually take my shots into Photoshop and just place them on a white background. Should this be an additional charge?
Can you suggest a video where I can learn this?
Your video worked great for my shots. But my client wants these shots delivered in a clipping path.
Can you suggest a video where I can learn this?
Yes, this is how you make clipping paths https://visualeducation.com/class/master-the-pen-tool/ but because you have a white background already then you can automate it with the auto selection tools too https://visualeducation.com/class/practical-demonstration-on-product-retouch/
I have a commercial shoot with the food packaging company. The specs for the photography request a 15 degree elevation from the top of the packaging.
How can I ensure I have the correct angle?
Hi, I would put a spirit level from the top of the product and then a protractor off of that to calculate that angle and use a piece of string if you need to be absolutely sure. Or go the other way and use a protractor from the camera being completely level and tilt down 15 degrees.
I’ve got a session with a client for some 500 products to shoot this week. Should be fun!
Best of luck, hope it goes well.
It went very well. Thanks for your brilliant Education videos,
It turned into some 1,800 products. Two twelve hour days. The advice you give is spot on. Each challenge I was presented at the session was easily answered within your videos.
Thank you so much for sharing your experiences and tips here on your site. Now I can afford a lifetime membership here!
That’s great to hear Don, well done!