
The Emotion of Light
Any effective image should evoke emotion — whether it be a sense of a bright, summer’s day or a darker sense of mystery — and it is only through careful use of light that we can achieve that.
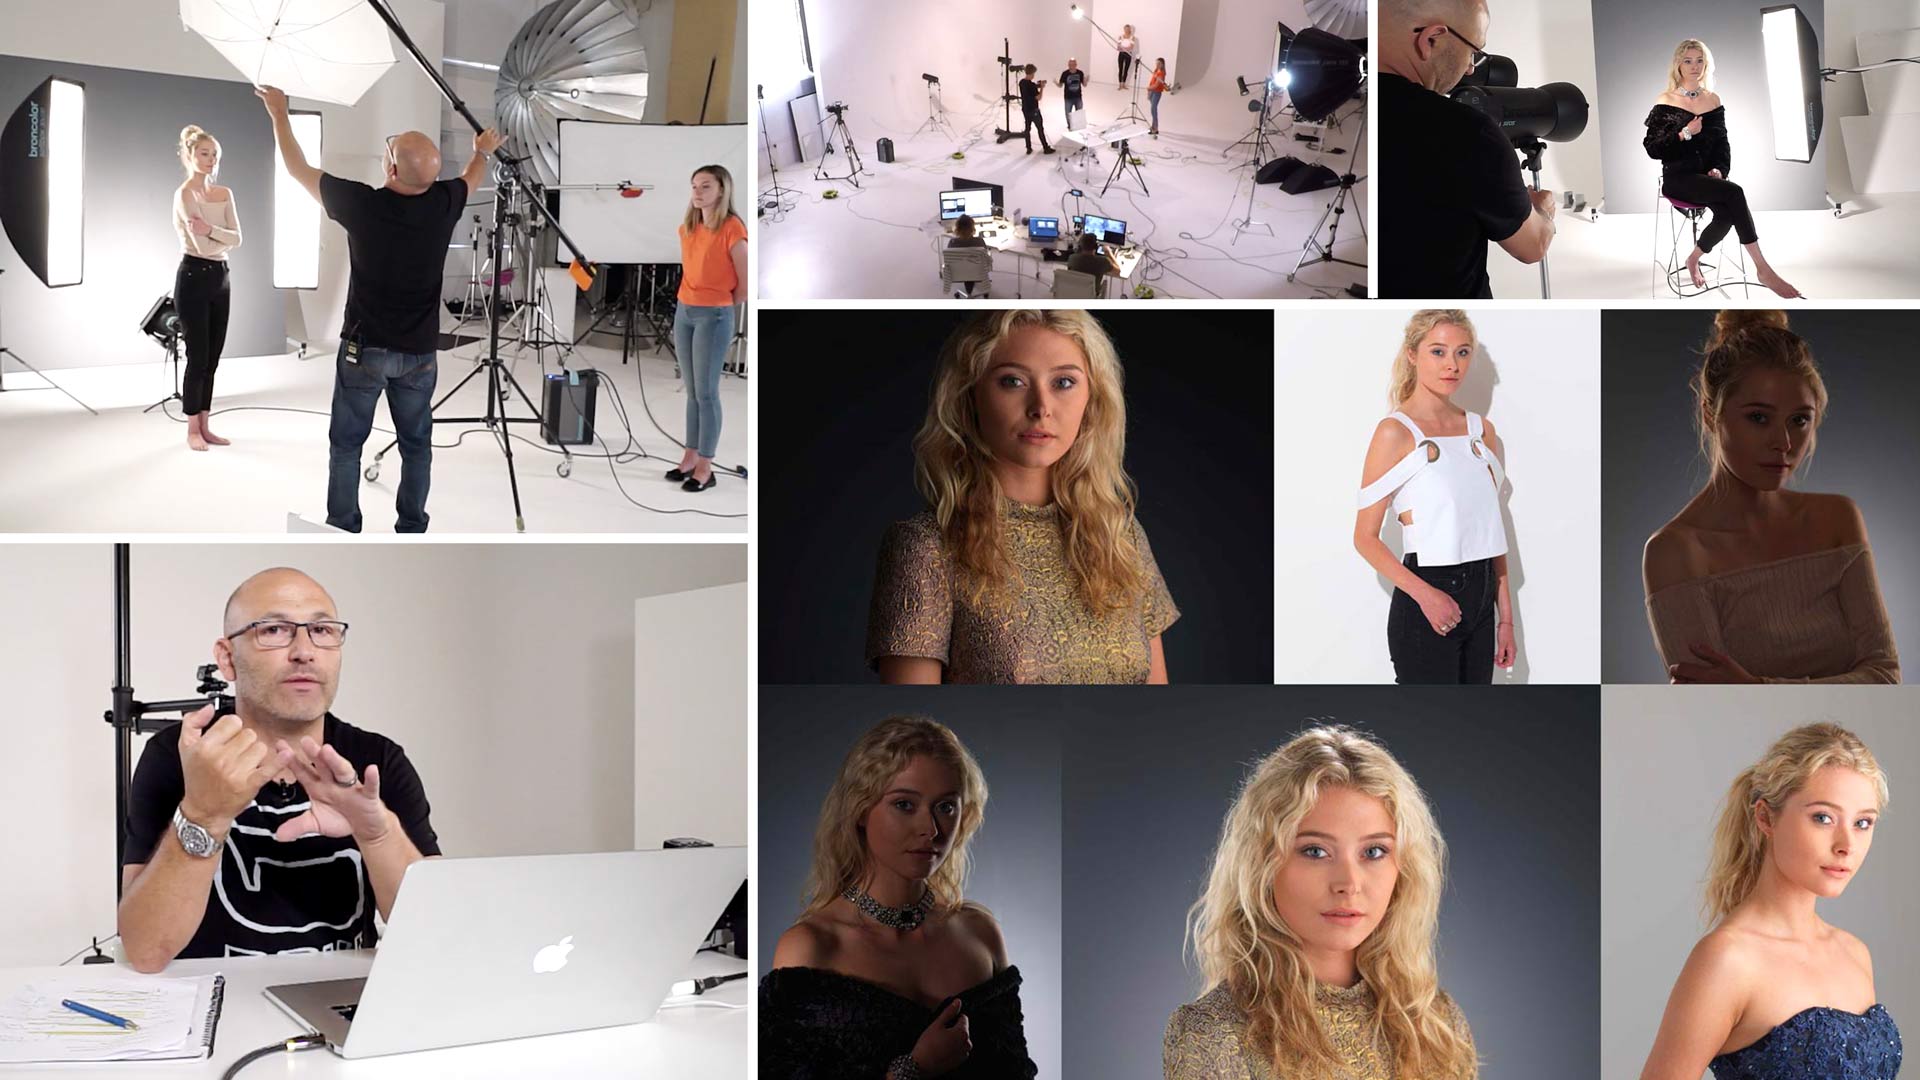
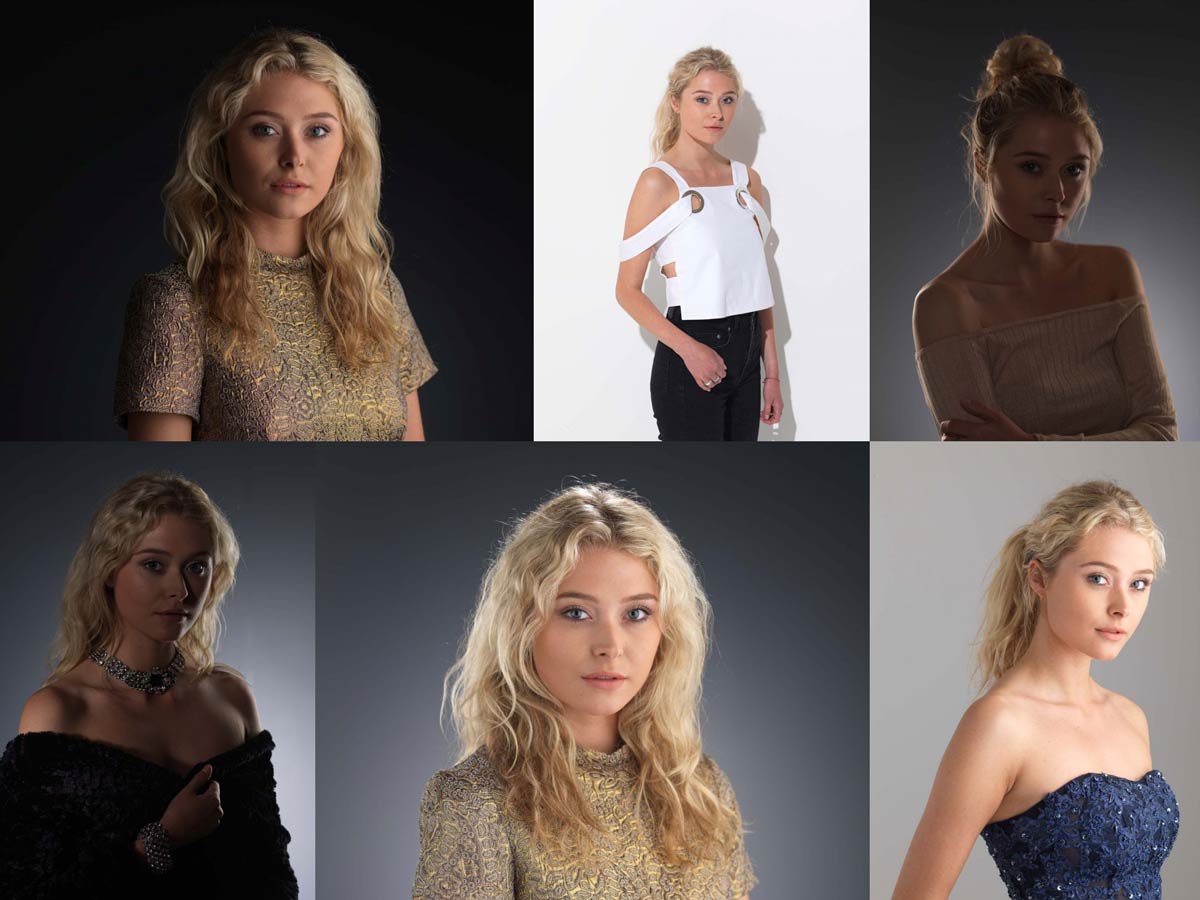
This in-depth chapter details everything from the theory and physics of light to the human perception of color. Karl reviews a number of images from his portfolio to show how two photographs with the same model and light source can look completely different.
He then goes on to demonstrate these principles, exploring the effects of directional lighting, various lighting modifiers and the effect of the inverse square law.
This photography class is a must-watch for those wanting to understand the emotion of light and how to use it to best effect. More information on the theory of light can be found in Chapter One of our portrait photography section.
In this live photography show, you’ll cover:
- Human visual response to light
- Theory of colour — juxtaposing and complementary colours and their effects
- Directional light and its impact
- How to control shadows
- Using negative fill to control light
- Simulating sunlight with a single light
- How to control light in small studio spaces
- Using reflectors and flags
- Lighting modifiers and their effects
- The best modifiers for soft light
- How to work with and balance multiple lights
- Four different lighting setups for effective portrait photography
If you have any questions, please post them in the comments below.
Comments
Starting around 1:52 you took a shot of your model and when you were done the pictures were quite dark. It seemed like an exercise in controlling rim lighting, Or were you teaching how to control lighting? Is there a practical value for this kind of dark shot?
Hi Vic, this class should help explain more of the intention and why: https://visualeducation.com/class/studio-lighting-setups-portraits-four-light-48/
At 1:19:34 — you mention that the white wall isn’t homogenous like a softbox — but couldn’t you just place a small diffusion frame (4×4?) in between the lamp and wall, to help spread the light and fill the larger white wall that you are bouncing into to make it homogenous? Thanks.
Hi Ty, it’s very difficult to make the wall homogenous. What you suggested would help but it would work entirely and it would require more space (the wall would need to be bigger and further back). The easier way would have been to add another light and have two lights hitting the wall.
Hi Karl!
As you are introducing additional lights, are you then adjusting your shutter speed to compensate for those lights in order to only be utilizing the flash instead of also allowing the modeling lights to alter the amount of lights.
Hi NaturesBest, thank you for your question. Generally your highest sync speed (that is the fastest shutter speed you can set while also using flash) is usually fast enough to cut out all the modelling lights so you don’t need to worry about them. Please watch this video for a further explanation of the relationship between flash, aperture and shutter – https://visualeducation.com/class/shutter-speeds-and-apertures-to-flash/
A real tour de force bringing in such a diverse range of concepts. Thank you.
Merci beaucoup!
Exhaustive, but worth every minute. Had to watch it in 3 sessions. Thanks Karl for doing it with such flows of adrennaline.
Thank you David much appreciated.
Excellent course! I’m looking forward to applying the lessons learned. At the 1 hour and 24 minute mark in the course Karl shows 2 portraits where he cast shadows across the models face. This technique was not included in this class. Can you suggest other classes on the platform that cover this material?
thanks!
pete
Hi Pete, yes those two images are classes in our Portrait Section.
At around the 1 hour point Karl moves the large 180×120 softbox very close to the model and takes a portrait. How does he avoid lens flare when he has the modifier so close to his lens?
thanks,
pete
Hi Pete, a softbox close to a model will not cause flare. Flare is generally caused when a light is pointing towards the camera lens or grazing the side of a lens without a lens hood or if you have a white background that is overexposed by too greater degree.
I eventually got to the end and thoroughly enjoyed watching this tutorial. I should be hopefully testing out some of these techniques in my own tiny studio in a couple of weeks’ time.
Good to hear James.
Thank you Karl, very informative, question i always thought the fill light was to be in the same plane as the camera? was it because of the way you had feathered the front of the fill light towards the camera you didnt get competing shadows?
Hi Karl,
I always thought Portrait photography is one dimensional with not much creativity. But the way you have covered the topics in lighting theory and now this additional topic of using lights more effectively I have started thinking of mastering the genre of Portrait Photography. Thanks a lot for such crisp teaching methodology.
Thank you.
When you paint the ploy boards, is the paint semi gloss or flat.
Hi, Always Matt.
Your methodical and logical way of teaching is brilliant. Everything is extremely clearly laid out and easy to understand. Thank you so much.
Thank you.
Thank You Karl, great lesson!!!
Brilliant course and explanations.
Thanks Geoff 🙂
I believe this is Karl’s magnum opus, so far. Wonderful just awesome.
Ha thanks Doug.