
Fishing Reel Photoshoot
Multiple metallic surfaces make for a masterclass in lighting control.
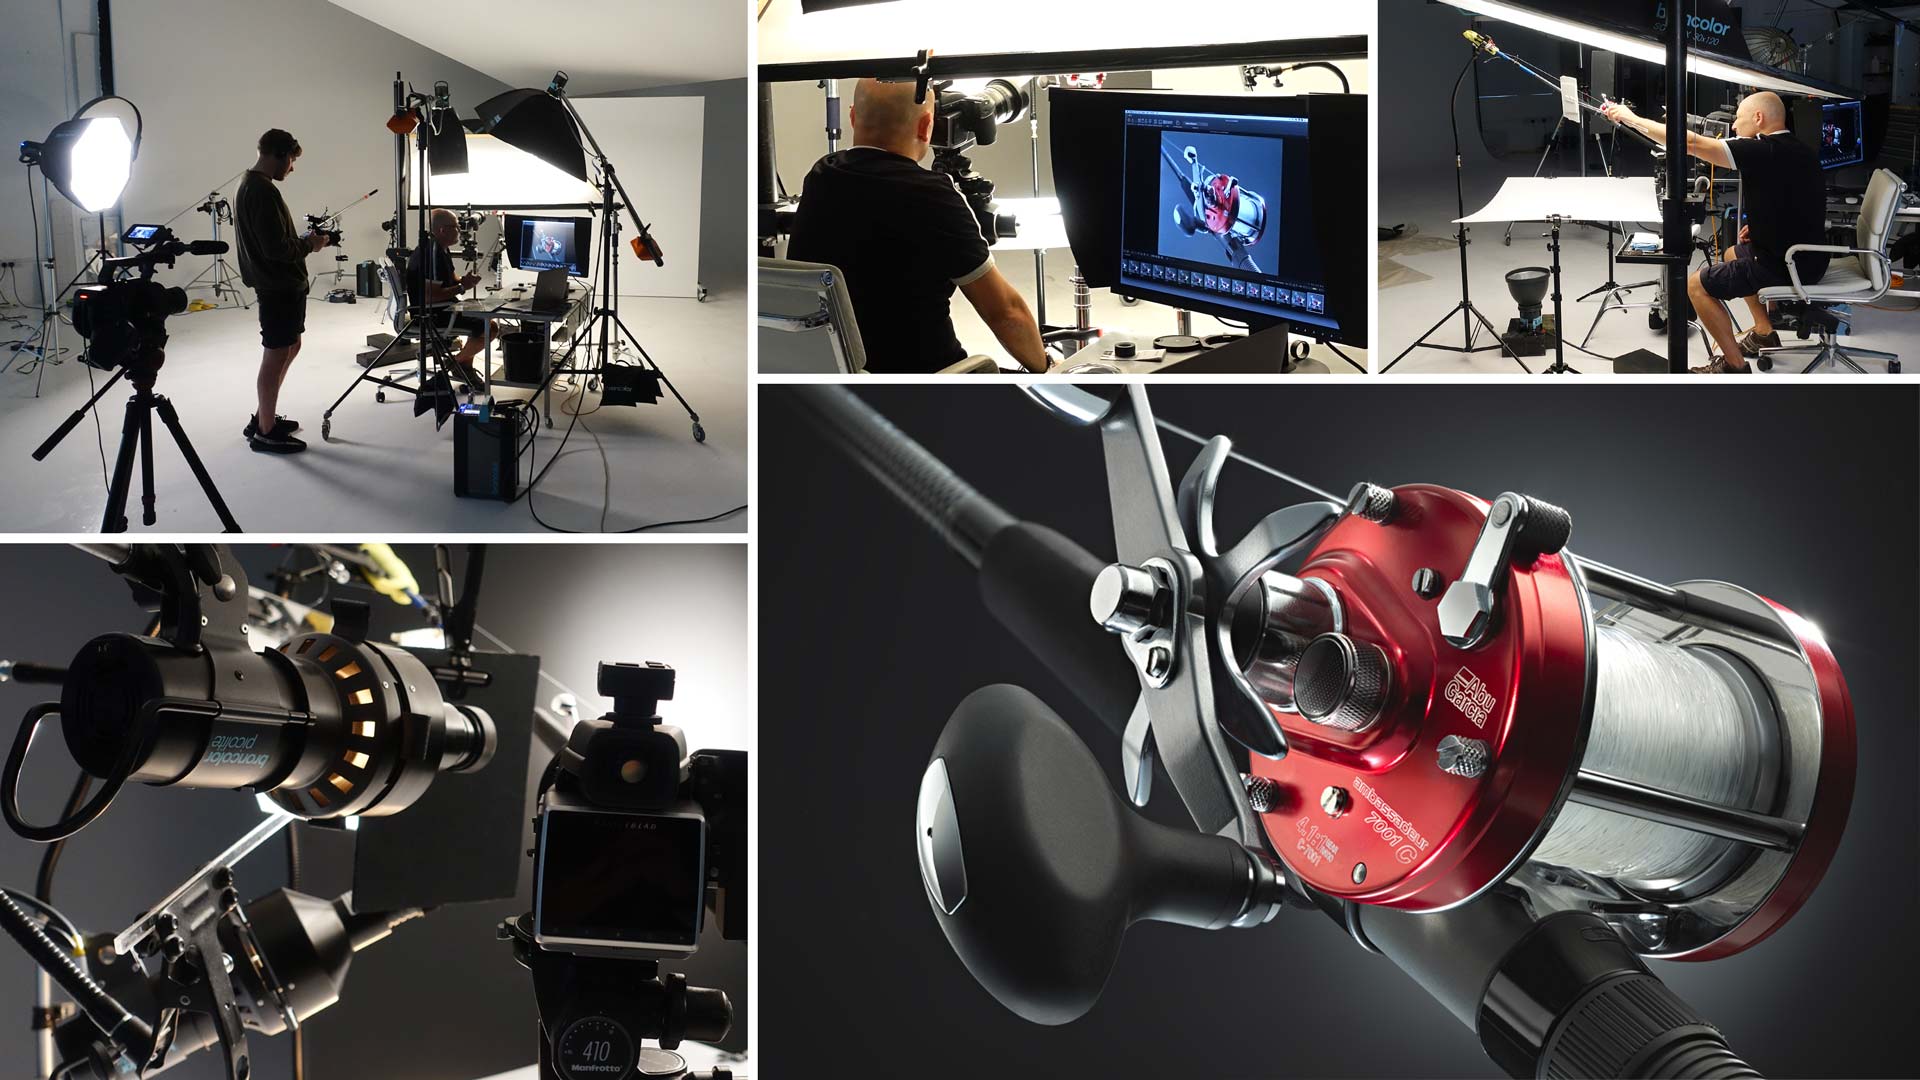
For this class, Karl undertook one of the most challenging shoots of his career — photographing an Abu Garcia fishing reel.
Key to the shot was controlling highlights on the metallic surfaces of the product, lighting key areas of the reel and achieving sufficient depth of field. You’ll watch see how Karl tackled all of these challenges and more through careful control of light, patience and experimentation.
In this class:
- How to photograph metallic products
- Techniques for creating gradient lighting
- How to light small details using specialist lighting modifiers and mirrors
- Flare and how to reduce it
- Controlling light bounce in a studio
- How to achieve greater depth of field using focus stacking
If you enjoyed this class, check out Cycling Photography: Specialized Racing Bike Shoot and Zenith Watch Product Shoot.
If you have any questions about this class, please post in the comment section below.
When it comes to product photography, understanding your product and the key features is paramount. As a keen fisherman, I knew what was important to show on this particular product, but lighting each of the elements would prove to be no small task.
With a highly reflective product such as this, it goes without saying that gradient lighting would form part of the setup. For this shoot, that’s where I started before moving on to lighting details such as the logo on the side of the product.
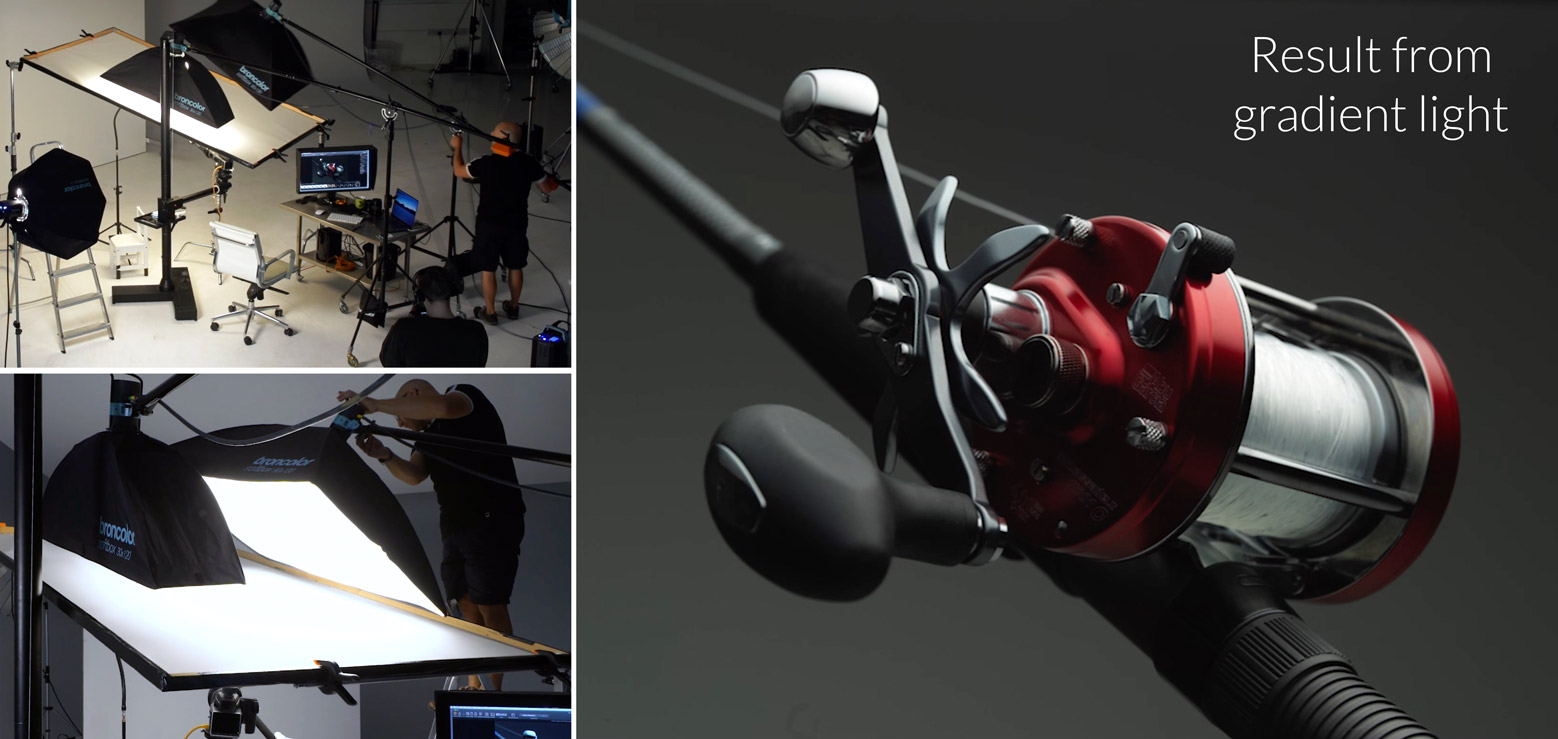
Creating an overhead gradient light was the first stage of the lighting setup.
As I progressed through the shoot, flare and light bounce proved to be two major challenges. This was caused by two main factors — lights shining into the lens, and light reflecting off the metal of the product and bouncing into the lens — and this was something that I had to address a few times throughout the shoot.
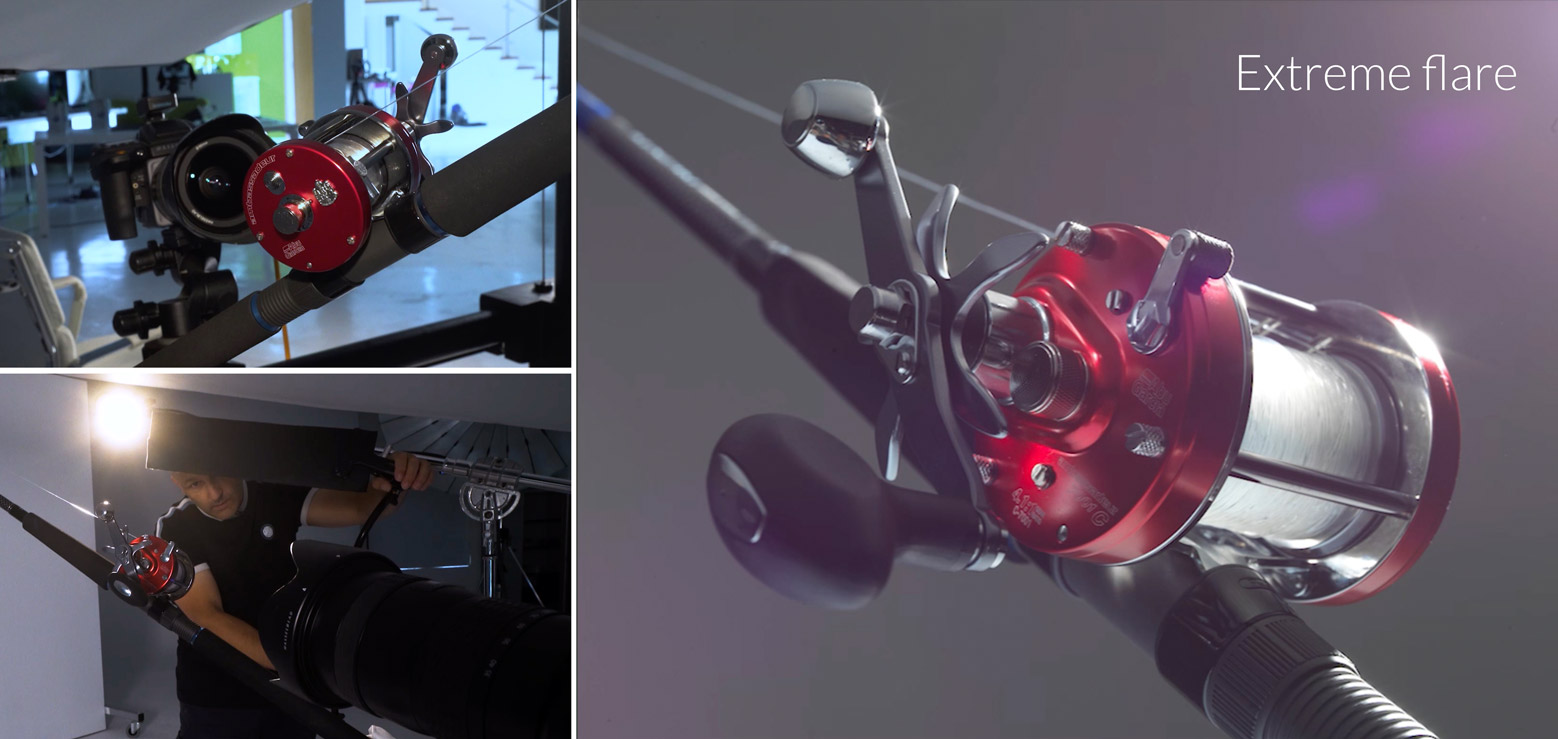
Flare was one of the challenges that had to be overcome during the shoot.
I spent the majority of this shoot lighting and refining the lighting on the product, before finishing with the background light and focus stack. To fully capture all of the details on the product, this was the only way I was able to get sufficient depth of field.
By working methodically and addressing each ‘problem’ as I went, I was able to reach an end result that I was happy with.
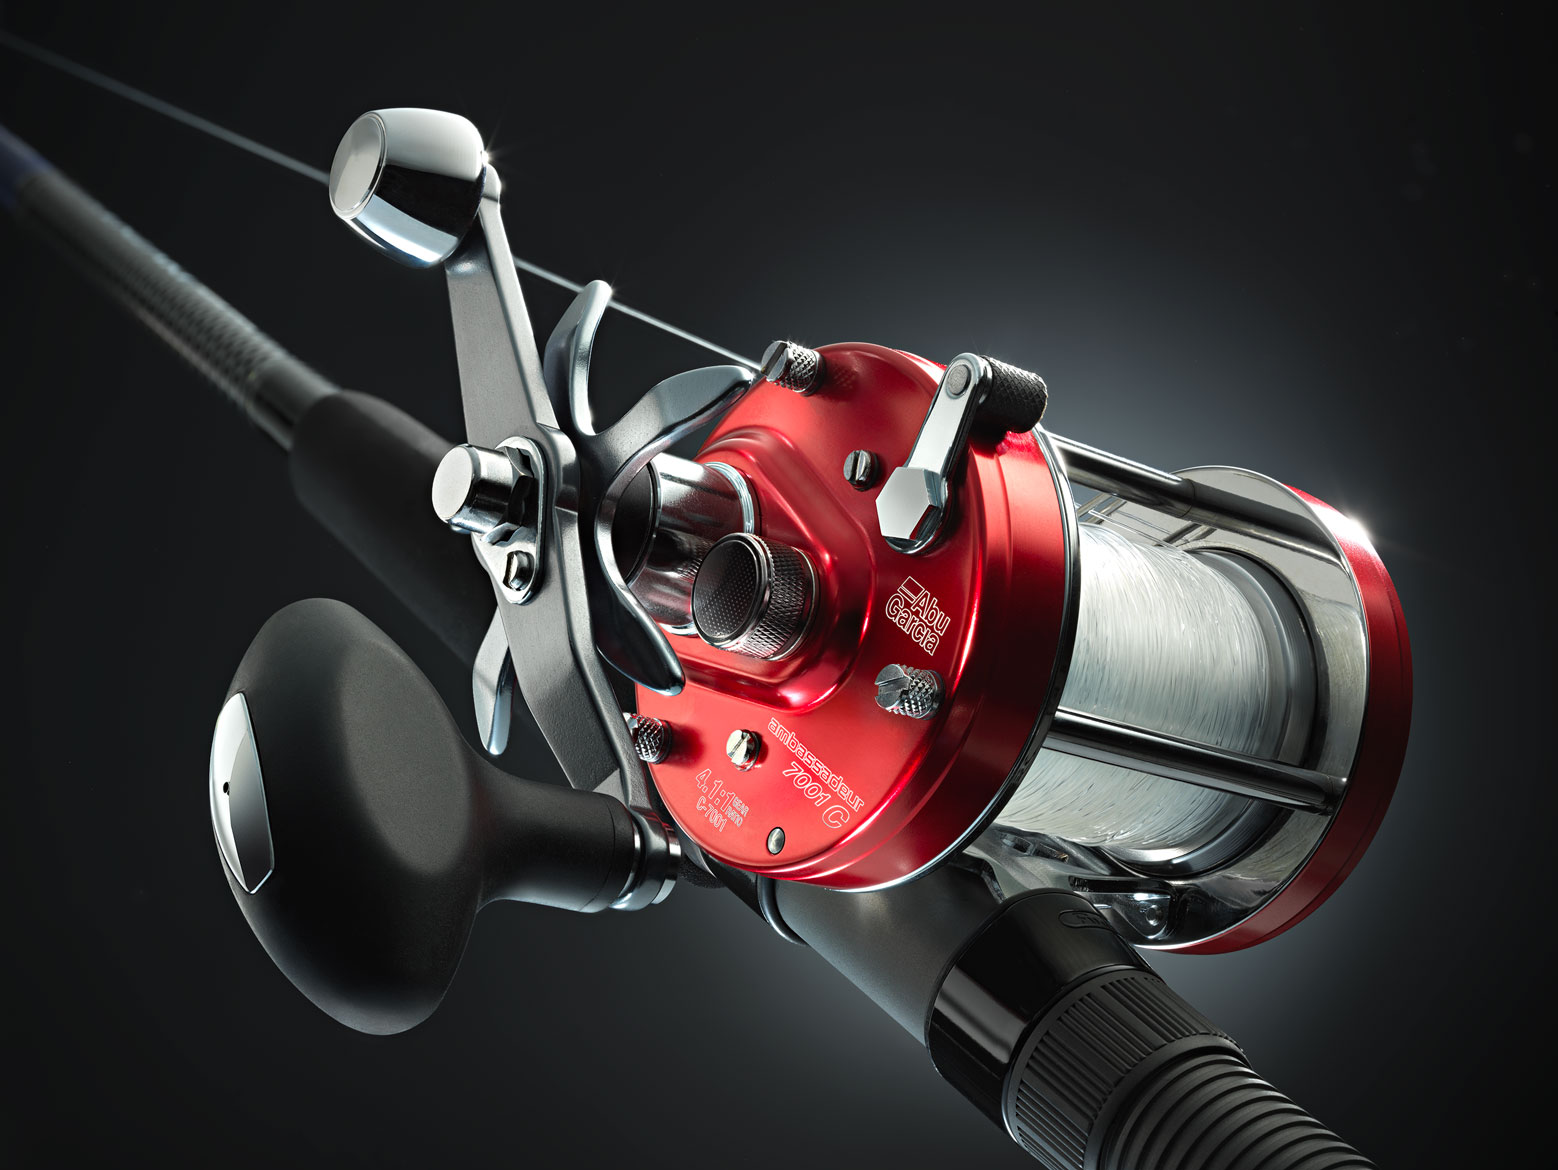
The final fishing reel photo.
Comments
Great pleasure to watch.
Cheers!
AWESOME! BEAUTIFUL ❤ THANK YOU VERY MUCH 😁
Hello Karl,
When I was a kid my old man would assign me some task around the house or in his workshop, he’d emphasize the notion of “things worth doing are worth doing right”. Fast forward many years upon which I had the good fortune to work on Oprah Winfrey’s television production team. One of her often repeated sayings was “love is in the details”. I only mention it because to me this meticulous shoot epitomizes both these ideas and should be the approach we strive toward for all assignments.
Side note…I don’t own small fresnel projection modifiers so sometimes when making a product logo ‘pop’ I use a small LED flashlight, the type that allows me to narrow/soften the beam and if need be I’ll flag it with little pieces of black gaff tape.
Anyway this has to be one of my fave videos, learned a lot and have to say that unquestionably your overall educational program is hands down THE BEST in the training marketplace, worth every penny.
Come to the states, do some workshops…I’m sure they would be a huge success.
Best,
Dave L.
Thanks Dave, glad you enjoyed it.
thanks for the great class, i always wanted to ask you about the scrim, did you make it your self or did you buy it, if you bought can you give me a link, if you made it your self is it the same matterial as lee difussion filter ? or what did you use, and can you give me the size of the scrim please
Hi Fadi and thanks, please see this video but yes using the LEE on just one side is good – https://visualeducation.com/class/making-a-scrim/
Super enjoyable and informative,I love the way you figure out the issues step by step.
Hi Helena, thank you very much. Yes that’s very much my process, to figure out what you want to do and then do it one light at a time and don’t move too far forwards until you’ve figured out how to solve the most recent problem. That way less compromise is involved in creating final image and less reliance on post production too.
One of the first lessons I gave myself before I signed up for your education was Focus Stacking on my XDII w/ 45P, It was a joy, I went right out and purchased Helicon, love its magic. I was a little dirtier and set all the parameters to automatic in the Hasselblad to go Infinite to near shooting the Inside copper Wrap of a Vacuum Transformer. (weird but it was shiny just like a Fishing Reel only Copper). Thank you for the tutorials. Would love to Join your getaway in March 2021. 7 Seats left, … I need to concentrate on everything you have put down on tape for now. My daughter is an equestrian, and I think I might enjoy learning a little more about Photographing Equine.
Hi, thanks and we’d love to have you. Unfortunately we are unable to confirm yet if it will be going ahead due to the covid situation, sadly we had to cancel it earlier this year as it was scheduled just as everything was going into lockdown. With our winter coming and cases rising again in Europe we are still unsure what the travel restrictions will be in March.
Lovely show, Karl. As always.
One question: what do you do with all the initial images after a photoshoot? Meaning the first ones that are incorrectly exposed, or are part of the whole process. Do you ever delete them?
Thank you Jorge, yes I enjoyed this one but there were a few frustrating moments trying to get light to the right place! I never keep all the raw files as they just take up too much space. If I conclude that 12 files are needed for the focus stack then I will keep those and then after a few months I usually delete them. We only hold on to them for a short while incase any are needed to be shown in the video edit but generally speaking I delete any unused ones. It’s a little different of fashion and beauty shots though as sometimes I like to go back to them a year later and there may be one or two expressions that surprise you that you didn’t think of first time round.
WOW! Complex doesn’t even begin to describe this shoot. I’m going to have to borrow a rod & reel and try this myself. Thanks Karl!
Thanks Bob.
Absolutely immaculate, pure perfection Mr Taylor. I just love the way you see all the intricate reflections and shadows to either eliminate or retain; fascinating and pleasurable to watch. Thank you for sharing this video.
Thank you Debbie.
Very nice Karl 🙂 all those different angled reflective surfaces are hard work! love the “sparkle” you got into it which really helps bring it to life. Will you be showing the retouching work for this shot ? and would also be interesting to know what you would charge for this one shot ?
Hi Saul, sorry I thought I’d replied to this but I must have accidentally deleted it. The main photoshop work was the focus stack which was an automated process using Helicon. After that there was a bit of dust clean up and I smoothed out the chrome on the top bit at the end of the handle and on the plate on the line release lever. Other than that it was as is from camera that you see in the video. If I wasn’t presenting/teaching it would have probably have been a half day shoot and you find pricing relating to that in our business section.
Hi Karl, many thanks. I think you did reply to my questions but in reply to Zegis. Cheers Saul
Super enjoyable and informative.
Amazing attention to detail in everything – photographic perfectionism. And all done in camera which is what keeps your attention through almost 1 1/2 hours of tutorial. Brilliant, thank you Karl
Hi Zegis, thank you. There wasn’t really much retouching on this one, just the usual dust clean up and I did a bit of clean up on the chrome handle at the top and on the plate on the gear release lever. The main thing was to get everything as perfect as possible in camera for the focus stack which was done with Helicon. If I’d not been presenting the shoot it would probably have taken me 6 hours which is longer than I expected (I thought it would have taken 4), so if you compare that to the price guidelines in the business section that will give you a guide on the pricing.
Very enlightening, I have watched a couple of your product photog classes now and I see when shooting very glossy/ reflective products you prefer to use a soft box over the scrim where as matt finish products you use a bare bulb to create gradation of light. Correct me please if the following is incorrect : use of a soft box on the scrim terminates the gradation suddenly which limits the extent of highlights that follow the contour of the surface of the glossy subjects. Where as on Matt subjects the gradation appears longer and is required for contouring the Matt subject due to their reduced reflectivity?
Hi Charles, I generally use scrims where the product is highly glossy and I don’t want a homogenous reflection of the light source in the product. The choice of bare bulb or softbox shape is usually dependent on the shape of the product and the shape of the reflection gradient that I want to see in the product, so for example bare bulb will give a radial gradient and a strip box will give a longer rectangular gradient based on the angle of the softbox etc. The gradient can terminate more suddenly with a softbox but this has more to do with it’s angle to the scrim and it’s distance from the scrim – I also can terminate a radial gradient more quickly by using a P70 reflector on the bare bulb but again distance from scrim plays it’s part. On matt subjects such as the carbon fibre race bicycle there isn’t really a need to use a scrim at all because the surface material is matt and therefore providing a diffused reflection already, gradient light can be achieved by simply tilting the angle of the softbox.
Thanks for your very comprehensive response!( I have copied it to my notes for future reference until it becomes intuitive) I am going to watch more of your product photog stuff. By the way not using a light meter makes so much sense re product photogy. Looking forward to all these videos.
Exceptionally crafted lighting! One of many super useful tutorials, unmatched anywhere, thank you for all that knowledge Karl !
Very kind thank you.
I’m hooked on this awesome lighting technique!
Bravo!
Thank you, it took some time but I think I got there in the end.