


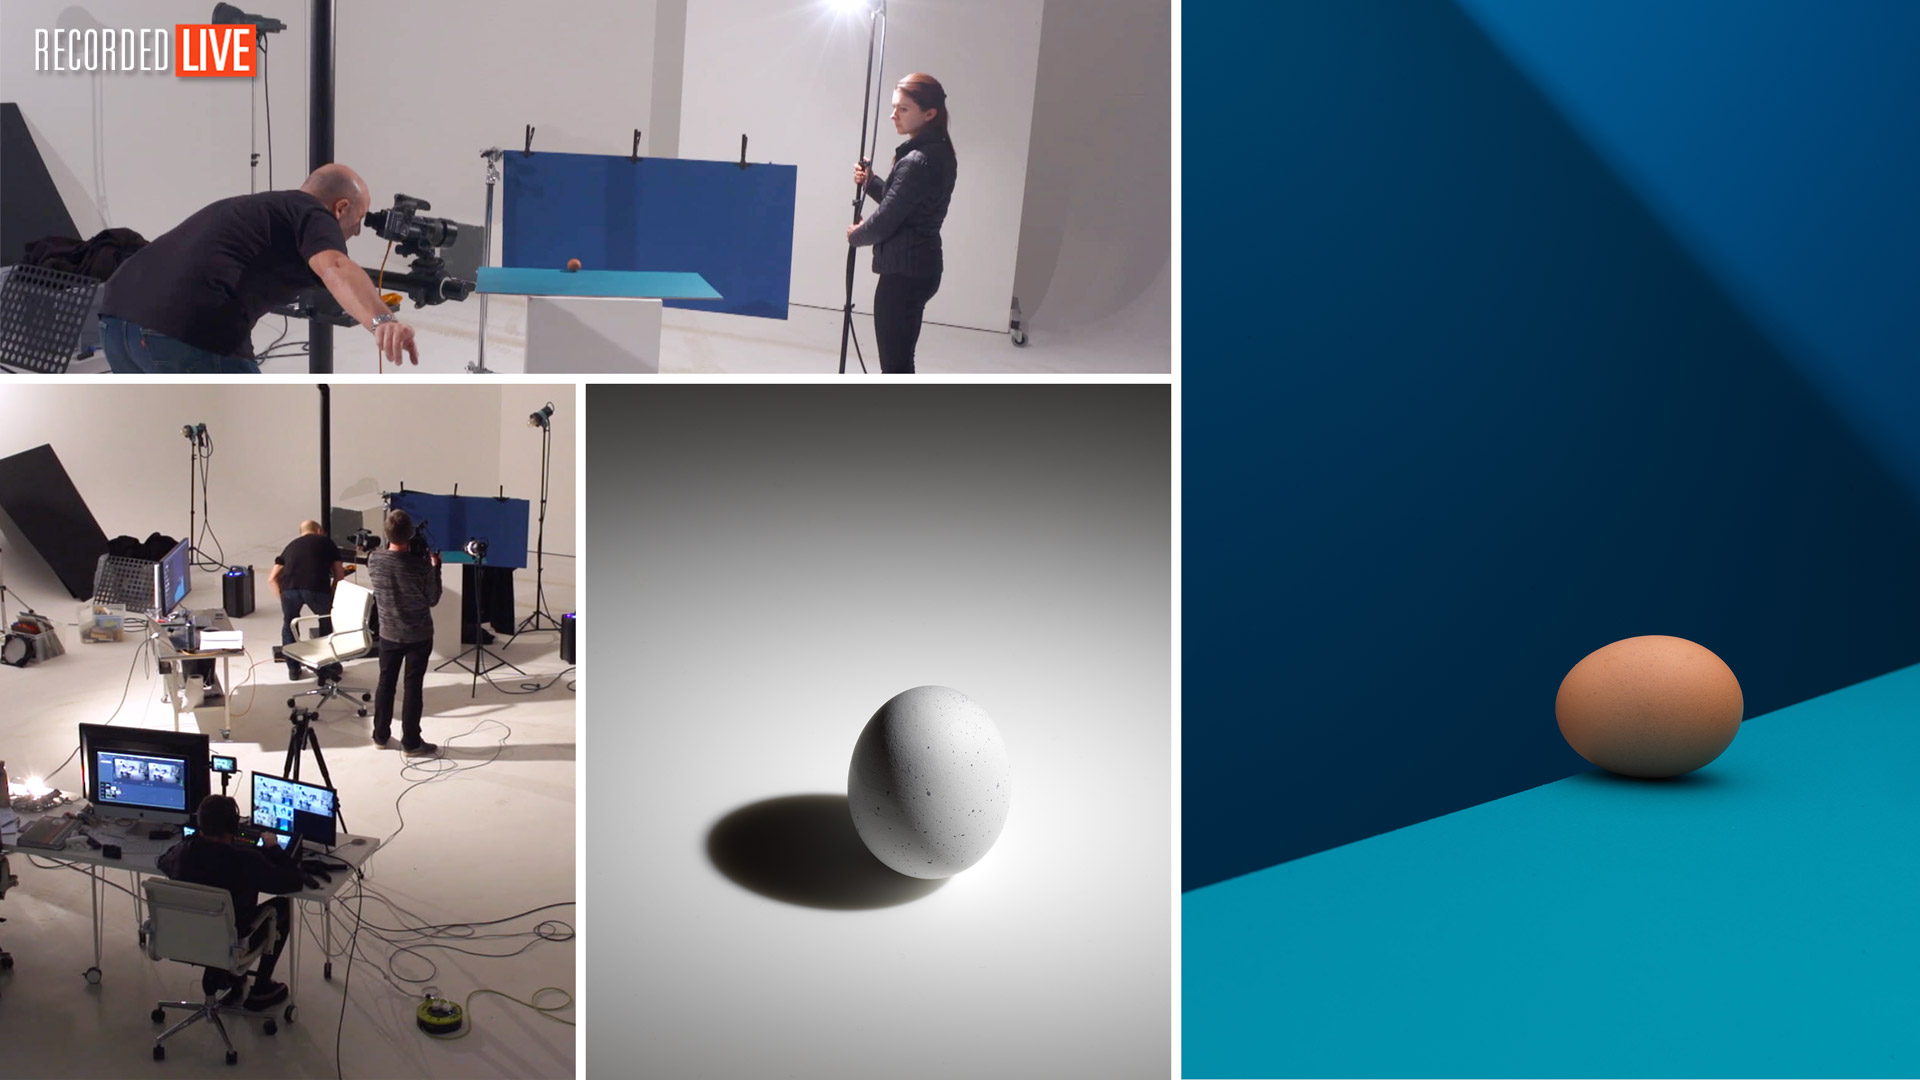

Lighting Control (The Egg Challenge)
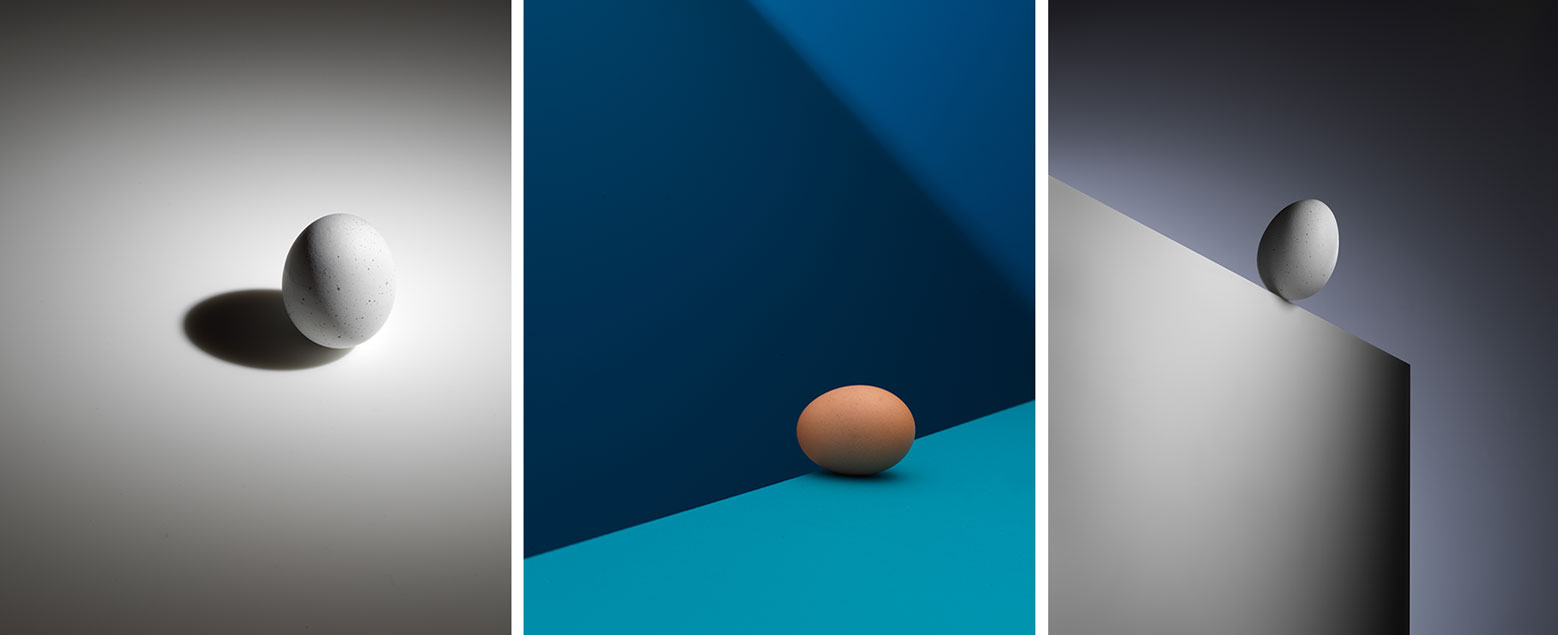
We set Karl a challenge – to shoot an inanimate subject (namely an egg) in a single location with minimal different surfaces and backgrounds, and zero props. How did he do?
In this live show, drawing on his knowledge of light and lighting control, Karl covers a number of techniques for controlling the mood and feel of an image, including:
- Light position
- Light direction
- Light hardness and softness
- Light colour
- Choice of modifier
- Invoking emotion
- Composition
- Sculpting the subject
Karl demonstrates how, by thinking outside the box and using light creatively, it’s possible to achieve great results – even when photographing simple subjects. Combining theory and practice, he reveals how the essentials of studio lighting can be applied for exciting results.
Using standard, affordable modifiers, as well as a few pro light shapers, Karl demonstrates important theoretical concepts relating to light and colour that can be used to better control studio lighting. These include how the size of the light impacts the hardness or softness of the light; how to mix hard and soft light and how to create completely shadowless light; and how to easily create an affordable DIY alternative for projection attachments.
He then creates two different still-life setups. The first demonstrates the importance of colour, while the second highlights how you can use narrative, emotion and anticipation to create alluring still-life imagery.
In this class:
- Creative ideas for still life photography
- Lighting theory and how to control studio lighting
- Colour theory and triadic colour schemes
- Creative one-light setups
- How to mix hard and soft light
- How to create shadowless light
- How to use narrative, emotion and anticipation for creative conceptual imagery
If you have any questions about this class, please post in the comments section below.
Comments
Excellent video ! Thanks Karl! So much inspiration ! From Korea!
I’ve been learning English too. ^^ Your English pronunciation is very helpful to keep me subscribing your education. But in Live Show, English subtitles (after live of course) would be fantastic merits to us who subscribe your channel in Asia.
Hi Thank you, we are working on trying to get our subtitles completed more quickly but it is quite a time consuming process.
Great show, Karl. The way you leveraged big things from the simplicity of an egg was fantastic. Very good concepts in that, thank you.
First, sorry about the English…
I see a lot of use of harsh light in food Photography recently.
My question is:
If I wanna take 30 eggs on the same surface.
Putting the eggs in same equal gap between each other, how do I light the whole eggs scene with harsh and make a pin sharp shadows in all of them?
I usually use bare bulb from a distance… but it’s not pin sharp
Thanks a lot
As usual, Karl, you are an excellent instructor and a true inspiration. I have so many more ideas now. Thank you!
Excellent lesson Karl! I was not expecting to learn so much about lighting with a help of an egg. I am impressed. Quick question regarding these DIY white stands/boxes. What are they made of and what size are they? It looks like they are light yet sturdy. Thank you in advance for your answer.
Kinds Regards,
Bogusz
Thank you for your comments Bogusz, the boxes are made from thick MDF and painted white, they are about 40cm square and 80cm tall. We get a carpenter to make them.
Excellent video. Great team ! Probably will watch it again.
Hi Kar!. I litterally love this course. Your explanations are always clear and rich of ideas and hints. Very helpful
Thank you.
I have to say this is one of the most intricate tutorials on shadow you have done and answered so many questions on ‘light’ over and above any previous courses I have watched. This simple egg matter has answered and completed a complete tapestry of light!
Many times I have lit a product and compare it to a longer exposure with ‘natural’ light, wondering what I was missing, how to recreate that ‘natural light’ feel, and the questions how and why? From lighting interiors to products the time spent watching has had huge value to my understanding. On that note your recent course on business portraits on locations – Again, creating an overall light in a basement with no light, same theory – the simple egg. Genuine, honest, valuable and massively beneficial content in all your courses worth it every time. All the best to you and thank you for sharing such knowledge with us.
Thank you for your comments James. I think you’ll find this very useful too https://visualeducation.com/class/live-broncolor-how-to-with-karl-taylor-urs-recher/
I enjoyed this. You keep hatching up these eggstraordinary workshops!
I notice the lower the power on my speed lights the shorter the flash duration, up to 1/42600 max at 1/128. So this high speed capture is possible with speedlights, close enough or possibly two ganged together at 1/8 power can give 5,000/s duration. After all its the flash duration causing the freezing of movement. A bit of faffing but possible to re-create in a dim studio with a 1.5s shutter speed.
Hi Chris, yes easily achievable with speed lights when working at this scale. I did this one entirely with speedlights https://visualeducation.com/class/colour-paint-sports-shoot/
Great class Karl
Very interesting workshop about an egg,, I have shot eggs before but this has given me more inspiration to try somethings differently.. Many thanks once again Karl.
All the best
Thanks Aby
Great show. It’s inspired a little project for me to try.
Thanks Heulwyn, I’ll be coming back to you soon with the other project
Hello Karl,
The extension/holding arm that you are using that holds the “flexible magic arm”(1:25:14 into the video, with you sitting and Ashleigh holding the egg), I cannot not find it on the Manfrotto/Avenger website. It has extended threads on each in, so that you can screw things on like the “magic arm”. Is the extension/holding arm made by Manfrotto/Avenger or by another manufacturer? Where can I find it?
Regards,
Victor
Hi Victor:
https://www.manfrotto.com/uk-en/heavy-duty-flexible-arm-520mm-237hd/
https://www.essentialphoto.co.uk/product/pixapro-stainless-steel-century-c-boom-arm-and-2x-grip-heads/
Thank you Karl !! This course is really great ! I love the simplicity of your approach, beautiful light, compositions.. everything is perfect !! Beautiful work, very chic 🖤 !! 🙂
Thank you 🙂
In my 12 years of photography, this is one of the single greatest lighting videos I’ve ever watched.
Very kind thank you, I think you’ll like this one too then 🙂 https://visualeducation.com/class/live-broncolor-how-to-with-karl-taylor-urs-recher/
Great show Karl. I can see doing this on a cold stormy afternoon. Good practice.
Thanks Geoff, yes these sort of small still life studies are great for winter days indoors.