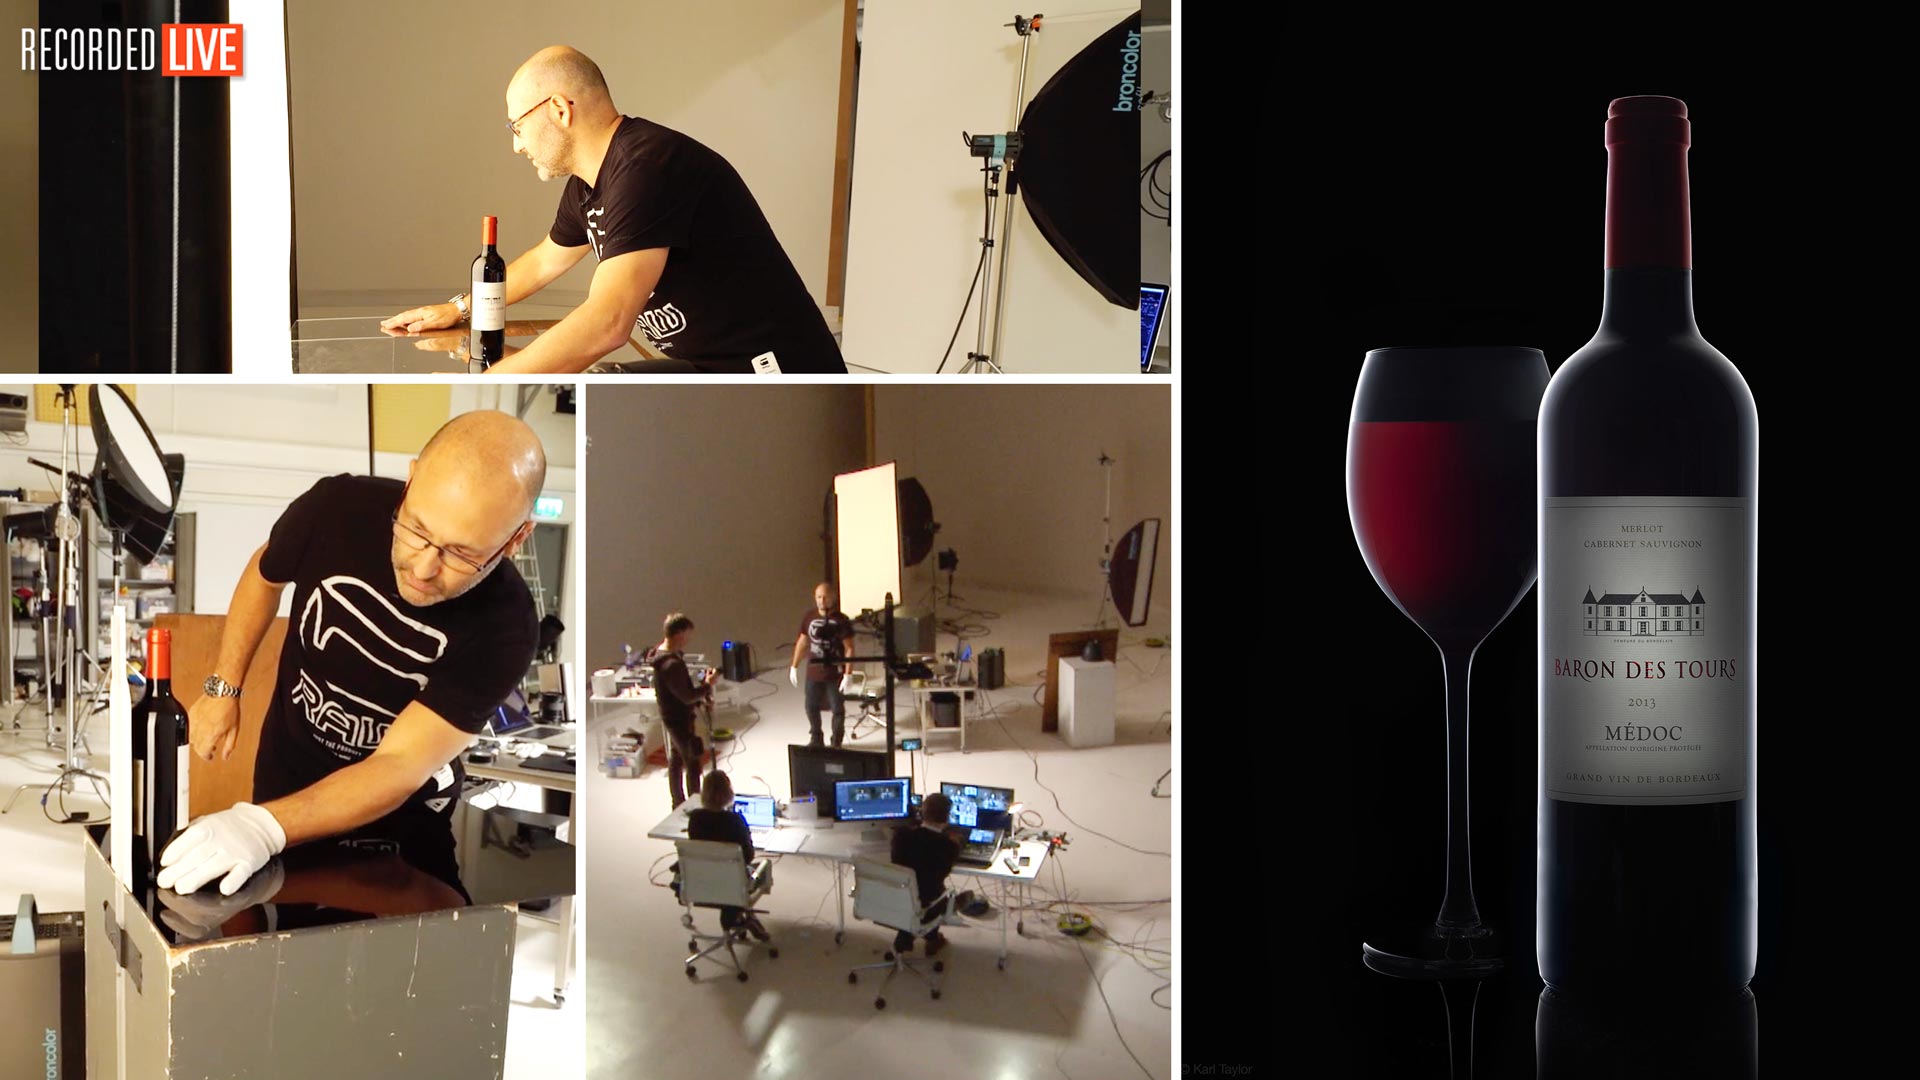

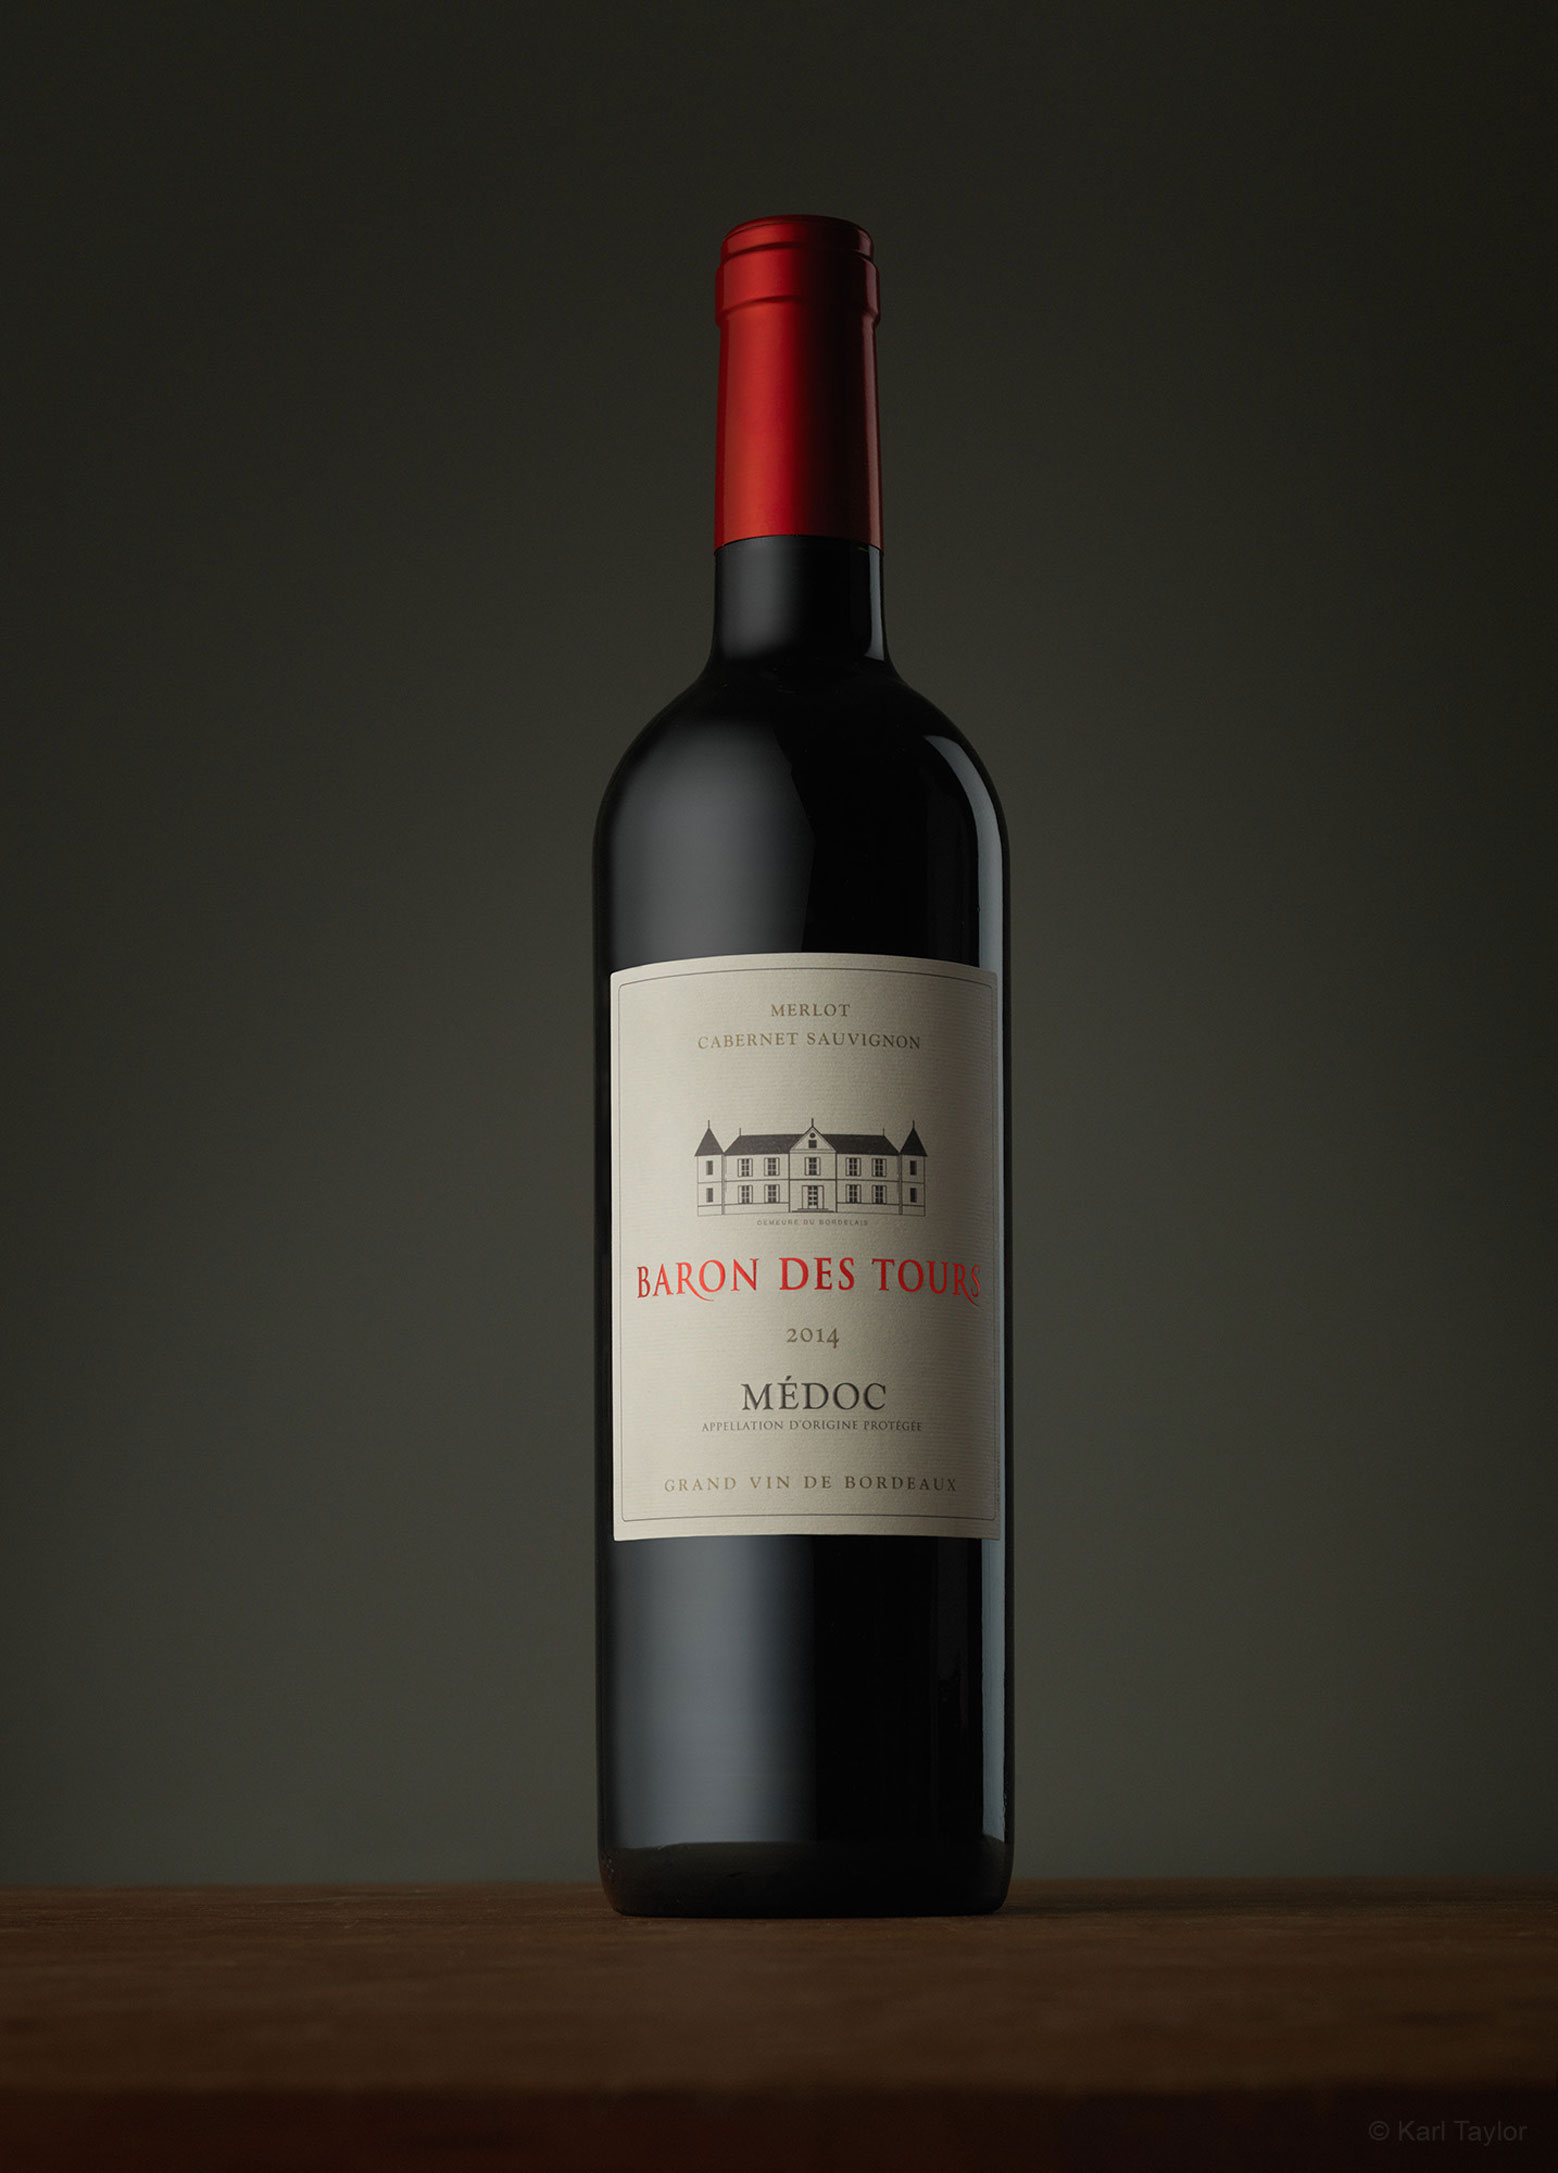
Wine Bottle Photography
Struggling to get your bottle shots right? Let Karl show you how to light them like a pro.
In this product photography workshop, recorded LIVE, you’ll watch Karl shoot a bottle of red wine. As he does so, he shares a host of useful techniques and tips to help you improve your own bottle photography.
Demonstrating two different lighting setups as he captures a variety of images, Karl explains the modifiers, background choices, lighting considerations and post-production requirements you need to replicate each one for yourself.
Learn from a pro and follow Karl step by step as he shows you how to achieve the perfect photograph of a bottle of red wine!
In this class:
- Product photography: How to photograph wine bottles
- Product photography tips
- Lighting modifiers for product photography
- Rim lighting techniques
- How to control reflections in bottles
- Working with composite images
- Correcting image distortion
- Photographing using coloured gels
If you enjoy this class, check out Whisky Photography or explore our huge Product Photography section.
Questions? Please post them in the comments section below.
Please note that we no longer sell diffusion material directly, but Visual Education subscribers are eligible to receive a wide range of discounts from top equipment suppliers.
Comments
This video has opened my eyes to a world of creative possibilities! As I am somewhat financially strapped, I have achieved an excellent “ghetto” variant of the picolight with a $20 ebay vintage projector combined with a speedlight. I just gutted the projector and removed the light bulb. I then machined a holder for a godox speedlight. I find that I can modify the output with various covers to contain the light. I can use the built in focus mechanism to achieve the defocus described in the video. Yes I would prefer to use the nice picolight. But felt like maybe others in the same boat as I could use a cheap alternative. Best regards, Emile.
Hi Emile, that’s excellent – I love these sort of home made solutions!
Thanks for this great and educated Tutorial.
you said that will be another tutorial for shooting white wine.
i can’t see it… where this tutorial ?
can you send a link ?
thank you very much
Sagi.
Hi, in our product photography section.
I also cant find the Video …
can you add a link ?
https://visualeducation.com/class/photographing-clear-liquid-bottles-gin-vodka/
thank you very much.
two more questions :
1. is there a link for buying diffuse paper in your web site ?
2. where in my profile, i can change the picture ?
Hi, I’m afraid that we do not sell the diffusion paper on our site but you can find a list of Lee Filter distributors at this link here – https://www.leefilters.com/dealer-lighting.html
To add a profile picture the member needs a Gravatar which is a globally recognised avatar. http://www.gravatar.com
Once you have created one of these using the email address you use to login to the website your picture will then show up on our website.
Hope this helps,
Emma
Dear Karl,
Thank you for the FANTASTIC content you propose. I walk around the Internet for years searching for quality courses and I must say that you offer the most precise, professional and complete content I’ve ever seen.
Please don’t stop.
Cheers from Luxembourg.
Very kind Nico thank you.
Followed the directions. Now I have a crackin’ photo. Noticed there are so many ways to adjust the lights to wrap and fade. Thank you!
Great cheers.
Karl, I am having a hard time finding those acrylic mirrors, can you help? I live in Atlanta, Georgia
Hi, try a sign service company or plastic supply company – Plexiglass Mirrors or Acrylic Mirrors.
Thank
These are available from many Amazon sellers; here’s one, for example:
https://www.amazon.com/24-Clear-Acrylic-Plexiglass-Mirror/dp/B01784INX6
Hi Karl, would using the 100×100 softbox on the left be much different to using the 120×180 since still reasonably big compared to the size of the bottle?
Hi Cameron, yes should be OK but remember size of the softbox is from the subjects point of view, so the distance from the subject also dictates size.
Hello Karl,
Hope all is well with you and your team..
I have a question regarding flair. I noticed you flagged the sides to reduce the flair, but how come you don’t get flair from the top? Or is that because the light is shooting over the top of the camera ?
Hi Philip, flare comes from the direction the light is coming from and you can actually see it in camera or on the test shot, so you simply need to block what you can see. If there was a need to eliminate any flare from the top and sides I would have used a window mask as you will see me use in many other tutorials.
Hi Karl,
Where can I get an extension tube for the Hasselblad lens? I can’t seem to find one on eBay 😀
Hi Alan – https://www.hasselblad.com/h-system-accessories/extension-tubes-h/ maybe the ProCentre in London?
Hi Karl,
You answered on one of the questions asked on the live show that you’re using an extension tube with a 80 mm lens and you prefer it over a 100mm Micro,
What particular model were you talking about?
and what (Canon) lens can you recommend for doing product photography and what extension tube? I do own a Canon 100 mm Micro and would like to expand my arsenal if it can help me achieve better images
Thank you!
Hi, The Canon 100mm Macro is probably the better option, you will see Anna and I shooting with it on a lot of the food tutorials. I was talking about Medium format lenses and not seeing a great deal of difference between those macro lenses and the using extension tubes. However a good inexpensive set of extension tubes for canon is a brand called Kenko (not the coffee brand).
Hello Karl, I have a question, how would you achieve that color glow in a clear white bottle, for example a Vodka or Tequila bottle, I would think that the whole bottle would get in color? Thanks.
Hello Pabel, why would you want to achieve a coloured glow down the side of a bottle such as vodka or tequila? That is not something you would normally want? If the light was coming from the back like in the second setup in this video then the colour would refract through the bottle and be visible on the opposite side of the bottle as well as putting colour on the glass on the other side. The whole bottle would not get in colour. If you watch this tutorial you will better understand what is happening and where the light is coming from https://visualeducation.com/class/photographing-clear-liquid-bottles-gin-vodka/
Hello Karl, greetings from California! What is the best way to photograph metallic screen printing on this bottle. The gold needs more dynamic range, I could only achieve this with a multiple shot and post comp. https://shop.sextantwines.com/product/Genoa-XIX?_ga=2.195047150.372624385.1589471568-120453018.1589471568
Hi, you can try the same technique I used on this shoot https://visualeducation.com/class/clinique-style-advertising-shoot-lighting-splash-shots/ to get either black or silver versions of the labels.
Hi Karl, what about a class on sparklling wine??
We’ll look at that for you.
great
Thanks a ton Karl for making one more in-depth live show/tutorial.
Probably the best way to make the most of available time, during the lock down.
Cheers!
hi karl
you mentioned having a large soft box is the best to have….I only have two medium sized soft boxes at the moment could I place them side by side to get the effect of a larger single softbox
thanks
Hi Lee, yes that’s perfectly OK but there may be a visible ‘stripe’ of darkness reflecting from between them if you are not using diffusion material in front.
Hey Karl, just out of curiosity I wanted to know that in this live show you mentioned that Polarizing filter does not work well with removing the reflections of a shiny metal surface but in one of your modules which is dedicated on Polarizing filters you’ve shown us how to remove reflections of a shiny metal surface. I’m a bit confused please help. Thank you.
Hi, Polarisers don’t work well on bare metal due to that light reflected from bare metal is not polarised. Can you tell me which module you think I mention this? Are you sure it wasn’t coated metal?
Hey Karl, unfortunately, I misunderstood the information given in your module, a big apology for my mistake & thank you for making me understand properly & clearing my doubts. The best platform to learn.
No problem thank you for clarifying and glad you are enjoying our platform!