


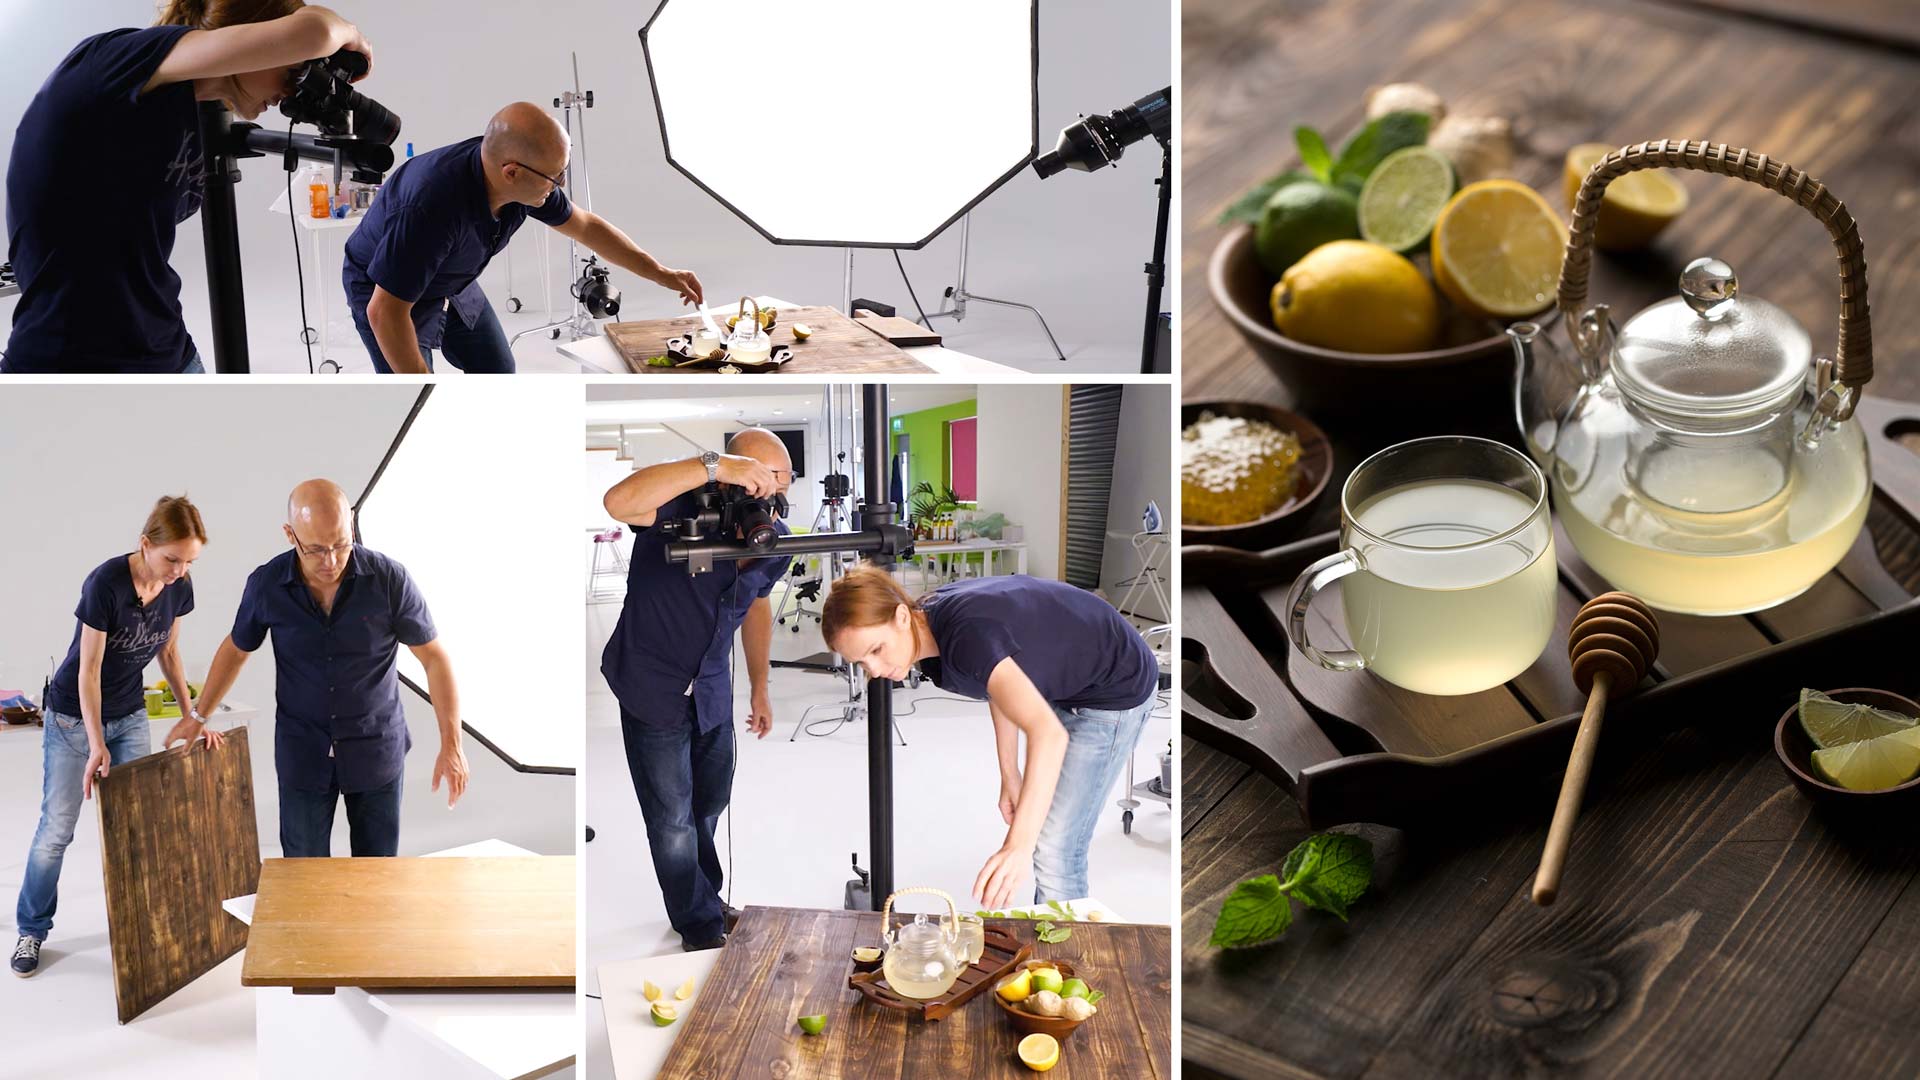

Ginger and Lime Tea Shoot
In this food photography class, Karl and food photographer Anna Pustynnikova demonstrate how to creatively use one studio light to create a beautiful image of ginger and lime tea.
This class provides a simple one-light setup that you can quickly and easily try yourself, while also demonstrating how to incorporate alternative lighting solutions (such as reflectors and specialist lights) that can be used to enhance the shot.
In this class:
- How to photograph food
- How to light and style food for photography
- Best modifiers for food photography
- Finding props and backgrounds for food photography
- How to use reflectors as an alternative light source
- Explain and demonstrate how to photograph glass objects
To begin, Anna and I first had to determine the composition of our shot. This included selecting and background and choosing what items we would include as props. After your product, the background is the second most important element of your shot. We experimented with different backgrounds, testing color, texture and depth of each option.
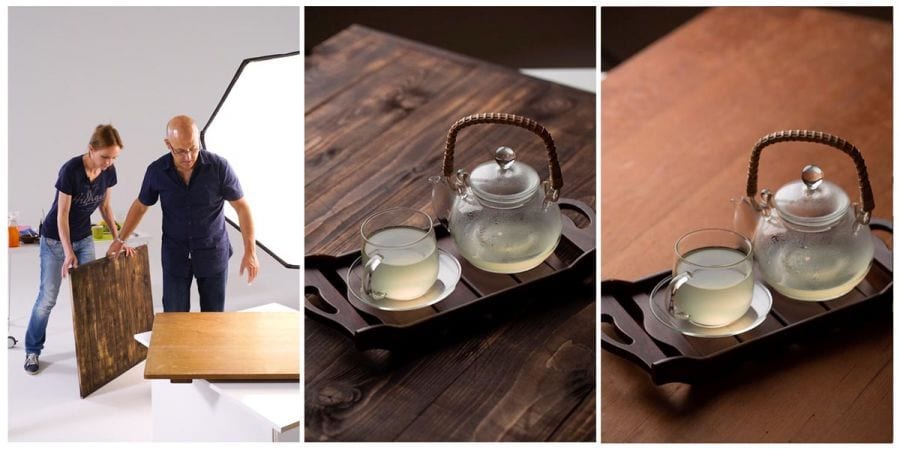
Testing different backgrounds for our ginger and lime tea shoot.
Once we’d made our final decision we started working on the styling of the shot. Again, we experimented with the placement of the props, such as the bowls, teacup and saucer, as well as the ingredients.
Here you can view our tests and choices for the bowls we used as props:
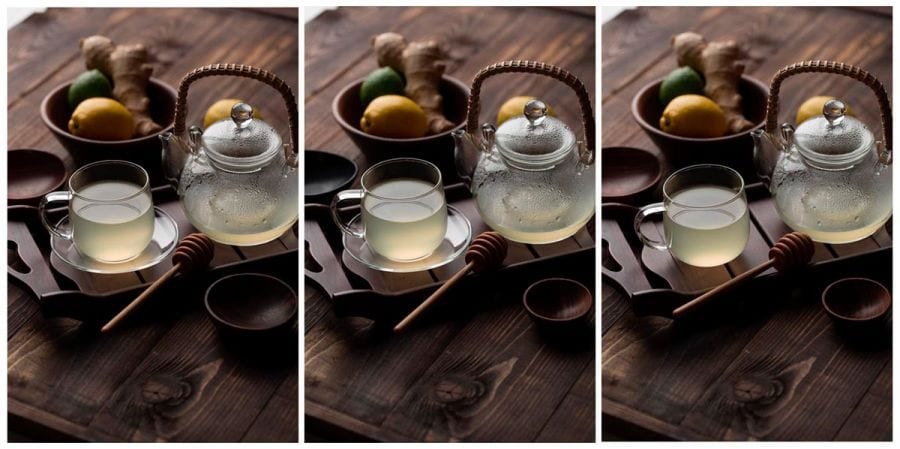
Experimenting with different sizes, colors and textures for props.
And here you can see Anna’s styling in progress:
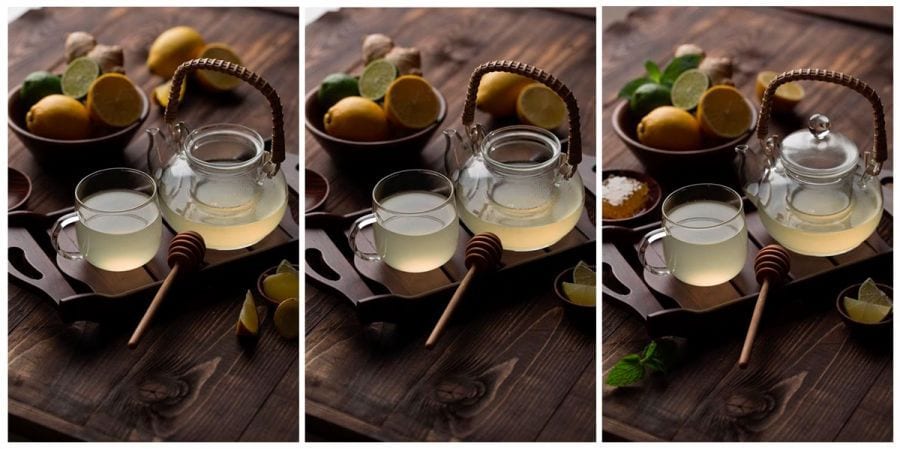
Step by step styling in the early stages of the shoot.
Once Anna was largely satisfied with the styling, it was time to focus on the lighting. Shooting with a single softbox placed behind the setup, the initial results were very pleasing.
To take it one step further, I added additional lights and reflectors to add pockets of light and create interest on certain elements of the shot, such as the mint and lemon slices in the foreground, the spout of the teapot and face of the cut lemon in the background.
In the image below you can see the effect of the additional picolite on the mint leaf.
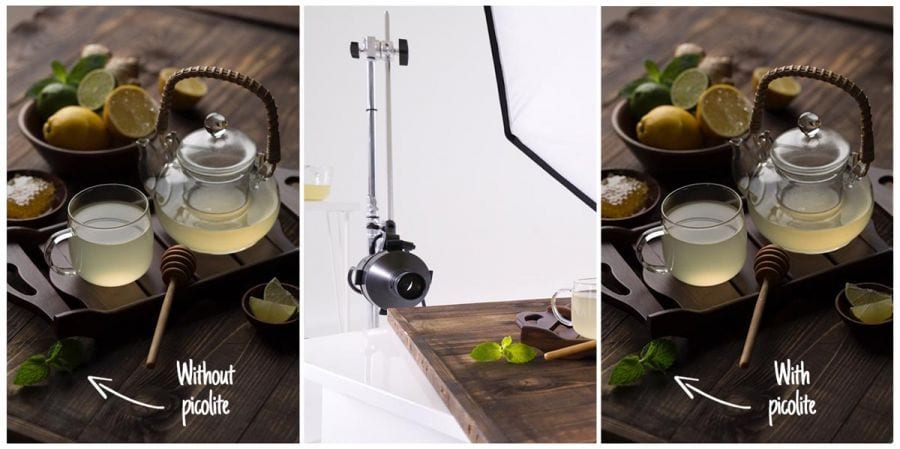
The effect of adding a picolite to highlight the mint leaves.
We also used a reflector to separate the teapot from the bowl behind it.
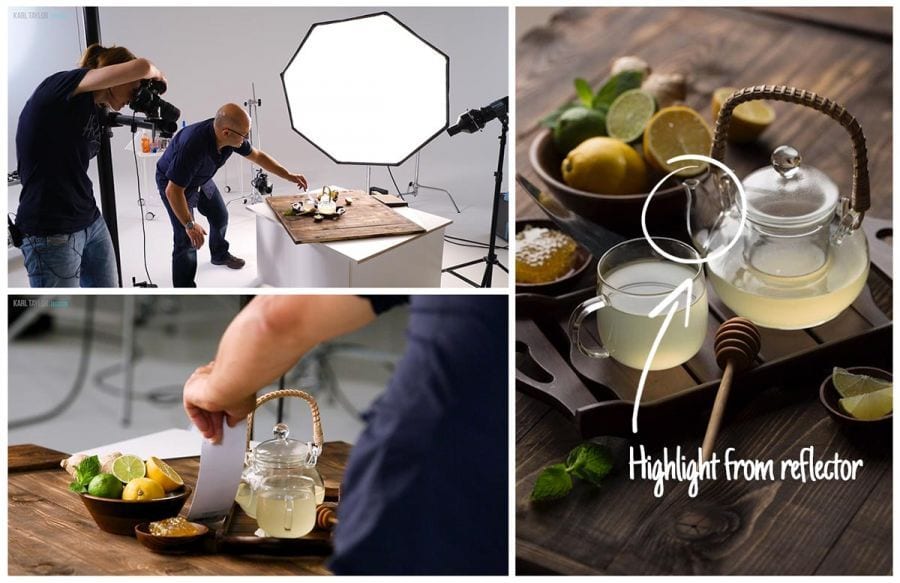
Using reflectors to highlight the spout of the teapot.
The final shot was achieved using three lights (two of which were picolites), but it’s important to remember that a great result was achieved using only the softbox. If you don’t have specialist lights such as picolites, reflectors are a powerful tool that you can use too.
The final image:
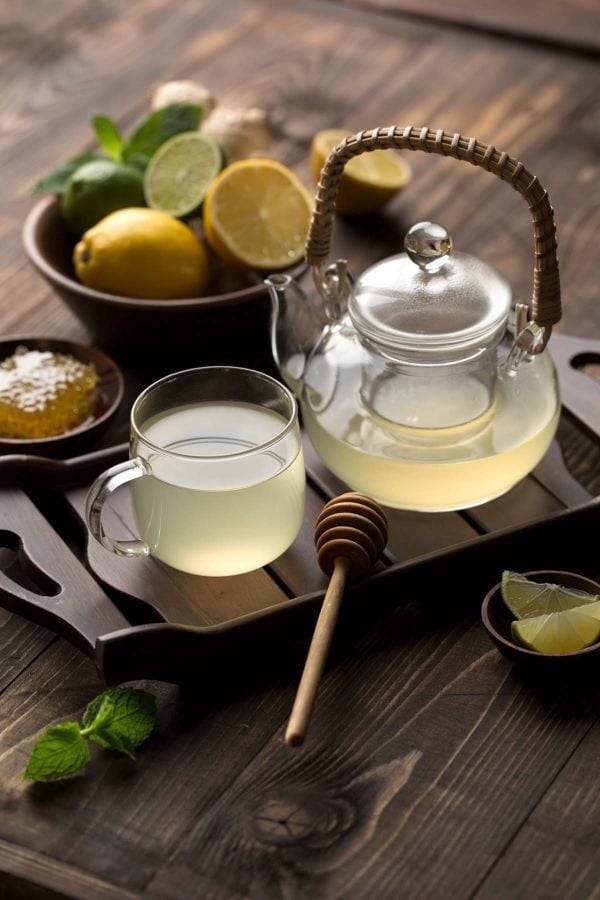
The final image of our ginger and lime tea shoot.
If you’d like to learn more about food photography, browse our selection of food photography courses in our Product section. I’ve also put together a selection of our most popular modules below.
- Key skills for food photography and styling
- Berries on a wooden board
- Live cheese shoot with Anna Pustynnikova
If you have any questions, please post in the comment section below.
Comments
Your octa 150 modeling light is so bright, did you do a test with shutter speed prior to this shoot to make sure ambient light from that modeling light wasn’t polluting?
Hi, yes my modelling lights are 650w when on full power but I usually have them on low power for shooting. Because we are filming video we sometimes have them on high power but sometimes it is simply that the cameraman has increased his exposure that makes them look brighter than they are. It’s always best to take a shot without the flash trigger to see if the modelling lights are having any affect on the image.
Thank you so much for everything Karl, I cannot really express how thankful I am for your help !!!
You’re very welcome.
Hi Karl
Fantastic lesson. I can not afford a pico light but love the different effects they can create and I see you use them a lot. Would it be possible to generate the same effect using a GODOX S30 5600K FOCUSING LED LIGHT WITH SA-08 BARN DOOR along with the Godox SA-P Projection Attachment with SA-01 85MM Lens for S30 LED Light.
Love the banter between you and Anna
Hi, thank you. I’m often using the Picolite with the projection attachement so if Godox do something similar then that should work just fine. I believe Westcott also make a third party projection attachment.
Sorry if I missed this while watching the video, but what’s the benefit of using the octobox in this situation instead of a big rectangular softbox? Was this for more directed light? I really appreciated the simple use of card reflectors to give rim lighting to the edge of the spout. Comparing the two photos, it’s amazing how much richer the image is with that one simple addition.
Hi James, the results would be hardly any different with a 130×130 square softbox and only slightly softer with the large 120×180 softbox. The difference is the look of the shadows (very minimal) or the highlight reflections on glossy objects (more noticeable especially on ‘berries’ shoot). Different softboxes don’t direct light anymore effectively than another softbox as they are diffusion apparatus with double diffusion resulting in an homogenous front surface as such the only difference will be the hardness or softness of the light due to their size. Parabolic reflectors direct the light by collimating it. Yes it’s the little tricks that make the big difference!
This is absolutely brillaint tutorial…..loved the detailed explaination…..you both are adorable
Hi Karl
I found these wonderful classes in quarantine season.
Since I signed up a couple of days ago I keep watching class after class.
I want to congratulate you and Anna for doing a wonderful job together.
Thank you for sharing such valuable knowledge.
Greetings from Argentina.
Thank you. Don’t forget our live show line up and live show replays which you can find in the live show section. Cheers Karl.
Hi Karl,
Thank you for this great video,I’have a question regarding the Picolite light , there is any other option to light up the menthe, if we don’t have the picolite?
Thank you
Lili
Hi Lili, Yes you can use the technique we used on the duck food photography or there are independent brand projection/gobo light modifiers that you can buy.
Karl, I used to get so frustrated during shoots. The shots weren’t coming out perfect from the beginning and I didn’t know what I was doing wrong. Now I see that food photography and tabletop photography in general starts with an idea but it’s more of an exploratory process. Knowing that even at the professional level the process is deliberately exploratory makes me feel so much better.
I’ve learned so much.
Thank you.
Thank you Henry.
Wow wonderful video, thankyou. Seeing this video i open my mind in looking detail that i didn’t notice before.
Thank you Andrea.