
Indoor Portrait Photography
Step inside for some top tips on capturing indoor portraits using natural light.
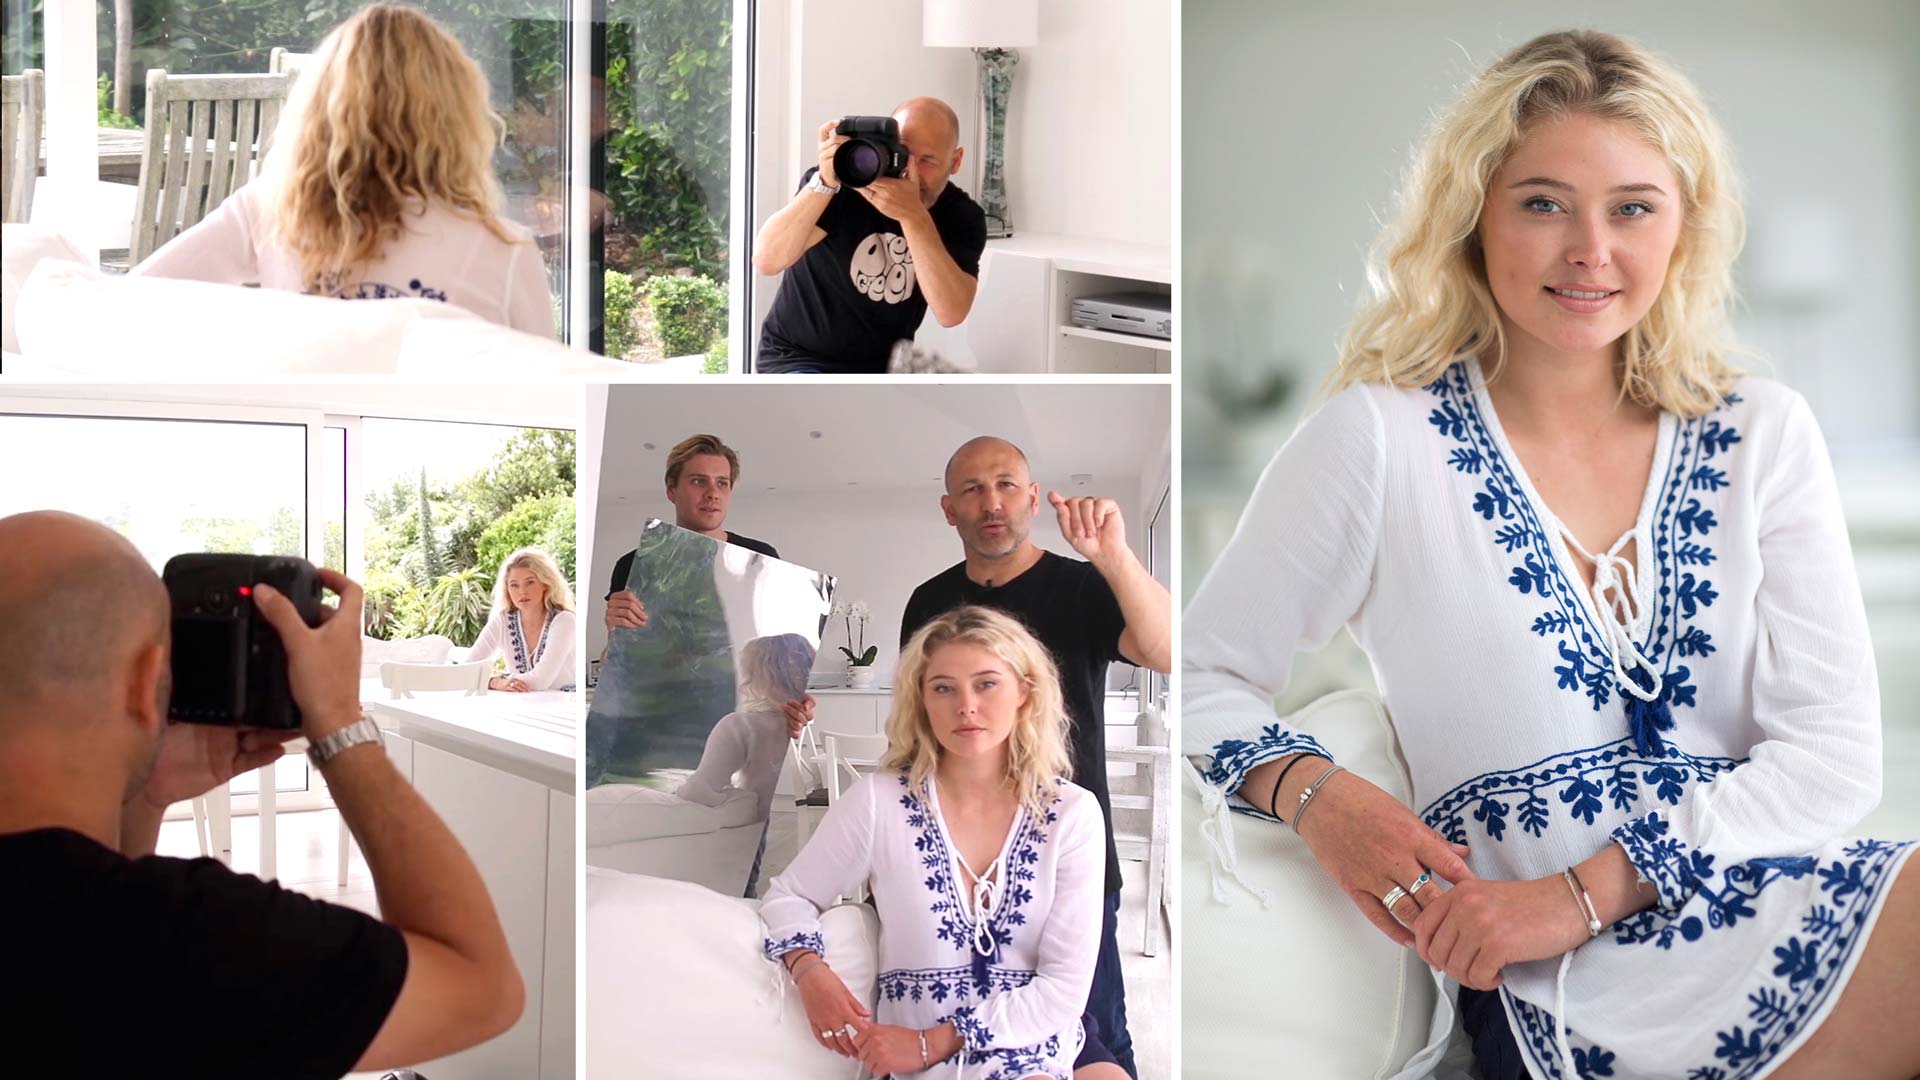
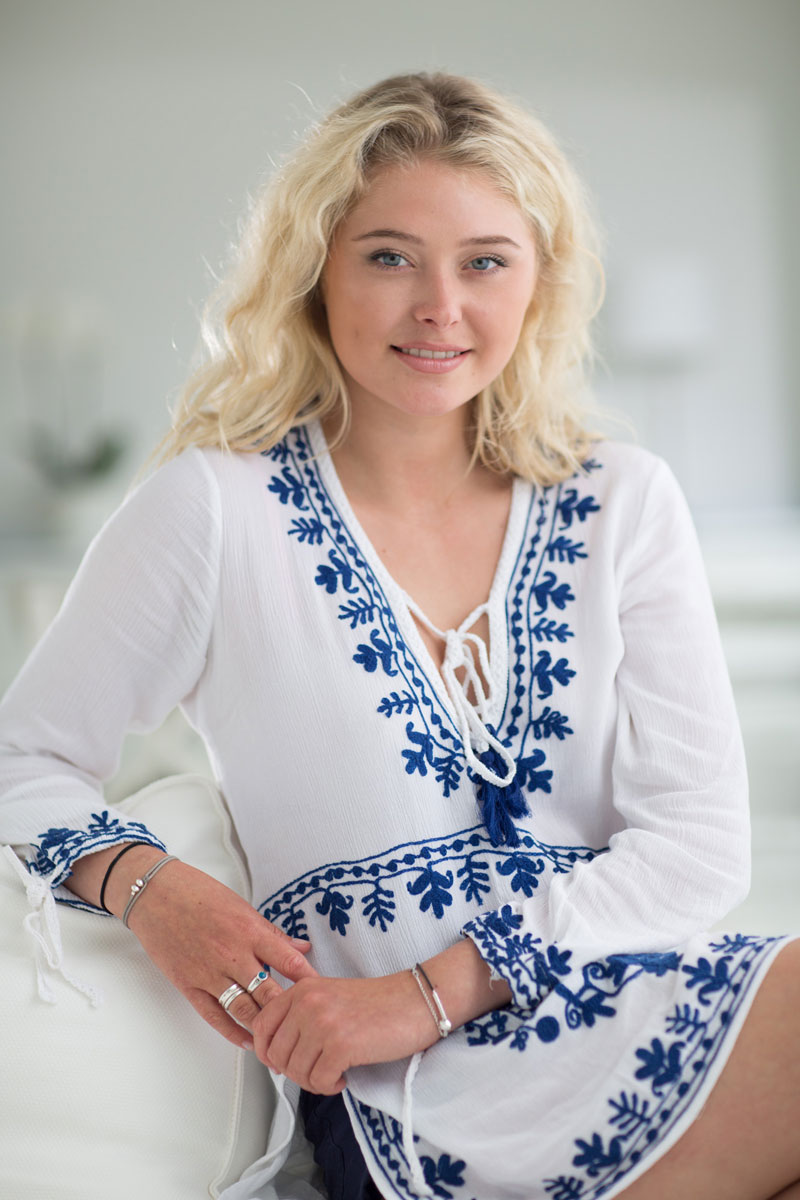
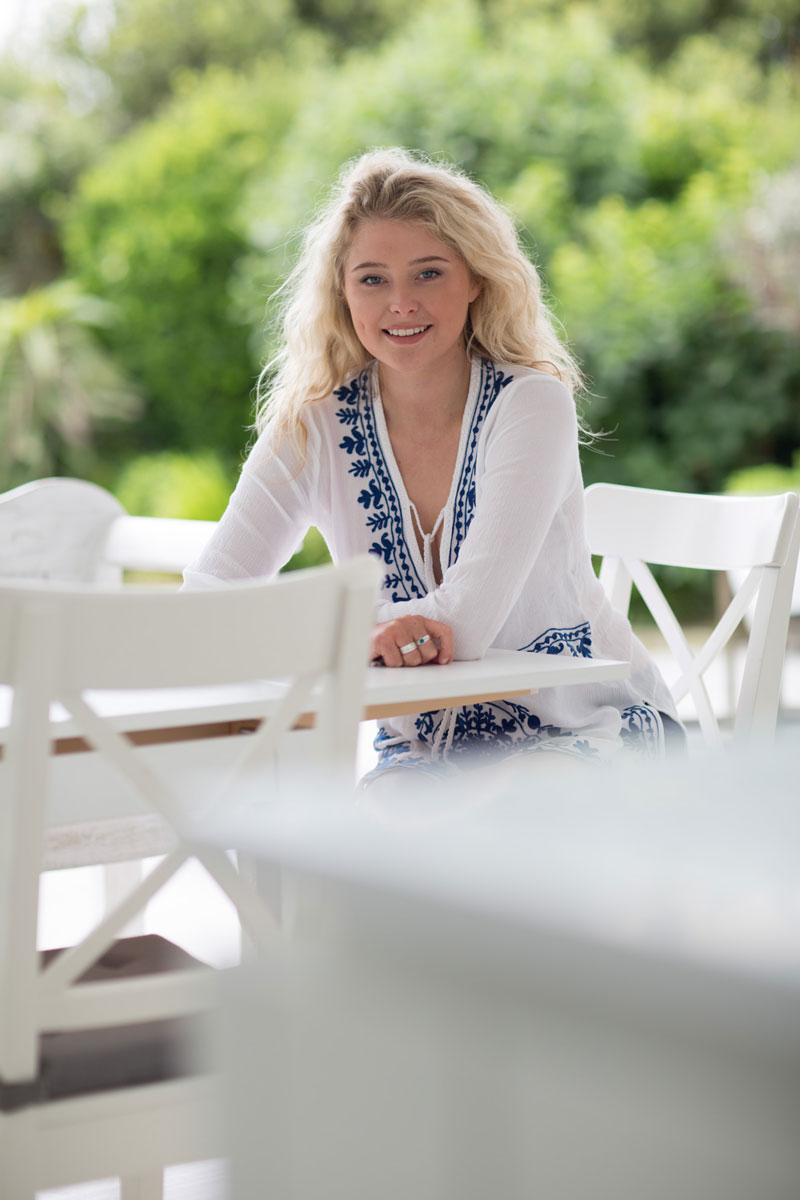
Photographing with natural light doesn’t mean you’re limited to working outside. In this portrait photography class, Karl demonstrates a different type of natural light photography – natural light photography indoors.
One of the key things to consider when working inside is your location. Big windows are your friend but too much light can actually be a bad thing. It’s important to study the location and understand the potential benefits or problems that the room you’re working in provides.
This natural light photography example shows an at-home indoor shoot. Karl explains a number of important factors to consider, as well as how to make the most of and control available light.
In this class:
- Portrait photography using natural light
- Natural light photography indoors
- How to create soft light for portraits
- Using reflectors and negative fill to control shadows
- Useful accessories and equipment for indoor photography
- How to soften harsh sunlight
Questions? Please post them in the comments section below.
Comments
hello Karl , you said that you sell the diffusion material [ 24:54] . I’m interested
Hi Danny, I’m afraid we don’t any more but if you contact Sara in customer support she will be able to point you in the right direction.
Hi karl
Excellent class!!!
What would be the ideal focal length for shooting indoors in moderate spaces, especially during weddings bride shoot. Would that be a 35mm or 50mm?
Hi, the lens used here was an 85mm which my preferred choice for this type of photography. I think that is covered earlier or later in this course though as well as in our introduction course in our essentials section. All the best Karl.
So, at 3:59, Karl has just proved that he is a Jedi.
May the Force be with you Karl!
Ha Ha and also with you.
the dog is so busy, haha
Great tutorial, Karl. Have you got tips on how to pose people that are not models? I get asked to shoot portraits for people in a similar scenario as to this but struggle with directing their positions. Do you have any go to positions as well as a video demonstrating this? Thanks!
Hi, there is a video covering some of this in the portrait section but it is not something we focus in huge detail as every subject is different.
Hi Karl,
First off, thanks for all the hard work you do making these tutorials. I really appreciate your willingness to share information and ability to explain in an easy to understand manner they why behind what you’re doing.
Specific to this course, I’m curious as to why you made the decision to shoot exclusively in portrait orientation. Was it an artistic choice, best way to limit distractions, or something else (such as family/model wanted an 8 x 10, etc.)? If it was an artistic decision, would you normally also do some landscape orientation to give the client a choice?
Hi Eric, thank you for your feedback it’s much appreciated. For this particular module of this course it was for artistic reasons and due largely to other distractions around the room or location. Throughout the other modules in this Natural Light Portraiture course there are likely some horizontal compositional choices although I would say in cases where it is a vertical positioned/standing model then it is likely that I’m going to opt for vertical format orientation to maximise the scale of the model in the composition. You will notice in many of my Fashion courses that the objectives may be somewhat different, I don’t need the model to fill the frame for example as I’m trying to invoke emotion from the surroundings or set and in those cases you may see me opt for a landscape orientation more often. All the best Karl.
I noticed when you added your own reflective surface vs the countertop you changed the shutter speed to 640 vs 1000 in the other shots. you did not explain why or if that was necessary.
Hi, from memory i’m not sure but given that it was a natural light scene the only reason to change shutter speed would be because of a change in the exposure of the light, for example sun goes behind more cloud or less cloud, which may have been happening regularly during filming.
“… don’t take an image; make an image” that is a very realistic message.
Thank you. I appreciate the fact that you showed a comparison (at 15:41 – 15:47) for the results of a Fill, No Fill, and Negative Fill image. I really hits home from a practical stand point.
Thanks Nick
where did you get that long extension arm with your Manfrotto Standard Lighting Stand? Was this a modification?
Hi Paulo, I think you talking about the lastolite reflector holder arm. If you could note down at what time in the video and I will confirm.
Hi Karl
I am doing a series of photographic studies of people in their workplaces. One of these people is a therapist and having seen the room she works in, it is quite dark. There is a window though, so some natural light. I have an SLR and a couple of reflectors but no studio lights., though there is a standard lamp on location. Any tips on stopping the picture look too dark? Thanks and thanks for all the great videos.
Tim
Hi Tim, if you’ve got no lights then you need to get her near to the window and use a reflector on the shadow side if possible. Probably need a higher ISO, shoot RAW and then you can pull up other detail later. Don’t be afraid to rearrange a few things in the background to suit too.
I am part of the working poor and not sure how to take family photos in my house when everything isn’t ideal.
Hi, this wasn’t my house. For portrait photography like this you often go to their house or outdoors.
I deliberately build in technical faults into my photos to confuse the experts. 🙂
21:20 I think the chair blocking the model’s forearm is distracting. What do you guys think?
Hi Leo, I wouldn’t agree at all. The kitchen work-surface and the chair work together to form occlusion which increase the sense of three dimensionality in two dimensional photography. The image is not about the models arm it’s about her face and upper body, although of course it is always possible to improve every images, one must take an image in its overall context and emotional impact, some of the best images in the world are full of ‘technical’ faults but work perfectly on an emotional level.
i noticed your photographing 1/1000 sec, is the sync speed of your dslr camera 1/250? how to prevent a black band from going across photo,
Hi Vincent, the sync speed with flash is 1/250th but there are no flash or studio lighting being used in this course. This is part of the course on natural light portraiture. For studio lighting portraiture see the course ‘Light Source’.
Natural light, i.e without flash therefore sync speed is not an issue.
This is wonderful video. I am happy because you mentioned the list of equipment used in the video.