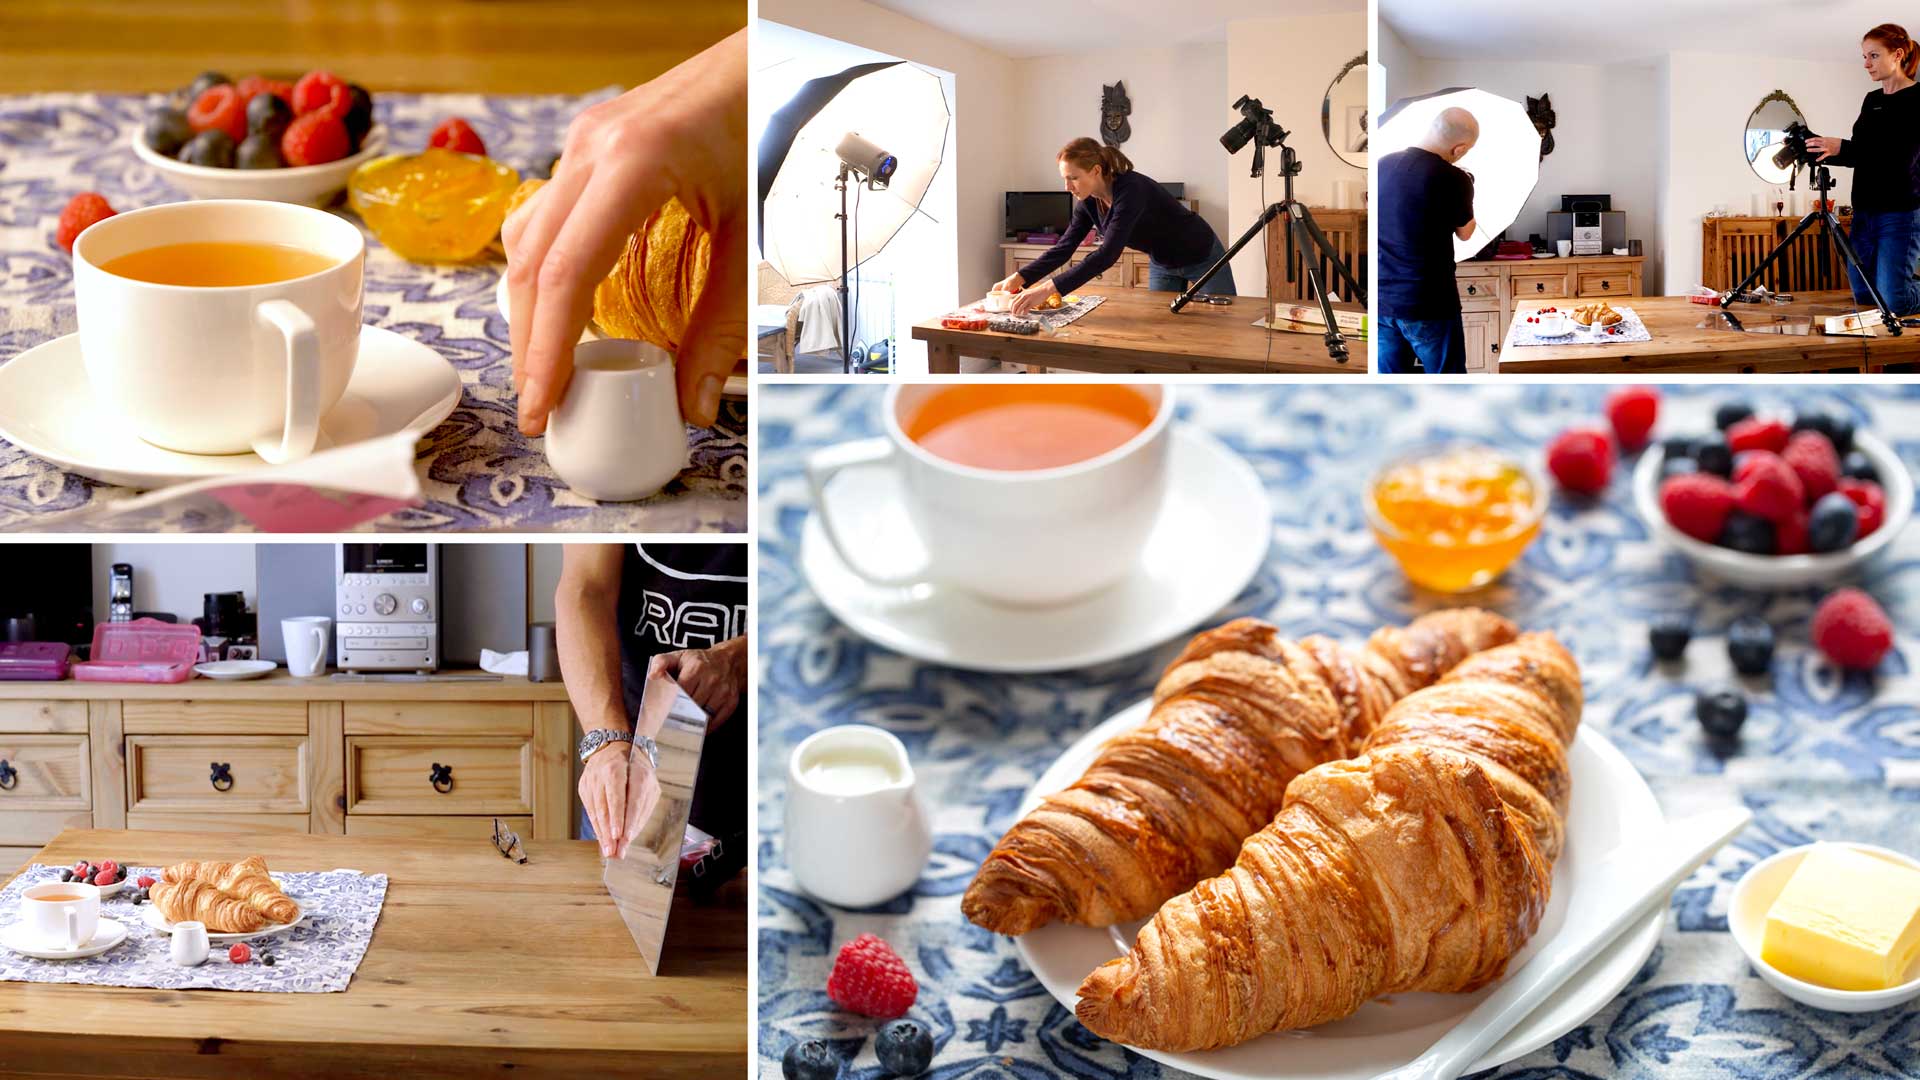

Simple Food Photography Setup: Croissants
Two croissants. Two lights. One delicious image.
In this food photography class, Karl and Anna cover the easy studio lighting setup behind this bright, fresh image.
Using only two studio lights, they demonstrate how to photograph food at home using a simple lighting setup with affordable modifiers. Karl also explains the advantages of using studio light over natural light and shows how to control the light to maximise shape, form and three dimensionality of an image.
In this class:
- Show how to photograph food at home
- How to photograph food using studio light
- Two light food photography setup
- Affordable modifiers for food photography
- How to control studio light to enhance shape and form
If you have any questions about this class, please post in the comment section below.
Once you’ve mastered natural light photography, one of the next steps is to try photographing with studio lights. This class, where Karl and Anna photograph an image of croissants, demonstrates a simple lighting setup ideal for those who are new to studio lighting or only have minimal studio equipment.
For this shot Karl uses studio lights with affordable accessories to re-create the feel of early morning light, showing how to achieve this using one or two lights.
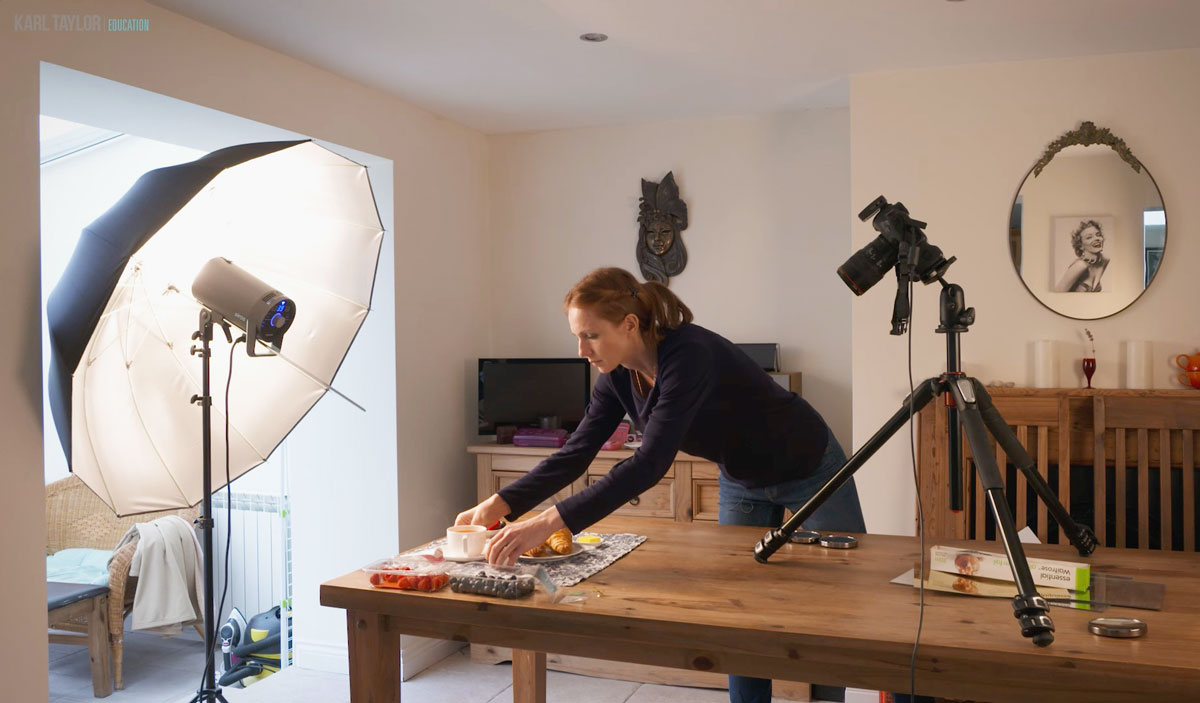
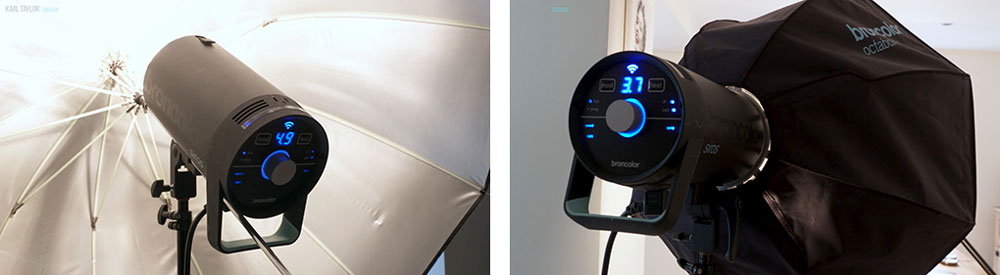
The lighting setup for this shoot required two lights with basic modifiers.
The advantages of using studio light instead of natural light is that it allows you to work at any time of day. As Anna explains, this is a huge advantage for her as she does a lot of her work in the evenings. Studio lights also allow for extra creative opportunities compared to when using only natural light.
Two important points to consider when working with studio lights is the balance and position of your lights.
Karl starts by discussing the balance of the lights and how, by simply adjusting the power of the fill light, you can either increase or decrease three dimensionality in an image.
Important considerations when it comes to lighting is the balance of your lights and how this impacts the shape and three dimensionality of the subject.
The second point to consider is the position of the light. The direction and height of your lights can have a big impact on the overall image. The direction of the light can help add shape, form and texture while the position (distance and height) of the lights will influence the contrast and shadows. You can see from the video that lights in a lower position will produce more shadows and give the feeling of early morning or late evening, while lights in a higher position will have shorter shadows.
These two points are important to consider whenever you’re using studio lighting. Regardless of whether you’re photographing a portrait with one light or a product with five lights — understanding how to control your lights will allow you to create the best possible image.
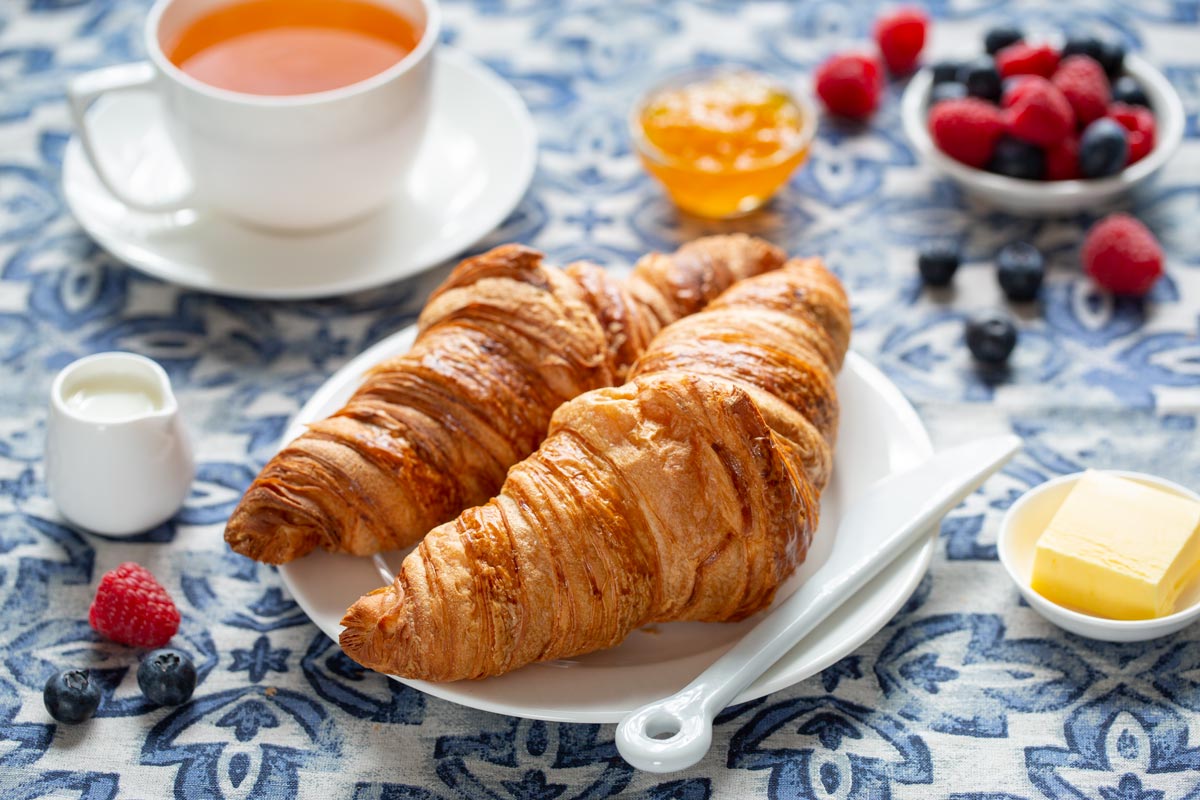
The final croissant image.
Comments
I really enjoyed this video; because it shows you can photograph in small spaces with minimal equipment.
Hi Donna, thank you. Yes lots of things are possible it’s working with what you’ve got and overcoming those challenges. We did a live show once where I used one light but made it look like 3. We’ve done great portrait shoots with just one light (we have a whole section on that) and even natural light only photography. Something is always possible but we also have to cover shoots that suit those who have 3, 4 or more lights too.
Karl.. love the look of these lights. Have to run some tests on some food or organic (non glossy) materials. I happen to have a beauty dish.. similar to the focus umbrella? Or likely too harsh? Just a thought. I need more practice mixing the sparkle of hard light (back lighting) with soft fills (side or front).. but this is a great base level starting point.
I also had this crazy thought, similar idea.. maybe food, maybe not, but with the addition of gels mixing some extra colour from sides or rear sides.. like your stack of rocks shot you did live. Or maybe push it further toward a still life… less editorial food.
Hi Gary, I’ve often mixed gold colour reflectors on food shots but I’d be careful with coloured gels.
what camera and lens are you using in this video?
Hi a Canon 100mm 2.8 lens and a Canon 5d mk2. You will see us use lots of different cameras and lenses in different courses as they are not really that important, they are all capable of delivering good results. It’s you internal knowledge of lighting that makes the biggest difference to any photograph.
It was very helpful
I have to photograph about 35 pizzas for a ordering website for a client. Which lighting setup and modifiers would you recommend for such a shoot?
Hi Marik, try to think of the physics of what you are photographing and trying to light. A pizza is mostly flat, I’m guessing you need to shoot from almost directly above. A pizza is also mostly matt surfaces apart from the odd glossy olive etc. So that determines already several points of how to approach it. Based on that I would say my lighting would be mostly a large ‘global’ light from above so I would light my ceiling above me and that will give a uniform soft light but it will be a bit boring and flat on it’s own so I would then add a hard spot light from a medium to low angle (maybe a honeycomb grid light) to reveal texture, highlights and make shadows, then I would balance the two lights to get the best results which would probably mean reducing the top ceiling light relative to the hard spot light.
Can we use some 2×3 or 1×4 softbox with grid to cotrol the light more easy for main light ? I know we will not be able to sort of focus it like with deep umrela… I have extra large deep umbrelas but they might be to big for that kind of job …
Hi Rok, Grids are great for reducing the spread of light from a softbox going out to areas of your room that you might not want it to, so in that sense they are ‘focusing’ the light a little more. The disadvantage of grids on softboxes is that they also reduce the effectiveness of a softbox being soft and the light will become a little harder and more contrasty. However this isn’t always a problem especially if you are trying to simulate light from a focusable umbrella, but keep in mind that a focusable light such as a Para is controlling light in a different way as it has a more central area strength and more directional beams of light so the look will never be the same. Please check out the lighting comparison tool on your home page for a comparison on many different modifiers you may find this interesting and useful.
Hi Karl,
Are both lights you’re using flash? It seems like they’re constantly on before they flash, is that just how that brand of light work?
I’m just getting into studio flash food photography from doing daylight only. I have an Elinchrom 500 and have been able to get some really nice shots lighting from behind. From this lesson I can see I need another smaller light from the front, but I’m wondering whether you recommend constant or flash?
Thanks,
Russell
Hi Russell, this is often confusing to people new to studio light. All of my lights are flash, they also have a constant light called the modelling lamp which just so you can see what you are doing but it has no effect on the photo. Watch this section, this is very important – Chapter 2 will explain everything clearly but you should also watch 1. as well. Cheers Karl.
Thanks, Karl. There doesn’t seem to be a link in your comment, I’m assuming there was supposed to be, for what you’re referencing me to watch?
Hi Russell, ah yes sorry – https://visualeducation.com/class/types-of-studio-lighting/
And the Chapter before it.
I really love this set up because is a typical shoot that bakery like to offer breakfast,..I would like to try the same set up to put in my portfolio,..Is is Ok. ?
on the other hands I would like to see a tutorial of how to shoot a long table with food,..and the different angles to show off all the menu,..top view..(Im not sure of equipment required , ladder i guest.., lens.) and what could be the best or better angles on that cases..
Thanks in advance for this amazing tutorial .
regards
Maria
Hi Maria, of course you are welcome to use the same lighting setups. See our Raw vegetable shoot for ideas on your longer table shot. Or see our Live Show replay on flat lay photography.
Thanks I did it … I changed certain things, I use a focal length of 70 mm to have bigger scene..but the Idea and lighting position was more or less the same…I also use a soft box as I don’t have octobox or umbrella but Im happy with the result.
thanks karl and Anna
Thanks Maria.
Hi,
It working on a food shot using cupcakes answers using continuous lightning, but thanks I will try your setup I like the feel and look of the lights there …… Thanks
Hi ,
Would you please tell me the right ISO , aperture and shutter speed?
Thanks
Great video and tips Karl, really thank you, though I have a question about the choice of the ‘soft box’.
How do we choose our light modifiers?
Did you choose an umbrella as a key light only because of the option of focusing the light by shifting the umbrella back and forth?
What would be the difference if you had a soft box like the fill light you have on the back as a key light?
Thanks in advance.
Vasilis.
How light looks is the holy grail of photographers and it is also why my platform is highly respected. Understanding light is the most fundamental aspect to successful studio photography. I’d encourage you to watch the following links please and then come back to me if you have further questions.
https://visualeducation.com/class/introduction-and-understanding-light/
https://visualeducation.com/class/lighting-modifiers-and-their-effects/
https://visualeducation.com/class/the-emotion-of-light-july-12th/
I am a beginner to photography switching from cooking food to food photography.I am very happy that I enrolled into this cause but I just want to know what focus mode your using
Hi, thanks for joining us. I usually focus manually.
May I ask, why did you ‘dump the power’ and pop it before you took the actual photograph? (At around 5minutes:43 seconds) I’ve seen that in other tutorials and videos but never understood why?
Thanks
Hi Philip, On many studio lights the capacitor will hold the higher charge in storage, so when you lower the power it can’t actually go lower because the higher charge hasn’t been used. On my broncolor lights however it will automatically dump the charge but it’s quicker to do it manually and old habits from other brands of lights that don’t do it.
Interesting results with Focus 110 – I have always used a softbox in that application. May have to try this – subtle but noticeable difference!
👍
Which aperture you use?
Hi Niki, this was f4.5 but don’t get too hung up on that you need to decide the depth of field based on what you ‘see’ each object and shooting distance will be different.
yessss, been waiting for this to come out!