
Rim Lighting Photography for Stunning Portraits
Discover a wonderful one-light technique for truly beautiful portraits.
Want to capture eye-catching portraits using just one light? Watch this class to learn how to achieve remarkable results with minimal equipment.
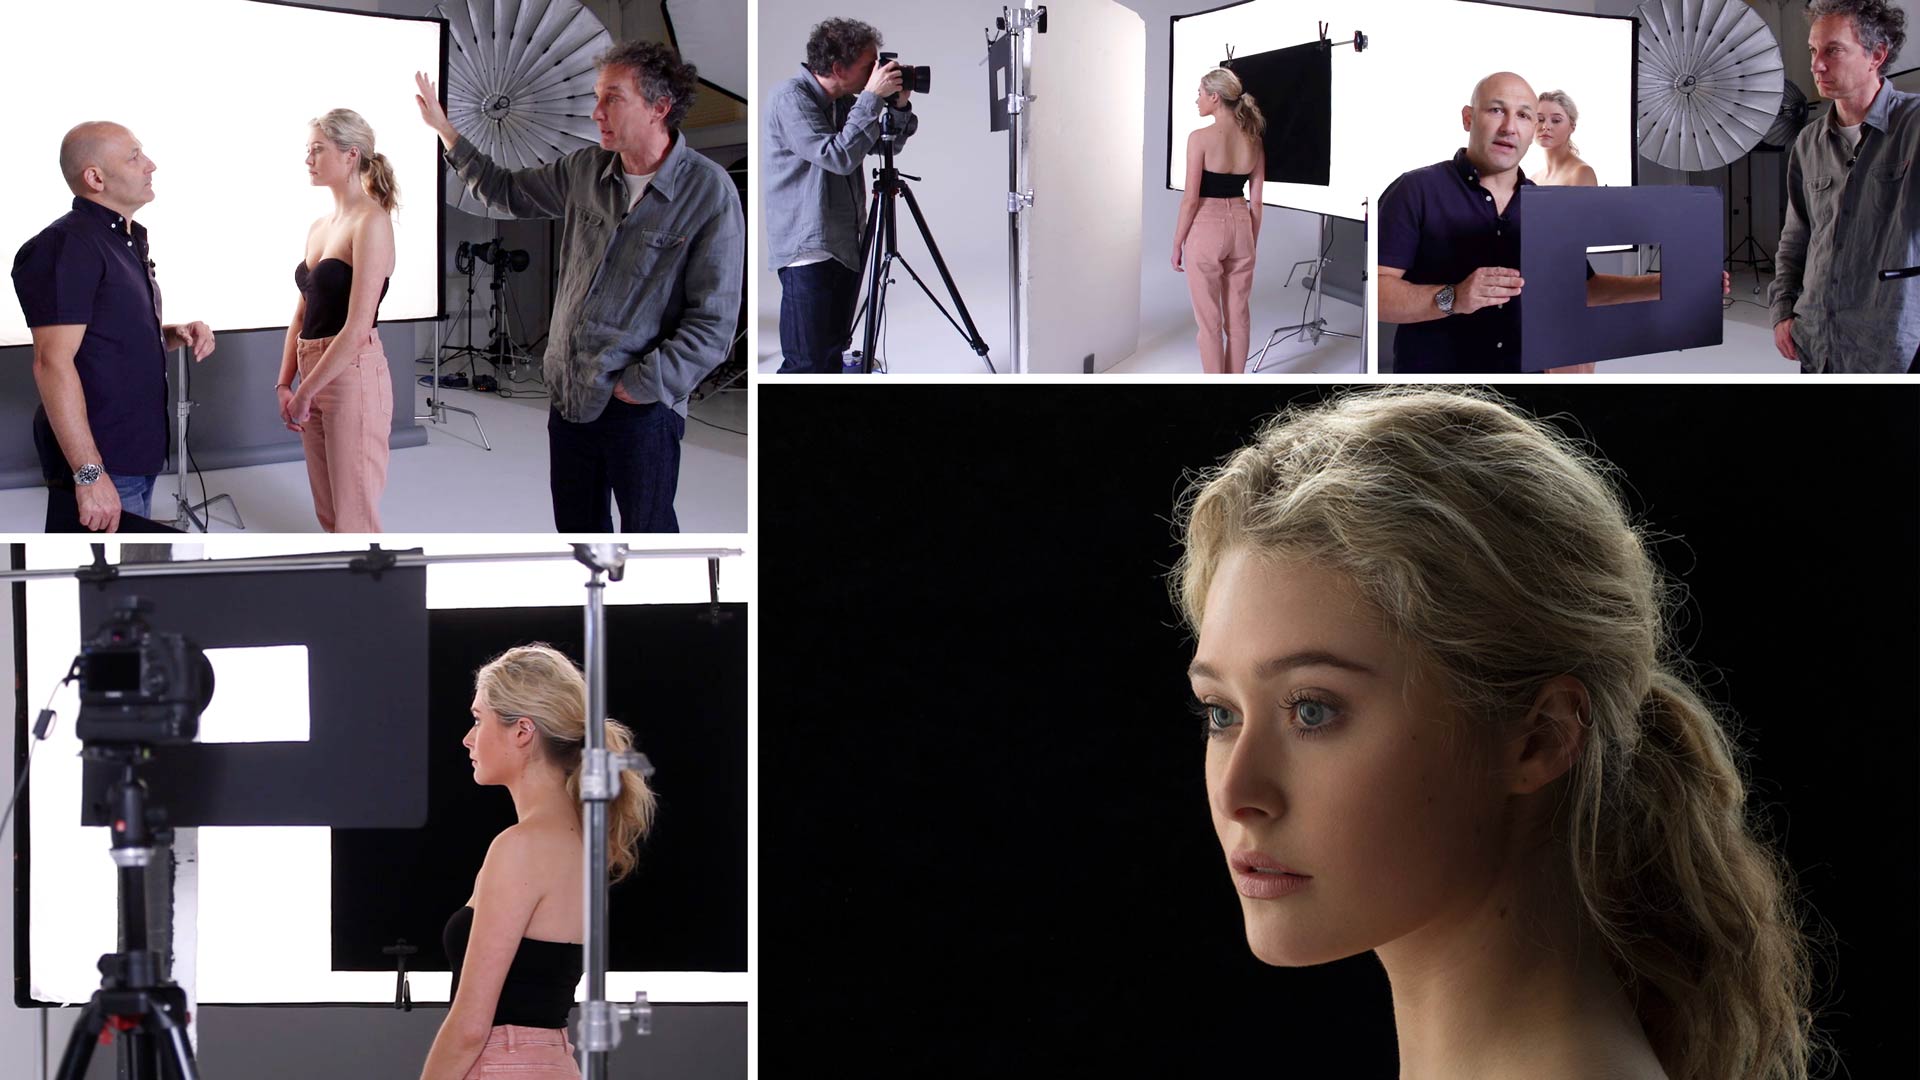
You’ll learn from professional photographers and lighting experts Karl Taylor and Urs Recher as they demonstrate how to create beautiful, soft rim lighting using backlighting – with a twist.
Don’t miss this chance to discover a super-smart, simple-but-effective technique that enables you to produce what looks like a four-light effect with just a single modified light.
In this class:
- Portrait photography using a single light
- How to use backlighting for creative effect
- How to avoid flare
- How to modify rim light
- Using reflectors and flags
- How to control shadows
Questions? Please post them in the comments section below.
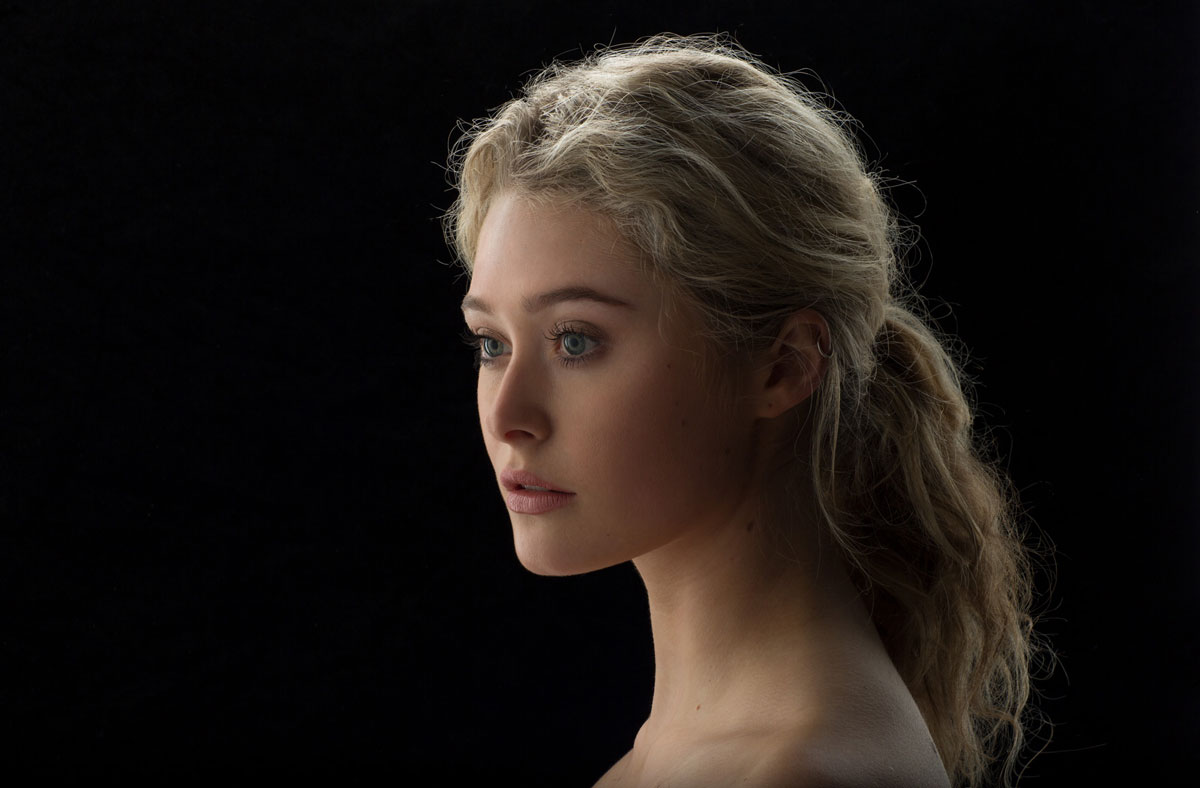
Stunning female portrait using rim lighting as a backlight.
Comments
I love this!
This one lesson justifies buying into the course.
Feeling inspired.
Thank you Tim, spread the word! 🙂
hi is this the same principe ?
https://www.cameratools.nl/_clientfiles/king/Broncolor/xlarge1/1013361500.jpg
Hi Harm, yes but with less control because with that the dimensions of the illumination are always the same.
Love this technique, tried this with still life. must try it out in portraits .
Extremely useful setup, and very creative!Thank you so much!
What was the ISO, shutter speed and aperture set to on these pictures?
Hi Karl
Will a para 133 work in this setup?
I don’t think it would be big enough.
Hi Karl,
How do you differentiate this set up from Strip light ?
Hi Latesh this is basically like three strip lights: one at the top (horizontal) and one either side, giving light all the way around the model.
Love the look of setup, cannot wait to try it. Seems simple ( well in theory anyway) but stunning. Brilliant lesson , hopefully helped me a lot .
Just one word needed – STUNNING
Thank you Peter.
That was one of the best photography classes I’ve ever had. Amazing what you guys are doing.
Thoroughly enjoying the videos, Karl, you and Urs make a good team.
Should the velvet-covered board behind the model also be in the same ratio as the camera sensor?
Hi Jeramy, technically speaking that could be a good idea but probably a but over the top 🙂
Hi Karl, I wish I had joined your site long ago. Could you please tell me the size of the soft box you used and the black card? Are they relevant to this set up or any size would work? Many thanks for your ideas
Hi Abdelfatah, thanks for joining. For this technique then a larger softbox makes it easier as the light can wrap around more easily, this softbox was 120x180cm.
This was excellent Karl, thank you. Did you measure the square you shot through or is the size irrelevant? I may have to make my own.
Hi Tianna, yes you measure the rectangle to match the format shape of the format you are shooting, so for example if shooting on a full frame 35mm camera then we know that the format of that camera is 36mm x 24mm, so if you times that 10 then you’d need a hole 360mm x 240mm, if that was too big then multiply by a lower number and measure it out on black foam board and cut.
Amazing! I am so grateful that you are sharing your knowledge. Thank you! I am learning so much.
Thank you Toma.
Thanks karl. Just signed up. Amazing site. It’s almost midnight here, looks like I’m going to be up all night!
Hi Syed, you will need your sleep to focus properly 🙂
simple and yet very effective lighting set up and it shows how you can turn a single light can do as main and fill in light and of course by using a reflector. this shows how you should understand the positioning of light and inverse square of law. Thanks Mr.Karl for your superb teaching and simple explanation.
Thank you Sastri.