
Rim Lighting Photography for Stunning Portraits
Discover a wonderful one-light technique for truly beautiful portraits.
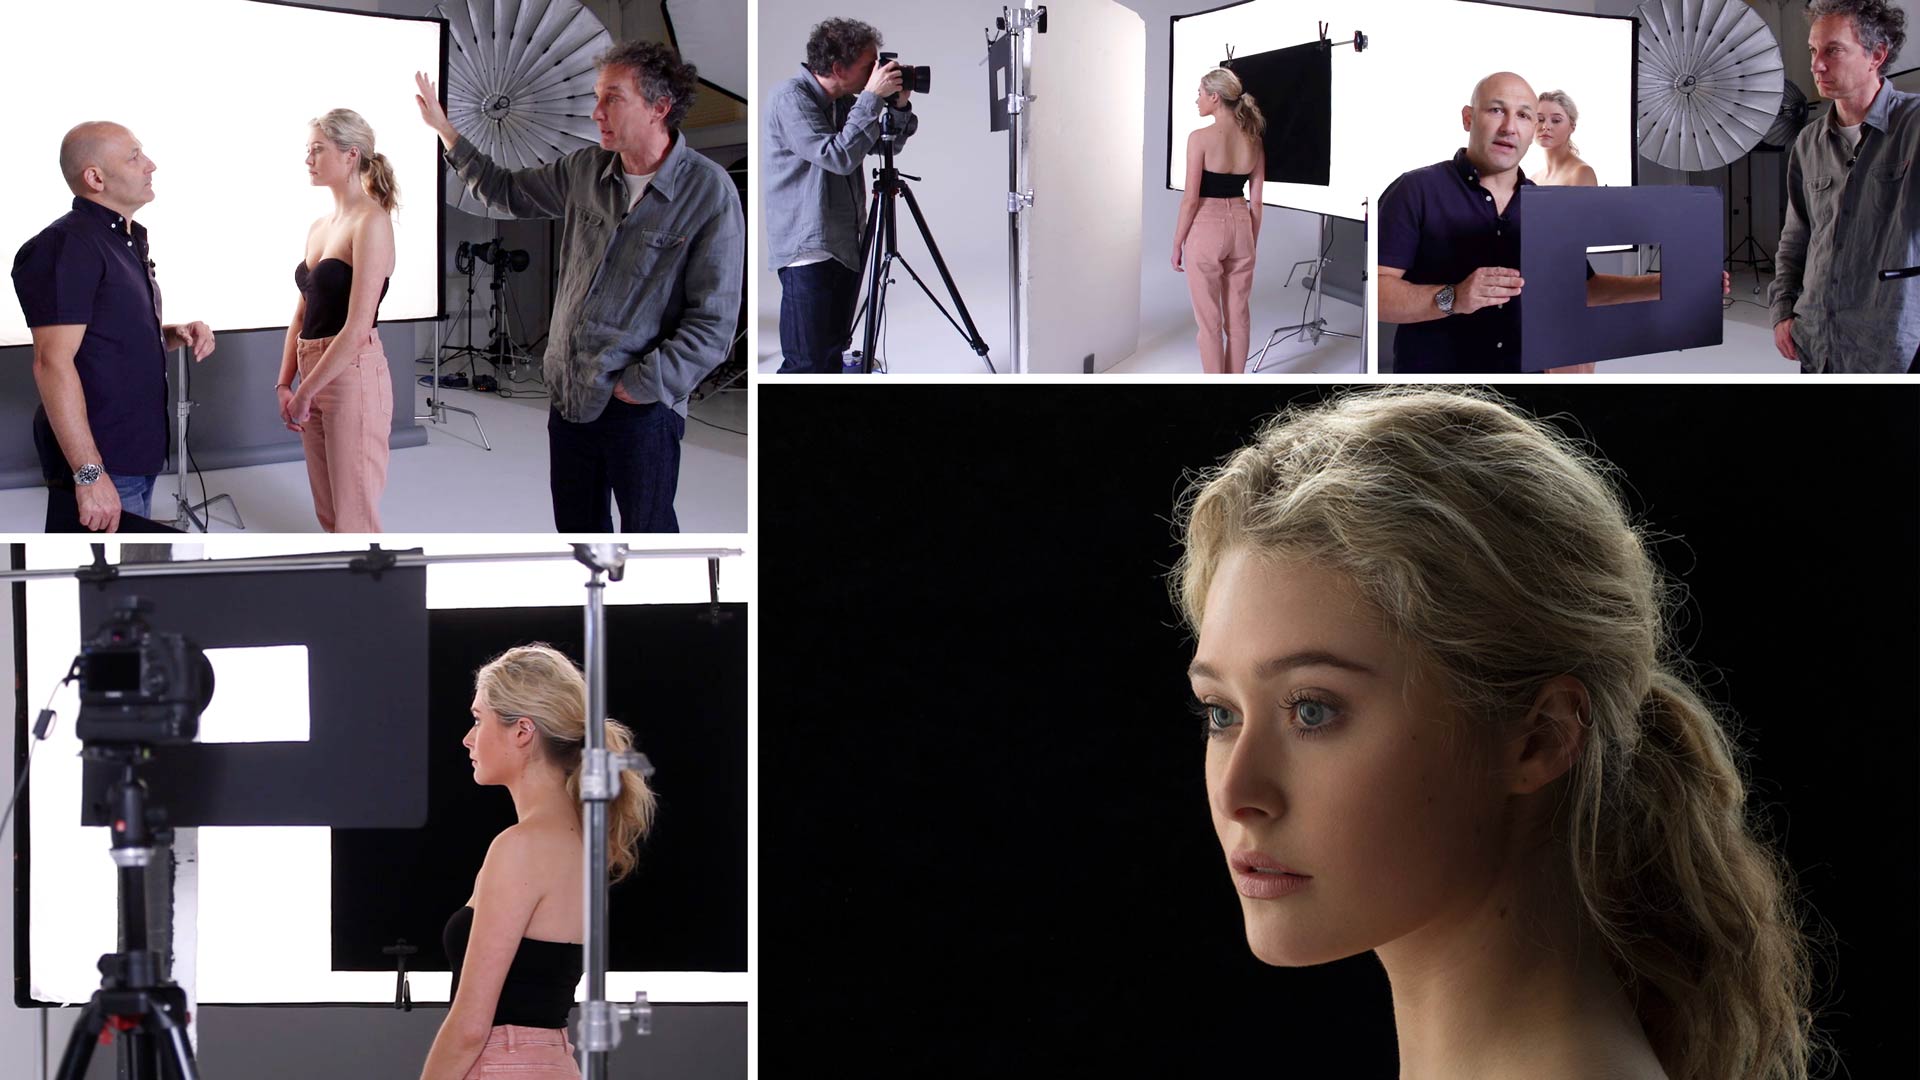
Want to capture eye-catching portraits using just one light? Watch this class to learn how to achieve remarkable results with minimal equipment.
You’ll learn from professional photographers and lighting experts Karl Taylor and Urs Recher as they demonstrate how to create beautiful, soft rim lighting using backlighting – with a twist.
Don’t miss this chance to discover a super-smart, simple-but-effective technique that enables you to produce what looks like a four-light effect with just a single modified light.
In this class:
- Portrait photography using a single light
- How to use backlighting for creative effect
- How to avoid flare
- How to modify rim light
- Using reflectors and flags
- How to control shadows
Questions? Please post them in the comments section below.
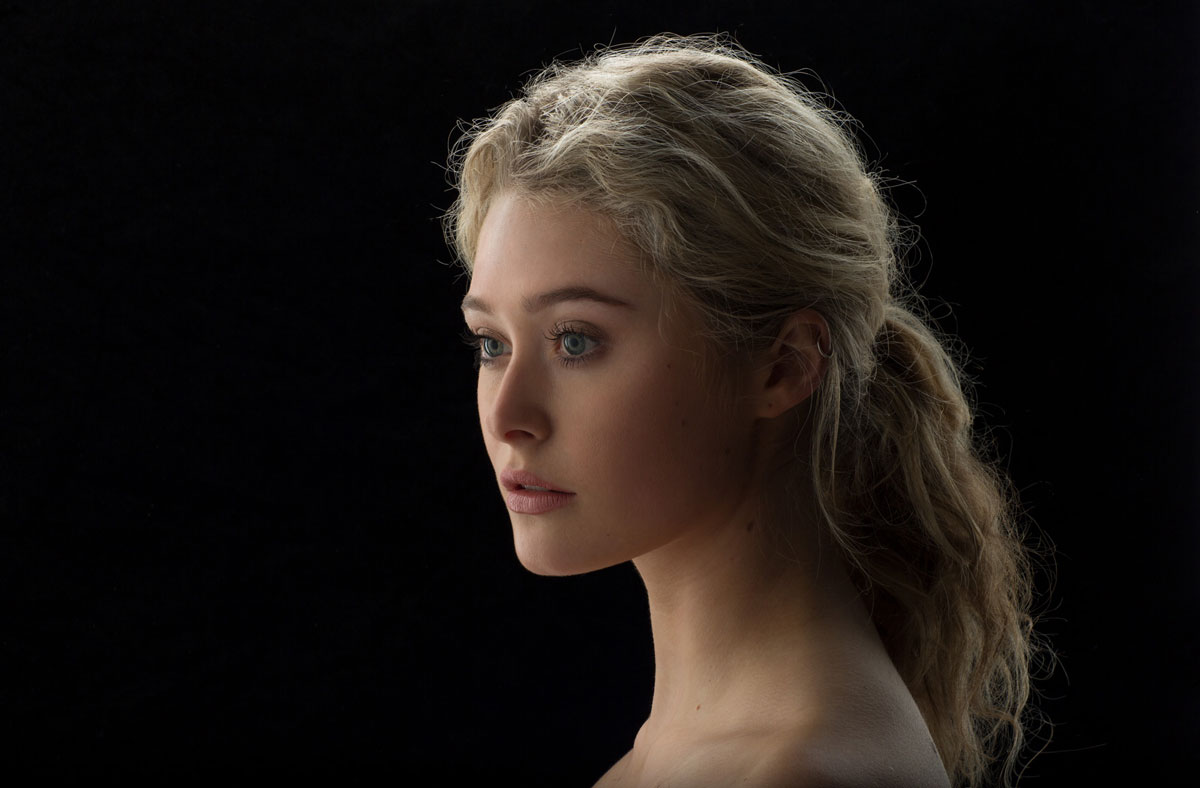
Stunning female portrait using rim lighting as a backlight.
Comments
Ciao Karl hai usato un soft box molto grande , non hai cadute di luce ai bordi? Oppure hai usato due flash ?
Io uso i flash Profoto D2 da 1000 ,ottengo un risultato simile? Grazie
Hi Peppe, you loose a bit of power with a bigger softbox but this only had one flash inside, it was 800J. So no problem for you and your flash.
Hello Karl,
Love this set up. Beautiful lightning with less equipment and also possible to achieve in a small studio.
As I am a photographer who don’t has a fantastic Broncolor Siros 800 I was wondering what are my possibilities, and can you give me a tip for a more afordable light. Would a continuous light be wise?
Kind regards
Martin
Hi Martin, thanks for your comments. I think studio flash is much more versatile than continuous light, it is also much more powerful allowing you to get smaller apertures and greater depth of field when needed. There are many brands of studio lights that are more economical, take a look at a Godox 600 or Elinchrom as a starting point but do a bit of research online you may find others.
Karl,
I am so pleased with your course. I can’t wait to put this into practice . Thank you for sharing your knowledge and years of experience. God Bless
Brian
Thanks Brian and let us know how you get on.
Hello Karl – Beautiful unique lighting – so well demonstrated. You and Urs work well together.
I was able to replicate this set-up in my studio with excellent results. What I learned is that the size of the black background relative to the subject makes a big difference! As Urs explained moving the light back or moving the background left or right changes the intensity of the rim light considerably. I tried a vertical orientation for the camera and the black background which resulted in intense rim lighting on the face and back of the model’s hair. Moving the black background closer to the model changed the relative size the same way you and Urs did moving the light source back.
The effective is similar to short lighting. Very slimming depending upon the amount of fill use. Thanks so much for demonstrating such a useful technique!
Thank you and glad you enjoyed it.
Hi Karl,
Your Education channel is brilliant! I am learning some great tips from just sampling different genres that you cover. You and Urs are lighting gurus, he looks at light from a completely different viewpoint than most.
Keep up the good work!
Thank you!
Karl, are the images coming through in Lightroom through tethering RAW images with no processing added or are you applying some basic editing in the import process? Or are you displaying the JPEG images? These tutorials are absolute gold. I am so happy that I became a member and have access to all of this education.
Thanks for your comments. When you tether into lightroom with a Canon, LR is just reading the images off of the memory card, so they are captured to the card too but they will be the RAW file in LR with no editing information applied unless you create a preset. Capture One is a better tethering software for most cameras, I’m mostly using Phocus which is the Hasselblad tethering software.
Great concept. I just had only one question, can I do this exact lighting with a Octa?
Thank you
Hi Rajb, you can do it but it won’t be ‘exactly’ the same because the size of the softbox is different. Therefore the physics of the light will be coming from a different angle or won’t be as big etc, always consider the physics. If something is not the same it is not the same. It’s like saying if I kick the ball more softly will it go in the goal, it might go in the goal but it won’t go in the goal as quickly as the ball that is kicked hard. That’s the physics.
Thanks for this tutorial. Wonderful setup and lovely light. Today I have tried with my big screen (1.5 m screen transparent as part of reflector) as I dont have that large softbox. And put a black fabric and a flashgun. It works well but not as perfect as you did (flare is the problem). I am preparing this trick as I shoot mostly outdoor and during traveling. Ill try for street portrait someday ! Thanks
Glad to be of help. Cheers Karl.
Hi Karl,
I’d be curious to hear how you might approach achieving this style of lighting with a full-length seated portrait. Maybe just a three-sided (top and sides) rim using strip boxes in front of a black BG? Seems like it would be a production to take this to scale, but it’s really pretty light!
Thx in advance!
Hi Jim, this is one option https://visualeducation.com/class/studio-lighting-setups-portraits-four-light-50/ or this is another but I’d put the softboxes lower down https://visualeducation.com/class/studio-lighting-setups-portraits-four-light-47/
Beautiful image, and a great talk-through of making a light work for you.
Thanks David.
Can I ask what power was the broncolor Siros 800, (having never used one) set to.
Hi Carl, the maximum power of this light is 800J which would be power 10, power 9 would be 400J (one stop less) power 8 would be 200J and so on etc. Given that most of the light was blocked it would have likely been on power 8, 9 or 10 but I would imagine that I mention that in the video.
Hi Karl!
Was that an acryllic mirror you used to reflect light from the soft box onto the back of Evie’s head? If so, what’s the difference between using this reflector and white card for instance?
Hi William, it would have been an acrylic mirror or a piece of polished stainless steel, I use both. Either of these would reflect more light if it is directed at exactly the right angle simply because they are more reflective. A white reflector is diffused so the light bounces off in all directions.
Cannot wait to use this setup. The light is so beautiful! Gorgeous portrait
love this lesson
Thank you.
Hi Karl, like this setup and the results. My questions: Broncolor supply this softbox with an optional black mask that leaves just the edges translucent. Is there any reason you prefer this makeshift black card to the ready-made Broncolor solution? Also, would using a somewhat longer lens (say 135mm) help reduce flare and provide a bit more room for the model, without hitting the edges of the central black card? Cheers, Martin
Hi Martin, because I can move the black card further to either side to then change the amount of light wrapping around. Although the mask is good it is fixed and therefore the options of light spill are fixed. Yes to a longer lens but at the expense of the perspective on the model too.
Hi Karl!
I joined the food photography lessons, but I’m going to take all your classes!
Great work!
2 Questions:
1. My biggest soft boxes at the moment are the octabox 150 or 120/80 cm.
Will this setup works for me too?
2. How do I make the lens flare window? Just cutting the size of the sensor out? And what
should be the size of the frame?
Thanks a lot!
Hi Gil, your softboxes should be good. You can also use diffusiong material as demonstrated to make them ‘bigger’. Yes just cut the same ratio shape as the sensor at a reasonable size and then position it at the right distance from a given lens once you’ve composed your shot and the camera is fixed. There is no set size necessary just what ever works for you, they are easy to make so you can make more than one size, sometimes different sizes are better for different lenses in terms of the distance they can be away from the lens hood.