
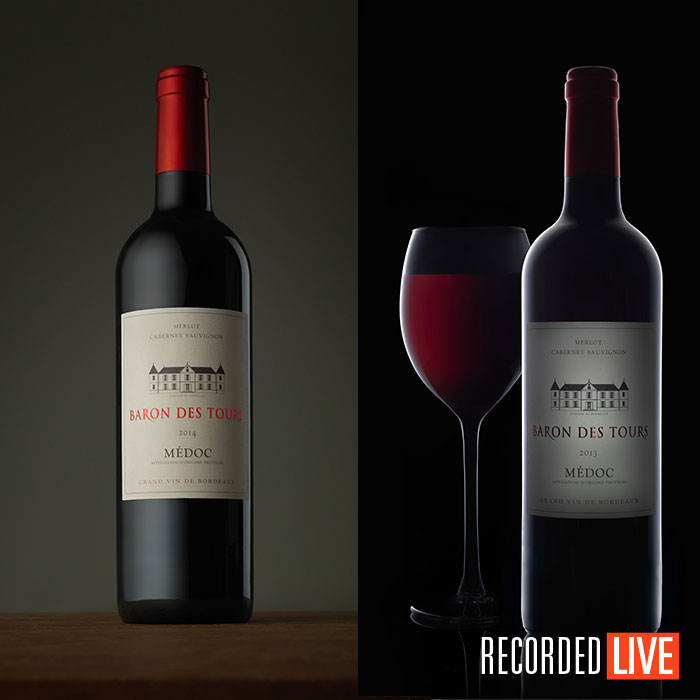
White Wine Photography
Want to make wine look wonderful? These vintage techniques will serve up delicious results.
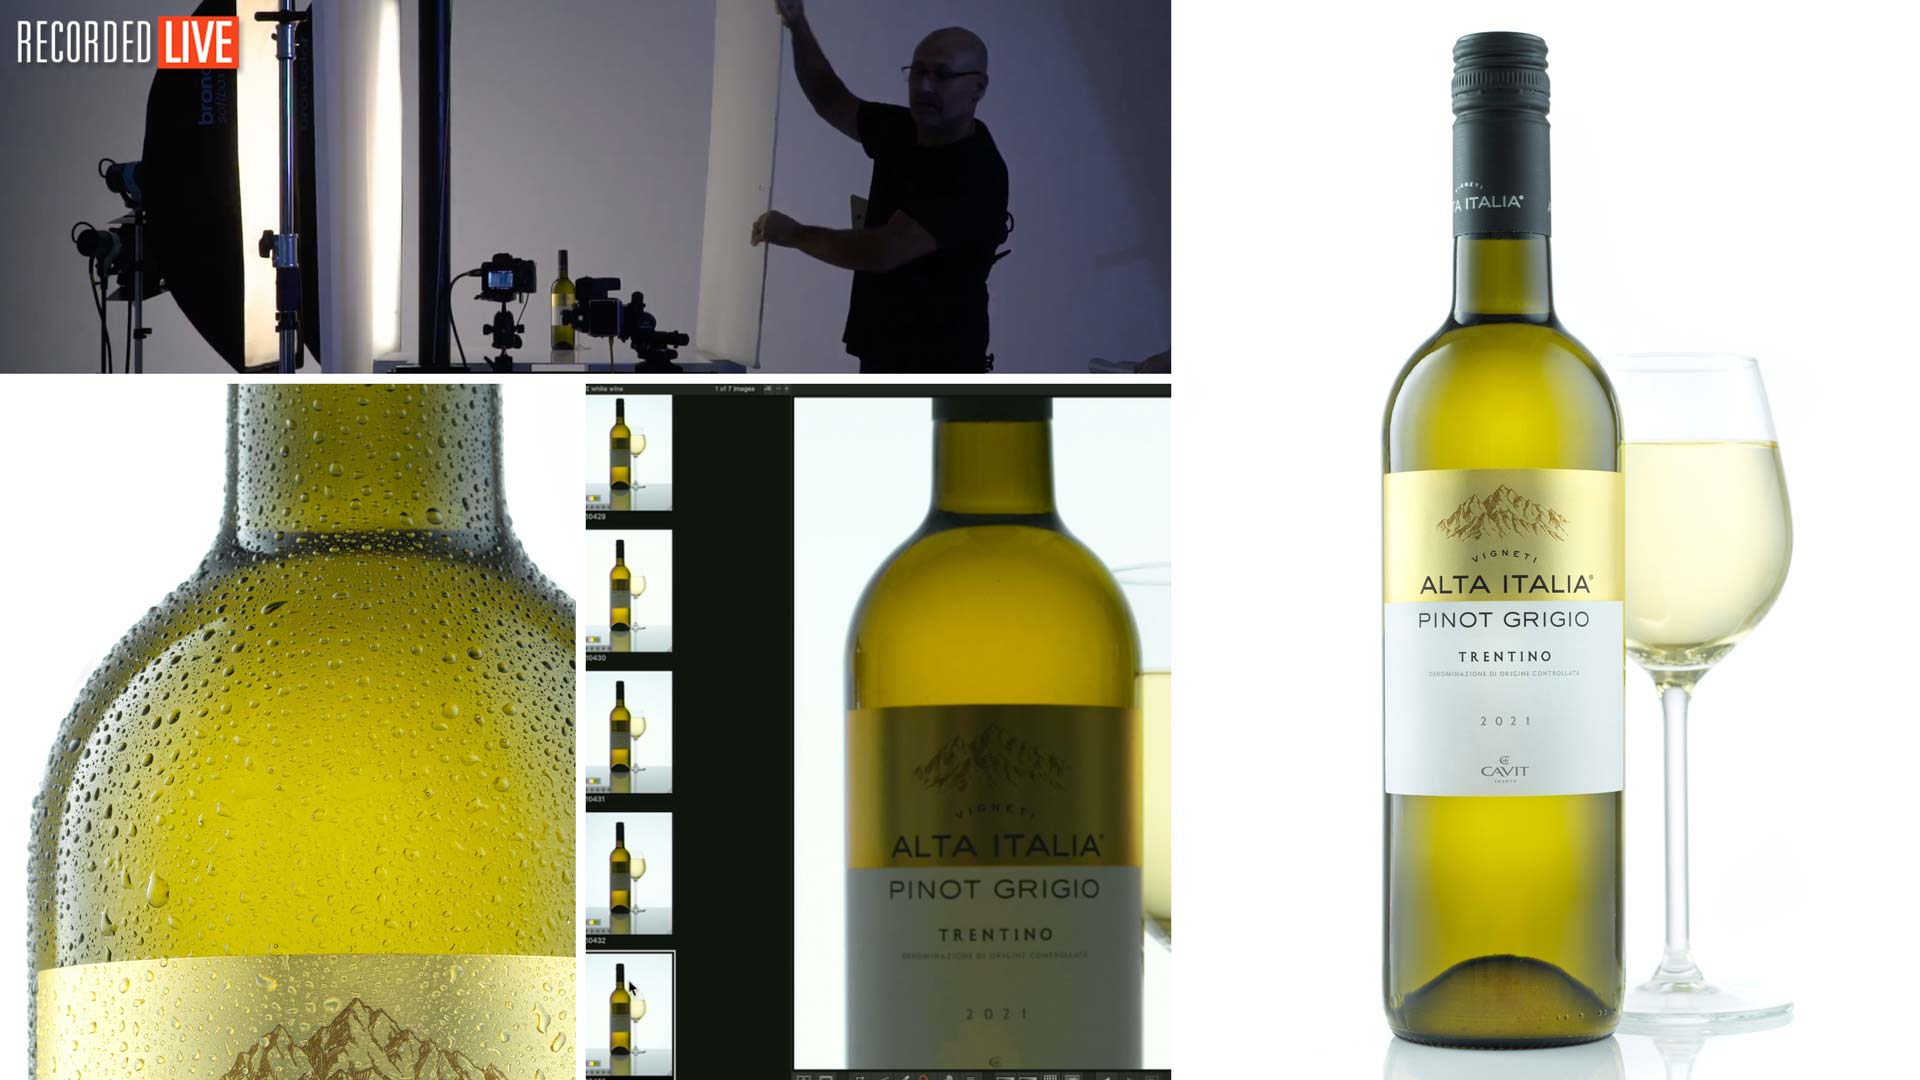
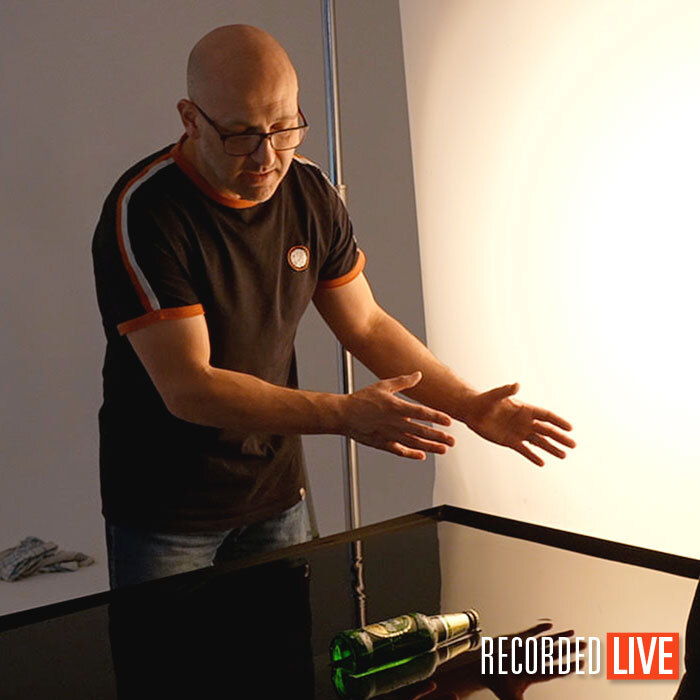
In this bottle photography workshop, recorded LIVE, Karl reveals some simple but effective techniques that you can easily apply in your own work.
You’ll discover a vast range of tips and tricks, from setting up and styling the shot to perfecting the lighting with subtle tweaks and adjustments.
As Karl answers viewer questions in real time, you’ll enjoy a true behind-the-scenes experience, learning from an seasoned professional as he shares his expertise to help you improve your skills.
In this class:
- Lighting techniques for bottle photography
- Photography with softbox modifiers
- How to take photographs of bottles
- Styling tips for bottle photography
If you enjoy this class, check out Beer Bottle Advertising Shot and Remy Martin XO Cognac Product Shoot.
Questions? Please post them in the comments section below.
Comments
Awsome class, learned a lot!
Would it be possible to get a top down view of the positions of the lights? Maybe it is only me, but it is sometimes hard to properly judge distance and angles from the video. Similar to the schematic in the blog post about the small studio of the wine merchant (https://visualeducation.com/how-to-set-up-a-small-photography-studio/)
Hi, we have a new member of staff who is currently working through all of our classes and creating a lighting diagram for each one so hopefully these should all be up in the next couple of months.
Thank you for that! What is the equipment list for this class?
Both Knowles and Lund sometimes use LED to “paint with light” around the bottle. How can that be used here ? Is the scrim still necessary with painting?
Hi, I don’t think there is enough control with that method as the results can be a bit more random. I think that technique is useful for things like jewellery with many facets or for ‘creative’ looks on some products but it is very much more experimentational and less controlled.
Amazing step by step and results! Great knowledge as always, i enjoy learning all of this. Now let’s go and take that picture!
Thanks Karl, and team!
Regards from México.
Thank you!
Hi Karl, Could you post production for White Wine Photography class pleas?
Thank you for learning.
When you increase power with your Bron Pack do you still need dumping the power before the shot??
Hi, no. You don’t actually need to dump it even if you decrease power as long as you wait for the beep to show that it has rebalanced. I’m just too impatient and dump the power on habit.
ah ah ! Thanks for the clarification -:)
Hi, great tutorial. I wanted to ask you for the background light can I use a 90x120cm softbox, placed behind a scrim with two strips of black foamboard on the sides to accentuate the dark “rimming” on the sides of the bottle? I am aware that as you explain in your tutorial I have less control but I only have two lights and I wanted to use one in the background and one to the side. In addition, having a small studio I would have difficulty positioning two lights for the background
Hi, you are understanding the physics which is good but my concern would be that the transition of the light to dark will be harder to control with your described method. Alternatively my thoughts would be to use a very wide scrim in a horizontal position as your background (see my scrims on frames in ‘introduction to product photography section’) then I would put your softbox behind that and have both a couple of meters away from your subject. You should then see a more gradual transition of light to dark either side that you can control more easily by moving the softbox further of closer behind the scrim.
hi Karl, what kind of mirror is that? can you send me a link on amazon or a name that I can search ? thanks
Hi, they are acrylic mirrors. You can get them cut to size and they come from plastic suppliers or sign service companines.
Hi Karl. I’ve enjoyed your class on white wine photography and have a composition question. The class you taught using a white rose was also quite good. I wonder what your opinion might be on combining the two and use a white rose as a third element. I am thinking of placing the stem going from left to right on a 45 degree angle and slightly over the base of the class. Your thoughts would be appreciated.
Thank you!
Hi, thank you I’m glad you enjoyed the classes. Unfortunately without seeing the result of your image it is too difficult to make an assessment of whether it will work or not, this is why I ‘pre-visualise’ my images with a sketch to see if the composition will work visually in a drawing. Then you have to think about the ‘idea’ of the shot and whether that will work from a narrative point of view. So for example what is the reason for the rose? What purpose does it serve and why is it associated with that particular bottle of wine. Does it make sense to the viewer, these thought processes are as important if not more important that whether it will work from a composition point of view. I teach a class on composition in our ‘Introduction to Photography’ section and I demonstrate that the most important thing is to keep the viewer in the image, to make them want to look at it. If the composition is bad they will want to look at it for less time, if the narrative is bad they will want to look at it for even less time unless it is something cleverly deliberate.
Excellent class with detailed explanation and great patience, Karl, thank you very much!
Thank you very much.
Hello Karl, I would like to point out that there is no automatic translation into my language Turkish in this video. There was this option in the videos I watched about food photography.
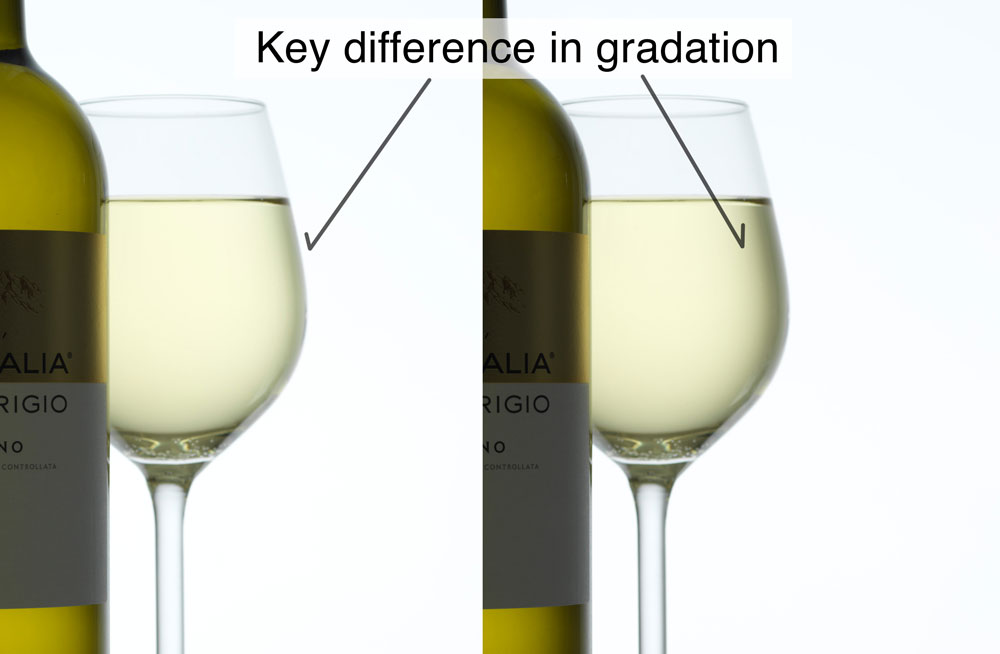
Hi Karl, I have a question regardig a glass top. It is bearly visible in cener. Is it better not to be shown or oposit? Whether we should pay more attention to that detail or not. Thanks
I simply love these shows, especially the logical way Karl explains what he is doing and why, and how he is answering upcoming questions. Thanks a lot to Karl and the whole team at KTE
Thanks Ralf, much appreciated.
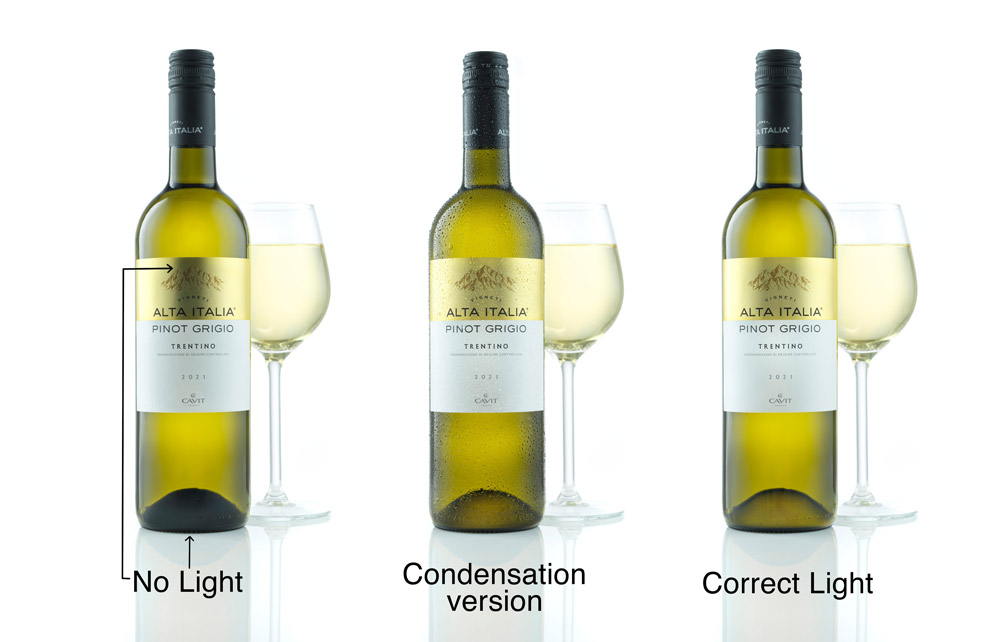
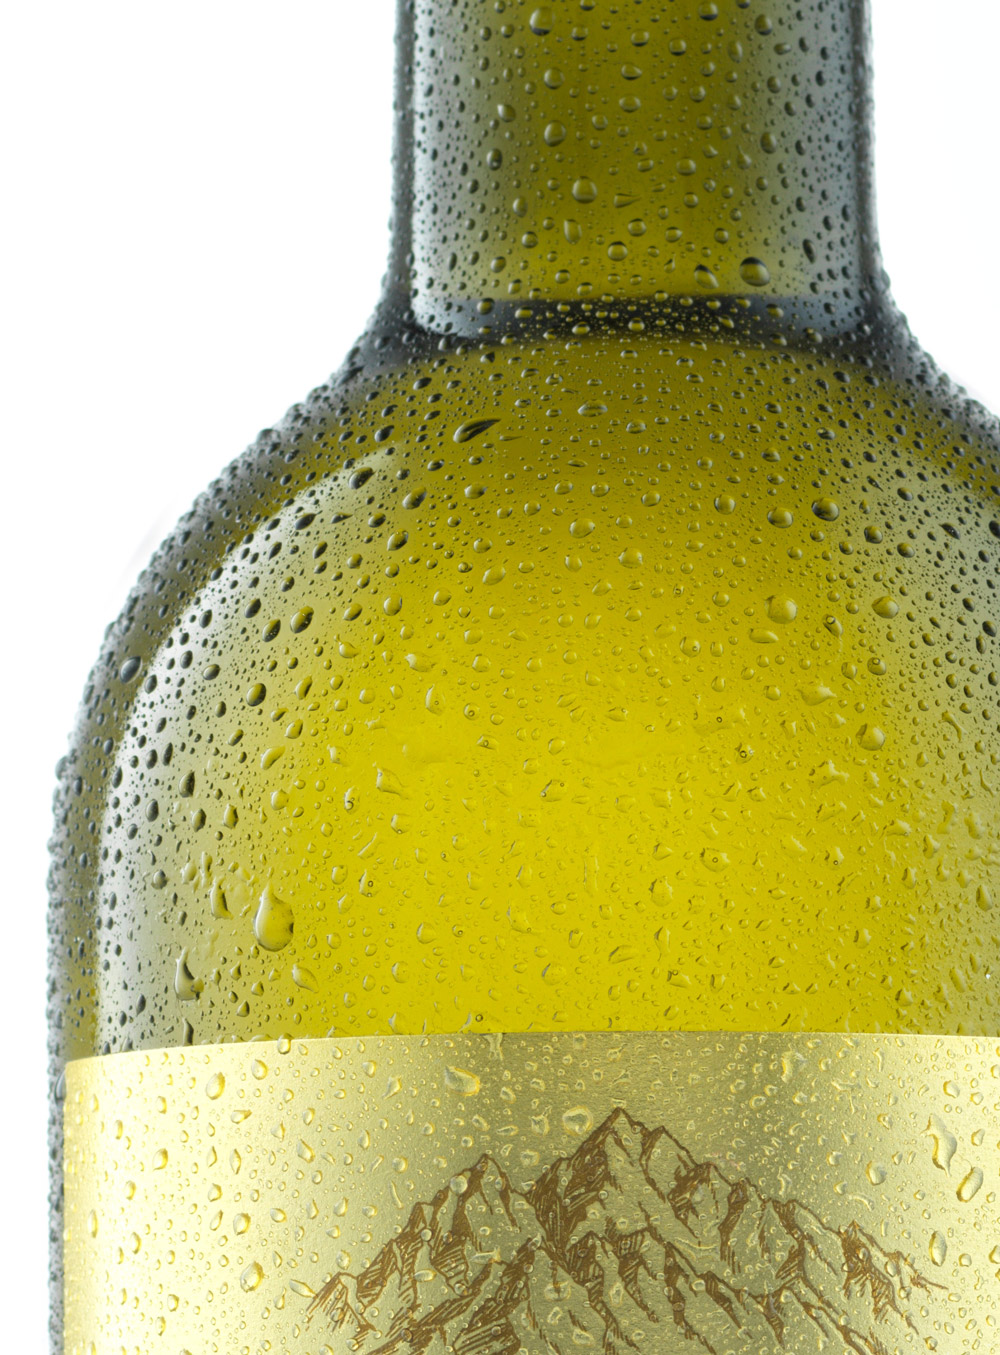
Excellent as always Karl, about 3 weeks too late for me as I had to shoot champagne and rose wine bottles for a client the other day and could have done with this knowledge of scrims and lighting the punt (great word). My question is regarding the condensation. I used this technique when shooting the champagne but decided to keep it away from the paper label and foil top as I did not feel that condensation would be on these materials, what’s your opinion?
Hi Jason. I generally shield the labels a little with my hand or a piece of paper so it has less condensation on it. Not because I don’t think condensation would form there but more to protect the legibility of the brand.
Excellent as always, thanks Karl & team.
Great idea for Tim to walk a 360 deg around the studio / set up at the end, so we can see the whole lighting set up from every angle. That could be useful as a feature in future shows.