Creating Visual Impact with Paint Splash Photography
Welcome to this guide where we'll explore the fascinating world of paint splash photography using fast flash techniques. This method has gained popularity for its ability to produce striking images, and in this article, we'll break down the process step by step.
From setting up your equipment to capturing the perfect shot and even some tips for post-production, you'll have all the tools you need to try this out for yourself.
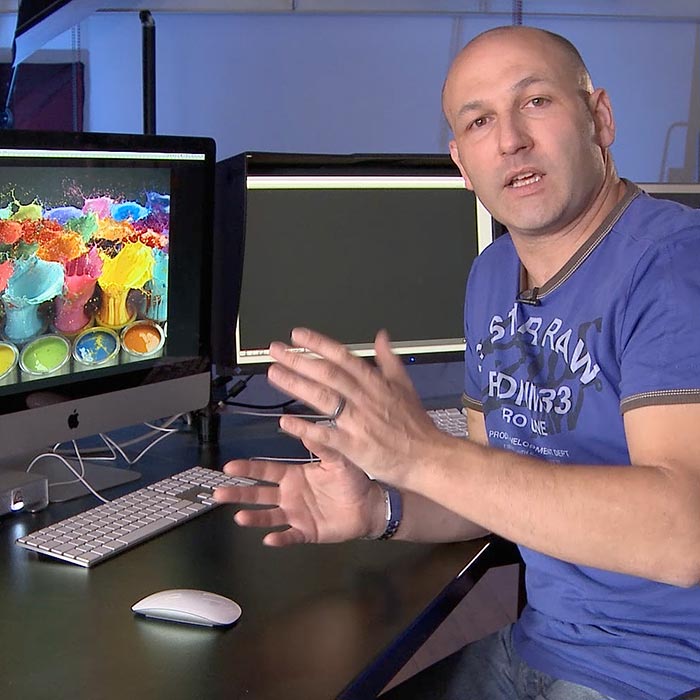
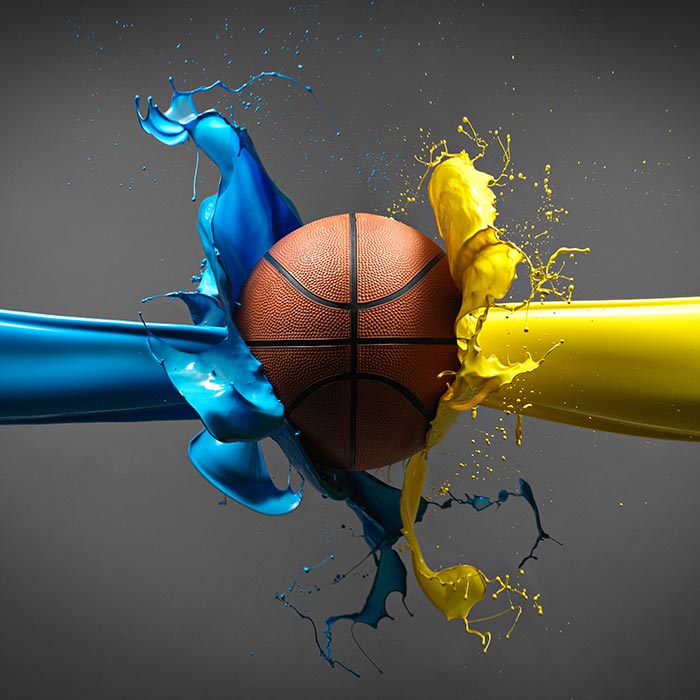
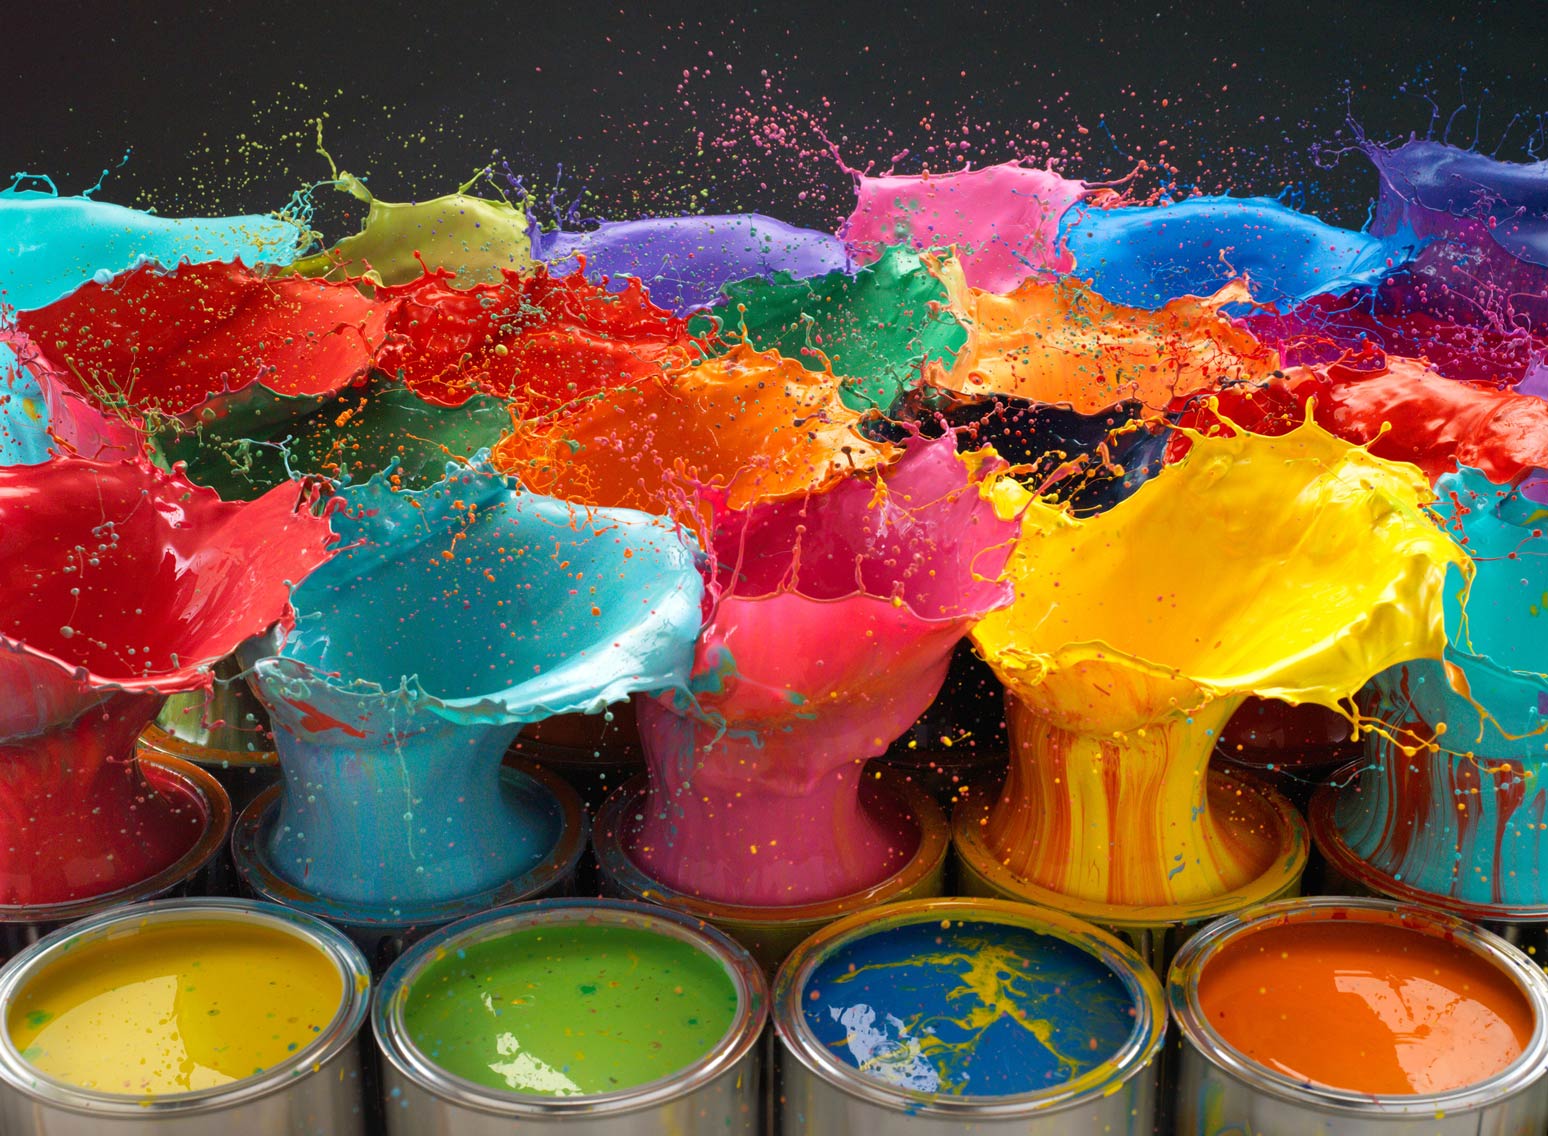
I’ve taken plenty of photos in my time, but very few have inspired as much excitement and curiosity as this one. The big question, of course, is HOW?
- How did I make the paint explode?
- How did I light the shot?
- How did I freeze the motion at just the right moment?
- And how big a mess did I make?
Watch the complete paint splash 'explosion' photography class to unlock the exact process. It’s a great lesson in how combining creative thinking with some simple physics (hint: gravity) can lead you to some truly original images that really make a splash.
Anyone for billiards?
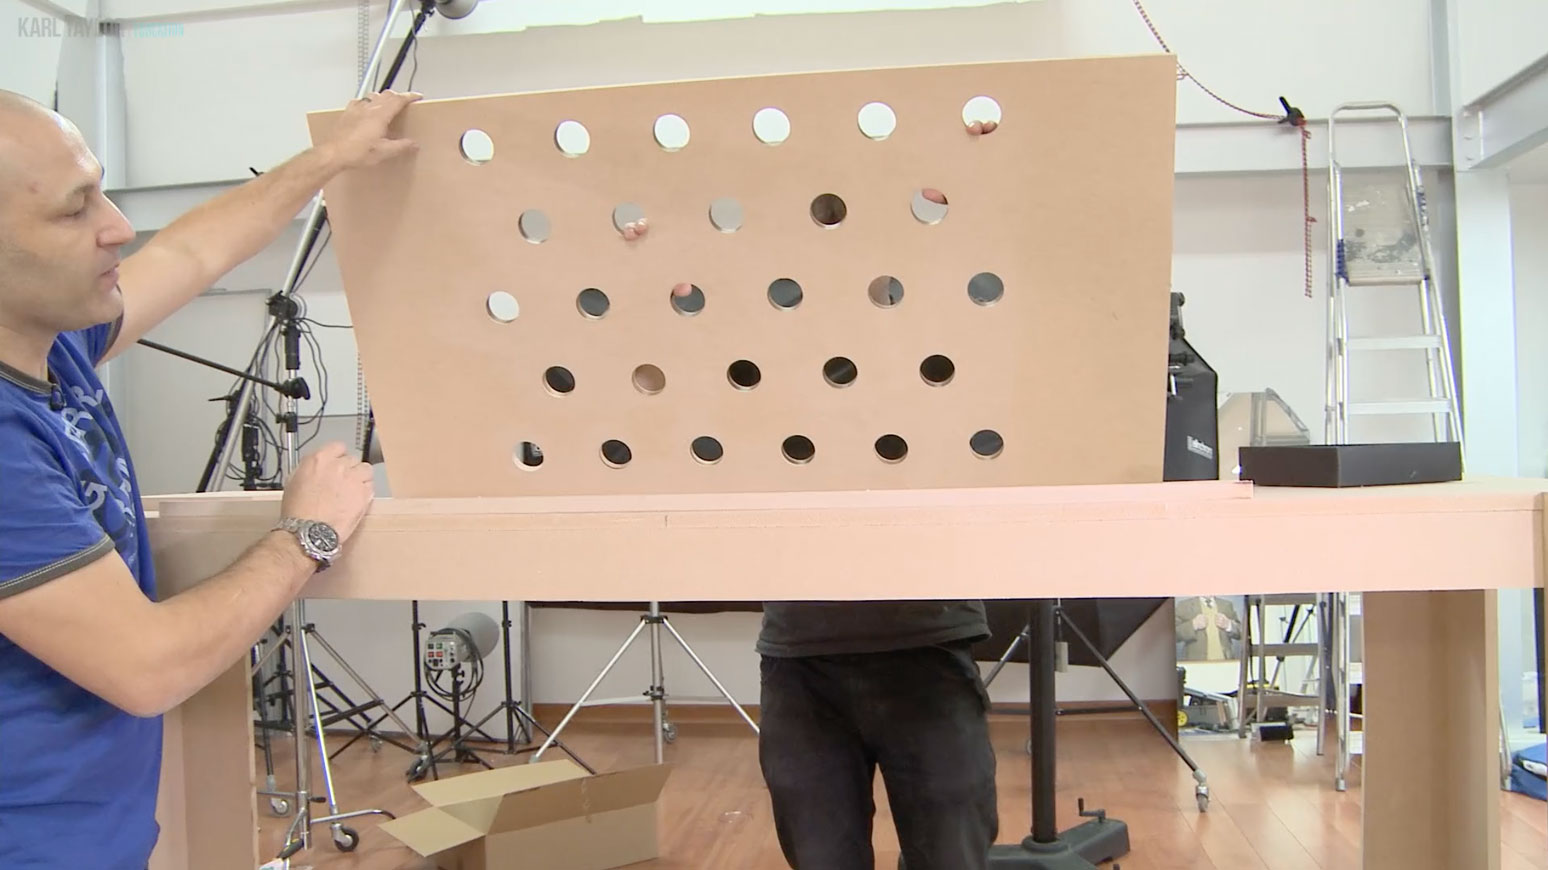
People usually assume I used some kind of explosives to make the paint splash up out of the cans. In fact, we used billiard balls!
To get the balls to drop simultaneously and in a controlled fashion, we built a trapdoor-style contraption that enabled us to release the balls exactly when and where we needed to.
Practice makes perfect
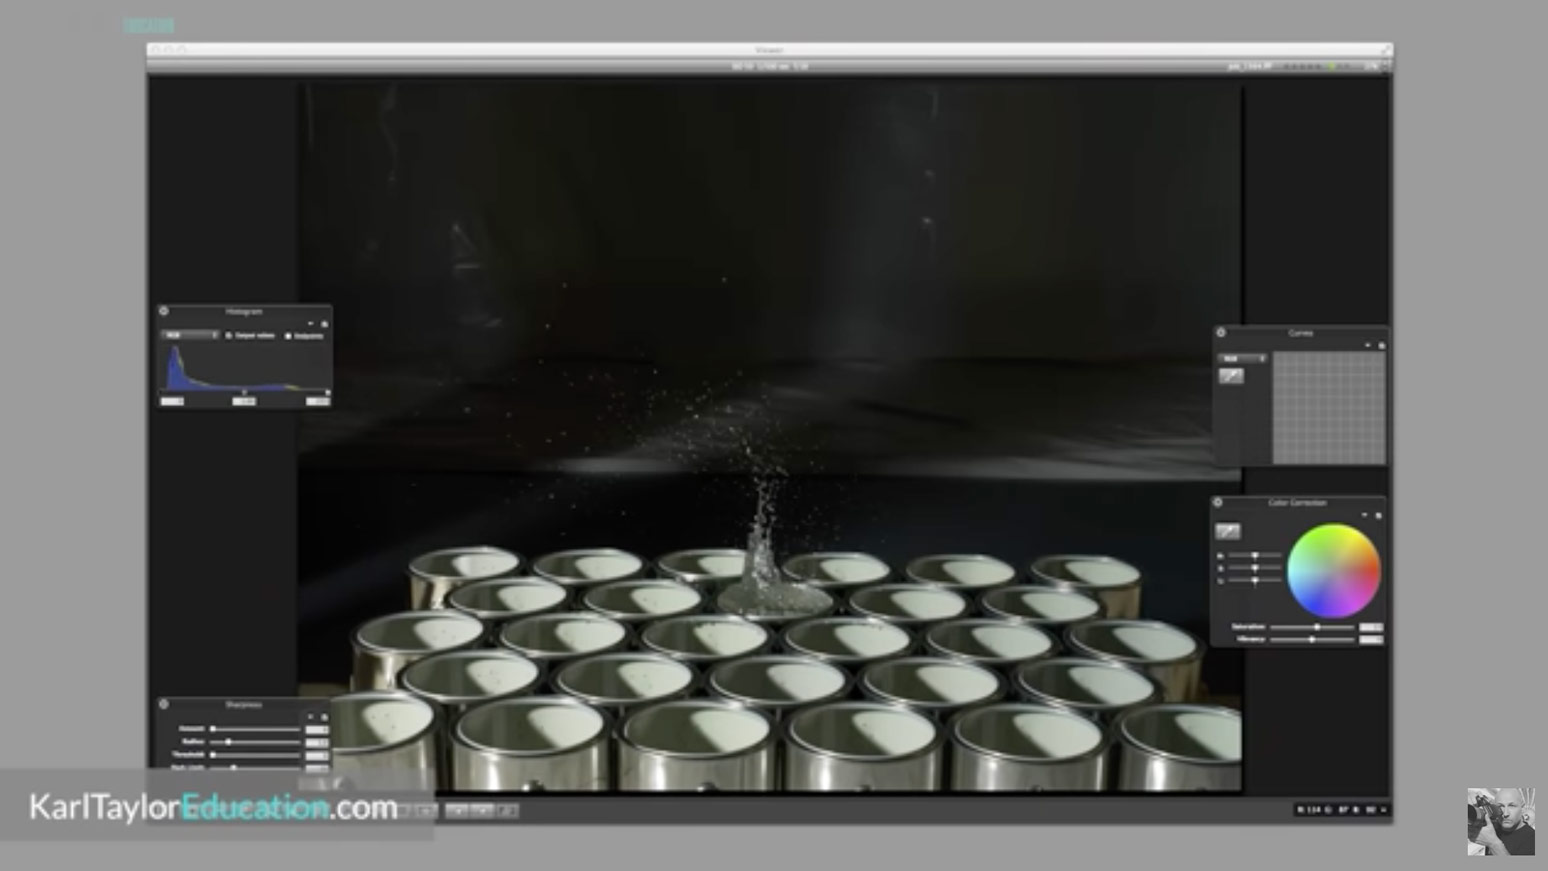
When you’re photographing paint splashes, things get messy fast. That’s why I opted to do some trial runs with water, making sure everything was just right before we filled the cans up with paint.
Essential Equipment and Setup
Before diving into the paint splash photography, let's make sure you have the right gear:
- Camera: You'll need a DSLR or mirrorless camera with manual mode capabilities to control your settings effectively.
- Lens: Choose a lens that suits your shooting space and provides versatility in framing.
- Tripod: A sturdy tripod is essential for keeping your camera steady during longer exposures.
- Backdrop: For this style of colourful shoot, use a neutral grey backdrop to keep the focus on the colourful paint explosions.
- Paint: Gather an assortment of vibrant paint colours in liquid form for the explosions.
- Lighting: Speedlights or studio lights with adjustable settings will help you freeze motion and illuminate the scene evenly.
Getting the right lighting setup
Creating the right lighting environment is crucial for capturing stunning paint explosions:
- Position your paint pots on a board against a gray background.
- Use scrims on the sides to diffuse the light and create a soft, even illumination.
- Place a larger scrim at a 45-degree angle behind the setup to enhance the glossy paint surface.
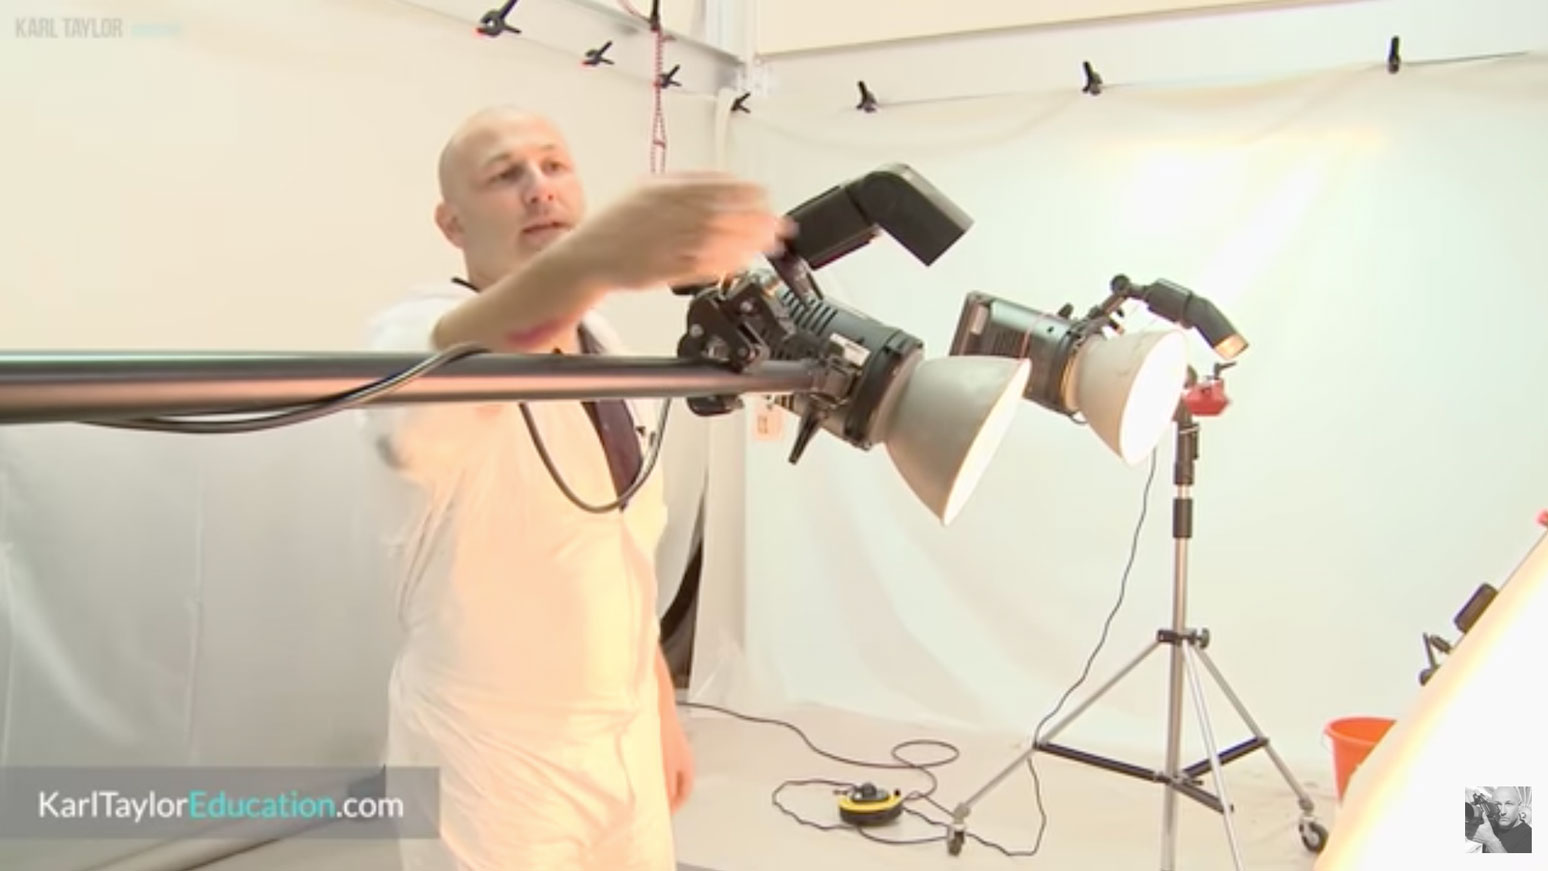
- Utilise boom arms and speed lights to achieve faster flash durations for freezing motion.
As you can see in the lighting diagram below, I set up scrims on either side of the wooden frame, with one speedlight positioned behind each scrim.
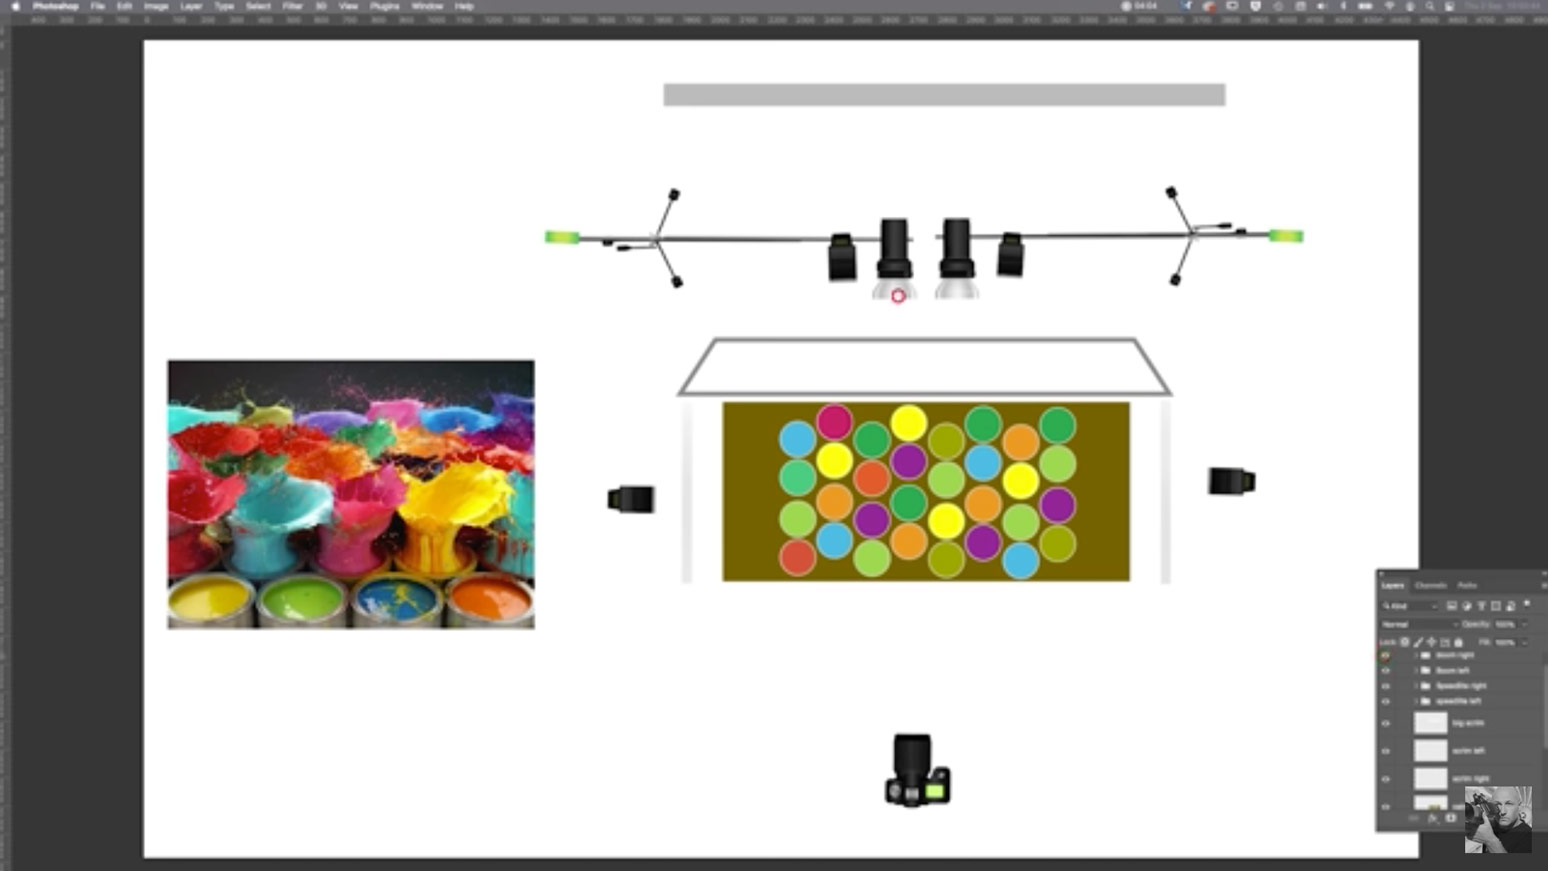
I also installed a third, much larger scrim, angled in above and behind. Behind this bigger scrim I set up two boom arms, with one speedlight and one studio light on each. Watch the full paint splash tutorial here.
ONLINE PHOTOGRAPHY CLASS
How to Make a Scrim
A scrim is an affordable lighting modifier that you can easily make yourself and use for many different types of photography.
Watch Now
Paint Splash Shoot - The Steps
Once everything was set up, the cans were full of paint and we were all in our Ghostbusters-style overalls, it was time to start shooting.
- Preparation is Key: Take the time to set up your equipment properly to avoid any issues during the shoot.
- Experiment with Angles: Try different camera angles and perspectives to find the most dynamic composition.
- Timing is Everything: Coordinate the release of the balls with the flash duration to capture the moment of impact.
- Play with Motion: Adjust the speed and trajectory of the falling balls to achieve different explosion patterns.
- Focus on Focus: Use manual focus to ensure sharpness on the paint explosion area.
- Embrace Imperfection: Don't be afraid of unexpected outcomes – they can add character to your final image.

We dropped a lot of balls, made a lot of mess, and captured some great shots.
© Karl Taylor
The final image is colourful, eye-catching, intriguing and exciting. It took an awful lot of work to get there, but it was more than worth the trouble.
With the right equipment, setup, and techniques, you can create your own stunning paint explosion photographs.
If you're eager to delve deeper into paint explosion photography, you can access the complete video tutorial on here. With a monthly subscription, you'll unlock not only this class but also over 900 more classes covering various photography techniques and topics.
From lighting mastery to post-processing skills, our extensive library has you covered. Plus, with our special offer of just $4.99 for the first month, there's no better time to start exploring. Sign up today and unleash your creativity with Visual Education.
Don't be afraid to experiment and embrace the creative process.
Happy shooting!
© Visual Education. All rights reserved. No content on this page may be used or shared by third parties.